When we take photography, not always everything goes as we expect and it is usual that the result we obtain is less or greater than what we initially had in mind. There are various elements that we have to take into account before taking our photography, but it is true that sometimes, no matter how much precaution we take, there is always something unforeseen that sneaks into our session. Surely it has happened to you that you take a photograph somewhere and people appear who somehow ruin the result because they did not count on it. It can also happen that you take a photograph and if you want a speck of dust or some element that is difficult to control but that has a negative effect on the result of our photographs..
The World of publishing allows you to solve all these problems that may arise at some point. The fact of being able to rectify our photographs gives us the possibility of not throwing in the towel when we see that we have had a bad result. Imagine that you have taken some incredible photos, I hope you have some kind of skin imperfection that you don't like at all, because applications like Lightroom Mobile will help us to solve it.

The corruption options are well known in the desktop version of this tool but it is even more interesting to be able to find them in its mobile version. Many times we do not have a computer or desktop software with which to edit our images or we simply have little time to locate all those resources. That is when applications like Lightroom Mobile allow us to correct and perfect our images just by having a mobile phone or tablet..
Today we want to show you the different correction options that Lightroom Mobile has and that will help us easily remove or delete people and objects. Having an image with some kind of unwanted element will no longer be a problem and we will see how easy it is to remove everything that is left over from our photos. Although it may seem complicated to do this process from a mobile screen, we will show you how the results are really incredible.
We are going to see the different ways that we have to be able to make corrections in our photographs within Lightroom Mobile and eliminate everything that we do not want in them..
To stay up to date, remember to subscribe to our YouTube channel!
SUBSCRIBE ON YOUTUBE
How to Erase People and Objects in Lightroom Mobile
We are going to find three main tools that will allow us to remove imperfections or elements from our photographs. Imagine that in your portrayed subject some skin imperfection is not letting him show off one hundred percent, or that someone you did not want has slipped into your photo without realizing it. Well, all this is already rectifiable even from our mobile phone thanks to the possibilities that Lightroom Mobile offers:
Lightroom Mobile Correction Tools
The tools that Lightroom Mobile includes to be able to rectify our images:
- Remove. This tool is used to be able to eliminate imperfections, people, objects or any element that we want by means of the automatic filling of the selection that we make, generating new pixels from the area of origin.
- To correct. Indicated to correct more specific parts in our photographs, its operation consists of taking the texture of our area of origin and will make it coincide in color and tone with the destination area of the image.
- Clone. Allows pixels from the source area you choose to be reproduced to the destination area of the photo.
The general function of these tools is to move the texture from the source zone to the destination zone. For example, the Remove tool will locate the origin automatically and fill in the area that we have traced on the image. For its part, the Correct option does take into account both the color and tone of the areas around the target area and will do a mix. The Clone tool will make an exact reproduction of the pixels that we put from the source zone in the destination zone without taking into account a fusion of pixels.
We are going to see how we can use this series of tools to remove objects, people or imperfections from our photos using Lightroom Mobile.
Step 1
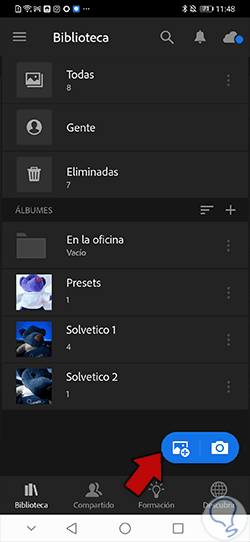
The first thing we will do is import or open our photo to the Lightroom Mobile Library. To do this we will use the icons that appear in the lower right part of the screen:
Step 2
Once our image is open, we will make sure that we are in the "Edit" mode from the top:

Step 3
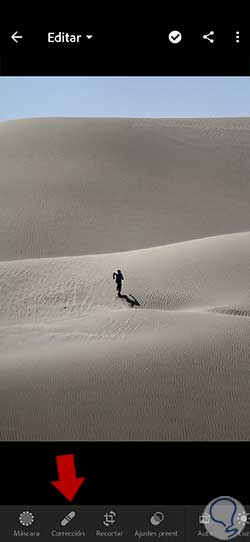
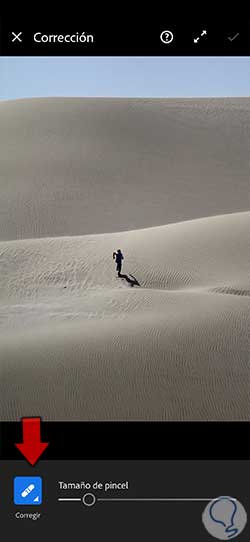
At the bottom of the screen you will see a menu of different options. In this case we will look at the option called "Correction" and click on it:
Step 4
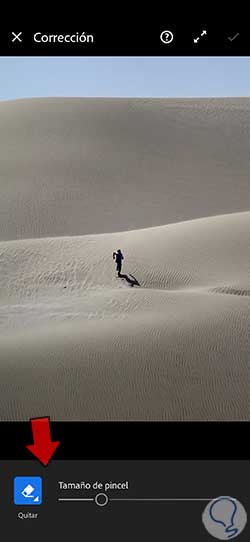
Here we will see a panel where we can choose one of the correction options and a "Brush Size" slider.
step 5
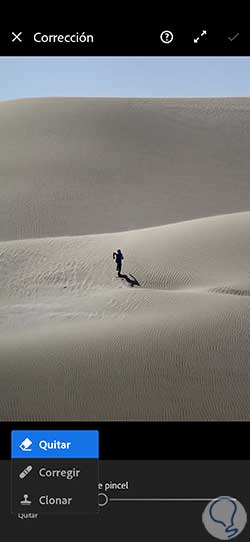
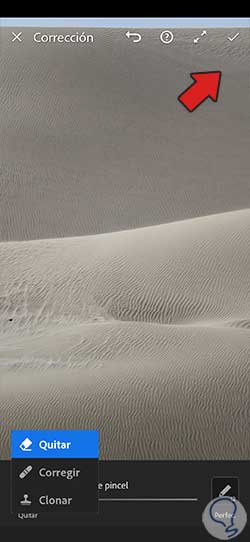
If we click on the option that is highlighted in blue we can see the different options that we have to correct our photograph:
step 6
Let's see how each of these correction tools works:
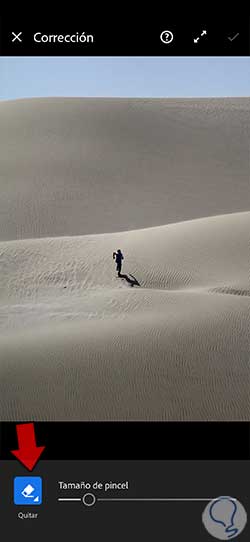
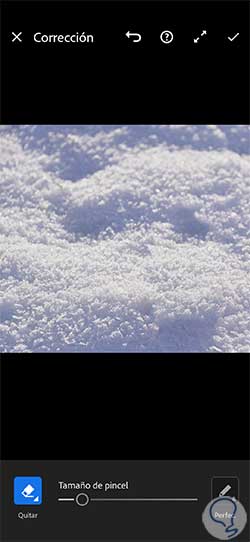
Remove
With this option we will be able to remove elements from our image automatically. Its operation consists of painting on an area of our image and we will see how that area is automatically filled with pixels generated on this area.
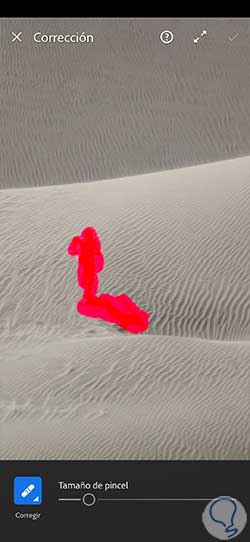
We are going to select this tool and adjust the size of the brush that we think is most appropriate.
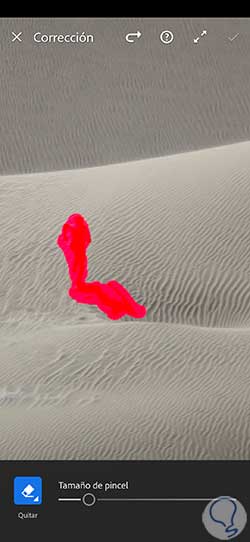
Now we are going to paint over the area of the element that we want to be removed from our photograph, in this case a person and their shadow. To do this, hold down and paint with the red color on the part to be erased. The better we define the area to be erased, the better the result will be.
If it is a very small area you can just tap on that area instead of making a larger selection by holding down.
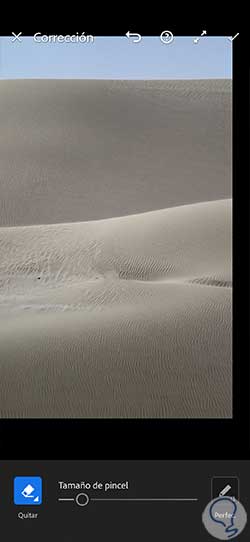
Once we stop pressing we will see that in a few seconds what we have selected will appear deleted. New pixels will have been generated from those of the erased area that will have filled the source area.
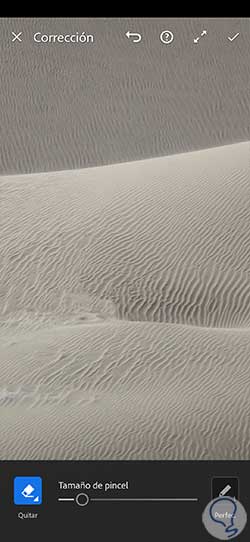
Many times it may be that some pixel or area is not completely replaced, so you can paint over it again or use one of the correction tools that we will see below to improve it.
We advise you to zoom in on the image to accurately correct avoiding evidence that it has been edited.
To correct
With this option we are going to take the texture of the area that we select as a starting point and it will match in color and tone with the destination area that we select. This way we can change one area for another quickly and in a personalized way. We recommend this tool when very specific erasures in your image or with very large patterns, as it will give better results.
In order to use this tool, we are going to choose it from the lower left list and adjust an optimal brush size.
Now we will paint over the area to be corrected and we will see that it is painted in red to indicate it.
Once the selection has been made, we will see that an origin area is created that we can move around the entire image marked with an arrow that goes to the destination area, which is the part that we have previously selected.
What we will do is move the source area in our image so that it replaces the area that we want to delete. In the case of an image with very defined shapes, it is better to choose source areas close to our selection so that it maintains that aspect ratio.
In the lower part of this option we will be able to modify its configuration, perfecting the selection with the "Fade" or "Opacity" options. You can also “Delete” the selection with this option.
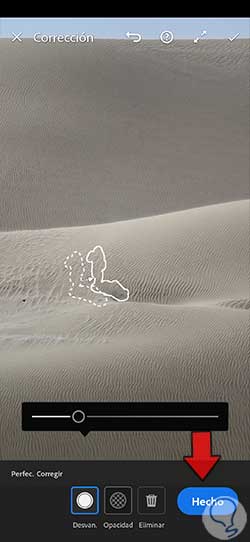
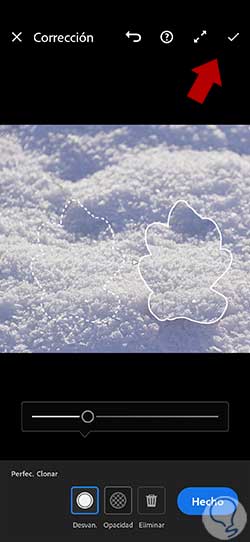
We will see that we have eliminated the element in our photograph once we click on the upper check of the image. In case you need to rectify any area again, you can use the tool again or complement it with the other correction tools that we are seeing.
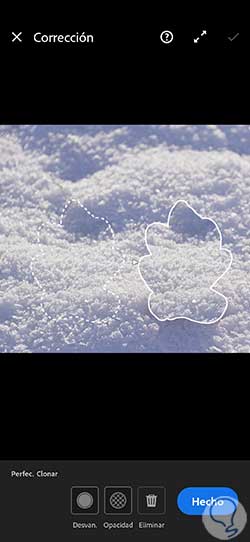
Clone
With this option we will be able to delete parts of our image but we will also be able to reproduce specific areas. By making a reproduction in pixels of a source area in a destination area, we can achieve both objectives. We are going to see in this case how we could eliminate some element of our image with this clone tool.
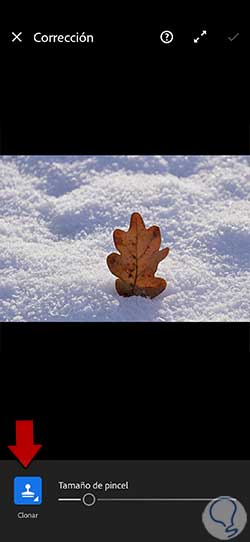
We select the "Clone" option in the drop-down menu at the bottom left of the options bar and adjust the size of the brush that best suits us. If necessary, enlarge the image a little more to make a more defined selection.
Now we are going to paint over the area that we want to eliminate and we will see that it is dyed red.
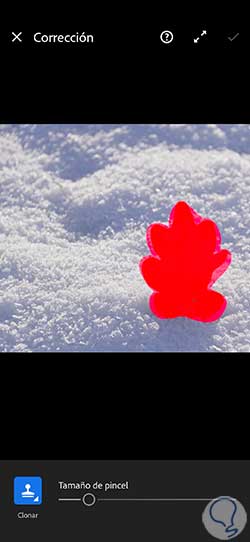
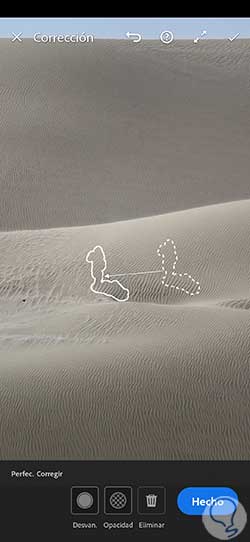
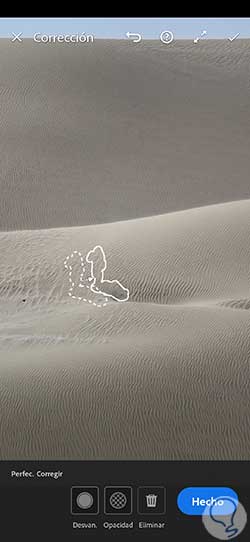
Once we release we will see that a selection has been created with a defined white border and another equal selection but with a dotted border. To eliminate the destination zone we are going to move this dotted area to a part of the image where we want the image to be cloned.
Once we click on "Done" or on the upper right check we will see our element deleted thanks to cloning.
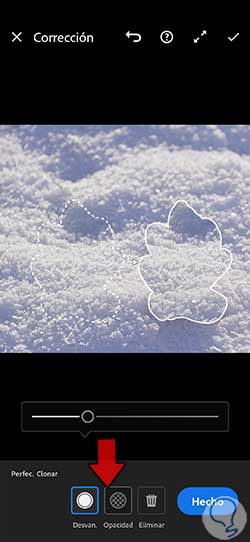
At the bottom you can use the "Fade" or "Opacity" options to improve cloning. To restart the selection, click on the “Delete” option.
If you see that the cloning has not been perfect, you can use this tool again in the areas to be corrected or help yourself with the other correction tools to improve it.
With these tools that Lightroom Mobile provides us, we are going to be able to eliminate imperfections, objects or people from our images without having to go through a computer or complex editing software. This way we will be able to rectify our photographs in a complete and professional way.