When we take our photographs it is normal that we are not able to control all the elements that are on the scene or even that we do not make a one hundred percent correct adjustment of our Camera. If you are in a highly relevant photo session, it is best to consult the results as we take photographs, thus avoiding unwanted surprises when we are going to upload the information to another device. Just like professional cameras we have options that will allow us to adjust our photography, on mobile devices we also have both automatic and manual adjustments to configure the scene we want to photograph..
It should be remembered that the ideal is that you always photograph from a RAW format that allows you to capture the most complete information possible, giving you the possibility of editing it later, the less information we have lost when taking the photo, the more data we will have about what we have captured. at the time of editing. 1 of the problems that we encounter the most when taking photography are focus-related errors that can also completely ruin the photography we like the most.
When talking about focus, we must bear in mind that when we are going to edit our photographs later in Lightroom Mobile, we will need a minimum focus in the photograph to be able to correct its sharpness, but if we have a completely blurred starting photograph, it will not be It is possible to improve practically nothing in sharpness. For this reason, it will not be valid to start with a photo in very poor conditions and try to hope for a miracle in post-production, since our hopes may be dashed. The concept of editing in Lightroom Mobile is based on the idea of improving images that already have a decent base, since in this case it will be quite unlikely to be able to give great sharpness to an image that is totally blurred..

An image that has a good sharpness and a good focus will be well received by the user on a regular basis, although it should be noted that sometimes the movement or blur effects have a justified aesthetic flow, something that we will not take into account in the edition. from today. Among the options that we will be able to find in the Lightroom Mobile focus interface are:
- Radio. Determines the area to which sharpening is to be applied around the edges. It is measured in pixels, so we can indicate extensions of x pixels to apply our approach. Use this setting carefully as it can cause unwanted focus fringing.
- Detail. With this parameter we will be able to determine the type of edges that Lightroom Mobile will take into account to focus. In low values it will take into account obvious borders and with high values it will consider any type of border. Try to avoid very high values since you could give a textured effect to the image that we are not looking for.
- Mask. It will help us determine which areas of the image we want to be the ones that suffer our editing. If, for example, you have an area of the sky in the background where we do not want to apply focus, then we will use high values. If we want the sharpening to be applied more generally to the image, we will use lower values in the mask.
We will also complete the editing of the focus with lens corrections that we see necessary since sometimes, depending on the camera lens used, we can find certain aberrations or deformations. All this to achieve good sharpness and focus in our photographs using Lightroom Mobile.
To stay up to date, remember to subscribe to our YouTube channel!
SUBSCRIBE ON YOUTUBE
How to Sharpen and Correct Lens in Lightroom Mobile
Although it is the mobile version, Lightroom Mobile contains some parameters in its focus interface that will allow us to improve this aspect along with the sharpness in our photographs. The good thing is that from the application it is not necessary for our settings to have a destructive nature since we can undo it and even create different versions if we want. If, in addition to the focus adjustments that you have used in your photograph, you would like to use them in others, you could create a preset with the profile that you generate to later easily apply it to other images.
What we will have to take into account is that we are going to be able to find some types of problems when we want to improve the focus or sharpness in our photographs from Lightroom Mobile, so you will have to make more edits carefully and always checking that the final result is not too artificial:
Mistakes to avoid when editing focus
Two of the most common errors that we can find when we edit the sharpness and focus of our image in Lightroom Mobile are:
- Overfocus photography. Many times, because we want to improve the focus and sharpness of our photography, we go too far when it comes to regulating the amounts and we find ourselves with overly focused photographs that are far from what our eye can perceive in reality, so the final appearance will be too contrived. Always try to give a focus edit as natural as possible that improves the final appearance of your photograph and does not, on the contrary, ruin the work.
- Photography with presence of noise. You have to be very careful when using the tools that we will see today since by accentuating the detail of certain zones or areas of our photography we will also be enhancing the presence of noise, especially if we are using an image where we have worked with ISO levels. tall. If we focus on areas that even already contained some noise or grain, we will end up further enhancing this effect, giving bad results.
We are going to see then how are the focus options that Lightroom Mobile offers and how to apply it to our photography to improve the focus and sharpness of our images..
Step 1
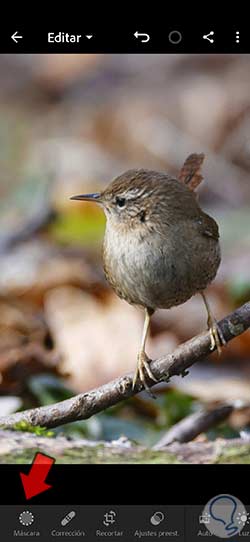
The first thing we will do is open the image where we want to improve the focus of our photography from Lightroom Mobile.

Step 2
In this case we are going to try to improve the focus of our subject since it has a bit of a lack of sharpness that we want to solve.
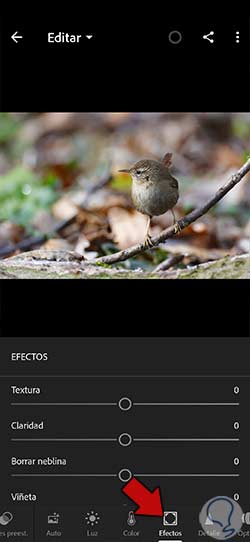
To do this, we are going to start by clicking on the "Effects" section to start improving the focus and sharpness of our photography. We will see that by playing with these effects we will achieve a sharper appearance, but we will be affecting the entire image in general.
Step 3
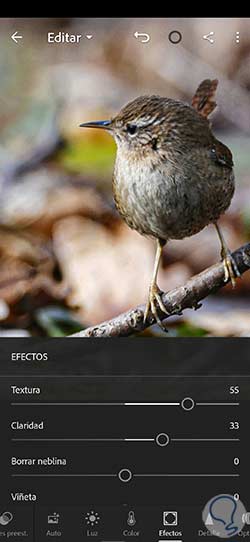
Here we will be able to force the focus of our photography a little more if we play with the following parameters:
- Texture. Increases contrast in areas where there is detail, but throughout the photo. The problem is that there will be areas where it will surely generate noise.
- Clarity. It is also applied to the entire photograph, normally generating a noise effect in the image that did not exist before.
Step 4
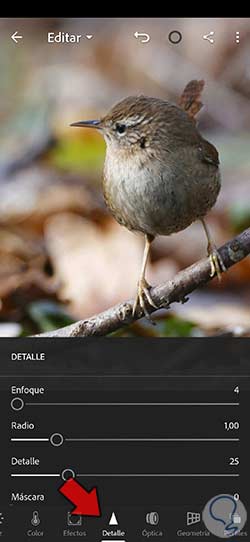
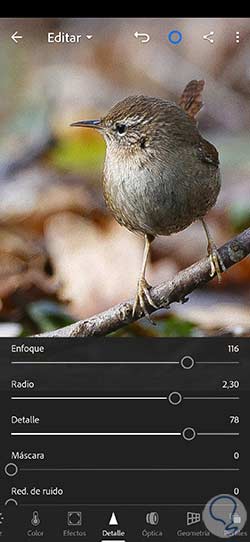
The best and most natural thing is to go to the Detail section to correct the sharpness of our photography. Here we will see the "Focus" option with which we can play to improve the focus of our photography.
step 5
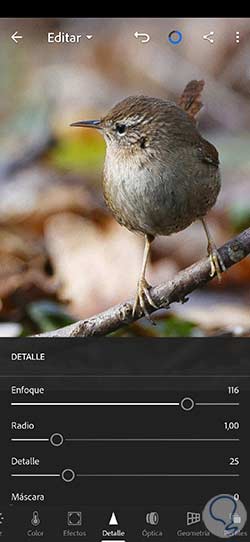
We can play here with the different parameters that we have. If we increase the focus, the level of extra sharpness that we are contributing to the photograph will grow.
step 6
If we increase the "Radius" it will be the size of the pixel selection and it will be larger as we increase the level.

step 7
We can also increase the "Detail" if we want to enhance the level of power effect of the details in the photograph.
step 8
The "Mask" option will modify the areas where the Focus effect will be applied in our photograph, thus avoiding noise being applied to the entire image in general. One option to better see how the mask is acting is to turn the Focus level all the way up and then move the Mask handle to better see where it is acting.
Normally, when using high levels of Mask, we will work on smoother areas where we do not usually want to apply more sharpening, while with lower values, it will act on the entire image with priority on the edges.
Then readjust the Sharpen level to your preference to enhance the image.

step 9
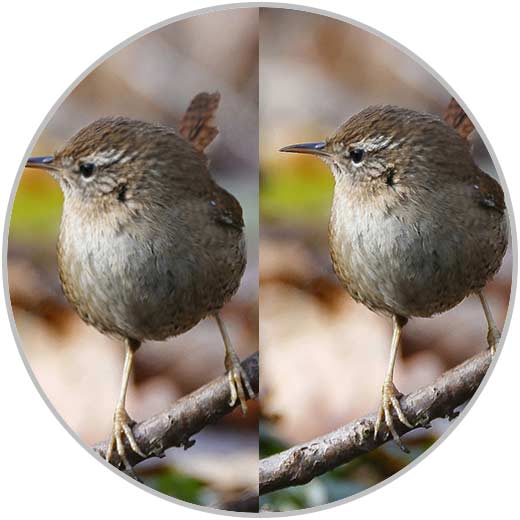
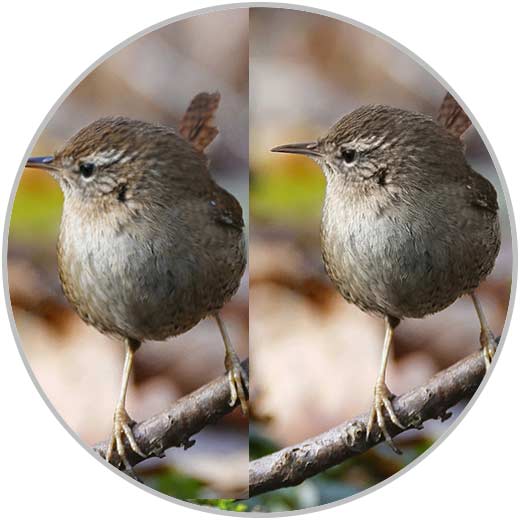
We can see a before and after when applying these Focus adjustments, but without generating much more noise in the photograph.
step 10
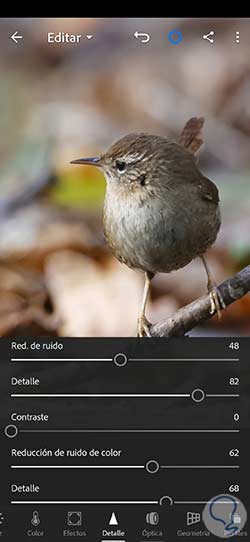
In addition to having an image where noise is too evident in color areas, you can use the "Noise Reduction" and "Color Noise Reduction" options in a complementary way, varying their "Detail" and "Contrast" settings. ” to remove those grainy areas.
step 11
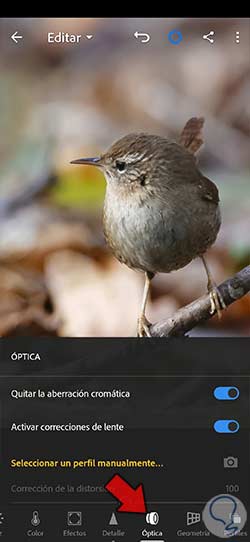
If you also want to improve the sharpness of your photography due to problems generated with a lens, we can go to the "Optics" section to solve it.
Here we will be able to select between two options to correct problems that may exist with the lens used or obvious chromatic errors that sometimes occur:
- Remove chromatic aberration: Eliminate color aberration that may exist in our photography.
- Activate lens correction: If you want to do a lens correction manually, we can click here and select the camera lens profile that we want to configure
step 12
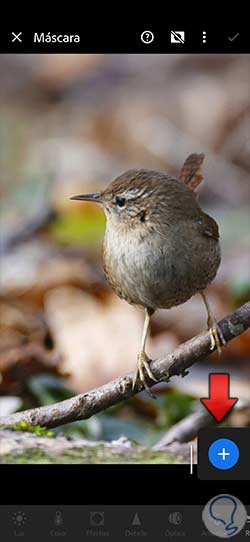
If you prefer to edit the focus and sharpness correction manually, we can work with masks and thus make it more specific. To do this, click on "Masks":
step 13
Now to "Create a new skin" we are going to click on the add button that you will see that appears:
step 14
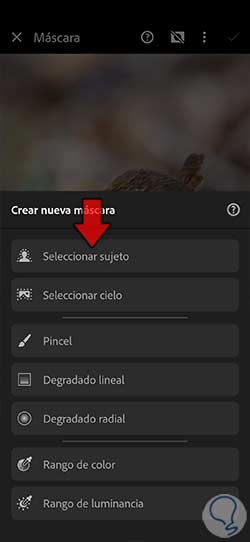
In this list that appears we are going to work either with the “Brush” tool or with “Select subject”. It will depend on whether we want to sharpen a very specific area (such as the eyes for example) or sharpen a specific subject. This last option is our case so we will click on it:
step 15
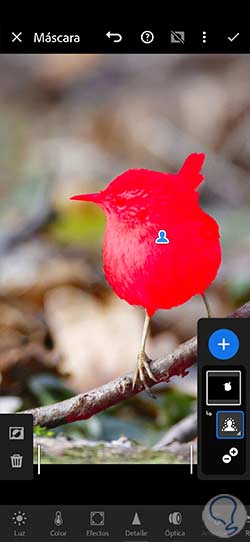
We will see that a selection of our subject is made automatically in red.
step 16
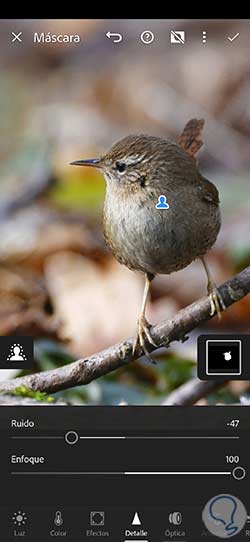
Since we already have the subject selected, we can play with its editing without affecting the rest of the image. So we are going to use the editing tools that we have seen before under the “Detail” group.
We will modify the "Focus" parameter until we find the sharpness improvement result we are looking for.
You can also move the "Noise" setting to adapt it to your photography in case we want to avoid or highlight it.
Click on the upper check when you finish editing this selection mask.
Note
You can take advantage of the fact that you already have your subject selected and isolated from the rest of the photograph to edit it with more parameters with Light or Color.
step 17
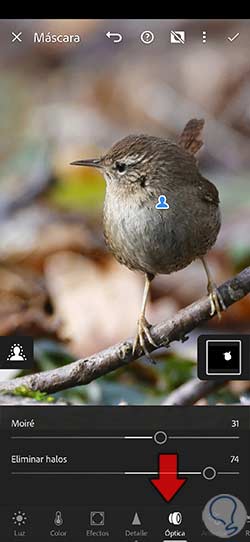
You can also make lens corrections in this part of the image from the "Optics" section. You can play around with the two settings that appear if you want to partially highlight the outline of your subject.
step 18
When we finish giving sharpness by focusing only on the subject, we will see the change that we have achieved in our photography in a more precise way.
In this way we will have managed to improve the sharpness and work of the lens used in our photography from Lightroom Mobile and ensuring that the adjustments do not affect the entire photograph equally.