We are going to start by seeing how we can work on the black and white style manually in Lightroom Mobile, working on the absence of color and adjusting the lights and shadows to achieve totally personalized results in our photos.
We can start by removing the color information from our photography manually using the settings that Lightroom Mobile brings for it. Before we begin to modify the lighting settings and others, we are going to focus on the color options, for this we open our image in Lightroom Mobile and click on the "Color" category at the bottom of the image.
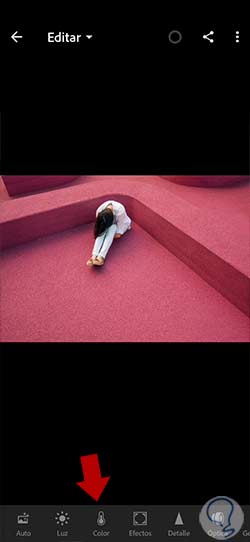
We will see that we are allowed to adjust different elements related to color. In this case, since what we are interested in is the intensity of the colors of our photograph, we are going to remove this information by completely lowering the "Saturation" of the photograph.
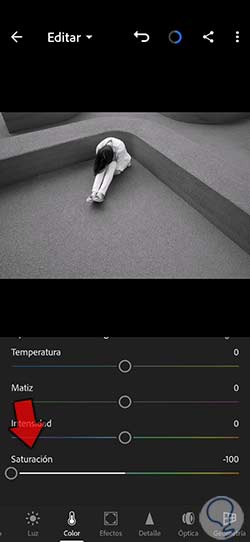
Although we see the color information desaturated to the maximum with a black and white effect, we can also retouch here color settings such as "Temperature", "Intensity" or "Hue" that modify the shadow and lighting area of our photograph.
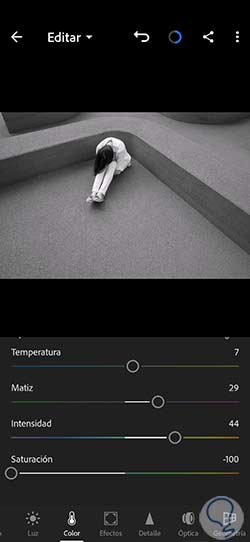
Although color information apparently does not seem to exist, the truth is that it is still there and that is why working with it ends up giving different results in photography. To enter a quick black and white mode we will also be able to click on the "B and W" option of the "Color" panel that will quickly transfer the photograph to this mode.
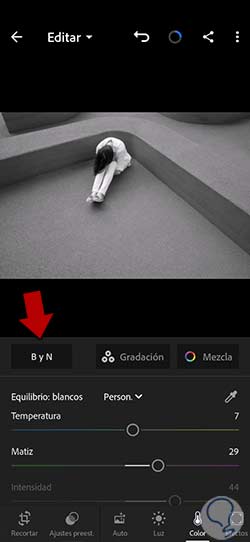
If we want to make sure that no shade of color appears in our photograph, we can go to the "Color" panel and enter "Mix" to see the color segmentation.
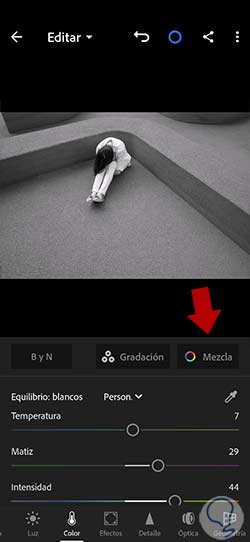
Here we will see a separation of colors that allows editing each one individually based on "Hue", "Saturation" and "Luminance". What we will do is set the “Saturation” parameter in each color to the minimum value -100.
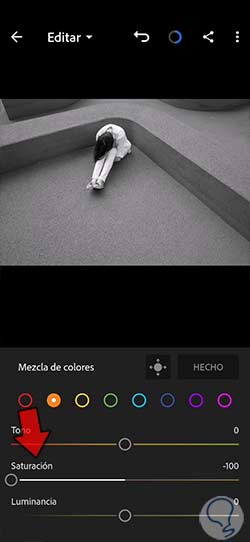
We apply the changes made using the "Done" button that appears above the color selection.
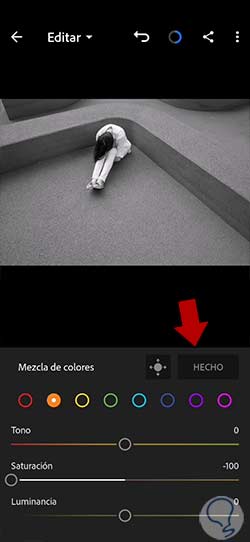
Once we have the color information already worked on in our photography and we have gone to Black and White mode, we can continue working on our image on lighting issues. To do this, we are going to click on the “Light” option.
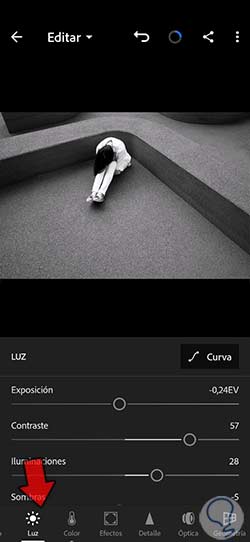
Here we will be able to work on each of the Light parameters depending on the final effect that we want to give. It will depend on how much light and dark area our image has to determine which parts we reduce or increase. In this case, having so much dark area, we are going to raise Highlights, Shadows and Whites in addition to Exposure to get more contrast. We also modified the part of Blacks to enhance them more.
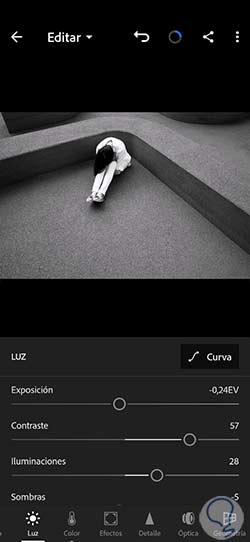
You can work directly on the light curve if we click on the "Curve" option of the main panel in which we are.
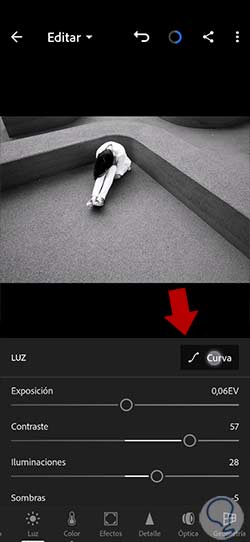
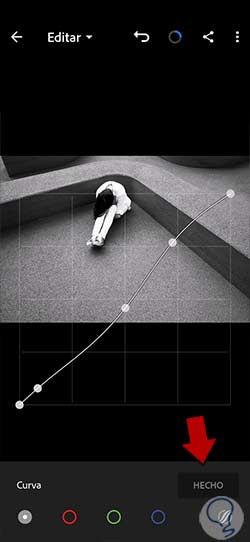
Here we will be able to add more control points if we want where to generate changes in the lighting graph manually. This way we will be able to mark where we want to do a work of contrast between light and shadow.
Click on the “Done” button when you have finished this edition.
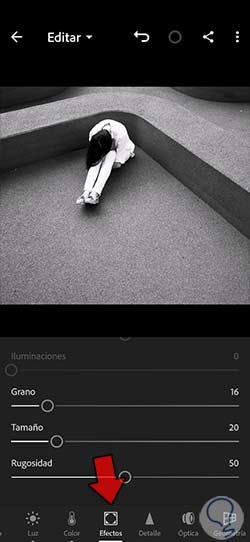
Many times, working on black and white images has the objective of simulating photography resulting from analog cameras, so we could add a grain effect to our photography to emulate it. To do this we will go to the "Effects" section and look for the "Grain" option. We will establish some values that we like for the final result of the photograph by moving the sliders of:
If you want from this "Effects" section we can also apply a known effect that is "Vignette". Since we want it to be dark, we will move the slider to the left thus giving negative values.
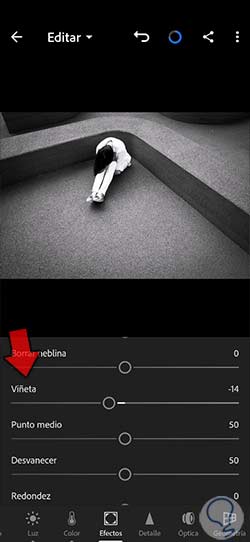
There may be specific areas of your photo where you want to specifically lighten or darken more. If this is your case, we have an option with which to work with black and white in a timely manner. For this we are going to use the “Mask” tool.
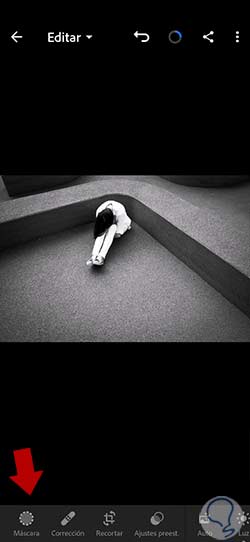
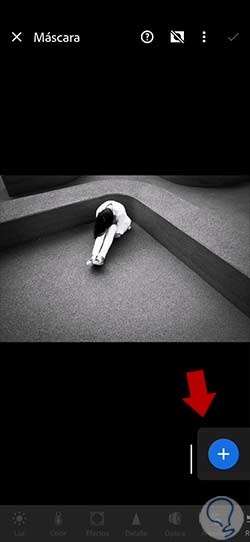
We are going to create a new skin using the “+” icon that we see at the bottom of the screen.
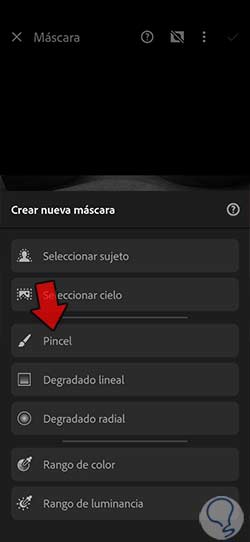
In the type of mask that we are going to use, we will choose the "Brush" one since it is the type that allows us to select the areas to work more manually.
On the left side we have different options with which to configure our brush. Once we have it ready we can start painting on the area or areas in which we want to make changes.
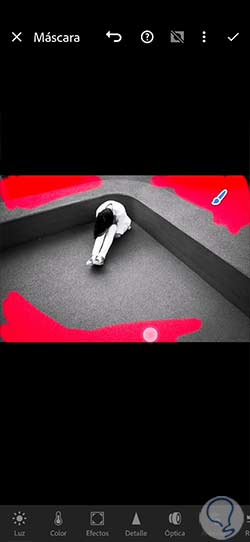
Once we have delimited the work area under that red color that we see, we can play with its lighting from the "Light" section. Here we will modify its parameters, achieving the effect we want, in this case, darken that area more.
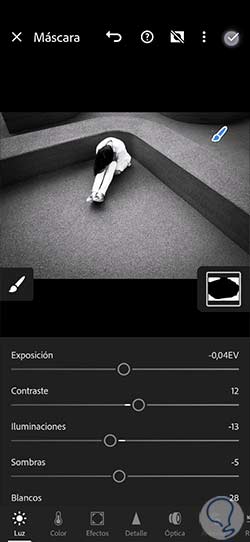
If there are several zones that you want to work on, don't worry because you can click again on create a new mask and add the ones you need to modify different zones.
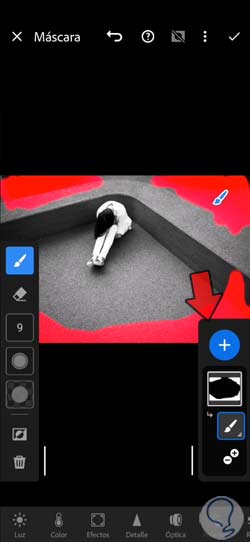
We apply the changes within our skins panel with the upper check icon.
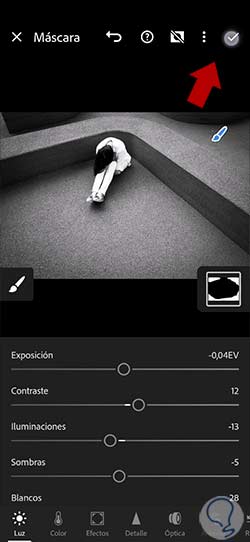
We will already have our black and white image edited and personalized according to our objective and preferred style.
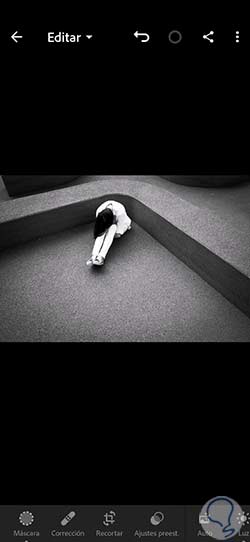
If you liked the configuration that you have made in black and white in a personalized way for your photography, you can create your own preset or preset adjustment and thus be able to use it whenever you want quickly.
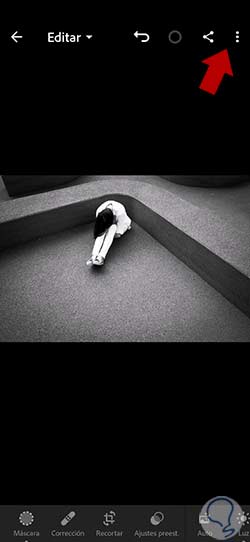
To do this, click on the three upper points of the menu that appears:
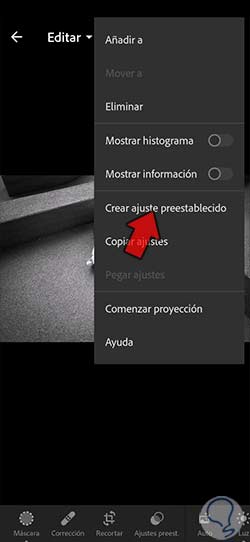
Now we will select the option "Create preset" to generate a new preset.
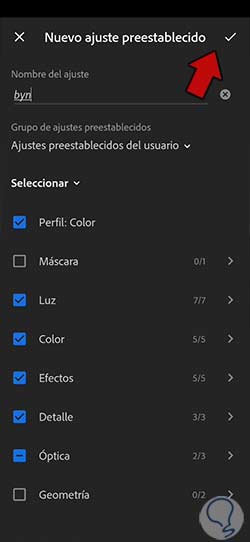
In this window we are going to give a certain name and select all those settings that we have changed and that we want to be part of our preset setting.
To save the preset, click on the check and it will be saved in the own presets section.
Then you can use your created black and white preset on any other photo whenever you want.
