With the rise of social networks, trends have been modified and that is why it is common to see more and more clear importance given to content. We constantly create and publish content of a different nature, content that speaks about us directly or indirectly and for this reason we must always take it into account. Within the most prominent social networks we can talk about Instagram as one of the most demanded showcases when it comes to showing our photos and videos. In addition, thanks to the diversity of functions that this platform has been implementing over time, the user has a multitude of options on how to publish that content..
If we dedicate ourselves to the creation of content in a professional way, we will normally try to create a feed that tries to identify and differentiate us from the rest. That is why more and more users when creating photography give importance to editing as this will be essential to determine a more or less professional style. Creating content is not only important, but we will also have to take into account offering good quality in order to differentiate ourselves from the competition or simply to personally achieve the best results we can. Think that if you take care of your photography from the moment you take it until the moment you publish it, in all this process there will be a job that will leave great results and with which you will surely be very satisfied.

As you already know, on Instagram there is a large multitude of content creators of different kinds and depending on what you do and your purpose, you will have to try to find a style and workflow that represents you. Do not worry if at first you feel a bit confused and you do not know very well where to guide your path when creating a type of style, because with the passage of time and trying different results you will end up finding one that gives you satisfaction. . That is why today we want to show you the different sections that you can use to edit photos in Lightroom Mobile for Instagram and get photos with personal and unique styles..
If you also want to get the most out of your photos and get professional results, don't miss out on everything we have to tell you about how to use Lightroom Mobile, as it will help you boost your results.
To stay up to date, remember to subscribe to our YouTube channel!
SUBSCRIBE ON YOUTUBE
How to Edit Photos in Lightroom Mobile for Instagram
As we have mentioned before, The World of Instagram is full of content creators, as well as photography and video everywhere, making it quite difficult to stand out within it. It may be that you only want on a personal level to show what you do and that is why it is important that you take care of the final quality that you bring to that content. Taking a photograph with your mobile automatically and putting one of the filters that the whole world uses is not creating quality and differentiating content, which is why tools like Lightroom Mobile offer you the possibility of making professional editions manually. Although making editions from scratch seems like hard work, the truth is that you will be giving added value to your photographs by getting unique material that speaks of you.
In today's example we want to show you the different tools that Lightroom Mobile offers us to make our professional editions from a mobile device and that you can adapt according to your tastes and objectives. Here we are going to use a series of values that we have liked for this specific image and that we also want to continue using in future editions, but it may happen that your photography or your style is different, so we invite you to follow each 1 of our steps and testing values you want. You may end up exporting different versions of the same photo to compare different styles and end up finding the one that is closest to what you want to create..
Keep in mind that starting Instagram asks for a series of requirements to prevent our photography from losing quality and among which we will summarize the following so that you keep it in mind when editing photos in Lightroom Mobile for Instagram:
- Upload an image that is at least 1080px wide
- Height between 566 and 1350 pixels
- Have an aspect ratio between 1.91 and 4:5
- Upscaling to 320px if you upload a photo with a width less than 320px

Taking this into account, we are going to see how to edit our photography in Lightroom Mobile and then publish it on our Instagram Social Network.
Step 1
We open our photography in Lightroom Mobile either from a previous library or by importing it.
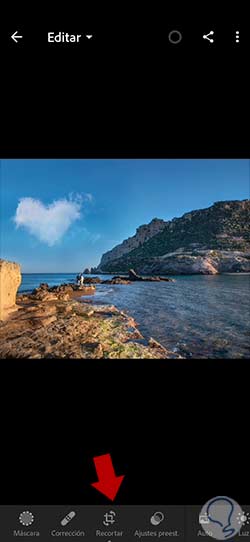
The first thing we will do when editing our photography is to adjust the proportions required to upload a photo to this platform. Although we could do this step at the end, the truth is that it is best to define what the framing of our photography will be like from the beginning and thus know where we will focus our attention.
We will click on the "Crop" option that we will see in the lower panel to start resizing our image.
Step 2
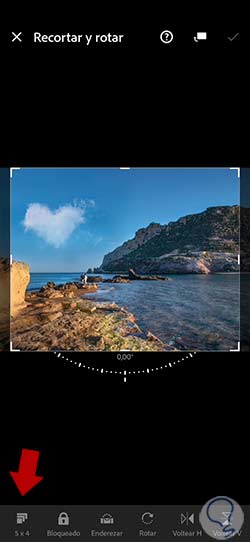
Next, we will click on the "Measurements" section of the lower panel to select the new proportion.
Step 3
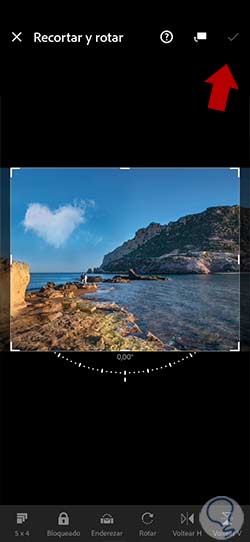
Here we will choose the ratio of 5:4 and adjust our image to this frame. To save the changes, click on the upper right check that appears.
Step 4
We will now begin editing our photograph. The adjustments of your image will depend on the type of photography you are using and the style of each one, but we will show you the different sections that you could edit.
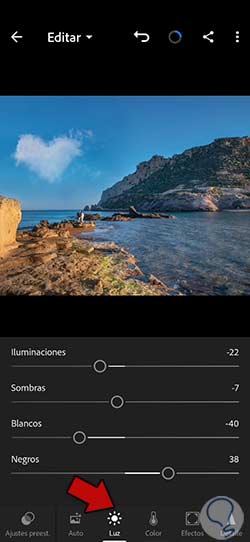
We will start by improving the lighting of our photography. To do this, click on the "Light" section.
Here we can improve the different settings related to light depending on the needs of our photography. In this case we will use the following values:
step 5
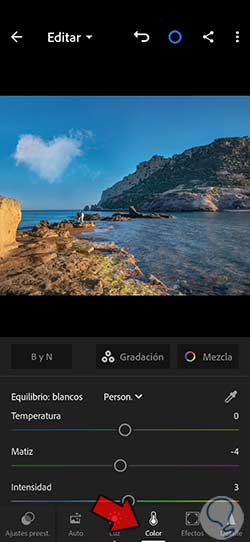
We return to continue editing our photography. Now we will continue modifying the "Color" of our photograph using the lower section that appears.
Here we will also be able to configure different parameters of our photograph related to the global color of the photograph. This will depend a lot on the final effect that we want to give to our image and on the colors that are already present. In this case we are going to establish these values:
step 6
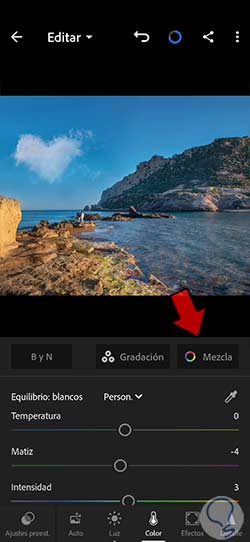
You also have the possibility to edit one by one the colors present in the photograph. To do this we can make a color segmentation by clicking on the "Mix" option.
step 7
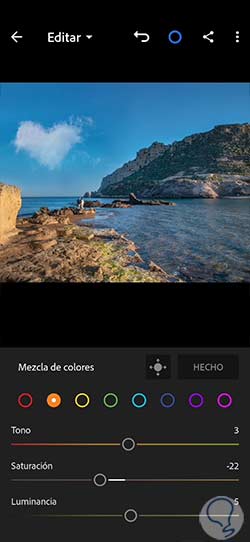
Here we can make individual color modifications that we want based on the “Hue”, “Saturation” and “Luminance” parameters. In this case we will make the following color configuration.
Once you finish in your last color, click on "Done" to apply the changes
step 8
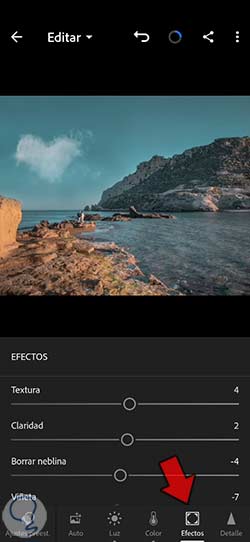
Once we have finished configuring the color of our photograph we will continue editing it. In this case we will enter "Effects" and we will apply different values depending on what we want to achieve. In this case we will seek to give a little more Texture to the image and define it softly also with "Clarity" and then we will apply a light haze effect and some vignetting.
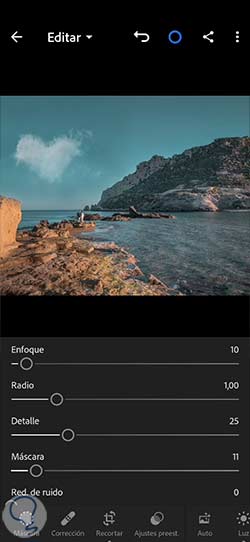
step 9
The next section in which we will work will be the subject of "Detail" that we can also find in the lower panel of options. Here we are going to give a little more focus using a mask to soften it, but compensate for possible loss of sharpness when uploading it to Instagram.
Everything will depend on your photograph since, if it is a portrait, for example, surely we do not want to give so much sharpness and contrast to avoid too accentuated features.
In this case we will choose the following values for our photograph:
step 10
Once we have completed our edition we can review it or finish it and export our image. If you want at any time to see how your photo is looking compared to the initial one, you can keep the image pressed and release it to see the change.
In this case we can see the before and after of our image editing for Instagram:
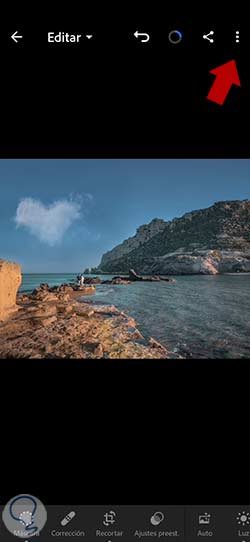
step 11
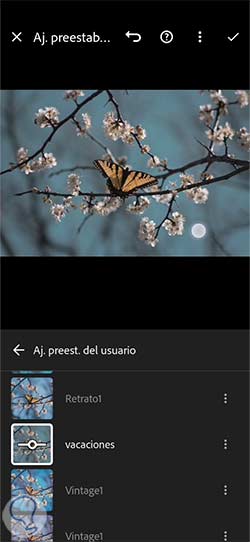
Once you have these adjustments made you can create a preset that helps you to be able to use those same adjustments at any time in all your images. To do this you can click on the three upper points of your photograph
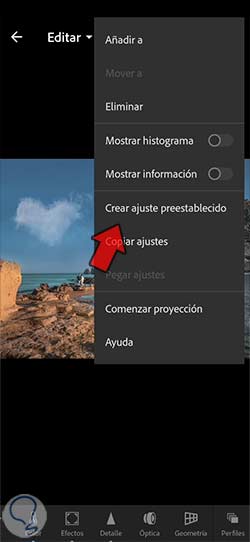
step 12
Here click on “Create preset” to create a new one.
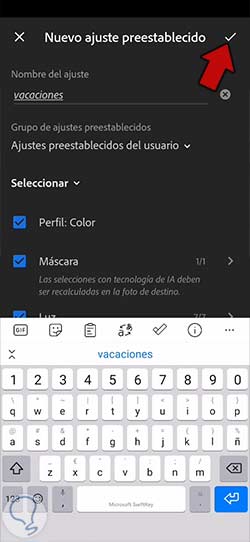
step 13
We will select the settings that we have modified and we will give a name to our preset or preset.
Click on the upper check to save it in the settings library.
step 14
We will already have a totally personalized preset that we can use whenever we want for our photographs and thus achieve similar styles for our content. To apply it, all you have to do is go to the Presets section and click on it on the photo you want.
step 15
You could also use any settings already preset by Lightroom Mobile to make quick edits to your photos for Instagram if you like any of the styles that appear.
Since we already have our photograph well edited and ready to upload it to Instagram, we will first have to export it with the correct settings to avoid losing quality in the process.
If you still don't know how you can export for Instagram using Lightroom Mobile, we recommend you visit this link where we explain in detail how you can perfectly export photos for Instagram:
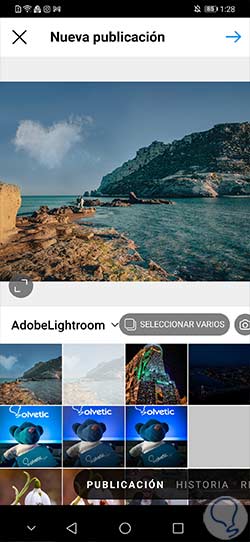
In this way we can upload our photography to the Instagram profile and have edited images
With this we would already have our photography for Instagram edited with a personalized style in a professional way and also well configured so that when uploading it to Instagram it does not lose quality thanks to the possibilities that Lightroom Mobile offers.