When we make our compositions in photography, there are various elements that we can take into account to include them in it. Depending on the type of photography that we are taking, we will have some of these elements as basic pillars and others that can only fulfill a secondary function and even not appear. If, for example, we are taking portrait photographs, our subject will be the protagonist while the rest of the scene will usually go into the background. If, on the other hand, we are working with more open shots and landscape photography, normally the subject usually does not appear or has a more relegated position in the composition. The game between the elements that we choose and those that we do not, as well as their role in our photography can get us some results or others..
If we are working with outdoor photography, one of the most present parts in this type of photography is the sky. Its role can be merely compositional by nature or have a leading role within our composition. An emphasized and dark sky can give, for example, a lot of personality on days where we have the presence of many clouds or atmospheric agents such as rain or snow. They are usually types of sky that emphasize the character of our photography since they enhance the information that we are giving with the rest of the image. For images where we are working on tranquility and calm, a clear and cloudless sky would also help us in that emphasis of a photographic nature.

As we know, we do not always have to follow standard patterns when editing our photographs and the trial and error process will give us results that we often did not expect. That is why it is possible that at some point you need to modify the sky of your photograph and change its color or aspect. In processes where, for example, we want to go from a day photograph to a night photograph, working on the sky will help us in that transition. Changing the color to the sky can also be a necessity at some point in composition and that is why tools like Lightroom Mobile will help us make this type of edition with professional results without too much complexity using only our mobile devices..
In the sections that we will see below, we are going to show you different ways that we can use to change the color of the sky in Lightroom Mobile and even to edit the sky completely without having to influence the rest of the photograph. Here the use of the mask will be a great ally to achieve it.
To stay up to date, remember to subscribe to our YouTube channel!
SUBSCRIBE ON YOUTUBE
1 Change the color of the sky in Lightroom Mobile
Since we are talking about the sky, it is an element that we should not let go unnoticed since our photographic compositions can be a great ally. Although sometimes we take our photographs and see the sky as an element that is naturally present, the truth is that its editing can emphasize our objective in the transmission of the visual message. That is why you have to know tools like Lightroom Mobile that provide us with the necessary options to make complete editions that personalize our result.
In this first section we want to use a way to change the color of the sky in Lightroom Mobile quite quickly but effectively. Imagine that the color of the sky that you have taken has been too dark, too light or even with a color that does not fit with the rest of your composition. In this sense, you should not worry since we are going to see one of the most useful color editing options that Lightroom Mobile has. To edit the color of our sky we are going to use the mixing panel that Lightroom Mobile provides us within its editing tools. Specifically, this panel is made up of a segmentation of individual colors that allows us to edit each color individually in our image..
Although many times we want to make a complete edition of the color of all the photographs, many times we only want to attack one in particular without wanting to influence the rest of the colors. Perhaps we need to change the hue, saturation or luminance of that color and that is why working from the mixing panel will help us a lot. Of course, the option that we are going to use in this section is only recommended if we see that our sky has a predominant color such as blue and in the rest of the image that color hardly has a presence, since if the same color is present in different parts of the image we will be modifying its color in them at the same time.
In this case, the objective is to work on the most predominant color on the sky and that usually falls on the blue tones. As the mixing panel is going to segment each of the colors, we will be able to work directly on the blue colors that appear and thus modify the sky of our photograph in a fast and efficient way.
Step 1
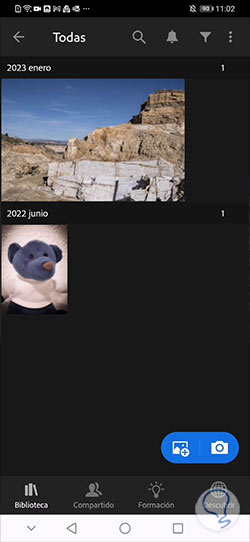
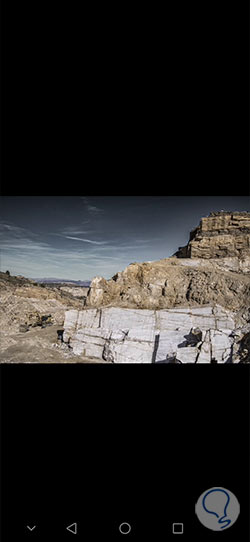
The first thing we will do is open our image from Lightroom Mobile, either from a specific album or folder or by adding it from the gallery or from the camera with the icons that appear.
Step 2
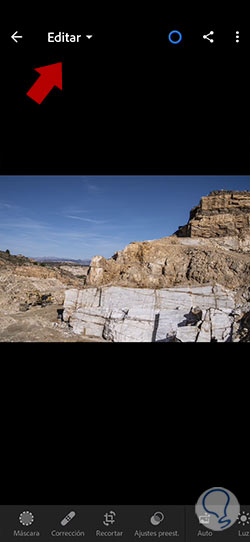
We will make sure that we are in edit mode by looking at the top option that appears on our image.
Step 3
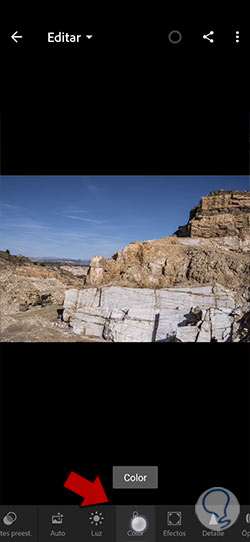
With this first option, what we will do is modify the color of the sky using one of the settings that is integrated into Lightroom Mobile. In this case we will use the “Color” setting that we can find at the bottom.
Step 4
Within the Color options that it shows us, we are going to work through the segregation of colors that we will find if we click on the "Mix" option.
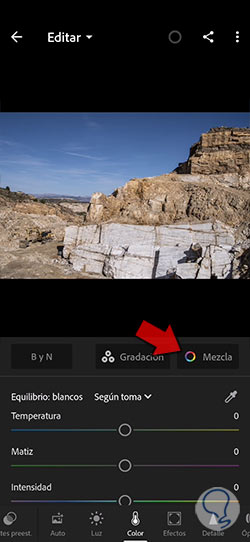
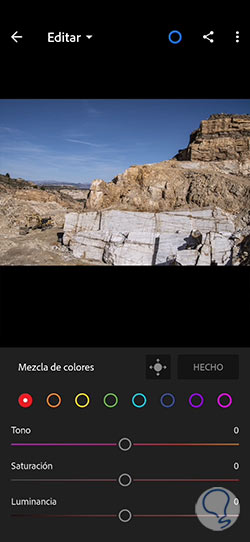
Step 5
In this Mix option we will find the possibility of editing the image by segmented colors, something very useful when we have a part or element of a single color that we can modify quickly. It is a recommended option when we have a part well defined by color, such as the sky.
To work on the color of the sky, we will look at its predominant color, which is blue. In this case it is a well-defined area, but if we had the blue color more present also in other areas it would be less effective and we would have to use the option in the next section.
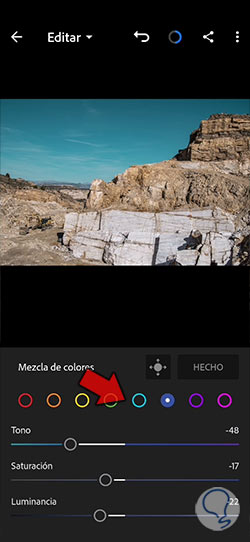
step 6
We are going to move each of the blue sliders in the color panel until we find a color that we like.
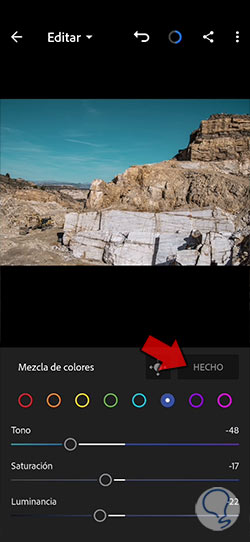
step 7
Once you finish editing the color, click on the "Done" option to apply the changes.
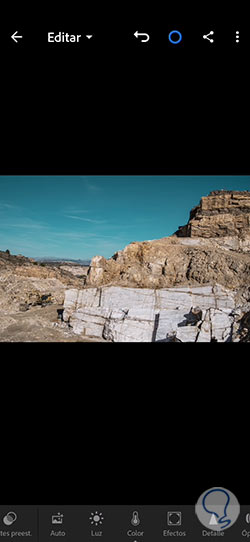
step 8
We will already have the color of our sky changed easily and quite quickly.
2 Edit sky in Lightroom Mobile
We have already seen that, if we have a sky well defined by a color such as blue and this is strongly evident in the rest of our photography, using the blend panel will be one of the fastest options we will find for this type of editions. This could be applied to other color changes, if we have a person in our photo with a red shirt and we want to change her color quickly, we can use that blend panel to modify it. But imagine that we have a photograph with a sky that needs to be edited with more options than the color or even that the color of the sky is also present in other areas of our image. This can happen, for example, in images where we have photography on beaches or the like, since we will have a well-pronounced blue color in the sky and that will also be reflected in the part of the water. With the previous method we will be modifying the color in both areas at the same time, something that we do not usually try.
That is why the use of masks in Lightroom Mobile is really useful and functional because it allows us to make modifications and adjustments in specific areas of our photos without making changes and modifications in the rest of the areas. Yes, with the previous section we saw a faster type of editing, in this case we are going to find an option to edit the sky in Lightroom Mobile in a much more complete way. Working with masks we will be able to delimit the area of the sky and apply adjustments to it from a focus to a change in color or lighting.
We are going to see below how to use the mask in Lightroom Mobile and use it to make complete modifications in the sky of our photos without having to influence the entire image.
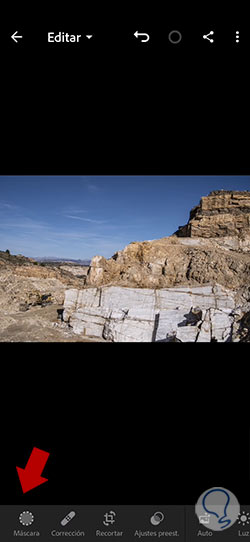
Step 1
The first thing we will do is open the image we want to edit either from a configured folder or album or import it from the camera or gallery.
Step 2
Once we have our image open, we make sure that we are in the "Edit" mode at the top so that the editing options appear.
Step 3
In this section we are going to see how we can change the color of the sky in an image, but using the "Mask" options of Lightroom Mobile. This allows that if we have different areas in our image and the color of the sky is present in more areas of the image in a pronounced way, we can work with that color only in the area that interests us.
To do this, we are going to click on this "Mask" option from the lower panel of options that appear.
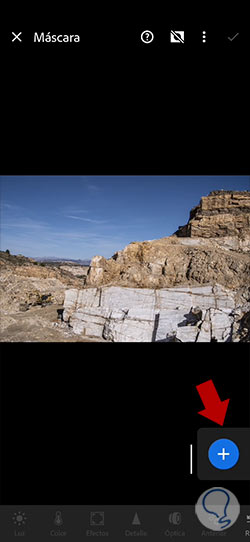
Step 4
To create a new mask we are going to click on the “+” icon for “Create new mask”.
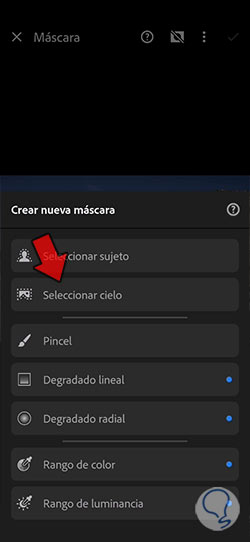
step 5
Now we will see that a drop-down menu opens with different options to create our mask. These options allow us to make edits in specific areas of our photography. As in this case we will focus on the sky, we will take advantage of the “Select sky” option.
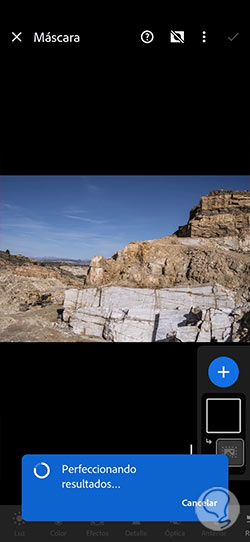
step 6
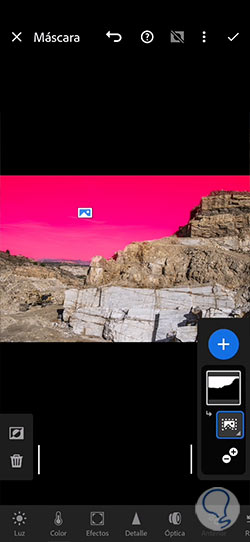
The selection will begin to be processed automatically to create a delimited mask in the sky area and it will warn us on the screen.
step 7
Once the selection is made, we will see that the mask has been created over the area of our sky and that it will be indicated by default in red.
step 8
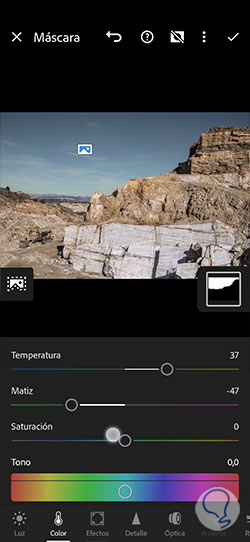
Since we already have our mask created and our delimited area of the sky, we can apply the changes we want since they will only modify this area. This will allow us to work on the color, but also other adjustments such as giving it "Effects", "Light" or "Detail".
In this case we will start working on the “Color” and click on it in the lower panel.

step 9
We will make color modifications and we will see that these changes are applied only to the sky area of our photograph.
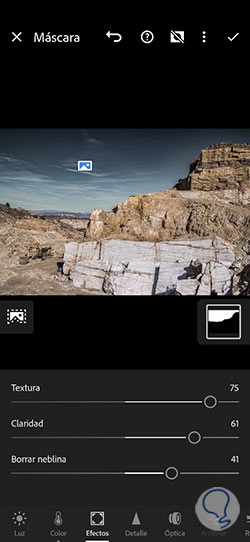
step 10
We can apply more changes to the sky part if we want. In this case we have worked on modifications on "Effects" but you can apply the changes you want and see them in real time.
As we are working on a mask, we will have the positive that we can return to it whenever we want and make the modifications as many times as we want.
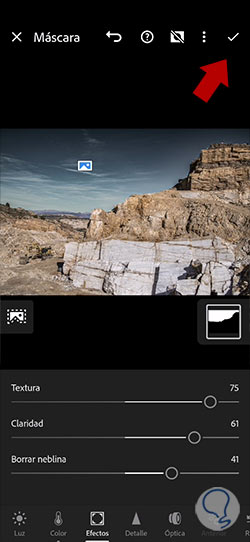
step 11
Once we apply the modifications in the sky of our image, we will click on the upper check so that the changes are applied.
step 12
We will already have the color of the sky in our image modified and we will also have been able to edit it with more options if we want to complete its editing.
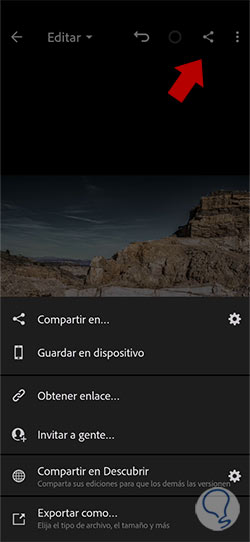
step 13
Finally, you only have to save your image with one of the options that appear when you click on the share icon option.
In this way we will be able to change the color and edit the sky of our photograph in a complete and non-intrusive way compared to the other parts of our image. Both the use of the Lightroom Mobile settings and the masks will allow us to adjust the color and appearance of our sky in a complete and professional way from Lightroom Mobile.