If we are talking about photography with lighting that has a bright setting and, on the other hand, shadows with a lot of intensity, we will be able to create much more pronounced depth effects in our images, something that we can achieve by editing the light in our photography if it is not already there. flaw. Light is essential in our photography since it is the basis of this art and for this reason it must be taken into account both when we take the photograph and when we proceed to execute the edition. Although the normal thing is to look for a point of balance in the light where lighting and shadows establish an adequate dynamic range, the truth is that depending on the objective we can make very marked adjustments that justify the result..
The light can be determined by different parameters and will depend on elements such as the subject, the time, the place, the predominant light source... all these elements will influence the light results of our photography and that is why they must be taken into account. in our sessions. Many times we have a photograph at an ideal moment but the configuration of the is difficult to control or we do not have that possibility, for this reason the decision will be key to recover the result that we were looking for.

Color is another undoubted protagonist in photography, in which both its presence and its absence can evoke different results in the same image. Color has an evident presence and its configuration can transform a photograph that goes unnoticed into one whose attention is undeniable for the observer where his gaze will be captured in a few seconds when seeing the photograph. For this reason, working with color globally or individually in our photographs and videos can be a substantial change in our results. We don't always want to get the same results with our video clips and that's why it's best to try different possible configurations until we get a result that resembles what we're looking for, something that Lightroom Mobile allows professionally..
As we said, it is very likely that you need to make adjustments to the light and color of your video and that is why it is best to use professional tools with Lightroom Mobile where it offers you adjustment possibilities that make complete modifications to your files. Let's see below what Lightroom Mobile offers us to change the light and color profile in our videos from mobile devices.
To stay up to date, remember to subscribe to our YouTube channel!
SUBSCRIBE ON YOUTUBE
Adjust light and color in video Lightroom Mobile
It is normal that we need to edit our video files once we have recorded them because it is difficult to be able to make previous adjustments perfectly. Is it for this reason that knowing tools as complete as Lightroom Mobile help us to have the possibility from anywhere to make professional editions of our video files to achieve really good results? It doesn't matter that the light and color are not good enough in the video file we have, since we have the possibility of manually correcting these elements and giving them the final look we are looking for.
Today we are going to show you how to modify the different light and color parameters that the Lightroom Mobile tool offers us, thus achieving results that we did not expect. You will no longer have a problem for having a video that is too dark or too exposed since you can easily rectify it. Likewise, you will be able to correct the color of that video and adapt it to the final appearance that you wanted to give it, you will even be able to create different versions with different settings to compare results..
The good thing about the Lightroom Mobile tool is that it allows you to easily see the before and after, and for this you just have to hold down the image of the video that appears to see the previous state and release it to continue seeing the current configuration. This will help you maintain a reference to the initial file where we will see how the changes have affected the final appearance of our clip.

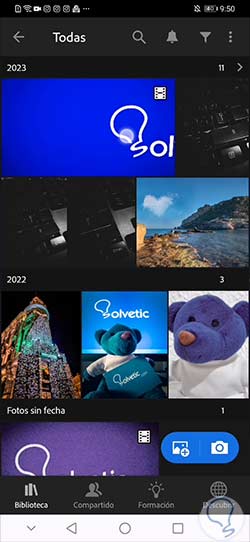
Step 1
The first thing we will do is find the video that we are going to edit either within one of the folders or albums that we have already created in Lightroom Mobile or by importing the file first from the blue icons that you will see below.
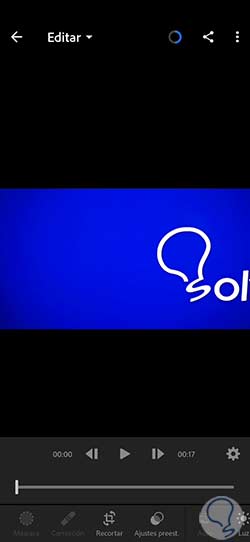
Step 2
Clicking on the video will enter the Edit panel automatically. Here if we look at the lower options we will see how there are different settings with which we can modify our video. In this case we will look at the Light and Color sections to make changes to our clip.
Step 3
We are going to see what we can modify in our video in terms of light and color and thus be able to customize its appearance in a personalized way.

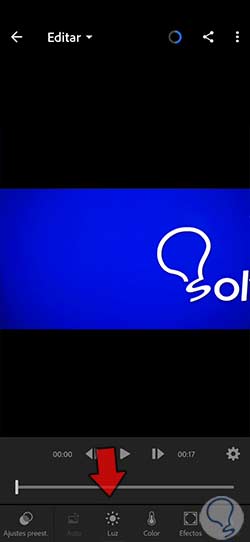
Adjust Light in Video Lightroom Mobile
We are going to start by clicking on the “Light” section to modify everything that has to do with it in our video.
Here we will find various options that allow us to touch up everything that has to do with Light. The edition of these parameters will depend on the final result that we want to achieve. If it is an underexposed video, we will have to improve and increase the lighting, while if it is too light, we will have to reduce it.
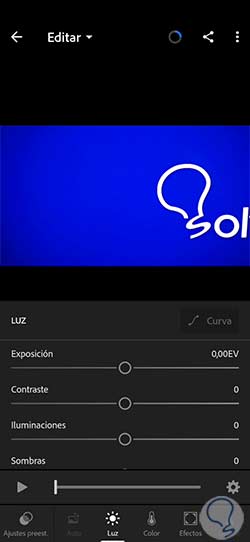
We are going to modify each of the parameters to change the appearance of our video completely. We will see in real time how our video changes from the upper thumbnail.
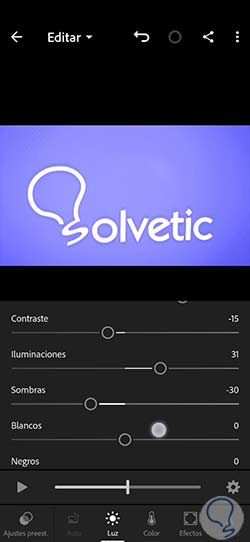
With this we would have been able to modify the light in our video in a manual and personalized way. The settings applied will depend on the needs of each video and the final aspect that we want to give our video using the parameters that Lightroom Mobile provides us.
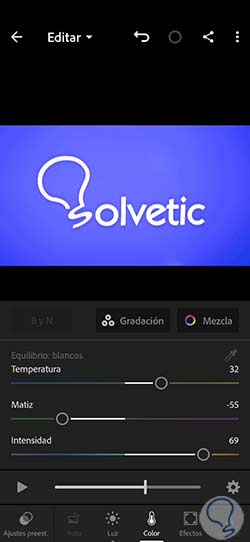
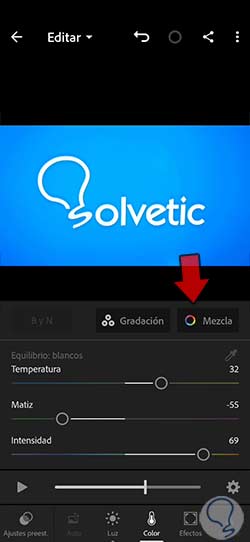
Adjust color in video Lightroom Mobile
If we also want to make changes to the color aspect of our video, we will also have the possibility to do so. To do this we can click on "Color" to see the options available to us.
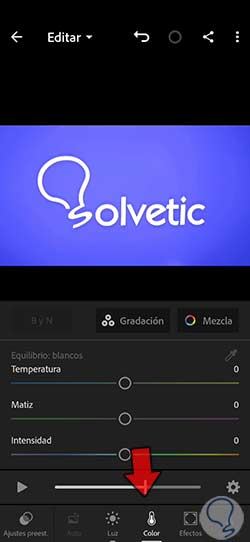
Here we will find different parameters that we will be able to regulate with their settings to achieve a personalized color configuration in our video. It will depend on the result that we want to achieve to make one or the other adjustments.
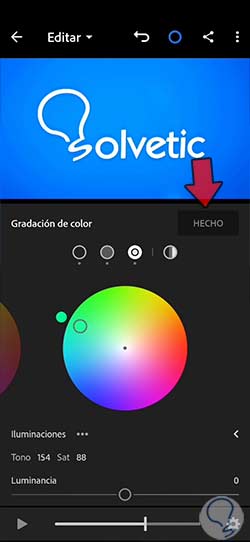
If you want to work on the color in the shadows, highlights and midtones separately, you can click on the option that appears under the name "Gradation".
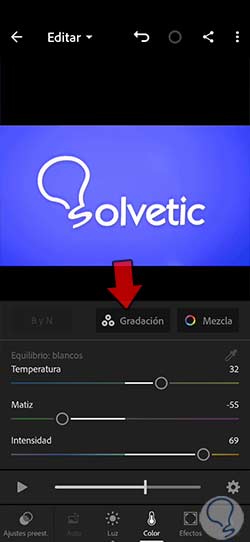
From this window we can move between Shadows, Midtones and Highlights to modify the Hue and saturation that we want in each specific section. Use the color wheel to move around the color wheel.
Click on "Done" when you have finished to be able to apply the changes you have made and that they are reflected in the video result.
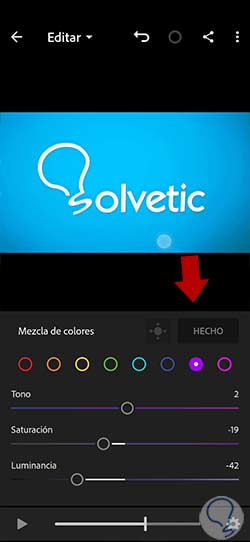
We return to the Color panel and find another quite interesting option, “Blend”. With this option we will be able to edit the color in a segmented way. We will click on it to see its options.
As we said, we have a segmented color panel to be able to make adjustments to a specific color in our video. We can click on the color and then use the “Hue”, “Saturation” and “Luminance” options to adjust its settings.

When we finish editing, we will click on "Done" so that the changes are applied and we can see them applied to our final video.
Step 4
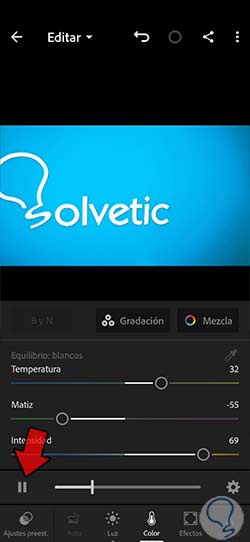
It should be noted that in each option that we have seen for editing our video, both in Light and in Color, we have a playback controller at the bottom that allows us to play the video or pause it to see what the final result of the video looks like. edition.
step 5
In this way, by being able to modify both the Light and the Color in our video in a personalized way, we can achieve the results we are looking for and can even achieve truly original effects.
step 6
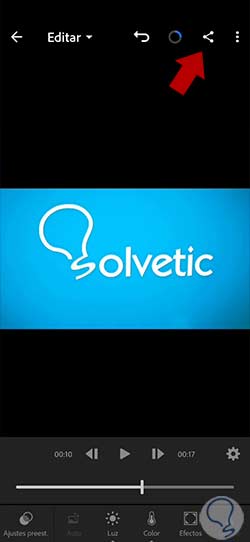
Once we have our video completely edited, you can export it from the top icon where you can choose how and where to export the edited clip from Lightroom Mobile.
step 7
To make quick light and color adjustments we recommend that you visit the following link where we tell you how to apply video presets within Lightroom Mobile.
In this way we have seen how we have interesting options in Lightroom Mobile that allow us to make Color and Light modifications in our video files, thus achieving professional results.