Sound is something that Windows 10/11 users have in common to play not only music but to have access to various tasks such as platforms, virtual meeting apps, sounds and system alerts and many more options where it is involved. the audio, but a common error today is that the sound may not be heard by users, there are various causes of this error and for each of them TechnoWikis has a comprehensive solution..
Sound problems on our PC can be quite frustrating since they won't let us use our equipment fully, especially in the multimedia area. We can see these types of errors manifested in different ways, such as my PC not being heard or always having quite low sound levels. The difficult thing is to find the root of the problem since it can be sound card problems or speaker errors including software problems. In order to solve it, we are going to see a series of possible options.
To stay up to date, remember to subscribe to our YouTube channel!
SUBSCRIBE ON YOUTUBE
1 Update sound drivers
Step 1
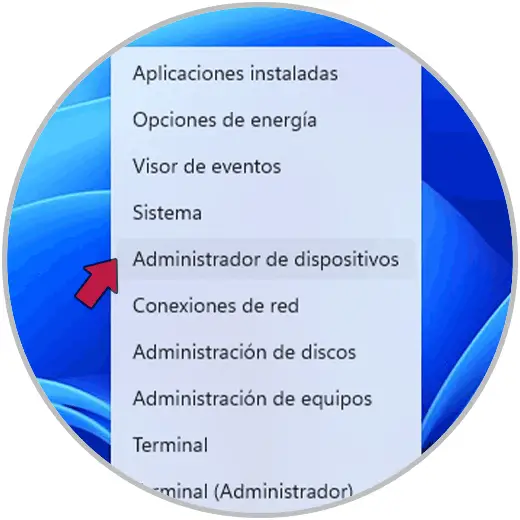
An outdated driver is synonymous with various sound errors and not just not being heard, to correct this we can update it automatically, open the Device Manager:
Step 2
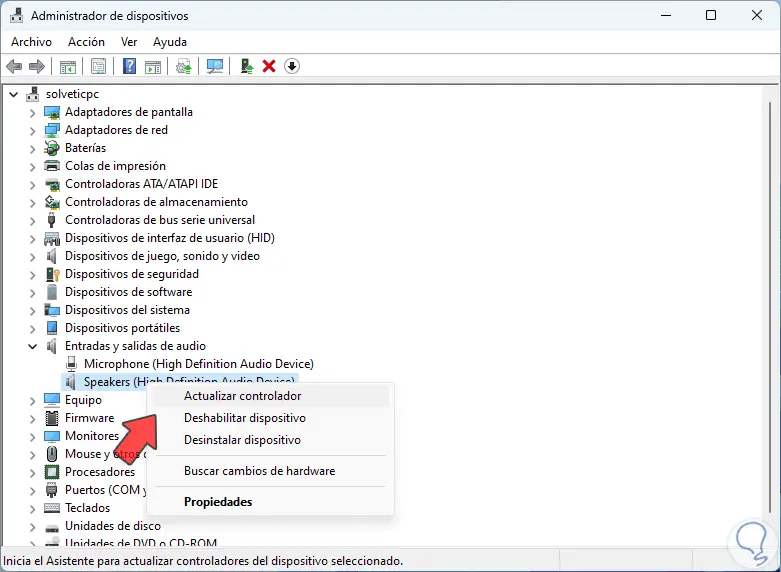
In "Audio inputs and outputs" we right click on the driver and select the "Update driver" option:
Step 3
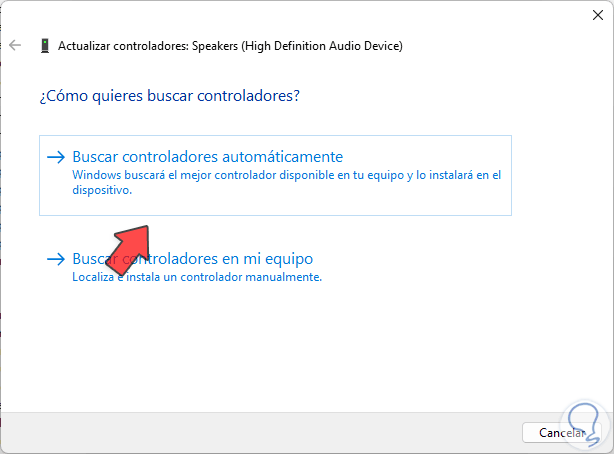
The following window will open. We click on "Search drivers automatically" and
Step 4
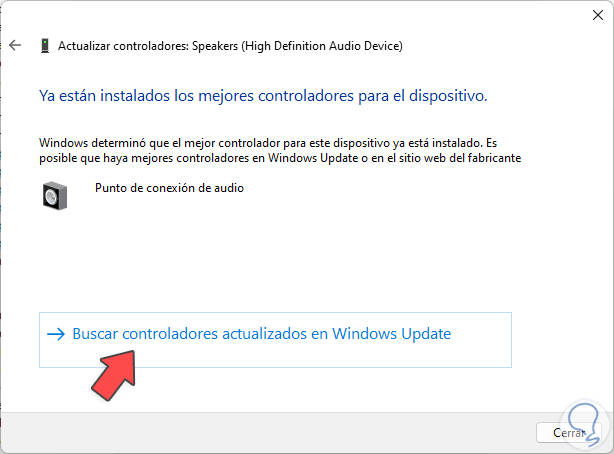
We wait for the process to complete:
step 5
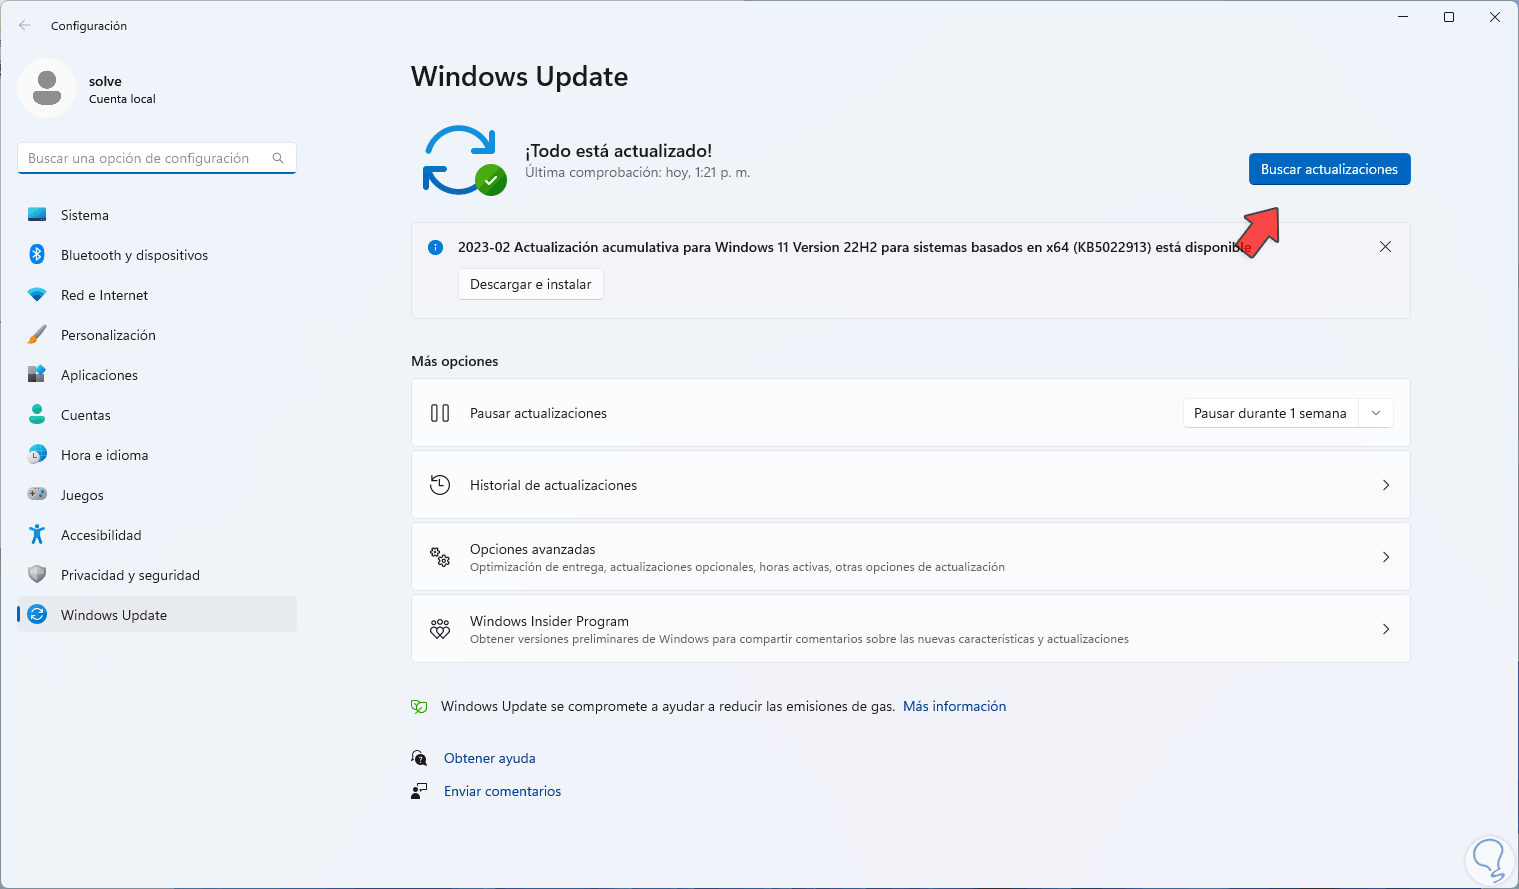
We click on "Search for updated drivers on Windows Update" to validate the availability of any update:
step 6
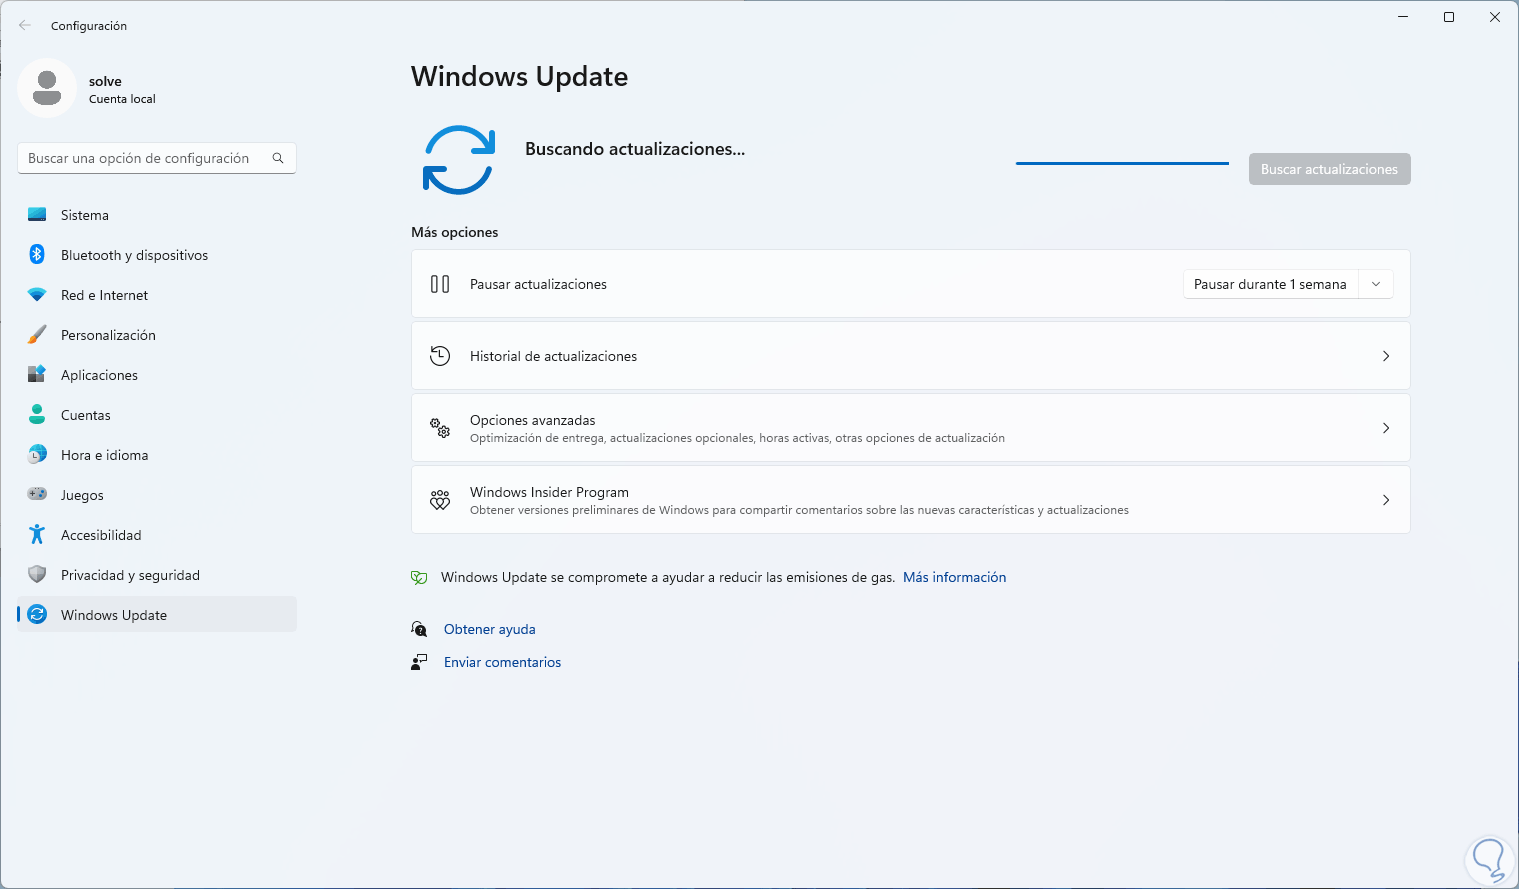
Click on “Check for updates” and check if there are available updates:
step 7
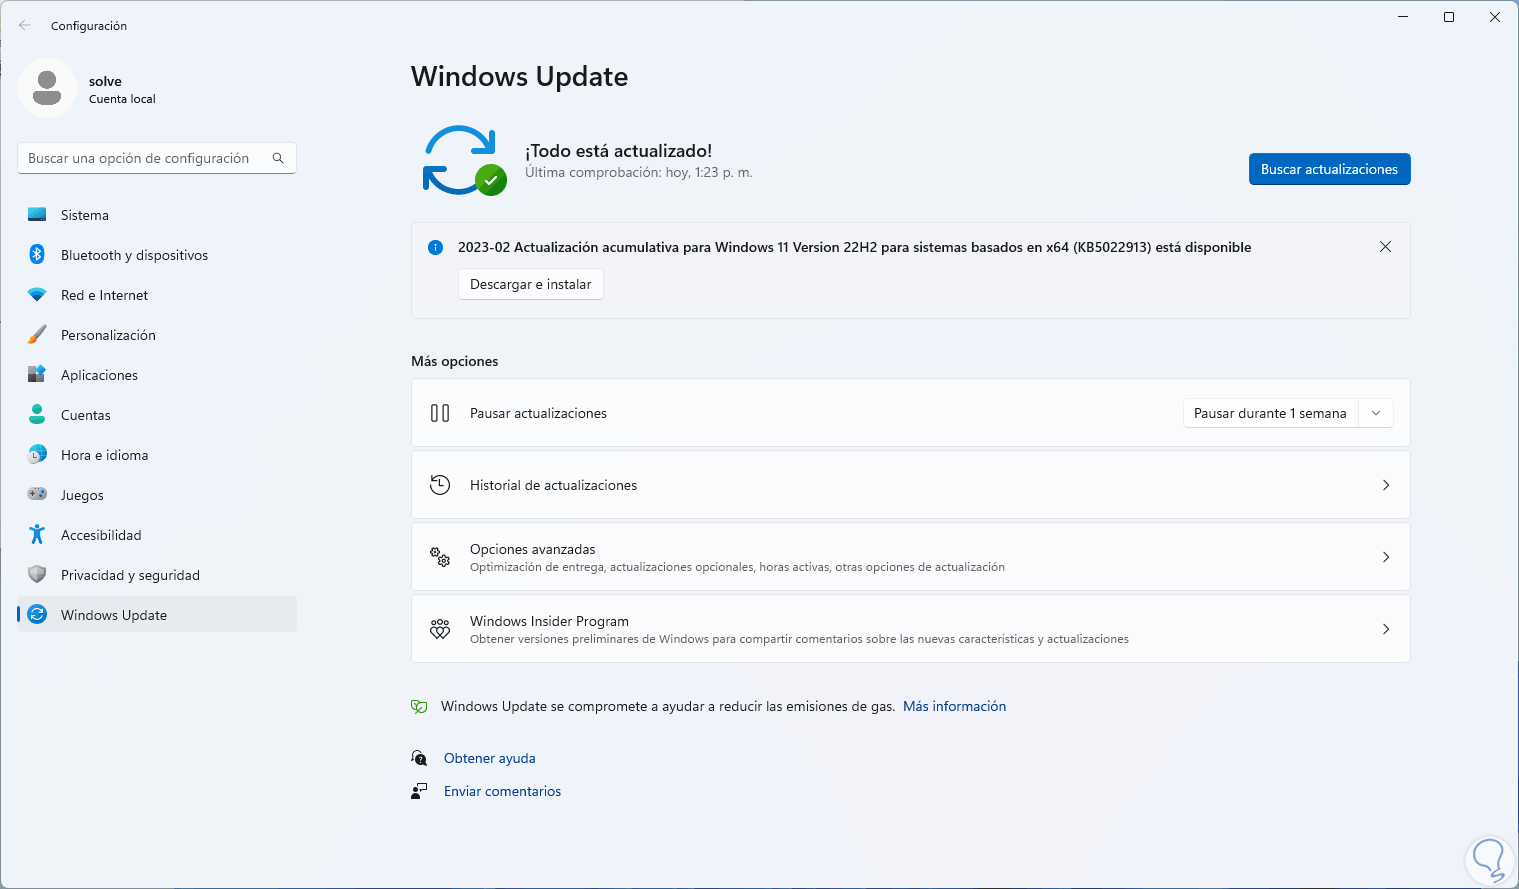
We await the end result:
2 Set sound format
The sound in Windows 10/11 has some special settings to optimize its operation, but a bad setting of these can lead to various errors..
Step 1
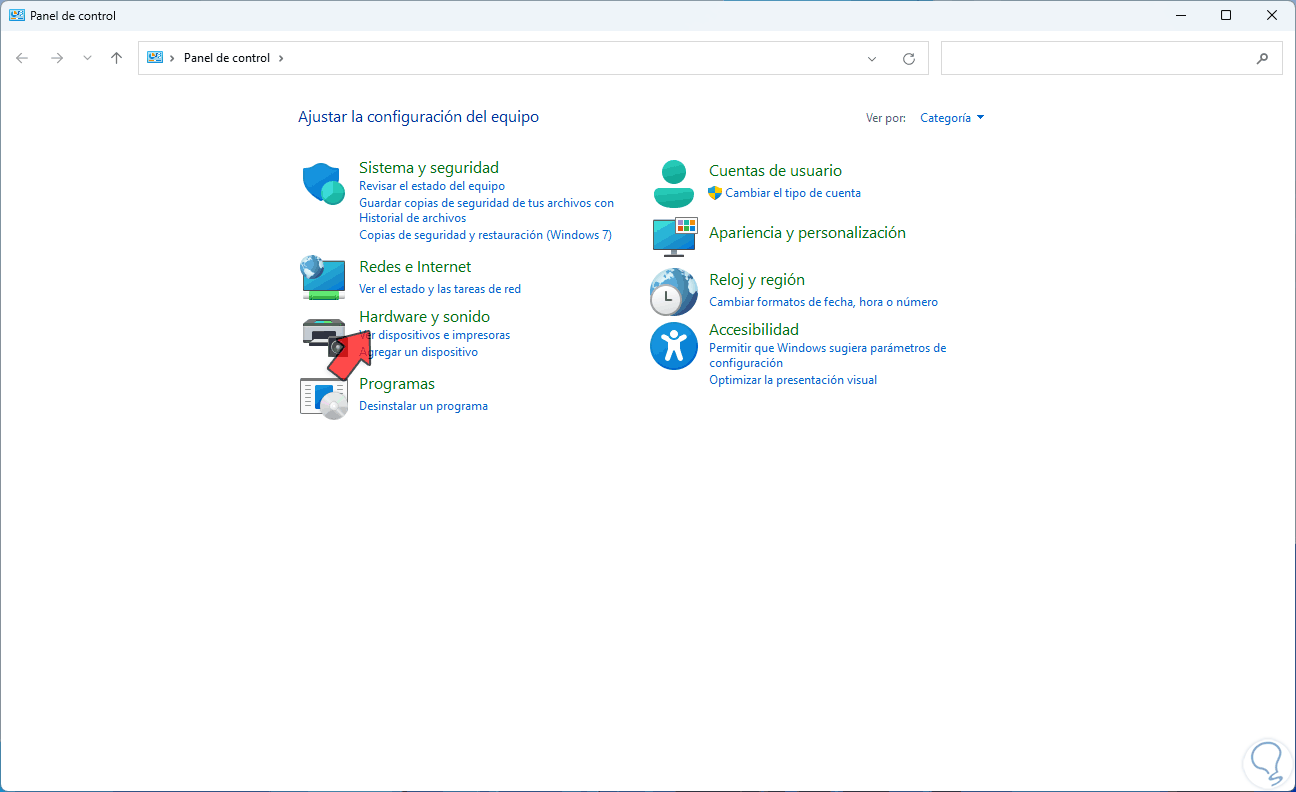
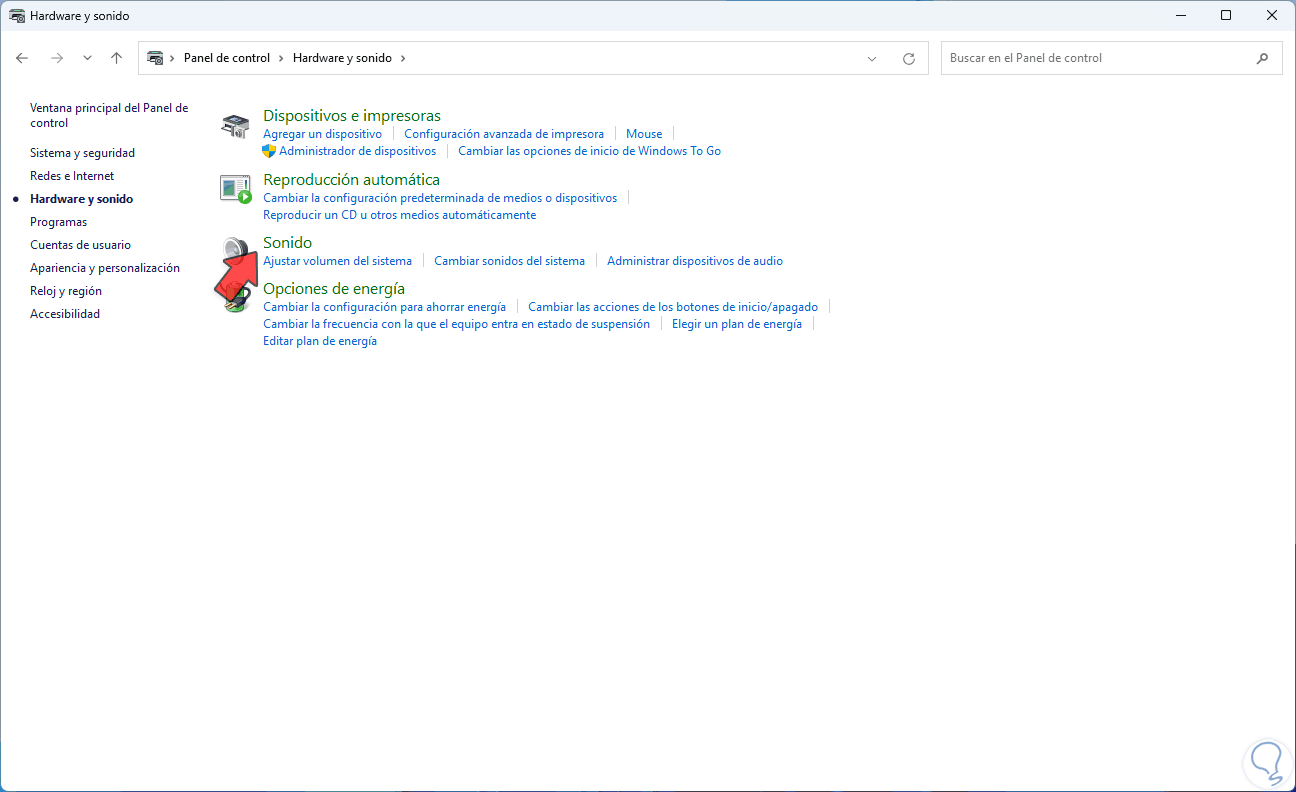
To validate this point we open the Control Panel and go to "Hardware and sound":
Step 2
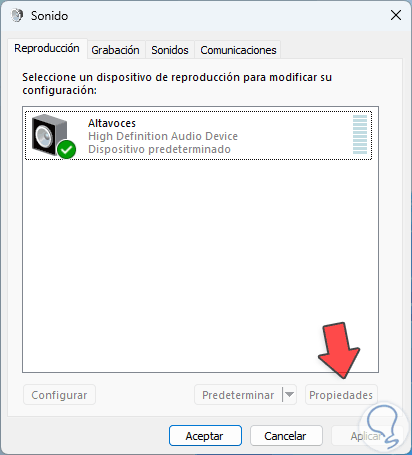
Now we click on "Sound". In the pop-up window we select the device.
Step 3
and click on "Properties":
Step 4
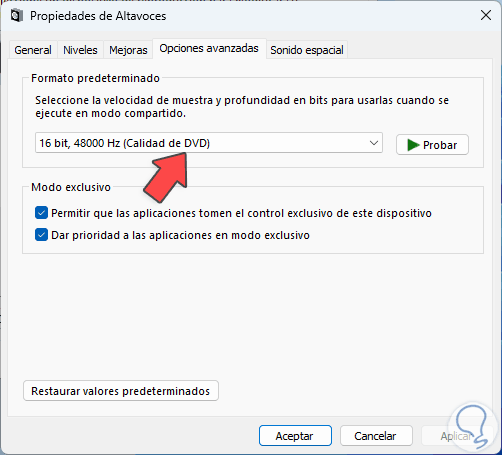
In the displayed window we go to the "Advanced options" tab where we will see the following:
We validate that in "Default format" is CD or DVD, in case of making any modification we must apply the changes.
3 Fix sound problems automatically
This is a tool integrated into Windows with which it seeks to offer a solution to common problems automatically or launch correction suggestions.
Step 1
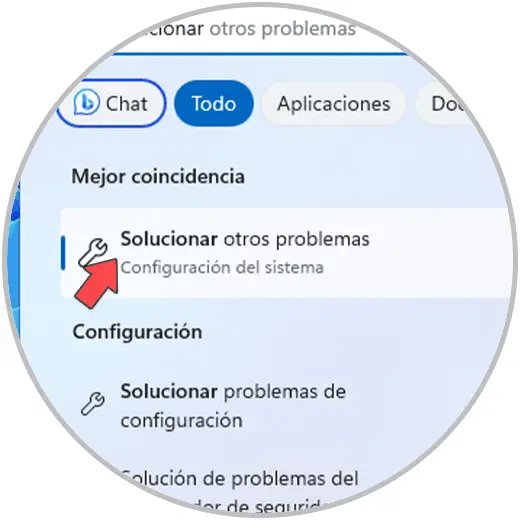
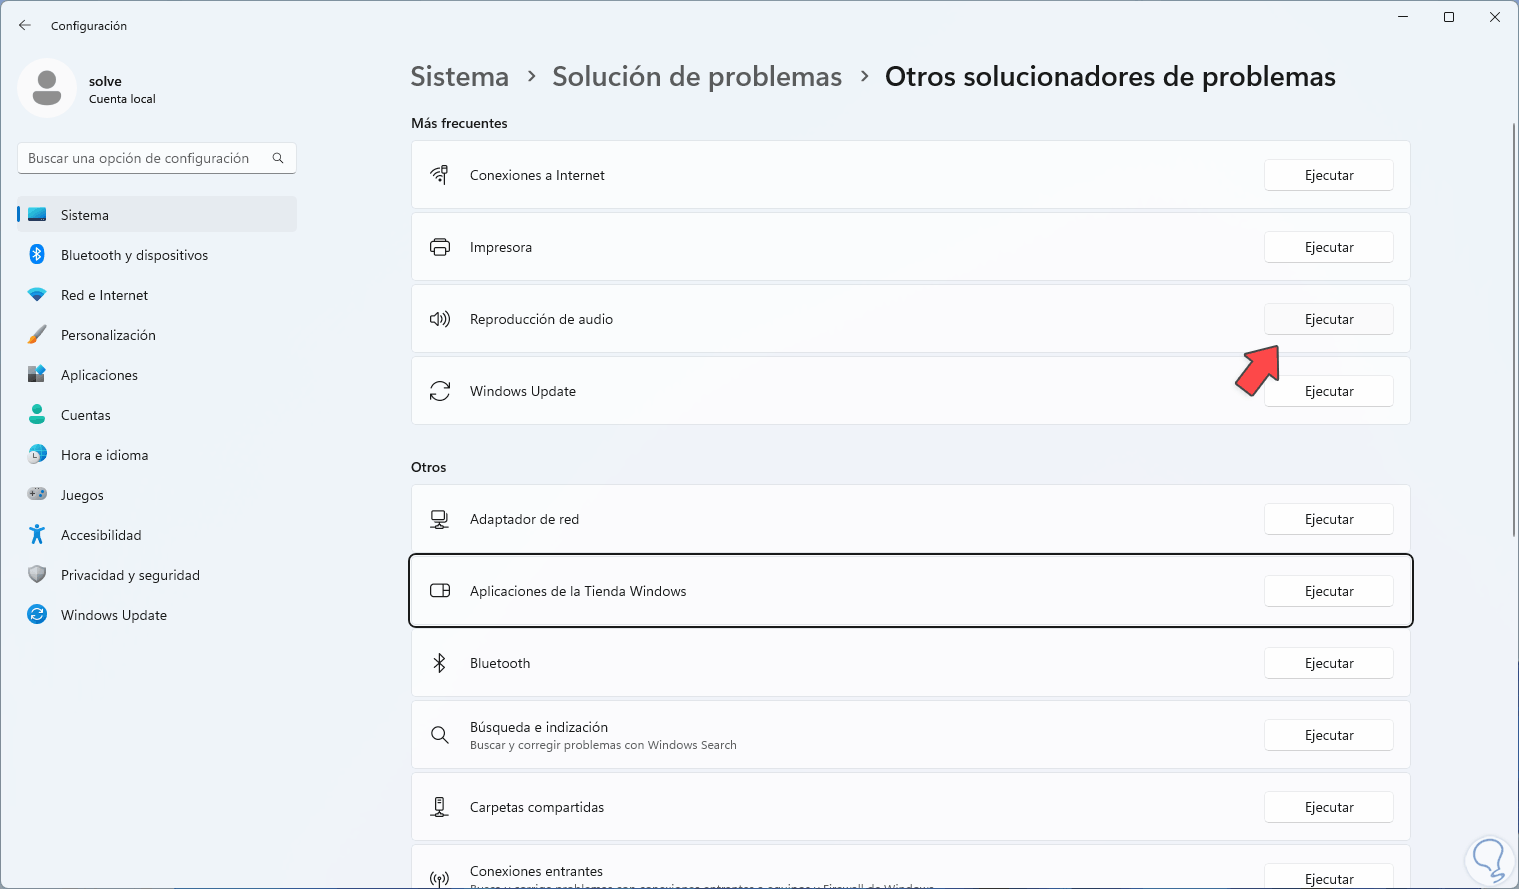
In the search engine we enter "solve" and click on "Solve Other problems":
Step 2
We will see the following options. In "Audio playback" we click on "Run"
Step 3
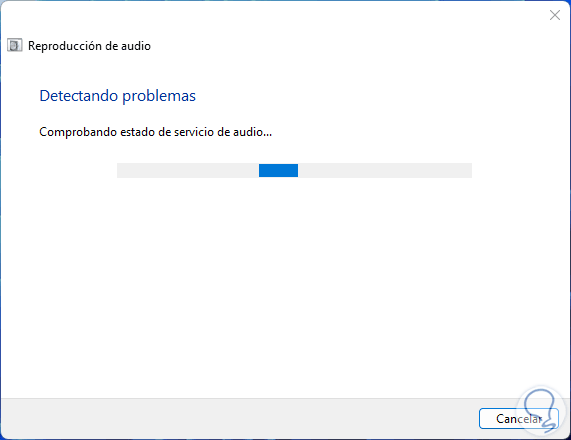
and the wizard will open analyzing each service:
Step 4
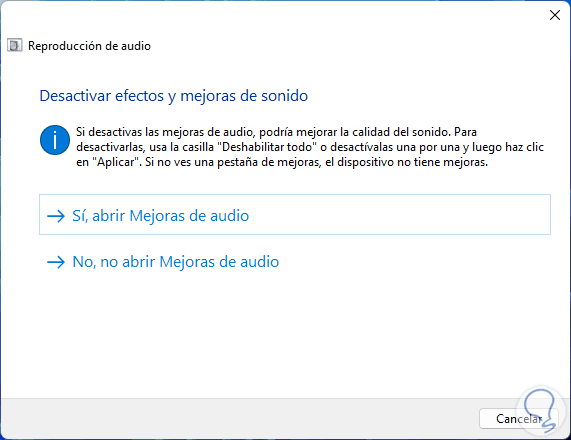
We will see suggestions associated with the audio:
step 5
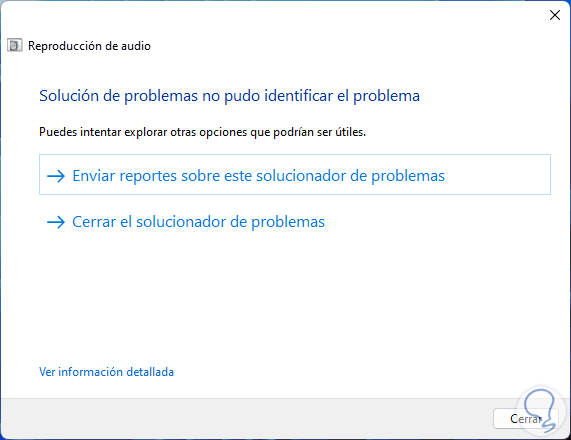
Wait for the analysis to complete:
4 Update sound drivers manually
Step 1
As we mentioned before, it is ideal to have an updated driver and if the automatic method does not achieve it, we can do it manually, we open the Device Manager:
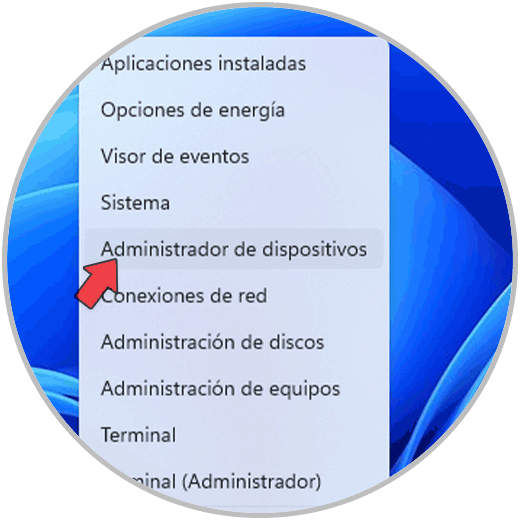
Step 2
In "Audio inputs and outputs" we right click on the driver and select "Update driver":
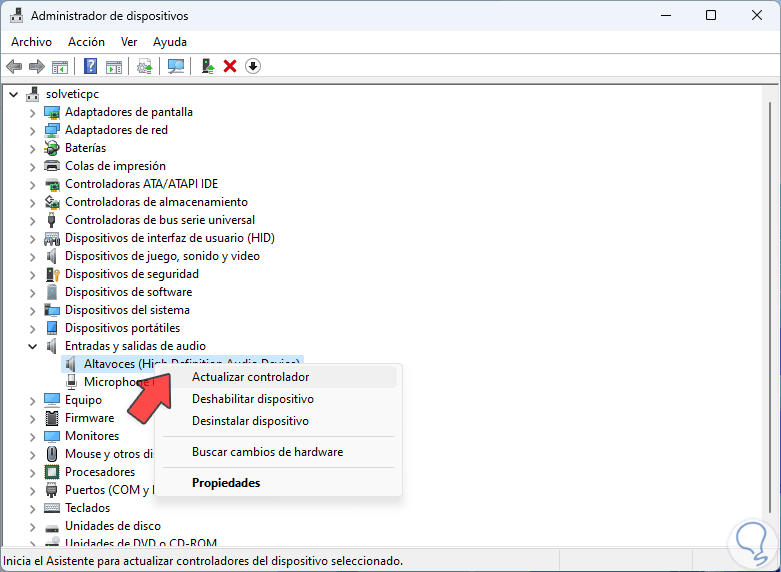
Step 3
We click on "Search for drivers on my computer":
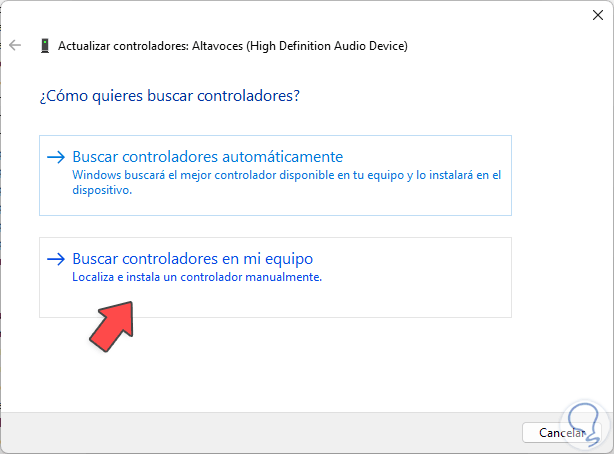
Step 4
Then we click on "Choose from a list of drivers available on the computer":
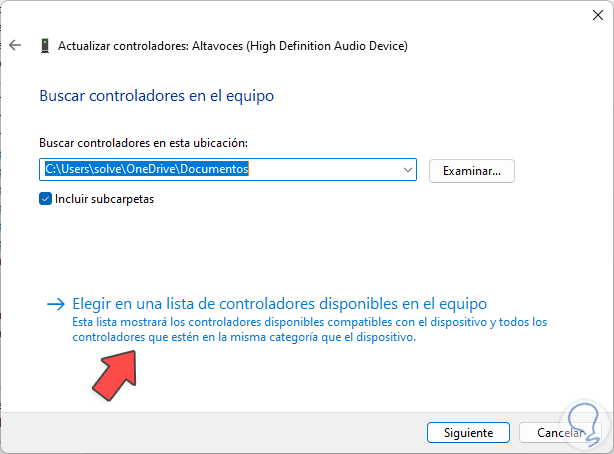
step 5
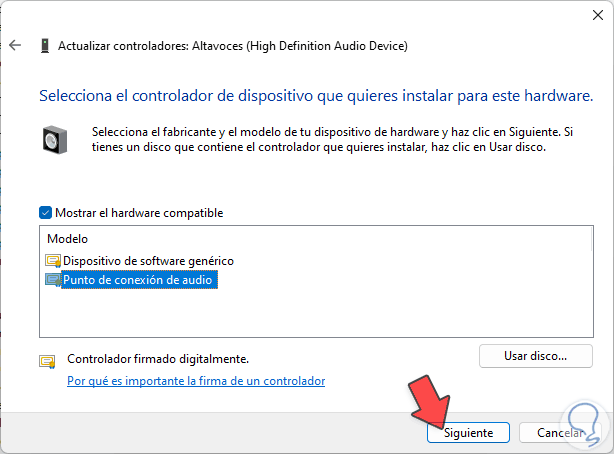
We select the driver which is available by default in the system:
step 6
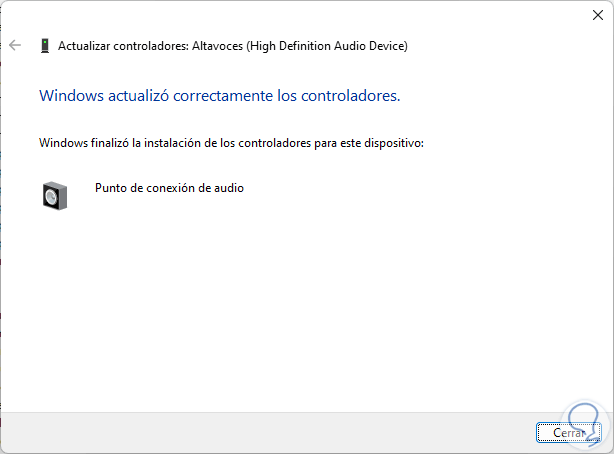
Complete the process by clicking Next:
5 Reinstall sound drivers
Step 1
It will be possible to reinstall the sound driver to restore all its parameters, to achieve this we open the Device Manager:

Step 2
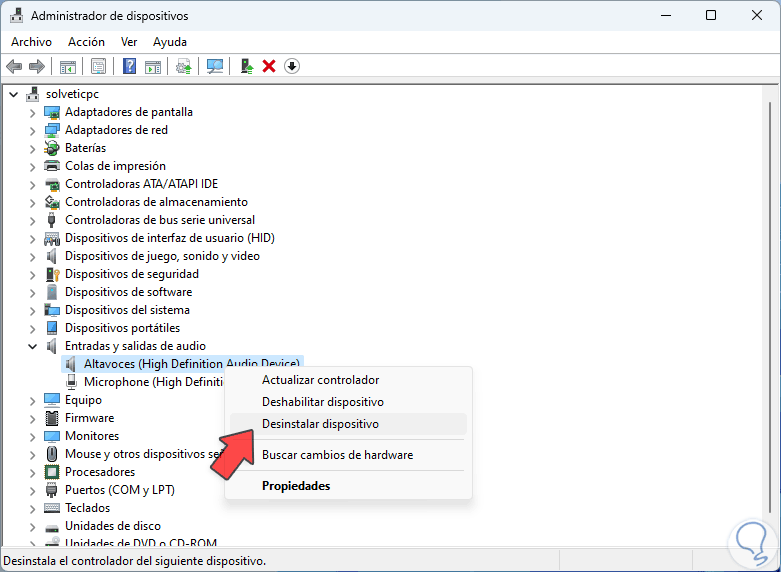
In "Audio inputs and outputs" we right click on the driver and select "Uninstall device":
Step 3
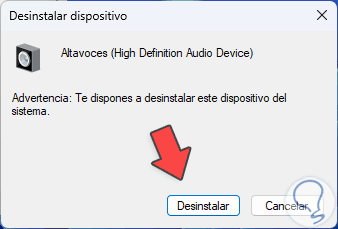
We see the following message:
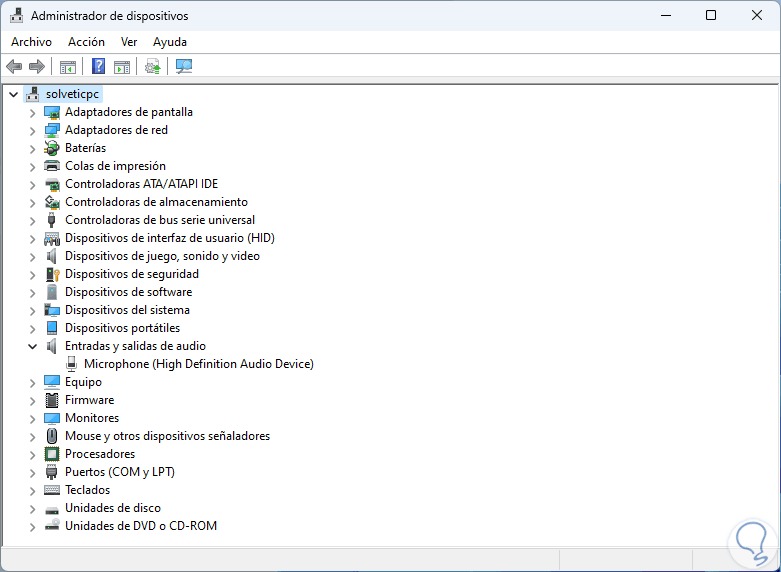
Step 4
Confirm the action and we see that the driver has been uninstalled:
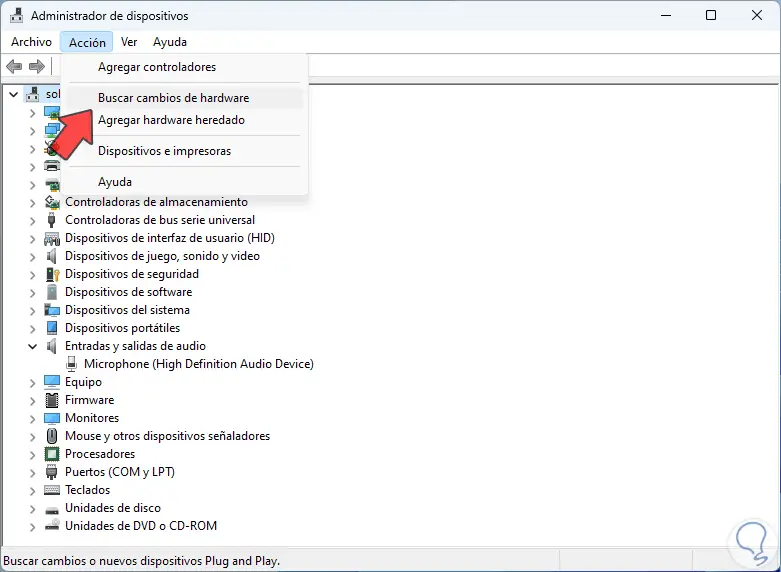
step 5
To reinstall it we go to the "Action - Search for hardware changes" menu:
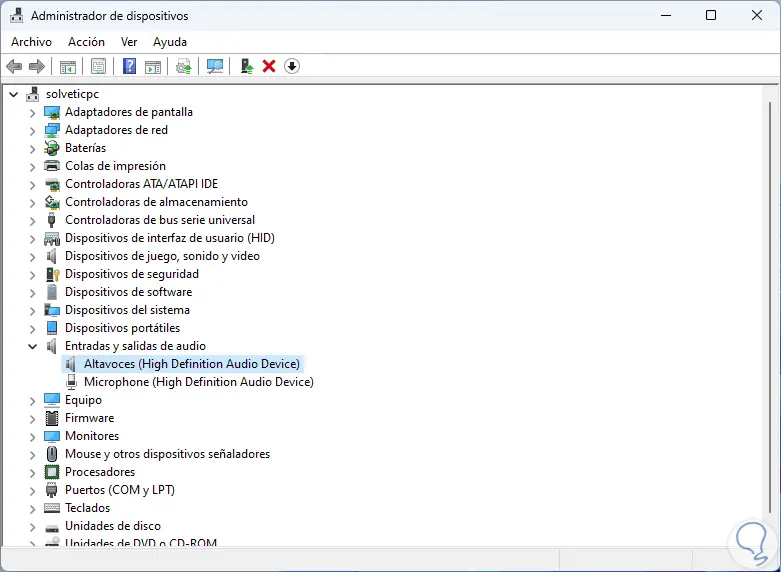
step 6
The driver will be installed automatically:
6 Set default sound device
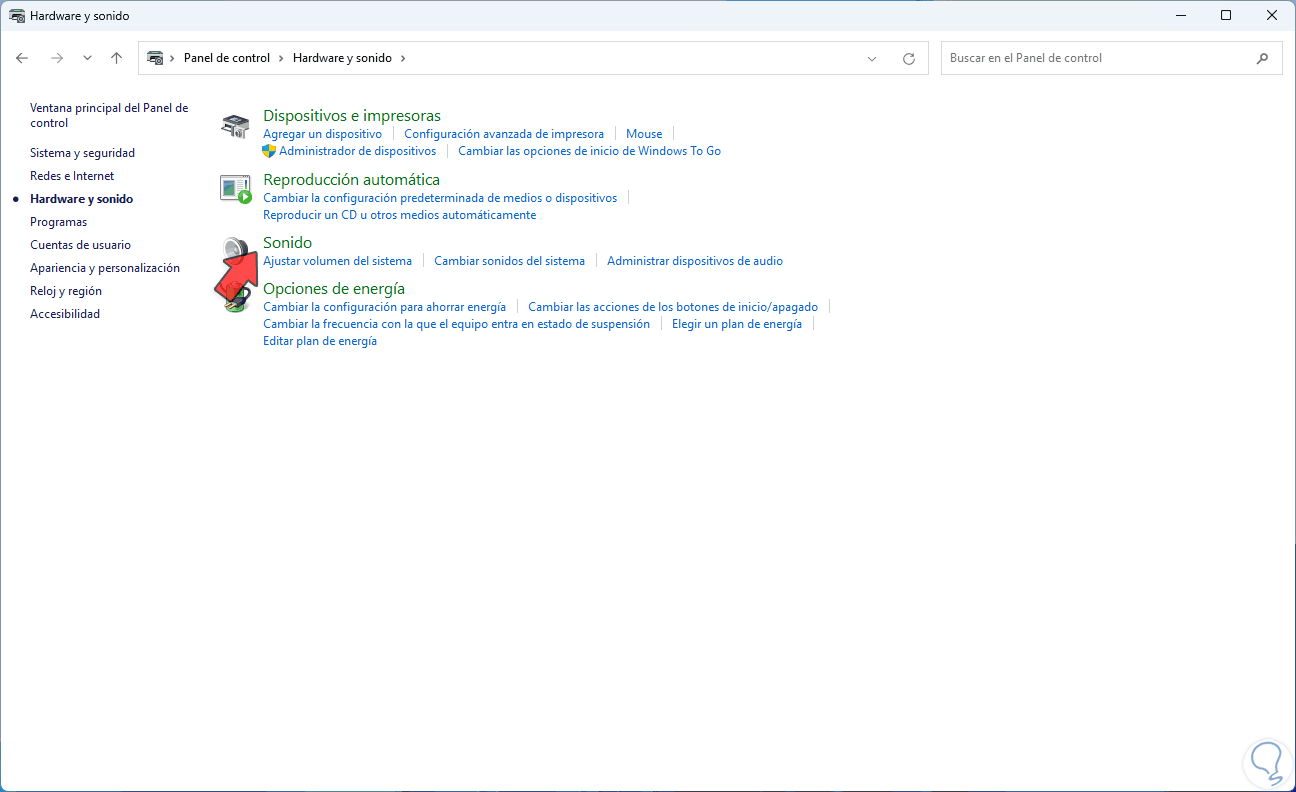
Step 1
In case of having several audio devices, it is likely that we are using the one that is not by default in Windows, to rule this out we open the Control Panel and go to "Hardware and sound - Sound":
Step 2
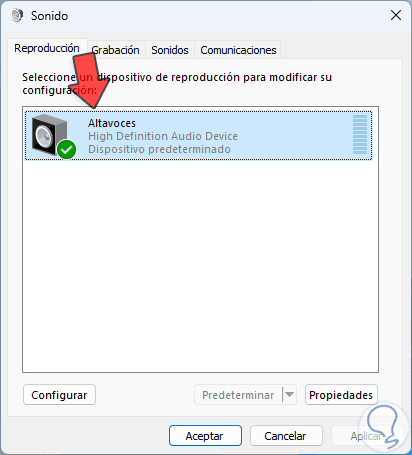
In the pop-up window we select the device and confirm that it is the default:
7 Disable sound enhancement
Step 1
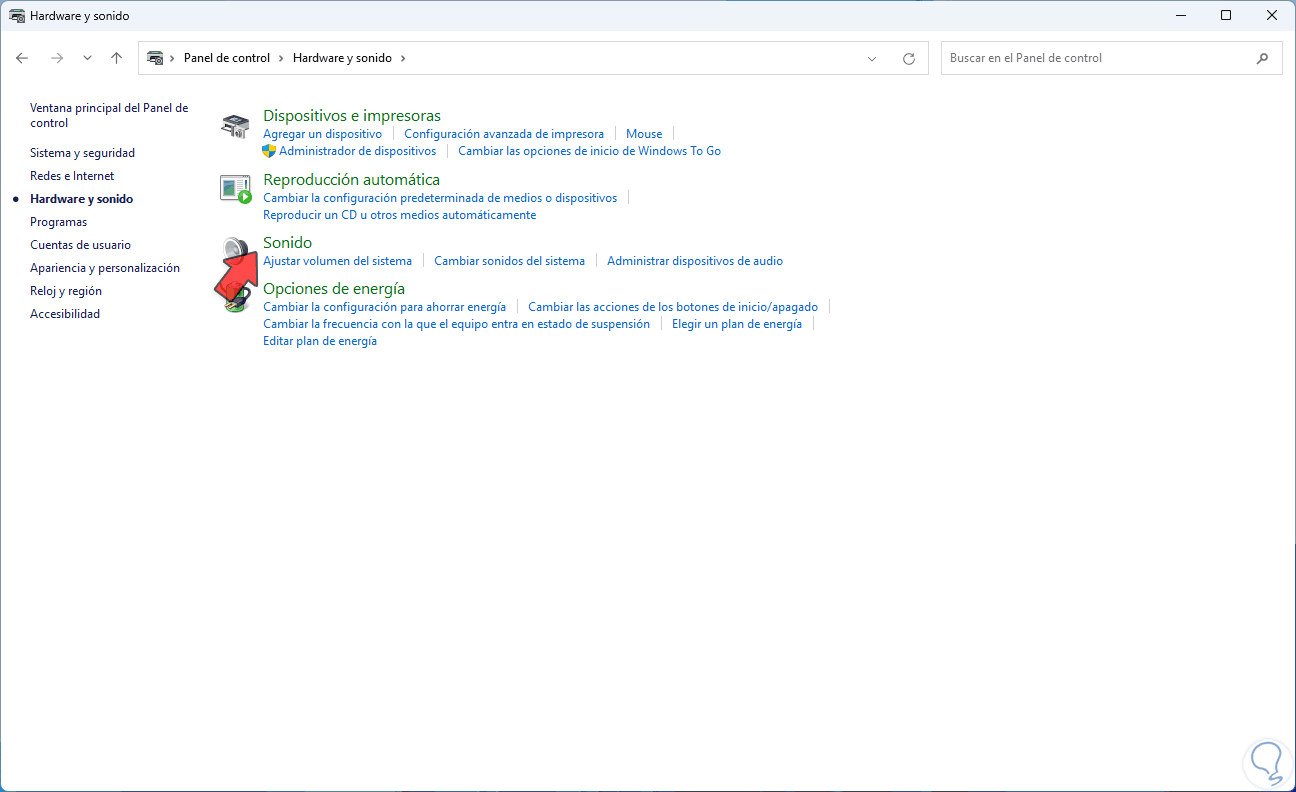
The audio improvements in Windows are a group of options that can optimize the operation of the sound, we can configure that by opening the Control Panel and going to "Hardware and sound - Sound":
Step 2
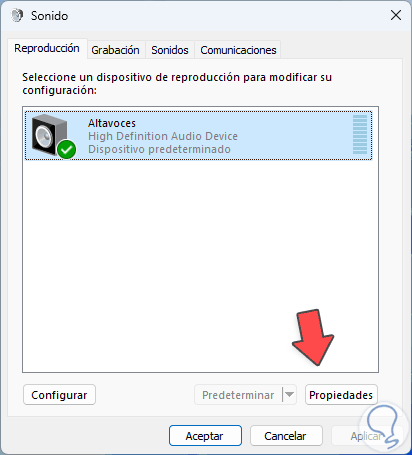
Select the device and click on "Properties":
Step 3
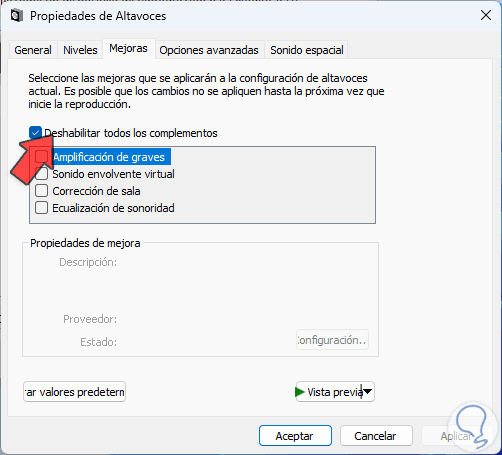
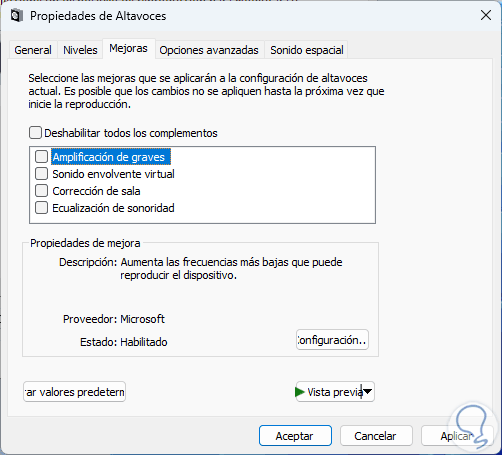
In the pop-up window we go to the "Improvements" tab:
Step 4
We deactivate the "Disable all plugins" box so that all items help improve the sound:
Apply the changes.
8 Unmute sound device
It is a very simple process but it can help to recover the audio and it is restoring our audio device.
Step 1
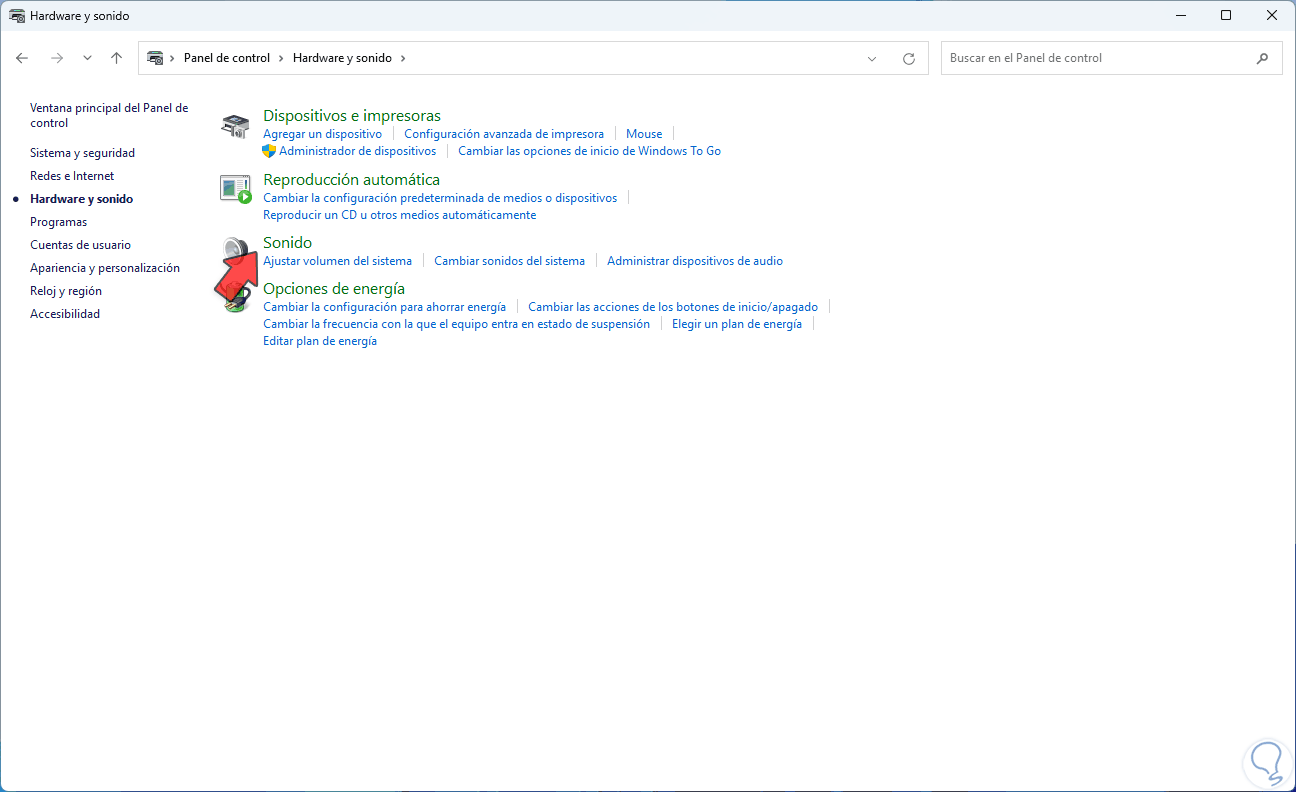
To achieve this, we open the Control Panel and go to "Hardware and sound - Sound":
Step 2
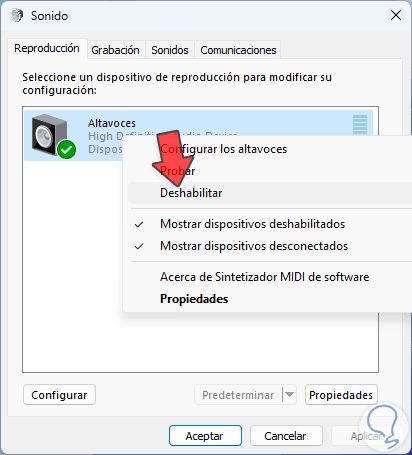
We right click on the device and select "Disable":
Step 3
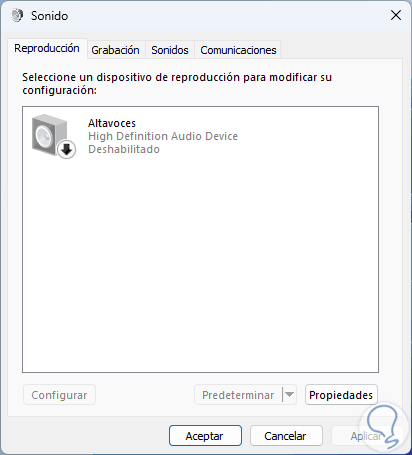
We will see the disabled device:
Step 4
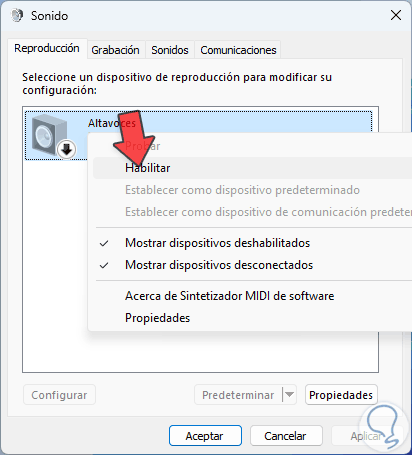
Then right click on it and select "Enable":
step 5
The medium will be enabled:
Apply the changes.

9 Set PC volume
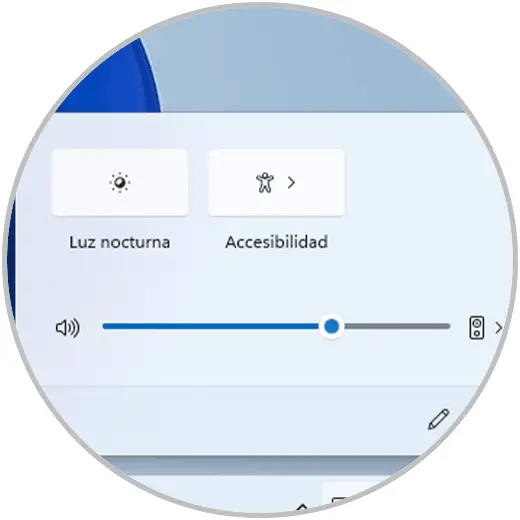
It is something very simple but the volume level can be at zero which does not generate any type of sound even if we have the device at full volume, it is very easy to validate this, we click on the volume icon on the taskbar and drag the slider bar to desired level:
1 0 Start Audio service
Step 1
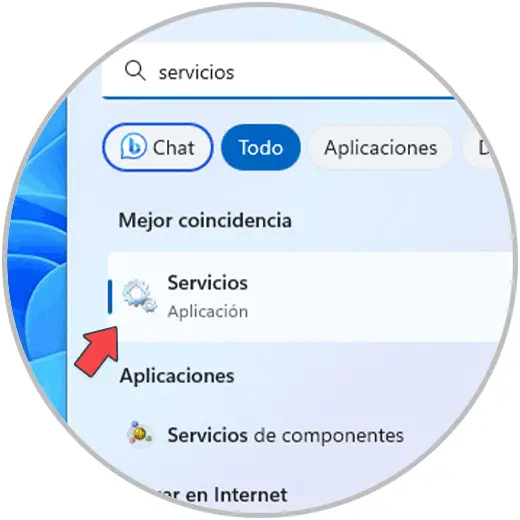
Finally we can check the audio service which is key for the sound to work correctly in Windows, open Services:
Step 2
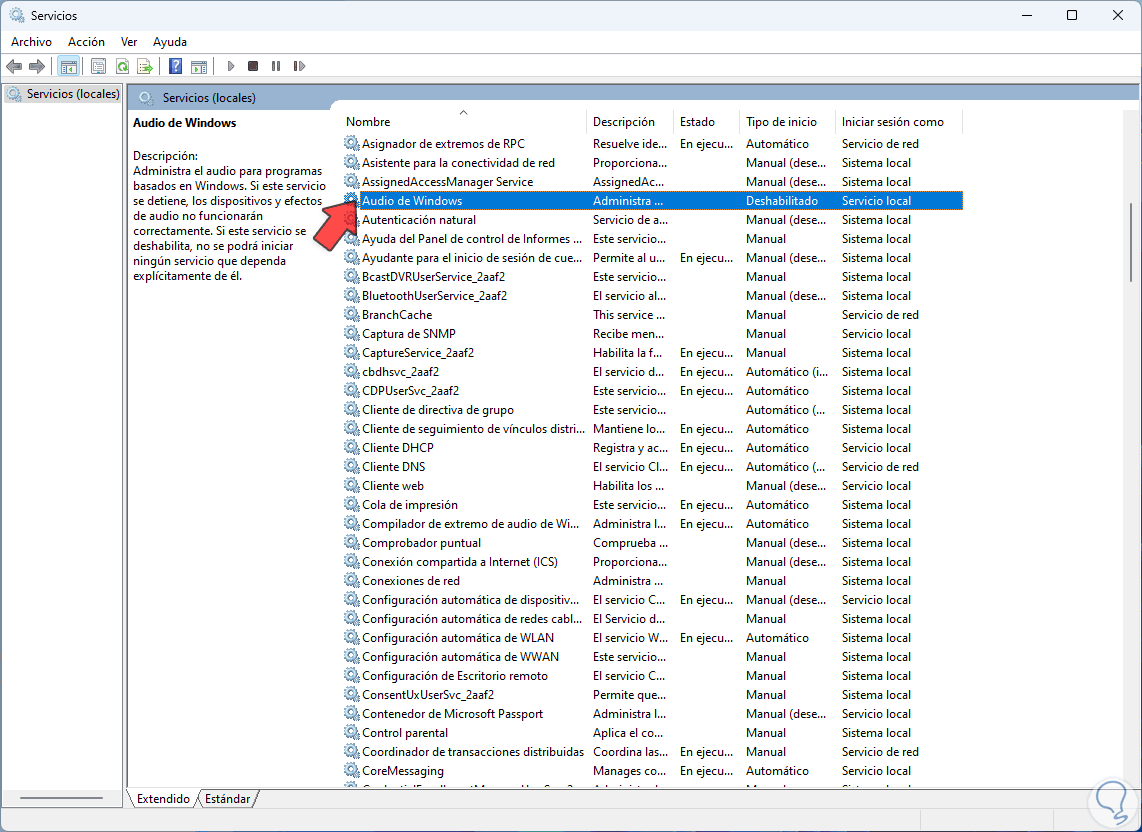
Locate the "Windows Audio" service:
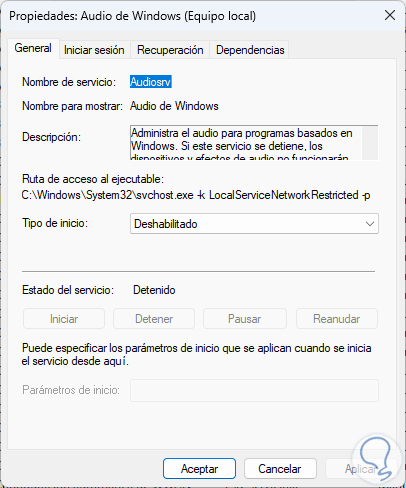
Step 3
Double click on it to see its properties:
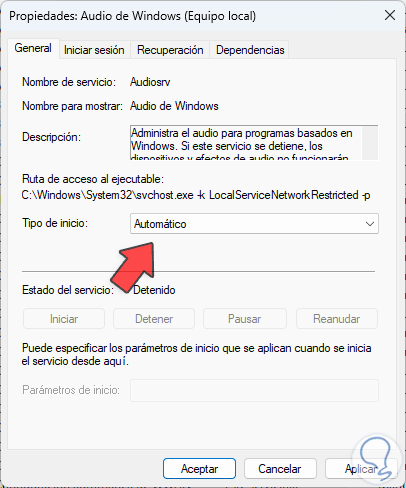
Step 4
Under "Startup type" set to "Automatic":
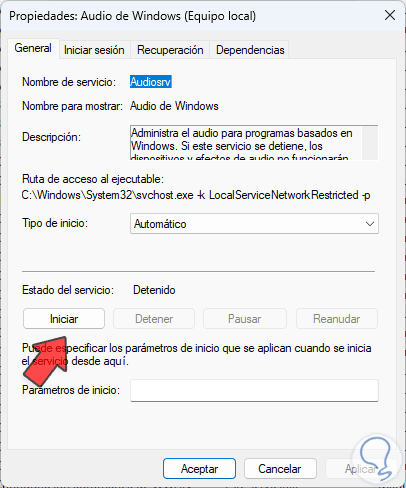
step 5
Click on "Apply" and then click on "Start":
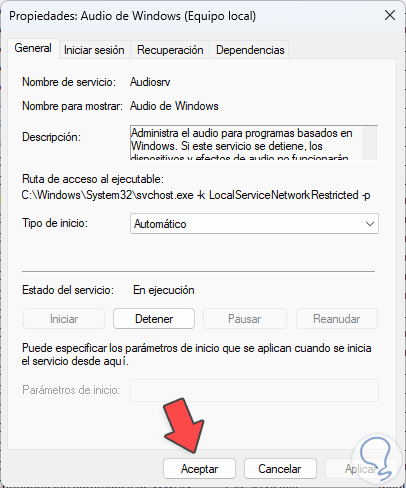
step 6
We will see that the service is active. Apply the changes.
Each of these steps will help us to recover the sound in Windows 10/11..