Windows Server 2016 is one of the most versatile operating systems for the management of computers and users as it offers us a wide range of options when managing each of them. One of the most useful options in Windows Server 2016, and that many times we do not use, is the redirection of folders which is a useful method that gives us the ability to manage profile folders in a network location , or, in Another location on the local computer..
As a general rule, the user's profile and configuration are hosted in the local profile, therefore, when we redirect a folder, it will be possible to access all this information regardless of where the session starts which is a guarantee of portability and availability.
Policy-based QoS node
Quality of Service (QoS) nodes have been developed to define and manage the way network traffic behaves on the server.
Within this category, we have the User Configuration node, which contains the Windows Configuration folder and within it is available in the Folder Redirection node, remember that this section is in the server group policies.
As we mentioned before, when using folder redirection we will have the opportunity to redirect folders such as AppData, Desktop, Documents, Images and more, from the default user profile location to a new location, network or local, and from there have the option of its management and control..
1. How to create a new Windows Server 2016 folder
Step 1
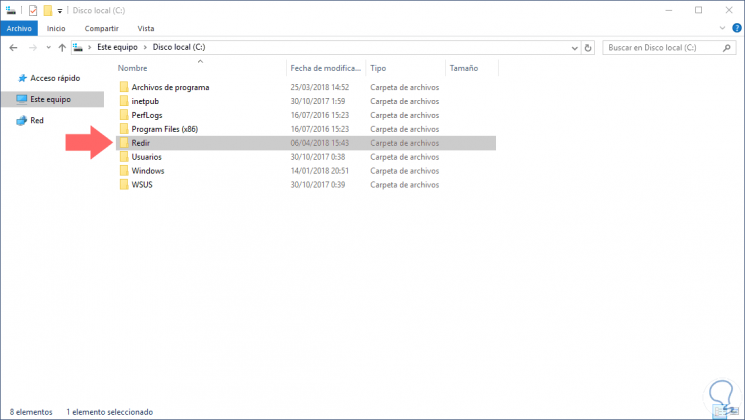
The first step to take is to create a shared folder, for this we go to the Windows Server explorer and in drive C we will create a new folder called Redir:
Step 2
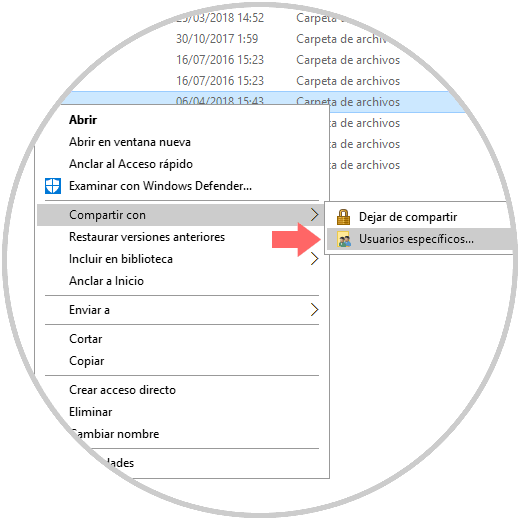
Now, we will right click on this new folder and select the Share option and from the options displayed we choose specific Users:
Step 3
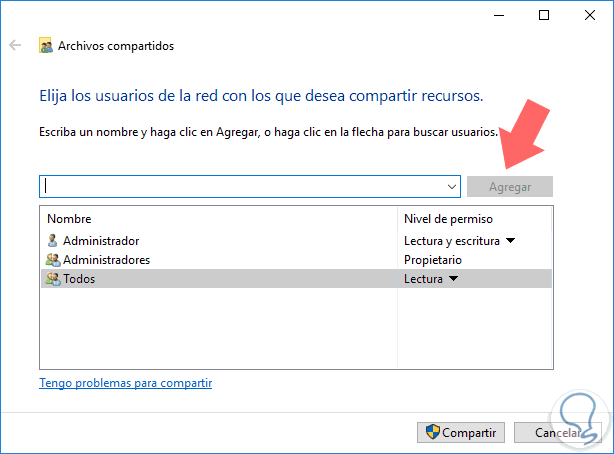
Now, in the pop-up window we will select All and click on the Add button:
Step 4
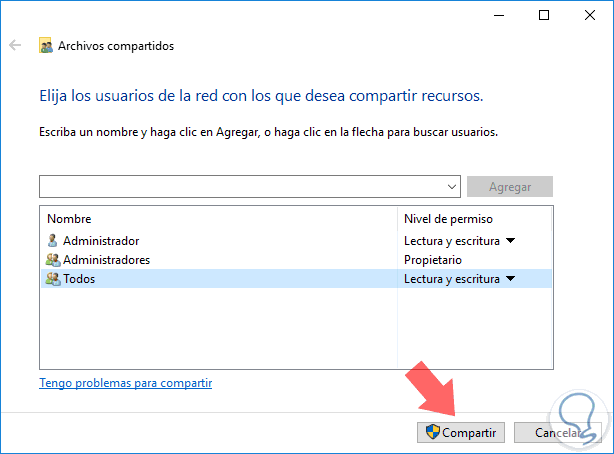
Click on the Everyone permission level section and select the Read and write option:
Step 5
Click on the Share button and we will see that the process of sharing the selected folder begins:
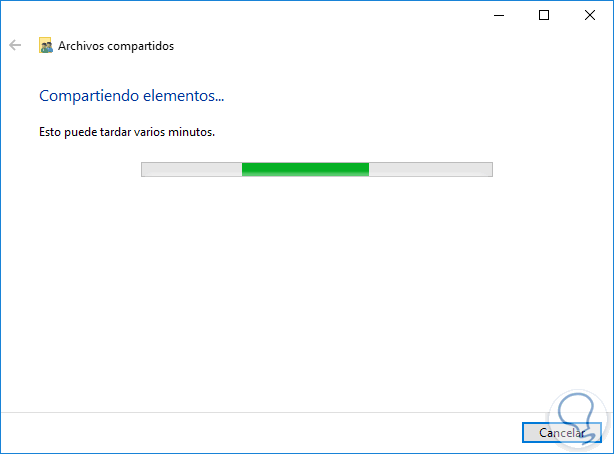
Step 6
Once finished we will see the following. There we can see the path through which the selected folder will be shared.
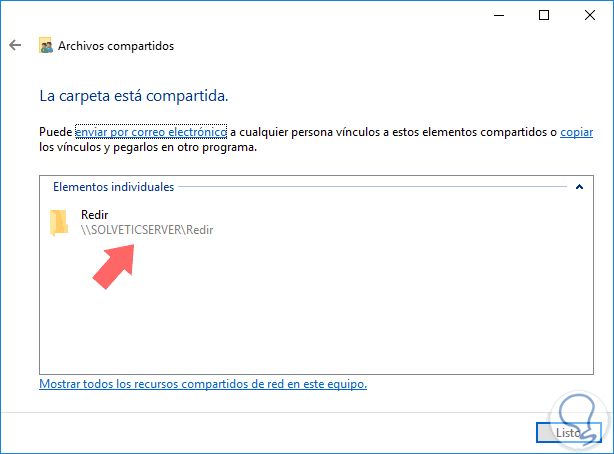
2 . How to create a new Windows Server 2016 group policy
The next step is to access the group policies and for this we go to the Server Administrator and go to the Tools / Group Policy Management path.
Step 1
In the displayed window we locate our domain, we will right click on it and select the option Create a GPO in this domain and link it here:
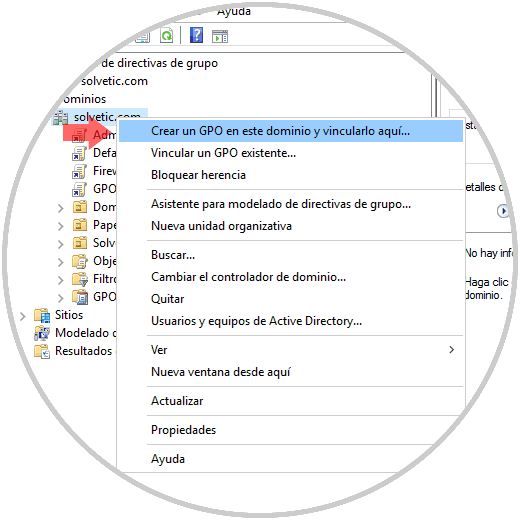
Step 2
In the new window we will assign a name for said GPO:
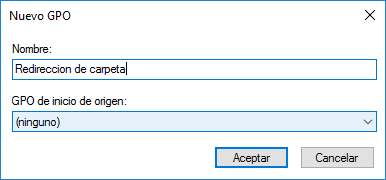
Step 3
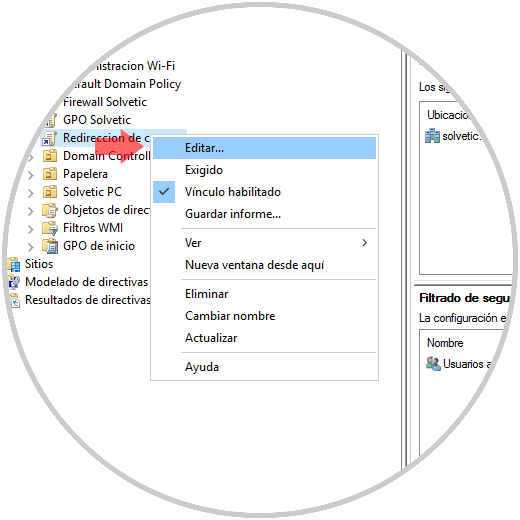
Click on OK and now we will right click on the new GPO and select the Edit option:
Step 4
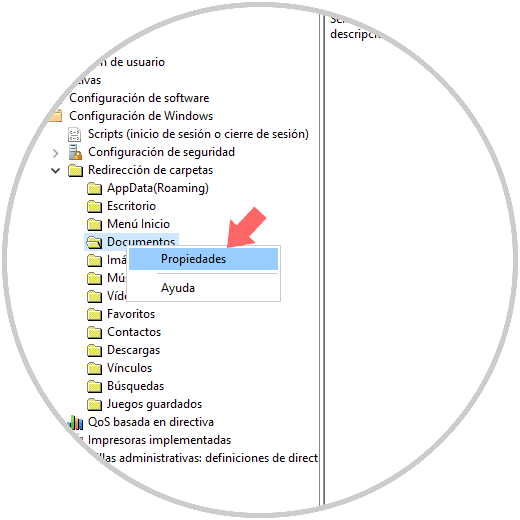
In the window that will open, we will go to the path User Configuration / Policies / Windows Configuration / Folder Redirection and we will right click on the Documents option and select Properties:
Step 5
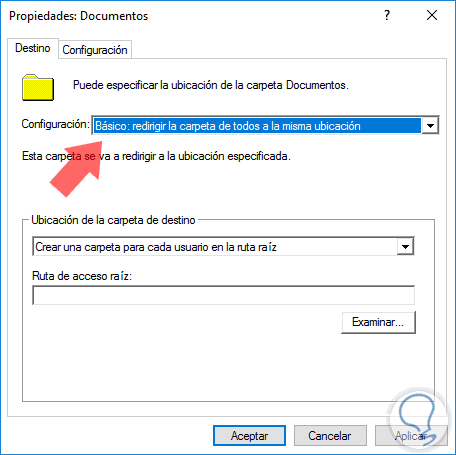
In the window that will be displayed, we define the Basic option: redirect everyone's folder to the same location in the Configuration field:
Step 6
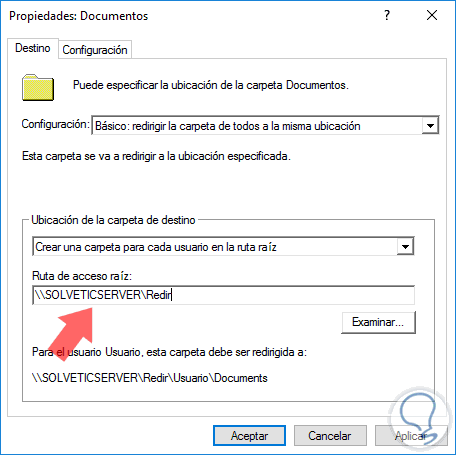
Now, in the Destination folder location field we define the option Create a folder for each user in the root path and in the Root path field we enter the path of the shared folder:
Step 7
Click on the Apply button and the following message will be displayed:
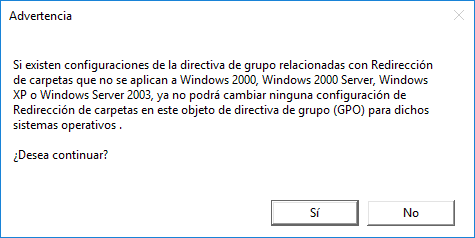
Click on the Yes button to confirm the action.
3. How to validate the Windows Server 2016 client computer
Step 1
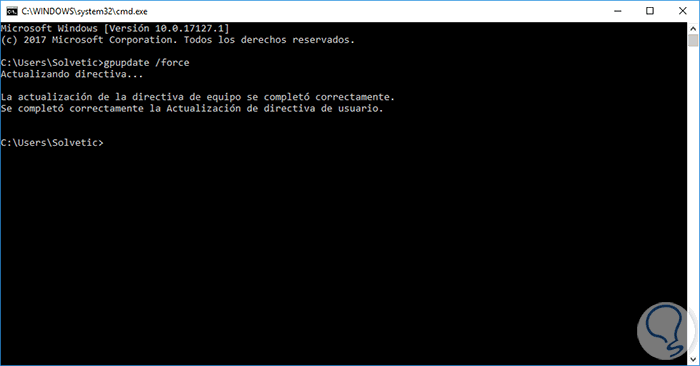
We must confirm that the redirection of the folder works correctly on the client computer, for this we will log in, go to the command prompt and execute the following command:
gpupdate / force
Step 2
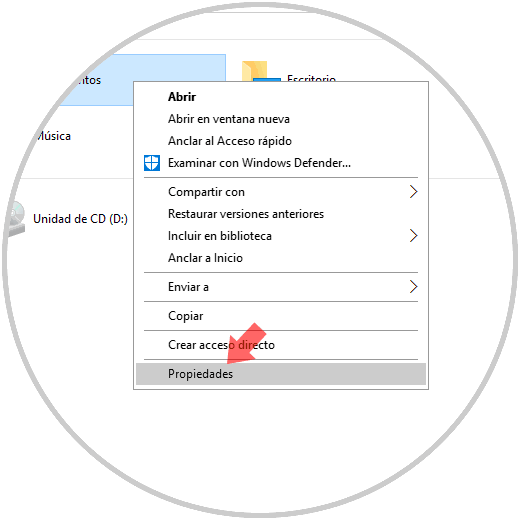
Once the policies have been updated, we go to the file browser and right click on the Documents library and select the Properties option:
Step 3
In the displayed window we go to the General tab and in the Location section we can see the path that points to the folder created in Windows Server 2016:
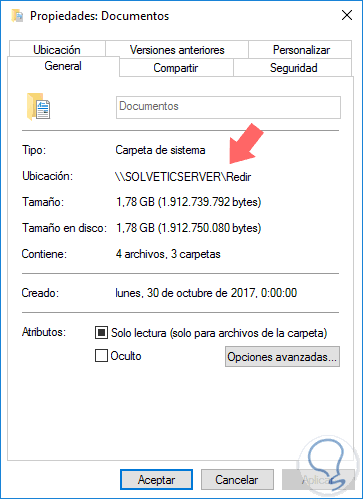
In this way, we have created a folder redirection to access our information from anywhere..