Backups are one of the best alternatives we have as advanced users or administrators to preserve the availability and integrity of both files and system elements..
When using Linux environments, we have a wide range of options to use and implement focused on this type of activities and one of the most outstanding will be analyzed by TechnoWikis and is System Tar and Restore.
What is System Tar and Restore?
System Tar and Restore is a backup utility that has been developed with two bash scripts, the main program star.sh and a gui wrapper star-gui.sh.
When using this utility we have three modes available to use such as:
System Tar and Restore Requirements
System Tar and Restore can be implemented in distributions such as Arch, Debian, Ubuntu, Fedora, openSUSE, Gentoo, Mandriva and Mageia. The requirements for its use are:
gtkdialog 0.8.3 or later (for the graphical user interface) tar 1.27 or later (support of acls and xattrs) rsync (for transfer mode) wget (to download backup files) gptfdisk / gdisk (for GPT and Syslinux) openssl / gpg (for encryption tasks)
System Tar and Restore Features
This utility offers us the following features:
- Partial or full system backup.
- We can restore or transfer to the same or different disk or partition.
- It is possible to restore or transfer the copy to an external device such as USB flash drive, SD card and more.
- It allows to restore a BIOS based system to UEFI and vice versa.
- It is able to prepare the system on a virtual machine (such as VirtualBox), create a backup and restore it to a normal machine.
Backup Mode (Backup)
One of the modes offered by this utility is the Backup mode, with this mode it will be possible to create a tar backup file of the system, there will be possible to define aspects such as:
- File Name: Refers to the desired name for the backup file. The default is Backup - $ (hostname) - $ (date +% Y% m% d-% H% M% S).
- Destination directory: Indicates where you want to save the backup file. The default value is /.
- / home directory: There we have three options: include it completely, keep only the files and folders hidden (which are necessary to log in and keep the basic configuration) or exclude it completely (if it is located in a separate partition and we want to use it in restore mode).
- Compression: By using this parameter it will be possible to choose between gzip, bzip2, xz and none (without compression).
- Encryption method and password: There we can select the encryption method (openssl or gpg) and specify a passphrase if we want to encrypt the selected file.
- Filing options: With this option you can use our own additional options in the filing cabinet.
Restore and transfer mode
The restore mode makes use of the file created previously to extract it to the desired partition. The transfer mode transfers the system to the desired partition using rsync There it will be possible to define aspects such as:
- Destination partitions: A destination root partition must be specified. Optionally allows you to choose any other partition for the / home, / boot, swap or custom mount points (/ var / opt etc.) and in the case of UEFI a destination ESP partition and its mount point (/ boot, / efi or / boot).
- Mounting options: At this point you can specify alternative comma-separated mounting options for the destination root partition. The default values ​​are: defaults, noatime.
- Btrfs Subvolumes: In case the target root file system is Btrfs, it will be possible to create subvolumes. For this we must establish the name of the root subvolume and you can also specify other subvolumes.
- Bootloader: In BIOS systems we can select Grub (version 2) or Syslinux and the target device. In the case of UEFI it is possible to select Grub, EFISTUB / efibootmgr or Systemd / bootctl. It also allows you to define additional kernel options.
- Modes: When using Restore mode, the backup file (local path or remote URL) must be specified. In case the file is encrypted, the passphrase must be specified.
1. Install System Tar and Restore on Linux
Step 1
To run this utility we can use any of the following lines:
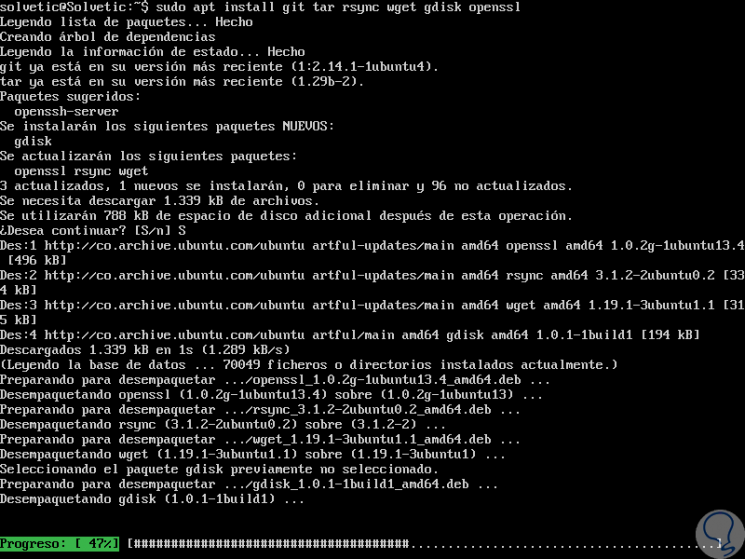
sudo apt install git tar rsync wget gdisk openssl (Debian / Ubuntu) yum install git tar rsync wget gdisk openssl (CentOS / RHEL) dnf install git tar rsync wget gptfdisk openssl (Fedora)
Step 2
There we will enter the letter S to confirm the download and installation. Once all required packages are installed in the selected distribution.
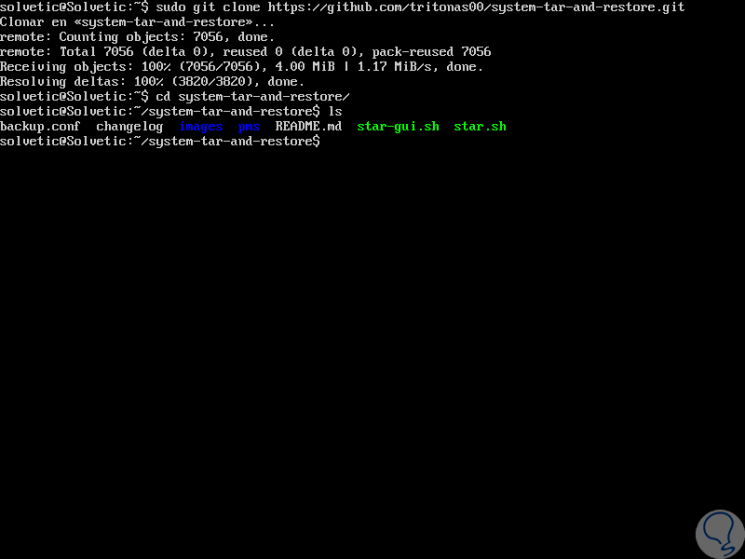
We will download these scripts to clone the tar system and restore the repository to the system and then execute these scripts with root user privileges or use the sudo command for it, in this case we will use the following lines:
git clone https://github.com/tritonas00/system-tar-and-restore.git cd system-tar-and-restore / ls
2. Back up the Linux system
Step 1
For this process, first of all, we will create a directory where the system backup files will be stored, in this chaos we execute:
sudo mkdir / backups
Step 2
Now we will execute the following command to create a system backup file in the created / backups directory, the compressed file will be compressed using the xz utility, for this we will use the following options:
-i
The operation mode is specified (0 means backup mode).
-d
The destination directory is specified, where the backup file will be stored.
-C
Define the compression utility.
-or
Read additional options of tar and rsync.
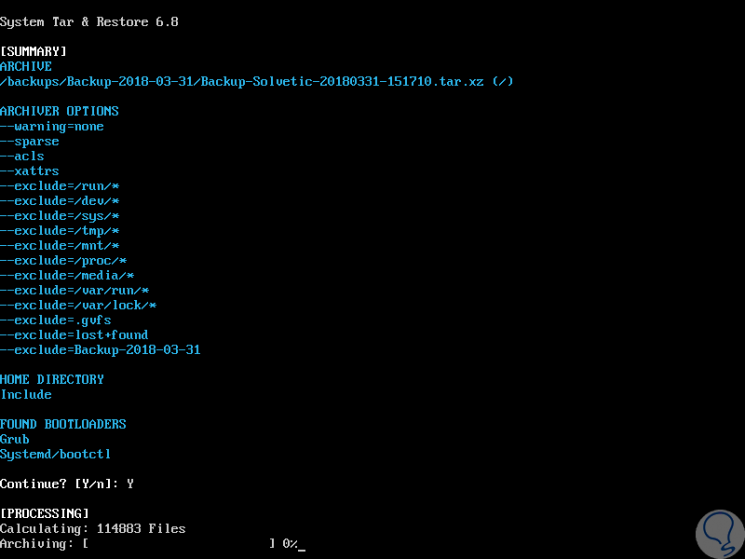
sudo ./star.sh -i 0 -d / backups -c xz -u "--warning = none"
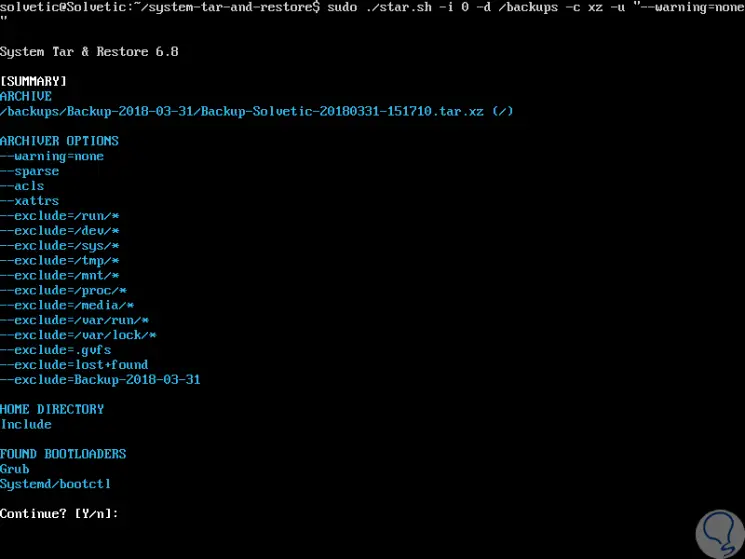
Step 3
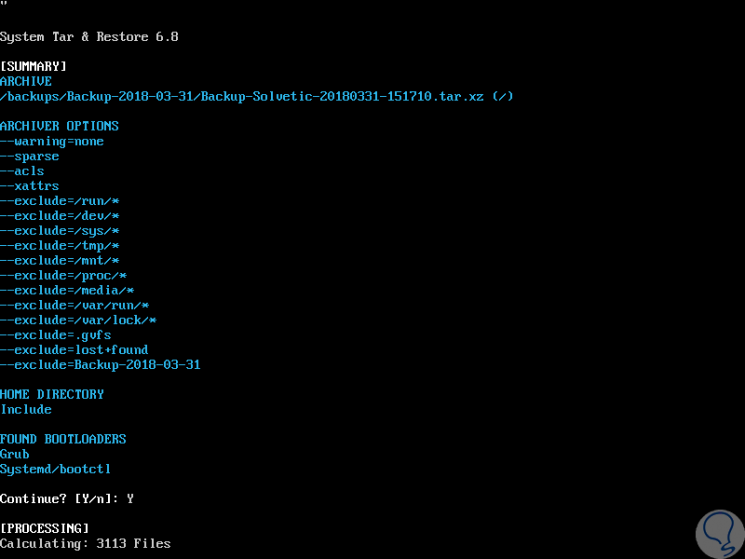
There we enter the letter Y to continue:
Step 4
To exclude / home in the backup, we will add the -H flag and use the gzip compression utility as well.
sudo ./star.sh -i 0 -d / backups -c gzip -H -u "--warning = none"
Step 5
There we must wait for the entire backup process to conclude which may take some time. In this way we have created a backup of our Linux system.
3. Restore a Linux backup
Step 1
To restore a Linux backup we must run the following line:
sudo ./star.sh -i 1 -r / dev / sdb1 -G / dev / sdb -f /backups/backup.tar.xz
Step 2
The options used are:
-i
Specify the operation mode (1 means restore mode).
-r
Define the root partition of root (/).
-G
Define the grub partition.
-F
Specify the backup file path.
Step 3
To get more help on this command we can execute the following line:
star.sh –help
We have learned to create and restore backups simply on Linux system thanks to this powerful utility.