Overclocking our graphics card is a safe process if we know what we are doing since otherwise we may be causing significant damage to our equipment. Today GPUs are quite prepared to prevent this type of damage..
Making a GPU overclock is a fairly common task in both the gaming world and in cryptocurrency mining since in both we need to obtain the maximum potential of our hardware.
Next, we will see how we can overclock the GPU in graphics such as NVIDIA..
What is overclocking
Overclocking means potentially increasing the performance of our GPU by putting it at a significantly higher speed than that usually used by that graphics processor. Although GPUs work based on a base speed, many have the possibility of forcing the initial speed that they have by default. Once we overload the speed we make the GPU increase in temperature and that is why it is important to find an intermediate line between performance and heat.
Each GPU has a secure overclocking speed so you will have to make sure of yours. If we go over and supersaturate the power of our GPU we will receive problems in graphic issues and even our PC could crash. This will be solved if we lower that acceleration again.
It is recommended a progressive increase in the speed of the GPU and avoid sudden rises.
Requirements for overclocking
To perform overclocking we will need three elements at the software level:
- On the one hand, we will have to use software in relation to the graphics we have in order to modify the GPU speeds.
MSI Afterburner
- On the other hand, we will also need a tester program that tests the new configuration.
Heaven Benchmark
- Finally, it is optional to have a program that is responsible for controlling the temperature of our GPU.
GPU Temp
1. How to use NVDIA graphics card or GPU overclocking software
Step 1
We open the MSI Afterburner application and we will see the following elements on the monitor
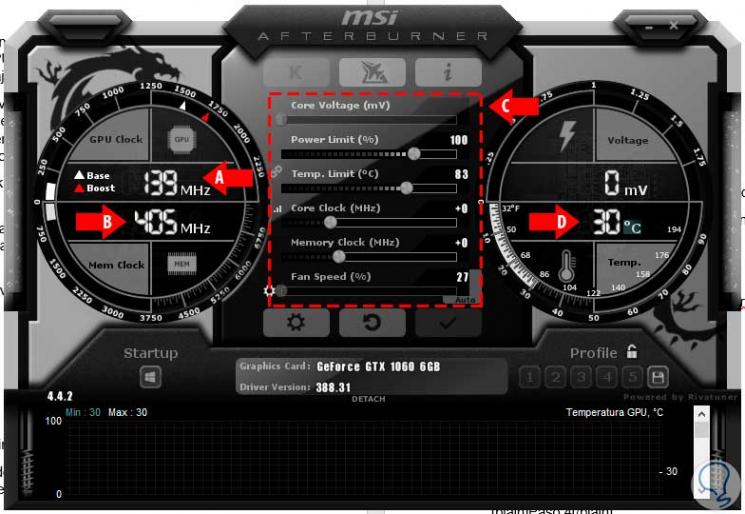
- A. It corresponds to the main speed that your central clock has and that you will use to perform overclocking.
- B. Speed ​​of the memory clock that can also suffer an overclocking, although it must be after performing it in the central as we have said before.
- C. This panel is control and from here you can overclock both the fan speed, memory clock or the central clock.
- D. This panel shows the temperature we have in the GPU in degrees.
Step 2
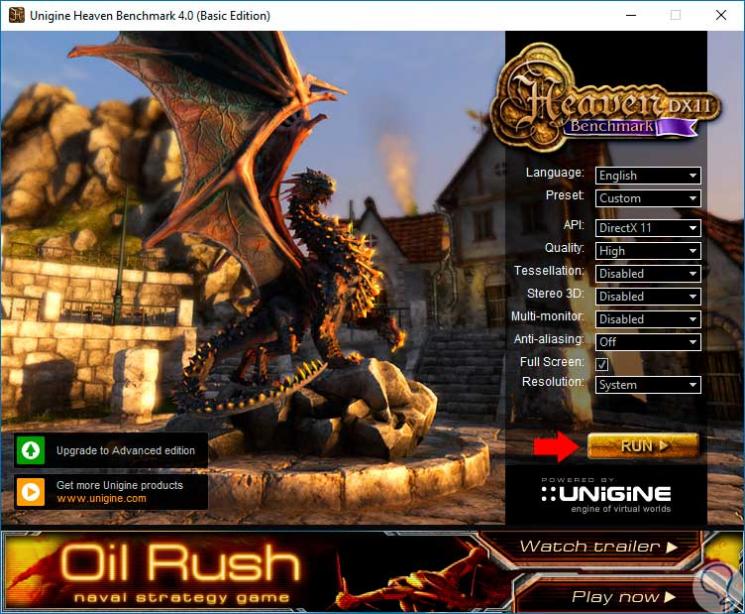
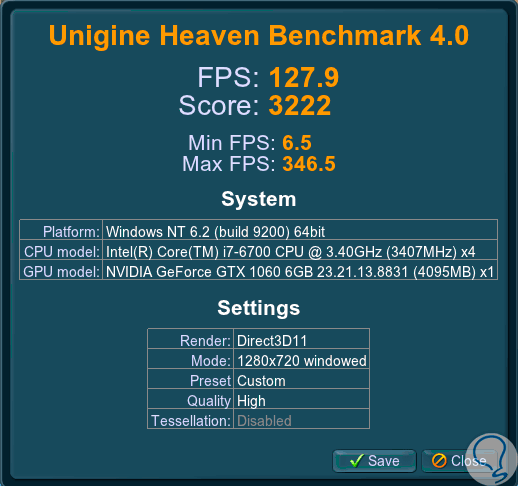
We open the testing software that we have downloaded, UNiGiNE Heaven to test the Benchmark from there. We execute it and press the RUN button.
Step 3
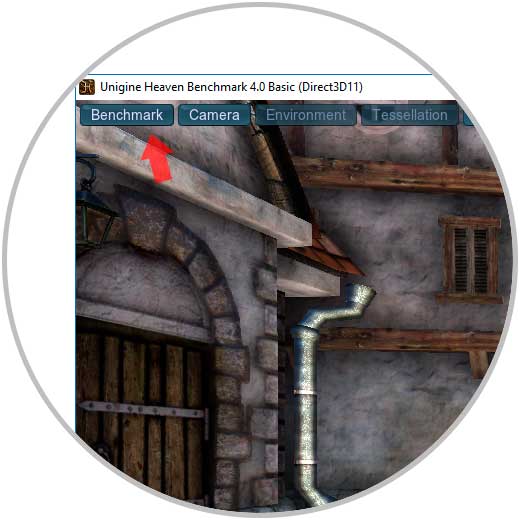
We wait for the screen to load and select the option at the top that puts Benchmark.
Step 4
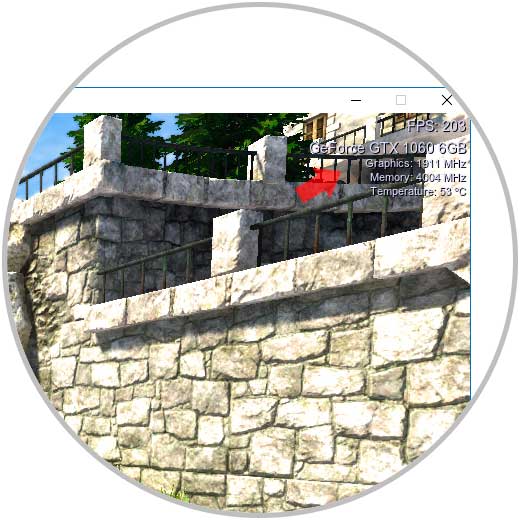
The test mode will be executed and on the right side you will be able to see data such as temperature, the frames it works on or the GPU clocks.
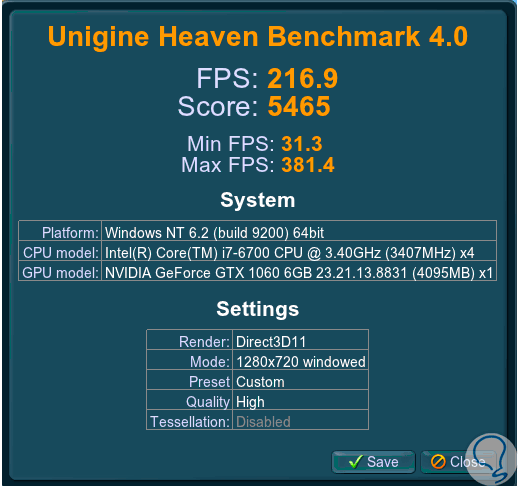
Step 5
We let all the scenes run, it will take several minutes. During this test you should be aware of the data that is displayed on the screen. It is possible for the GPU to take a temperature and maintain it for the entire test time. In the end, a statistical summary of data provided by our GPU will be provided.
2. How to overclocking with NVDIA graphics card or GPU
Once we have seen how to use the software, we will see how we can perform overclocking in our GPU.
Step 1
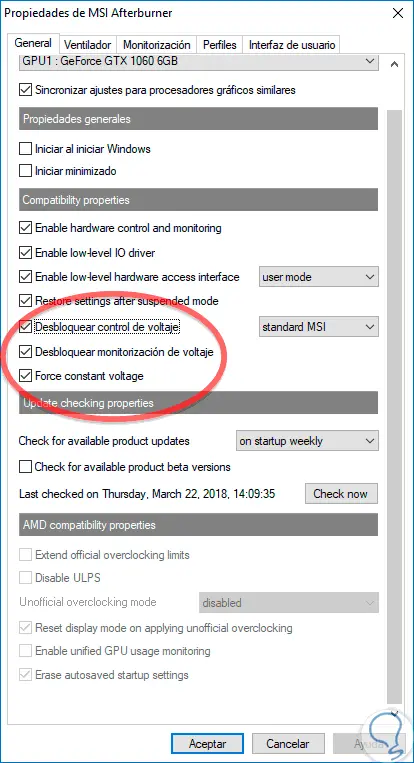
Open MSI Afterburner and click on the configuration icon.

Step 2
We go to the "Compatibility options" and mark "Unlock voltage control", "Unlock voltage monitoring" and "Force a constant voltage". Click OK and then the computer will restart.
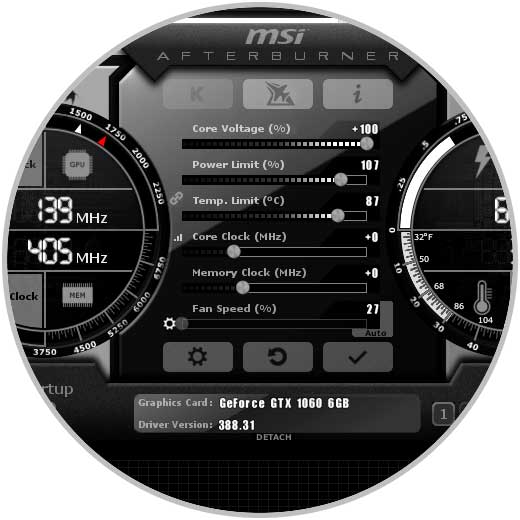
Step 3
Once we have restarted we return to our MSI Afterburner panel and put the following values:
- We set the temperature limit to 87 degrees, we will see that the power limit controller or “Power limit†accompanies you too.
- We place the "Core Voltage" control all the way to the right. The resulting percentage will depend on our graph.
- Finally, we press the verification check.
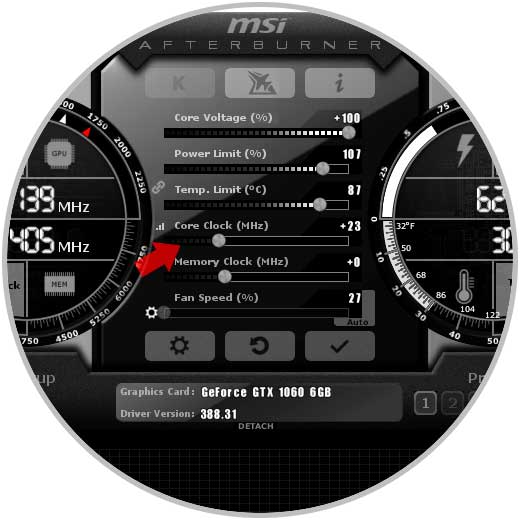
Step 4
Once we have this optimized configuration, we will move the control of the “Core clock†to the right side to a value of +23. Then click on verify.
Step 5
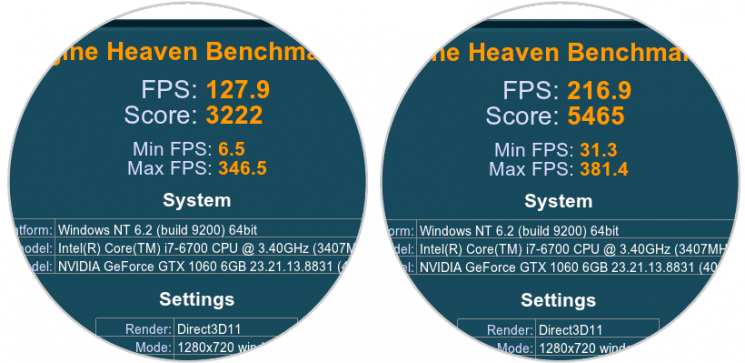
Finally, rerun the testing software with the Bechmark and verify that the results are better after this configuration.
Step 6
If we compare it with the results of the principle:
Step 7
If we see that our computer does not give any errors, we will repeat this process:
- Add in more than 20 or 30 the speed of your watch
- Run Heaven Benchmark 4.0, test the Benchmark and verify that it has improved and there are no bugs
- If after that your device continues to function normally, perform the process again.
3. How to save an overclocking configuration with NVDIA graphics card or GPU
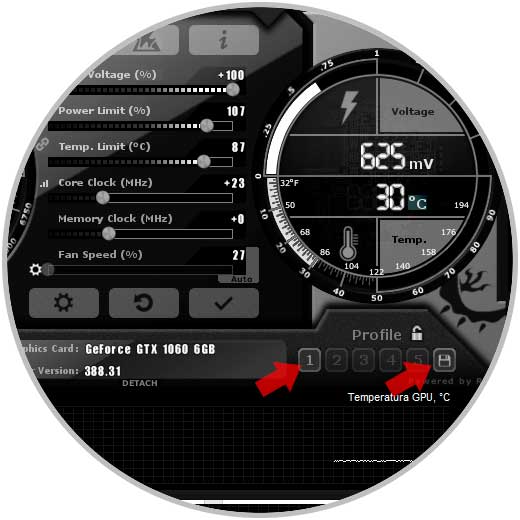
Step 1
To finish the overclocking process we can save our configuration and thus apply it quickly when we need it again. To do this we will go to the “Profile†area, select the save icon and then a number.
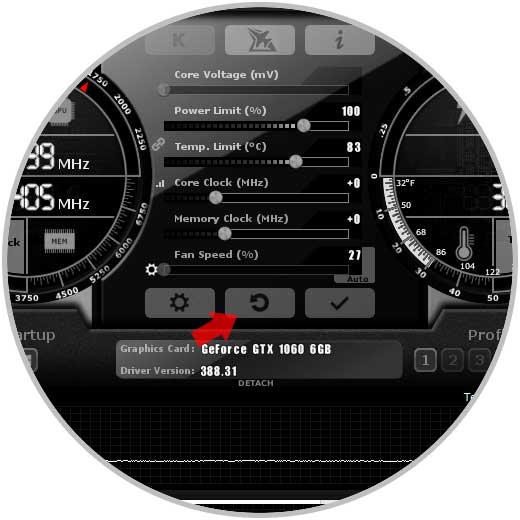
Step 2
If you observe any type of failure due to overclocking, you can press the reset button to return to a default configuration.
In this way we can modify the speed with which our graph works either to play or to undermine cryptocurrency with more power..