One of the components that plays a vital role in the optimal development and visualization of elements in Windows 10 is the GPU (Graphic Process Unity) which is basically a coprocessor, that is, it has been developed as a component similar to the CPU, with the only differences that the type of focused processing of the GPU are the graphics, with this it is possible to alleviate the CPU load a bit since it avoids managing the graphic part and the CPU can be dedicated to more relevant tasks of the System and its applications..
The main difference between the CPU and the GPU is its architecture, the GPUs have been built in such a way that they are more efficient for the calculation of graphical information in Windows.
In the case of Windows 10, the system is able to automatically determine which is the optimal GPU for your integrated Microsoft Edge browser , but this does not always take the GPU with more capacity or the most outstanding, so with the new version of Windows 10 April 2018, or version 1803, it will be possible to manually select the default GPU that the Microsoft Edge browser will use in order to improve its overall performance..
Let's see how to perform this configuration.
To keep up, remember to subscribe to our YouTube channel! SUBSCRIBE
Select the GPU for Microsoft Edge in Windows 10 April 2018
Step 1
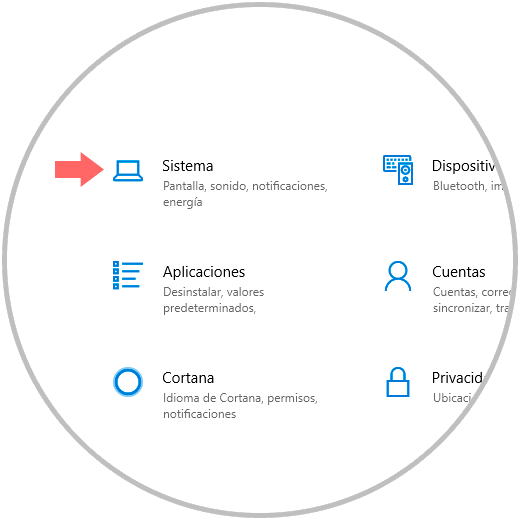
For this, we will go to the Start menu and there we will select the “Configuration†utility where the following will be displayed:
Step 2
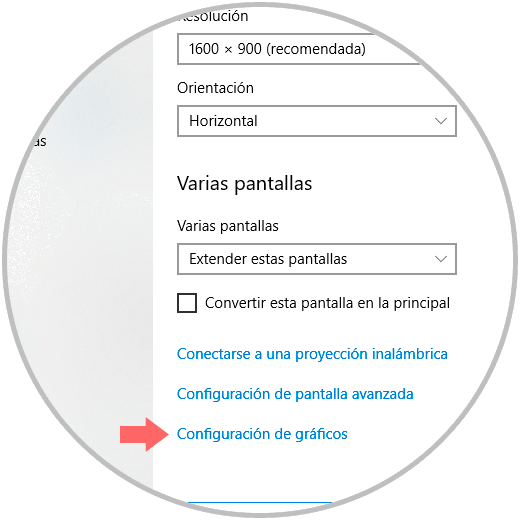
We click on the “System†category and in the new window we go to the “Screen†section and at the bottom we click on the “Graphics configuration†line:
Step 3
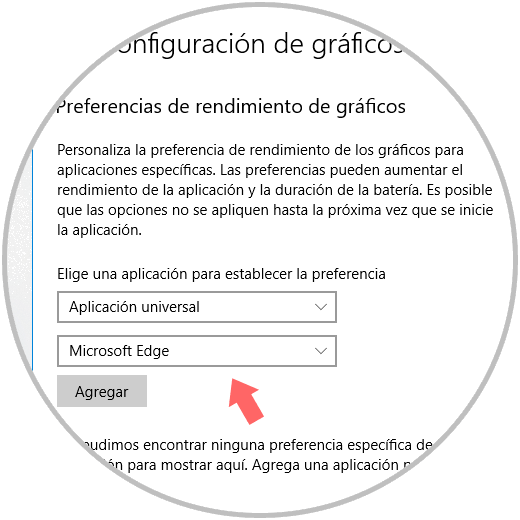
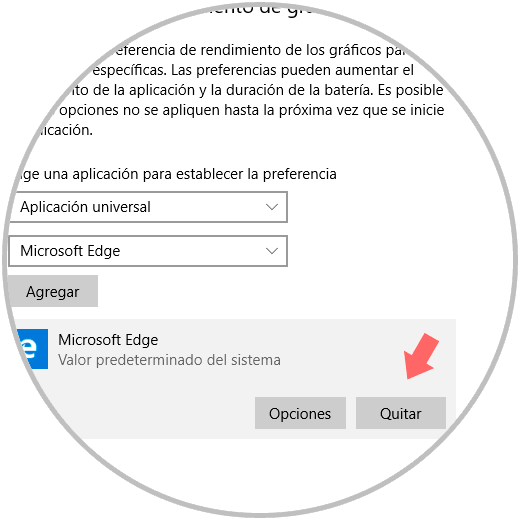
In the new window displayed, we select the option “Universal application†in the field “Choose an application to set the preference†and in the next field we select “Microsoft Edgeâ€:
Step 4
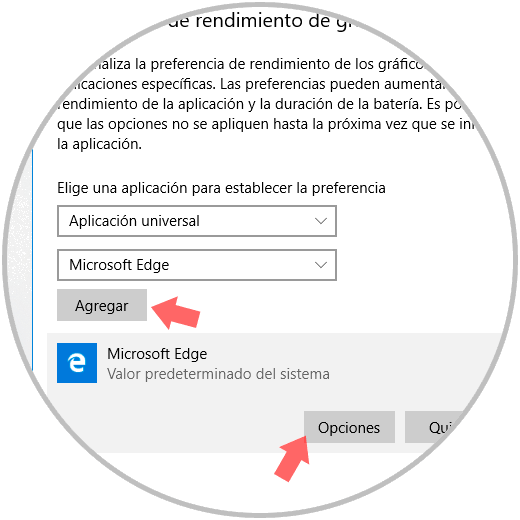
Click on the "Add" button and then clicking on the application we will see the following options:
Step 5
There we click on the "Options" button and in the window we will see the GPU available in the system, as well as the alternatives to use it, we activate the "High performance" box:
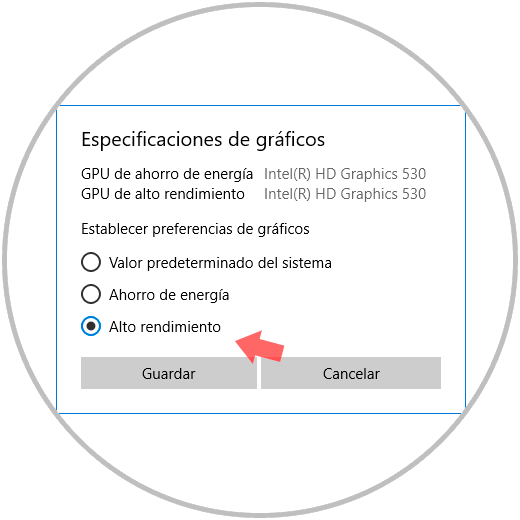
Step 6
By selecting this option we are defining that when using Microsoft Edge the best GPU alternative will be selected and thus we will get the most out of the graphical interface. Once this option is defined, click on the “Save†button to apply the changes.
We can see that the selected option is set. At the moment we do not want to use this option, we can click on the "Remove" button so that the configuration is still automatically defined by the operating system..
It's that simple to define the level of GPU usage for Microsoft Edge, or other applications, in Windows 10 April 2018.