As new versions of Windows 10 are launched, we can face new functionalities and improvements both in terms of environment and execution and security, just in the latter category Microsoft has added a new option to the Windows Defender Security Center which has been basically developed to act as a worse antivirus software with this new inclusion in the April 2018 version, 1803, a new security option developed to help protect the Windows 10 device against malicious software attacks is added which abounds in the network and It can have a negative impact on all processes, services and system files.
Within this security range we have two fundamental aspects to keep in mind that they are:
Core insulation
Core isolation is a novelty that is responsible for providing additional protection against all types of malware and other similar attacks by isolating the processes of the operating system equipment and the device itself.
Within this function, we can go to "Core Isolation Details" in order to modify the configuration of the core isolation functions in Windows 10.
Memory integrity
Memory integrity is an integrated function of kernel isolation, so when we enable memory integrity it is possible to prevent malicious code from accessing high-security Windows 10 processes in the event that any attack.
Security processor
This security processor offers additional encryption for the device thus increasing security capacity.
Now TechnoWikis will explain in detail how to enable memory integrity in Windows 10 April 2018.
1. Enable Memory Integrity in Windows 10 April 2018
Step 1
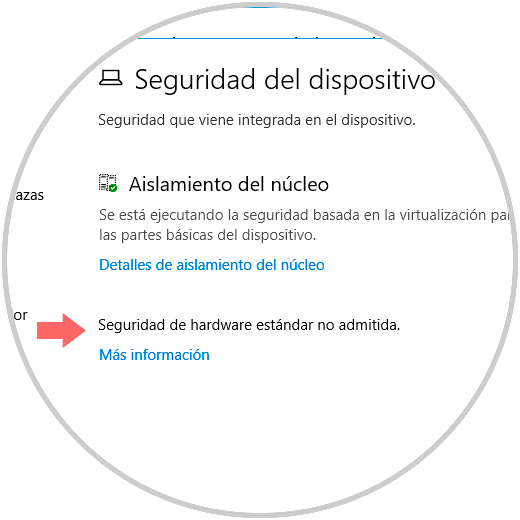
To start the process we will go to the Windows Defender Security Center and in the window that will open we will go to the "Device Security" section where we will see the following:
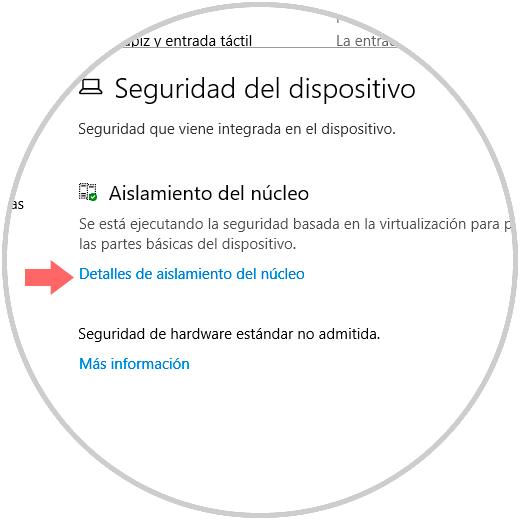
Step 2
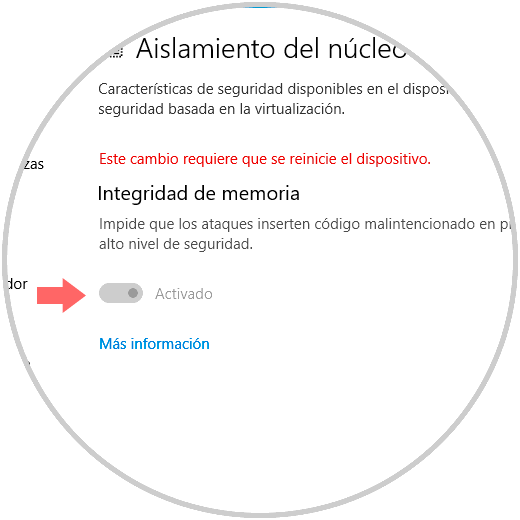
There we will click on the line "Core insulation details" and the following will be displayed where we must activate the "On" switch. This has enabled memory integrity and as we see it requires that the computer be restarted to apply the changes.
It is important to clarify that this function is closely related to the virtualization-based security function, so that our processor must be compatible with virtualization, and this virtualization must be enabled in the BIOS or UEFI firmware.
2. Troubleshoot security processor and memory integrity Windows 10 April 2018
Some problems may be associated with disabling memory integrity where it is requested that only the administrator can execute the action and therefore we must edit a system registry.
Step 1
For this, we will use the following keys and in the displayed window we will execute the regedit command, then we will go to the following route:
+ R
HKEY_LOCAL_MACHINE \ SYSTEM \ CurrentControlSet \ Control \ DeviceGuard \ Scenarios \ HypervisorEnforcedCodeIntegrity
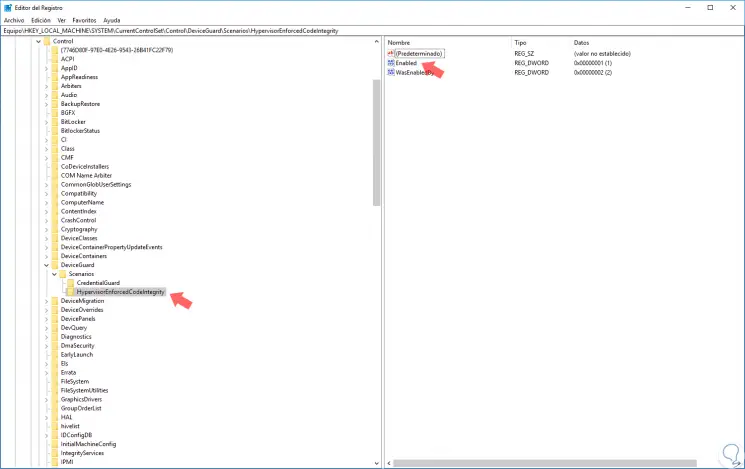
Step 2
There we will double click on the register called "Enabled" and set its value to 0:
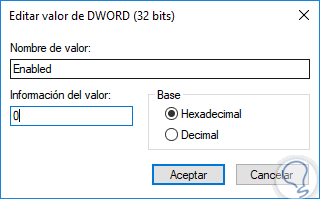
Step 3
Click on OK and we can exit the Registry Editor. Now, some of the advanced security processor troubleshooting options are as follows:
Error messages
There we find the most important error messages about the security processor.
Delete TPM
This option resets the security processor to the default settings.
Collect records
Through this option, we can collect records to obtain more information in order to better analyze the events associated with the security processor, these records will be stored in a folder on the desktop.
3. Perform secure boot Windows 10 April 2018
The secure boot of Windows 10 into memory integrity was designed to prevent a sophisticated and dangerous type of malware, known as rootkit, from being loaded at device startup. These rootkits make use of the same privileges as the operating system and are started before the operating system, which can be hidden from the user.
Rootkits are part of a complete set of malware that is capable of evading local logins, recording passwords and keystrokes, transferring private files and capturing cryptographic keys, which will make each file's security and files vulnerable. .

4. Configure hardware security level Windows 10 April 2018
Once memory integrity is enabled, at the bottom of the "Device security" section, we can see one of the following messages, indicating the security level of our device:
The device meets the standard hardware security requirements
This message means that the device supports the memory integrity and isolation of the kernel, and also has the following:
The device meets the requirements for enhanced hardware security
This message refers to the fact that the device, in addition to complying with all standard hardware security requirements, also has memory integrity active.
Standard hardware security not supported
This message indicates that the device does not meet at least one of the standard hardware security requirements.
Thus we have seen how this new security implementation of Windows Defender will help us to have much safer computers.