Security when browsing will always be one of the main objectives that, as administrators, advanced users or beginners we must take into account not only when using Windows 10 but any other operating system and the reason is that when surfing the web we are exposed to millions of threats that can negatively affect both applications and our personal information..
With the launch of Windows 10 April 2018 , new features and improvements have been added precisely to increase system security and one of them is the Windows Defender Application Protection which is focused on raising Microsoft Edge security levels on What is Microsoft's commitment to the topic of web browsers.
Through this tutorial we will learn to enable this new functionality of Windows 10 April 2018..
What is Windows Defender Application Protection
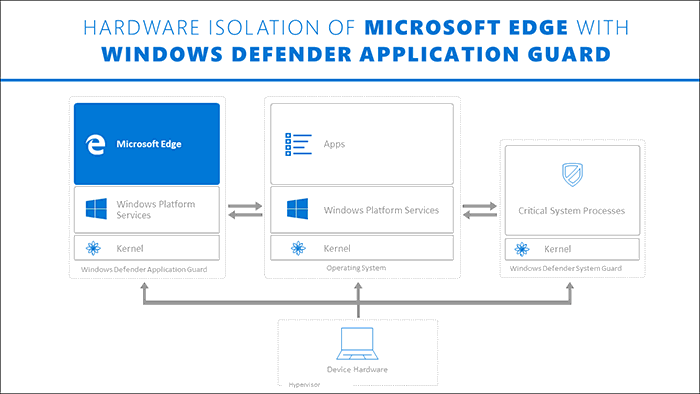
Also called Windows Defender Application Guard (Application Guard), it is a function that has been designed to help prevent all types of attacks on the system , this allows the system to always be available and secure. This feature makes use of a hardware isolation approach, with which any attack can be prevented.
This feature can be installed in versions of Windows 10 as:
- Windows 10 Business Edition, version 1709 or higher
- Windows 10 Professional Edition, version 1803
This novelty has been designed exclusively for Windows 10 and Microsoft Edge , and the Application Guard function aims to isolate untrusted sites defined by the organization itself, thus protecting the company when all users browse the Internet or when a user Normal surf the web. IT administrators will have the opportunity to define which websites are reliable, cloud resources and internal networks, so everything that is not there will be considered untrustworthy.
To understand how Application Protection works, let's look at the following: if an employee accesses a website that has been listed as untrustworthy through Microsoft Edge or Internet Explorer, Microsoft Edge opens that site in an isolated Hyper- enabled container. V, which is separate from the host operating system. With this process, container isolation indicates that if the site that is not trusted turns out to be malicious, the computer is protected and the attacker cannot access the data stored there..
The ideal devices to use this type of protection are
- Corporate teams which are linked to a domain and are managed by the organization
- The company's mobile laptops which are linked by domain and managed by the organization
- Personal devices which are desktop computers or mobile laptops for personal use that are not linked to a domain or managed by a specific organization.
- BYOD (Bring your own device) devices, these are portable personal property devices that are not linked to a domain, but are managed by the organization through tools such as Microsoft Intune.
Now we will see how to enable this tool in Windows 10 April 2018.
1. How to enable Windows Defender Applications protection feature
Step 1
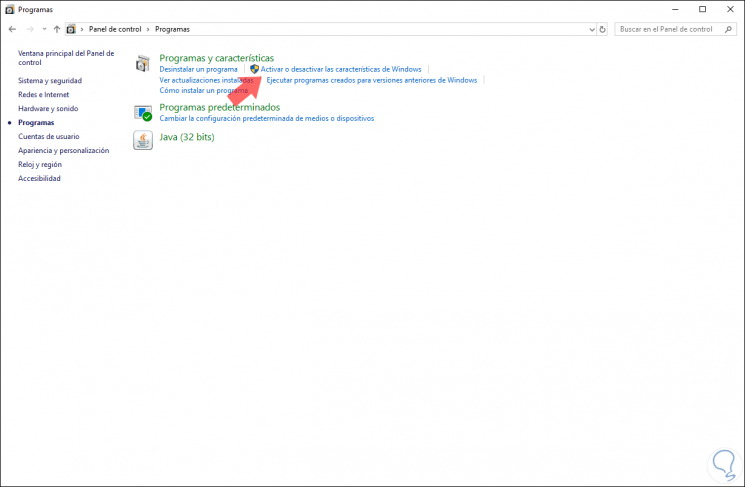
First, we will go to the following route:
Control Panel \ Programs
Step 2
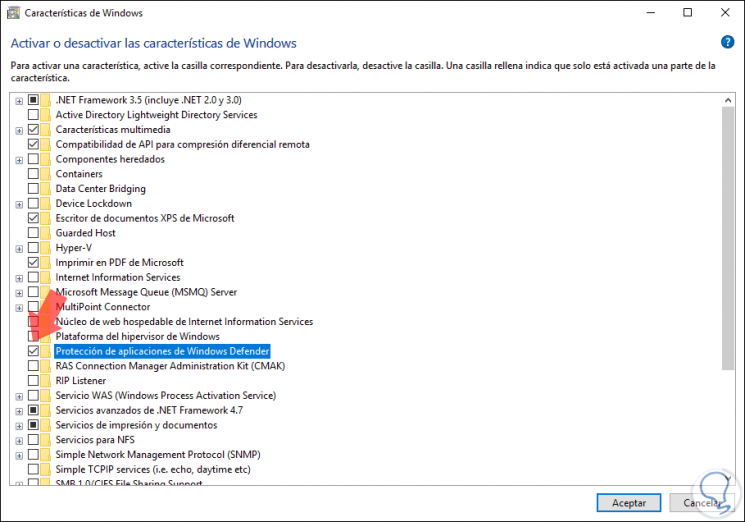
There we click on the Activate or deactivate the Windows features line and in the window that will appear we will locate the line called Windows Defender Application Protection and check its box:
Step 3
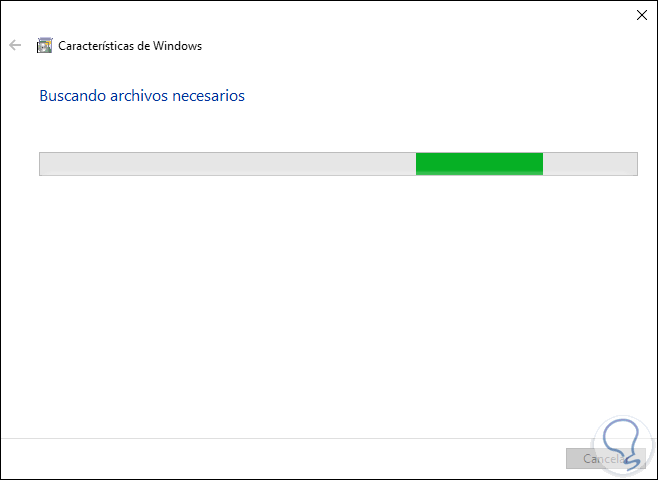
Click on Accept and start the application process of the feature:
Step 4
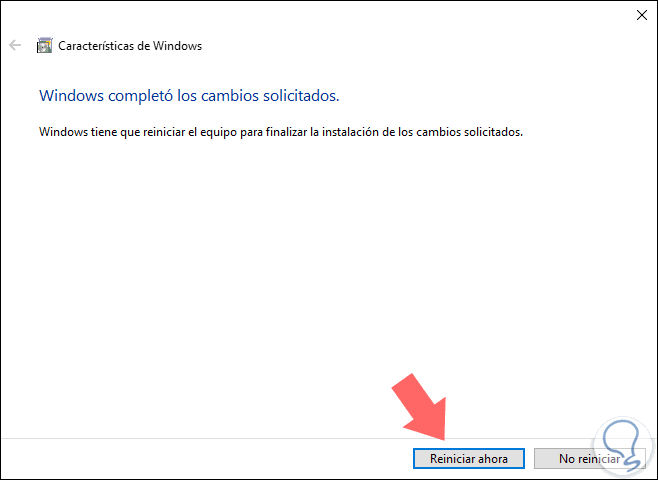
Once this process is finished we will see the following. Click on the Restart now button for the changes to be applied.
2. How to use Windows Defender Application Protection
Step 1
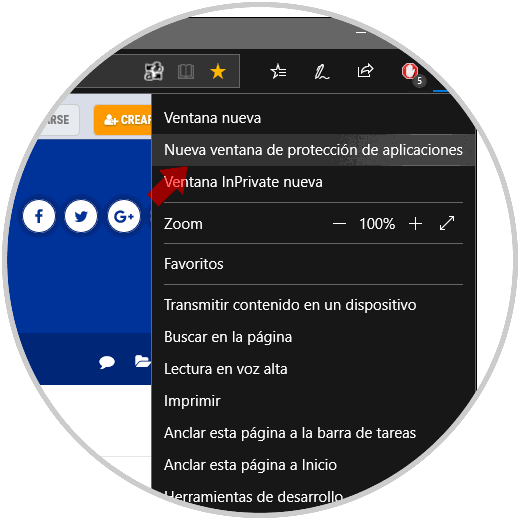
To use this new function in Windows 10, we access Microsoft Edge and from the side menu we select the option New application protection window:
Step 2
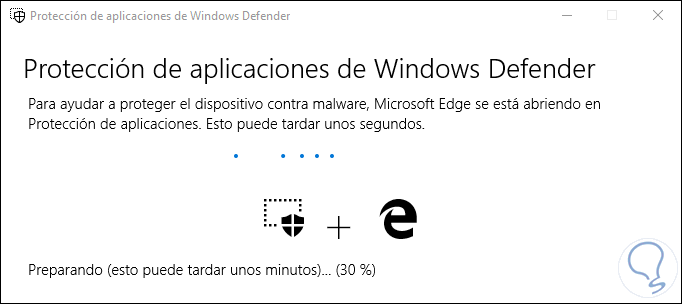
The following message will be displayed indicating that the secure environment is being created:
Step 3
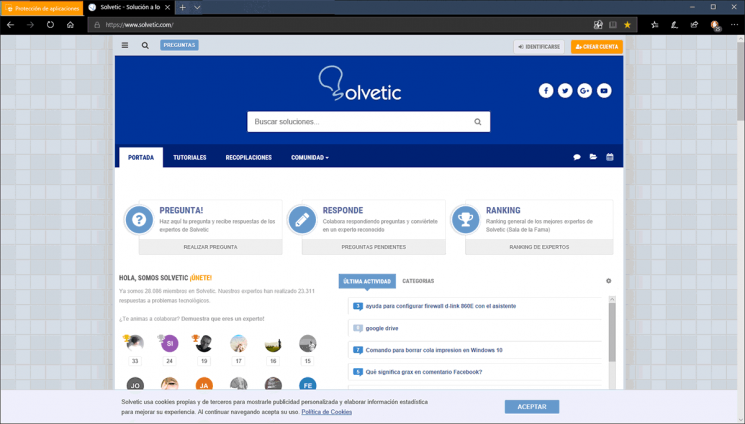
After completing this process, a new virtualized environment will be created automatically in order to completely isolate the Microsoft Edge web browsing session in Windows 10. We can recognize this session by its logo in the upper left.
Now, we will have the security of being in a safe environment to navigate thanks to this option.