One of the most used and necessary network components in any type of organization and network infrastructure is undoubtedly the DNS server , to get a little in context, remember that the DNS server (Domain Name System - Domain Name System ) is the one that allows you to translate domain names into IP addresses and vice versa to facilitate communication between all network devices..
By default, our ISP, or Internet provider, offers us an automatic DNS server, but sometimes we can face DNS failures such as connection errors, not opening pages and more.
The solution in this case is to modify the default DNS server and so today we will see how to achieve this in Chromebook in a useful way..
Step 1
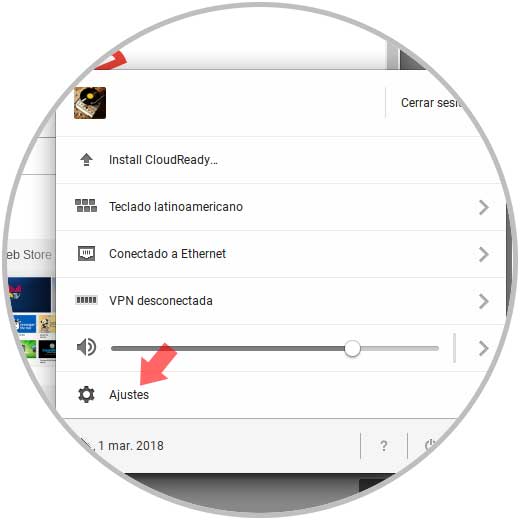
For this, we access Chromebook, click on the access icon located at the bottom right and there we will click on the Settings option:

Step 2
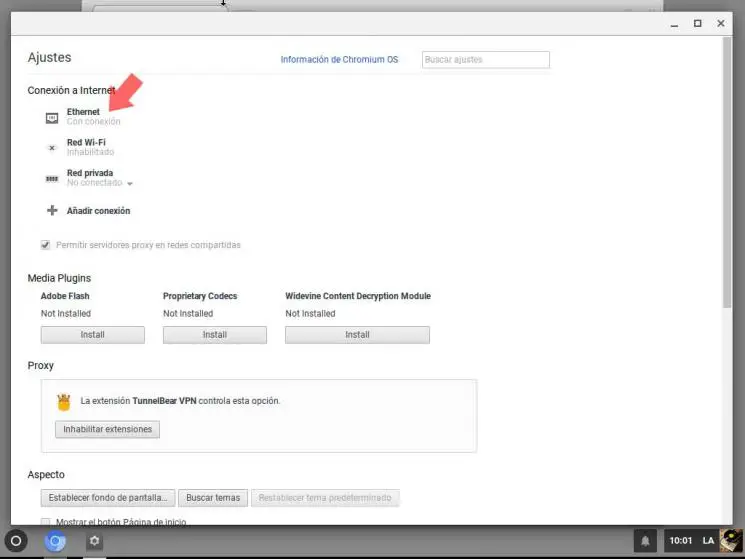
By selecting this option we will see the following:

Step 3
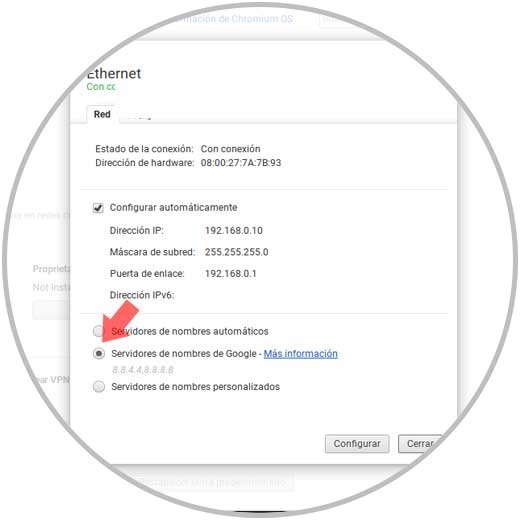
There we can select the type of network we are currently using, in this case Ethernet, and the following window will be displayed:

There we find all the parameters of the network to use and we look at the bottom where the DNS values ​​are located, there is enough to activate the box in the desired option like this:
Automatic name servers
Set the DNS server offered by the provider
Google name servers
This option allows us to use Google’s public DNS with IP addresses 8.8.8.8 and 8.8.4.4.
Custom Name Servers
Here it will be possible to assign the DNS servers of a third party and for this we must have the respective IP address.
Click on Close to apply the changes and in this simple way we have edited the DNS in Chromebook.