The use of the mouse in Chromebook is daily since it is the option to select integrated of the equipment, unless we use a mouse connected externally. By default the mouse cursor has an established style and design, but this does not mean that we cannot change it and if this is your plan TechnoWikis will help you to do it on Chromebook..
When we work with our equipment, the normal thing is that we like to adapt it to our needs and preferences, although not all computers allow the same configurations. If we talk about a Chromebook we know that its system is more limited than others like Windows 10, but that does not mean that it does not include functionalities that help us personalize our Chromebook and improve our workspace.
To stay up to date, remember to subscribe to our YouTube channel! SUBSCRIBE
How to change the cursor on Chromebook
Step 1
To achieve this, we go to "Configuration" from the beginning:
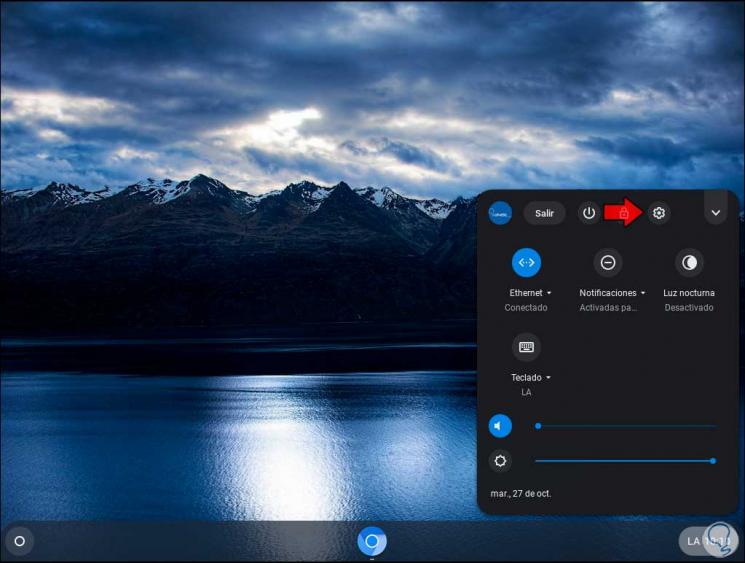
Step 2
In the configuration window we go to the "Device" section where we see the following options:
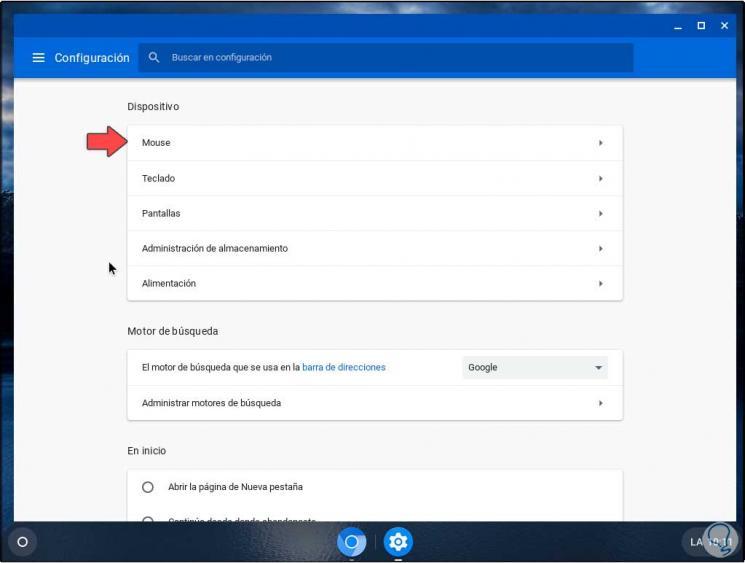
Step 3
We click on "Mouse" and there it will be possible:
- Modify the main button, that is, toggle right and left button
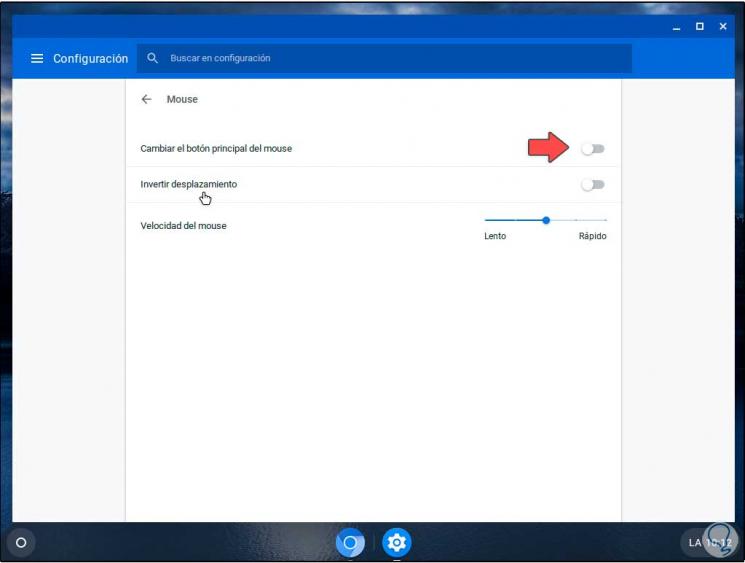
Step 4
To modify the cursor itself, we go back to the menu and this time we select "Advanced settings" to see the following available options:
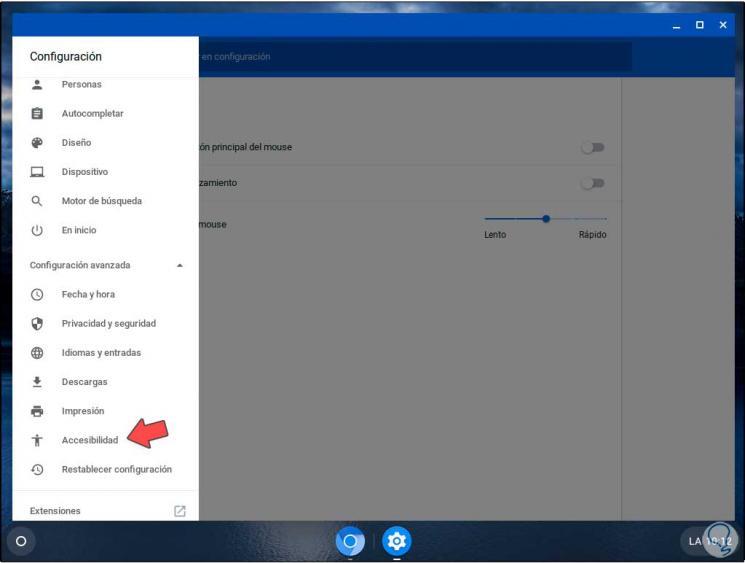
Step 5
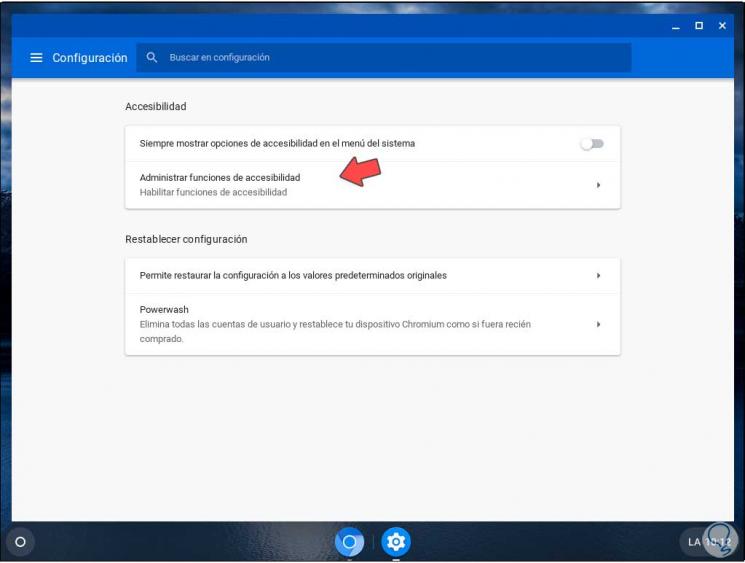
We click on the option "Accessibility" and we will go to the following window:
Step 6
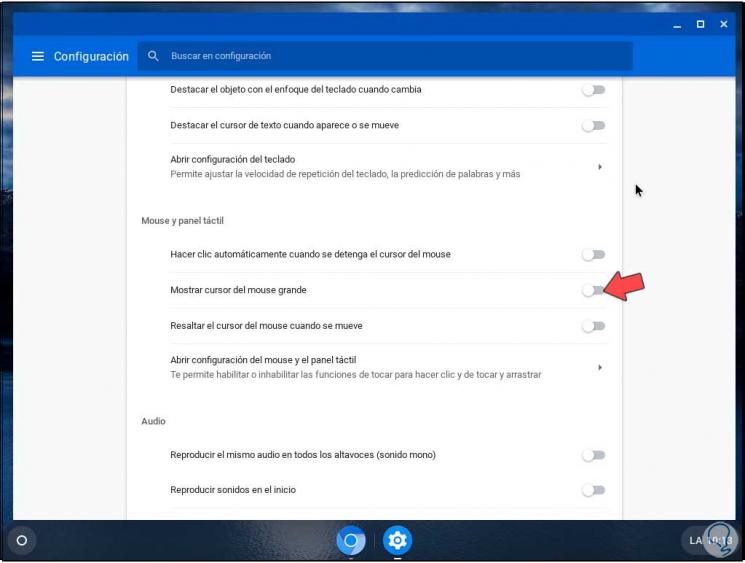
We click on "Manage accessibility features" and go to the "Mouse and touch panel" section:
Step 7
There we can activate the switch "Show large mouse cursor" and we will see that it changes its appearance immediately:
Step 8
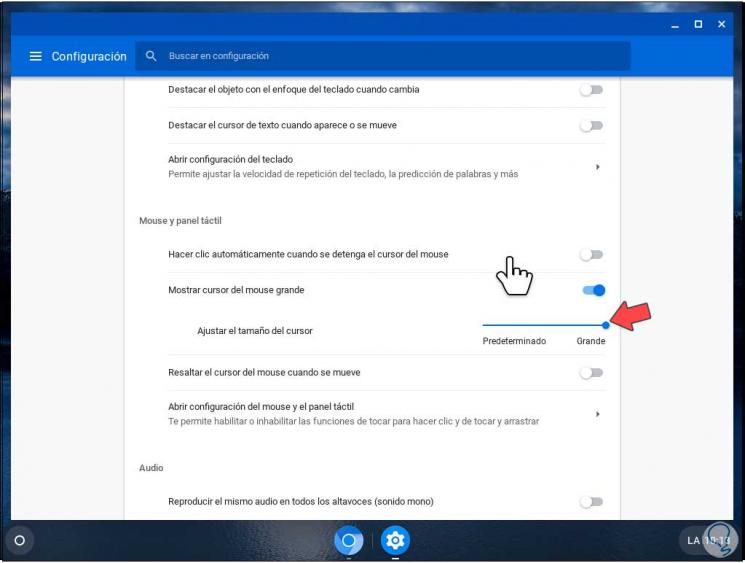
This will activate an additional option called "Adjust the cursor size", we simply move the sliding line to the desired size:
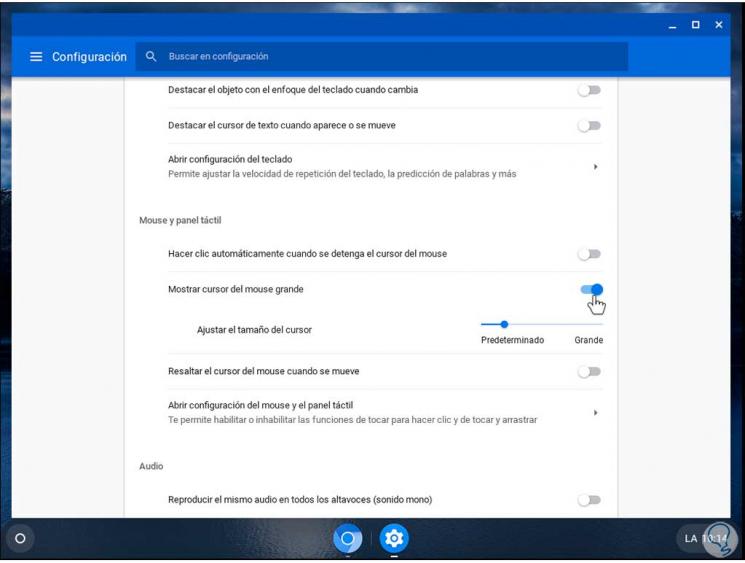
It is a simple but functional process to adjust the mouse cursor on Chromebook computers and customize this important and fundamental part of this type of computer..