When using Windows Server 2016 we have at hand a powerful system that includes numerous and extensive development capabilities, design and administration of users and equipment where the slightest error can have serious problems of configuration and management of the entire infrastructure..
The network issue is undoubtedly one of the most critical since any fault that occurs there, will affect the whole issue of connections both server and clients and this brings serious management problems. One of the most commonly used topics at the network level is the routing table which is a connection table between the address of the destination computer and the node through which the router must send the network packets and by default, All routers have a dynamic routing table.
We know that the essential task of a router is the forwarding of packets to the arrival network, that is, the destination IP address. To know where that arrival is, you must call your routing table that will show you the way. When we talk about dynamic routing we will be making a route choice based on the best path available for it..
What is a routing table?
The routing tables are those whose objective is to guide the packets in a correct way to their destination. In the case of TCP / IP tables, they will be those that manage the sending of network packets making a redirection easier and more effective. We could say that a routing table works like a virtual map where network nodes are registered within routers or databases.
A dynamic routing table allows the router to be able to select the best route for the packet forwarding process using the information it obtains from other nearby routers and this should allow the network and everything that travels through It is safe, fast and functional.
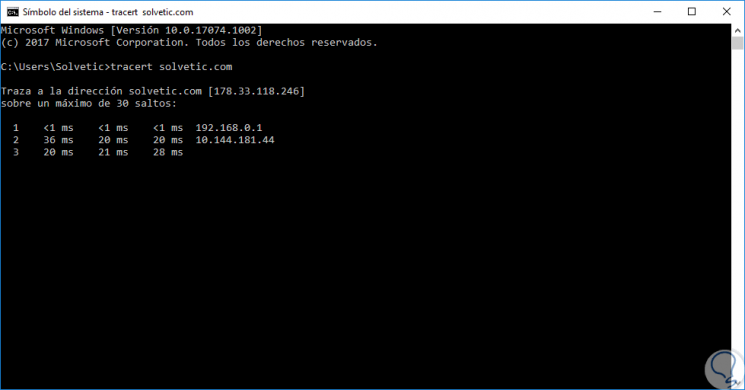
We can verify this thanks to the tracert command in Windows environments:
Advantages of routers
Modern routers are also in the ability to allow us to select a static routing, that is, with a single IP address that does not change constantly, and this is ideal in scenarios such as:
- Better administrative control.
- Use of applications that require a fixed IP.
- Channels dedicated to the network.
- Direct all traffic through a specific network or subnet and more.
1. View the routing table in Windows Server 2016
For that, we will open the command prompt as administrators and execute the following:
route print
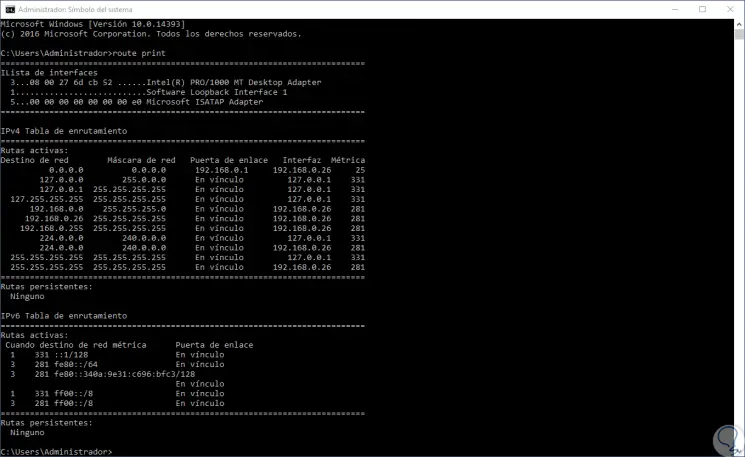
In this result we can see a list of network destinations and the gateways to which packets are forwarded when they are directed to that particular destination..
2. Add static routing to the routing table commands in Server 2016
Step 1
To add this routing, we will use the following syntax:
route ADD Network_ Destiny MASK Network_ Mask Metric Link Door
Step 2
The netmask and the metric are optional, so if we don't specify any value, the mask's value will be 255.255.255.0 automatically and for the metric it will be 0.0.0.0. We will use the following value:
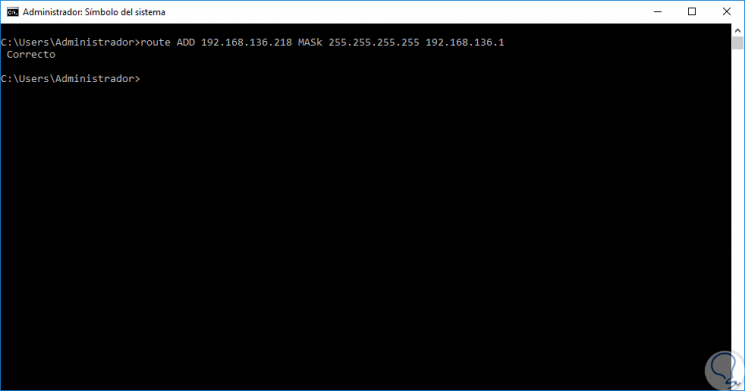
route ADD 192.168.136.218 MASK 255.255.255.255 192.168.136.1
Step 3
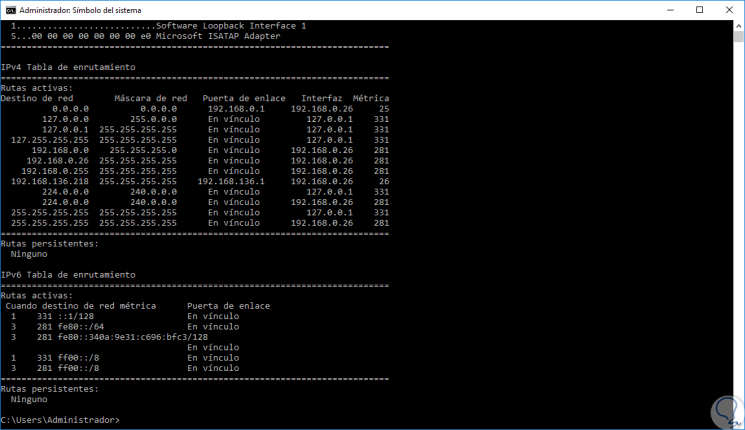
As we see, the result is correct. If we execute the “route print†command again, we can see this address in the routing table:
Step 4
If we want this address to be permanent, we will add the -p parameter like this:
route -p ADD 192.168.136.218 MASK 255.255.255.255 192.168.136.1
3. Add static routing to the graphic mode routing table in Server 2016
The next alternative we have in Windows Server 2016 is to perform this process directly on the network adapter.
Step 1
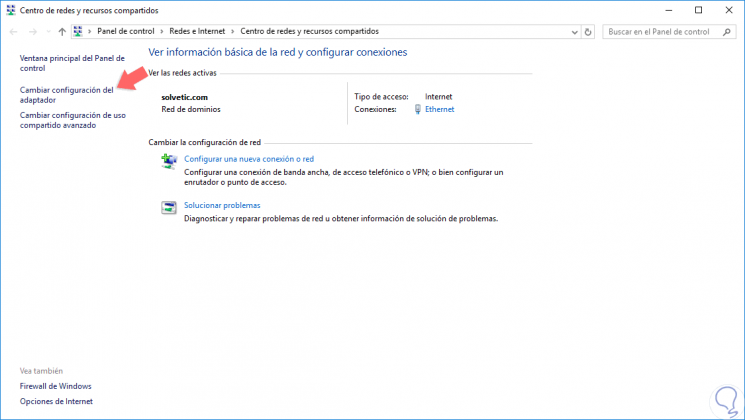
For this, we will right click on the network icon in the taskbar and select the option “Open the network and shared resources center†where we will see the following:
Step 2
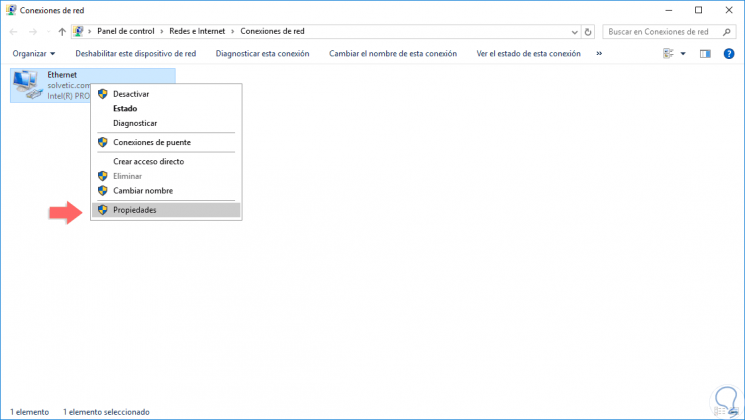
There we click on the option “Change adapter settings†located on the left side and right click on the current network adapter and select the line “Propertiesâ€:
Step 3
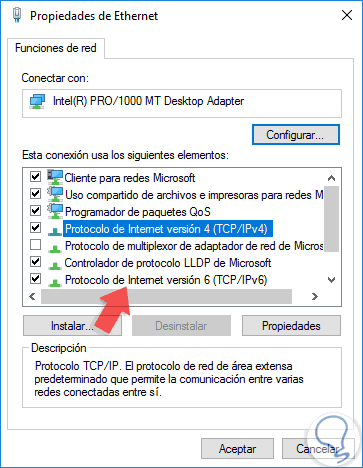
In the displayed window we will select the line "Internet Protocol version 4" and click on the "Properties" button:
Note
In case of using IPv6 click on "Internet Protocol version 6".
Step 4
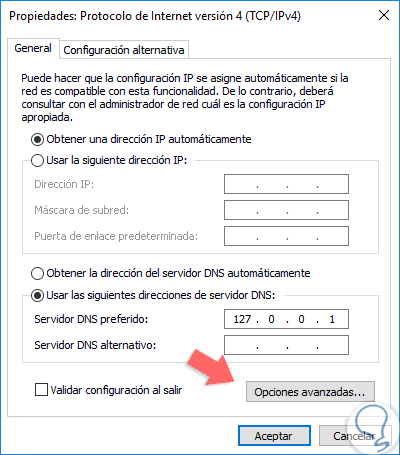
The following will be displayed:
Step 5
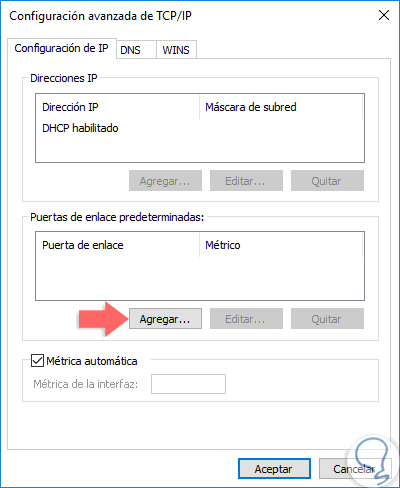
There we click on the "Advanced Options" button and the following window will be displayed:
Step 6
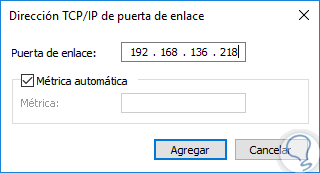
There we click on the “Add†button located in the “Default link doors†section and in the pop-up window we will enter the IP address to be established as static routing:
Step 7
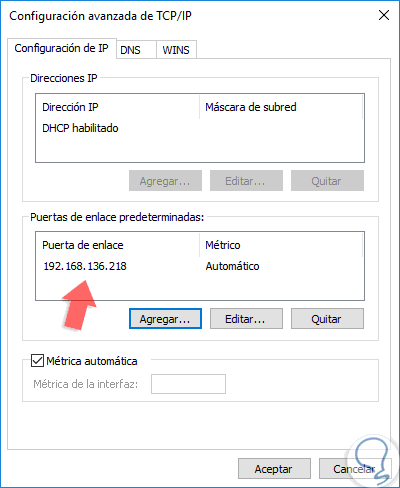
Click on Accept and we will see it added. Click on OK to apply the changes and we can restart the server.
4. Remove a static routing address in Server 2016
When we want to eliminate this static routing address, it is enough to access the command prompt as administrators again and execute the following syntax:
route delete IP_address
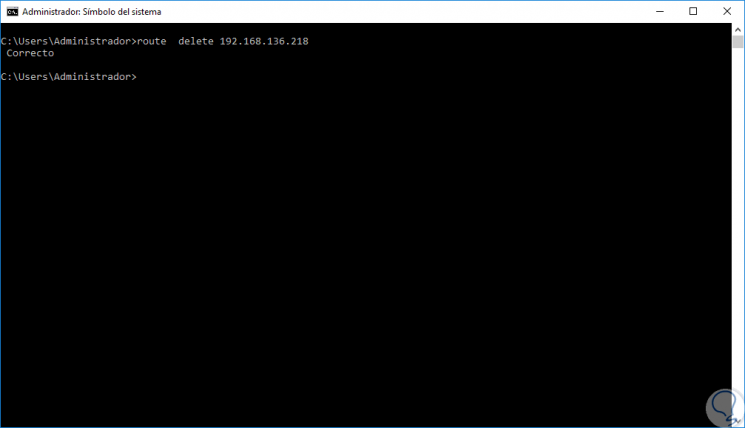
Thus we have seen how to add or remove static routes in the routing table in Windows Server 2016.