The IP address is the door that opens to access the Internet since this is the identifier of our computer on the network, an IP address (Internet Protocol - Internet Protocol) is an identifier in which we find a group of four numbers from the 0 to 255 separated by points to define this address, it is a unique number associated with our device..
IP types
In the world of networks we find two different types of IP addresses that are:
- Dynamic IP addresses: this type of address is assigned directly by a DHCP server and this is in charge of leasing that address at a specific time, after which time the lease is renewed giving rise to this IP address being modified.
- Static IP addresses: they are special for server environments or machines that have a special task since they are IP addresses that we will always see fixed, that is, they will not change at any time.
IP addresses are used in servers or special equipment because, being fixed, we can use the equipment being certain that the connections to it will always find the same IP address, preventing communication from being lost, by default in Ubuntu 20.04 (Server or GUI), the IP address is offered by DHCP :
TechnoWikis will explain how to assign an IP address in Ubuntu and this process applies to both Ubuntu Server 20.04 and Ubuntu 20.04.
1. Configure a static IP address in Ubuntu 20.04
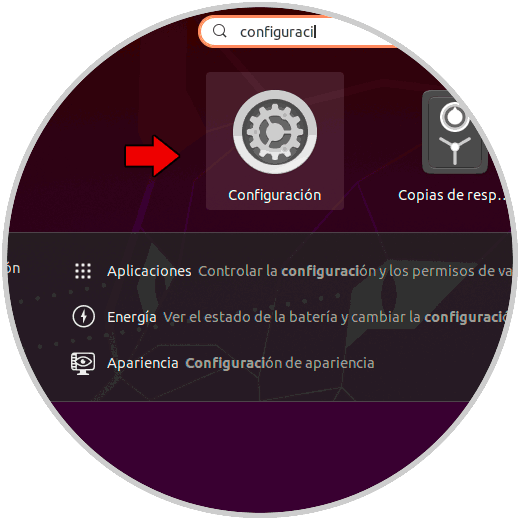
Step 1
The first step will be to go to the search engine and enter "configuration":
Step 2
We select the Ubuntu Configuration and in the displayed window we go to the "Network" section:

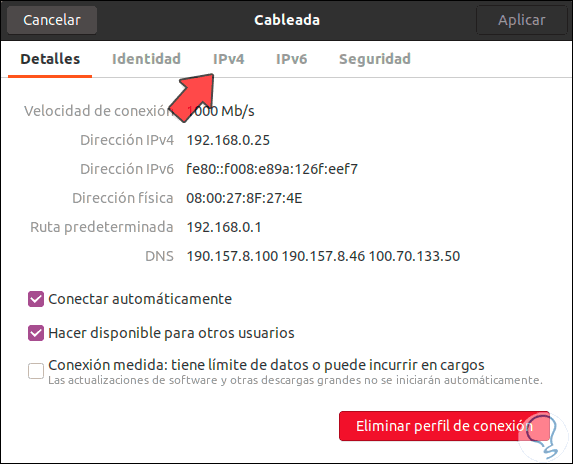
Step 3
There we will click on the gear icon located next to the connection status, this will open the following window where we find details of the current connection such as:
- Current IPv4 and IPv6 address
- MAC address of the network card
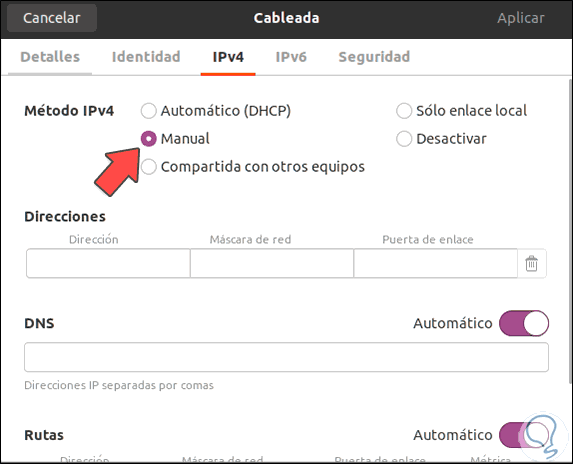
Step 4
We go to the IPv4 tab and there we activate the "Manual" box in the "IPv4 Method" section:
Step 5
This will enable the "Addresses" fields, there we will enter the following:
- Desired IP address as static
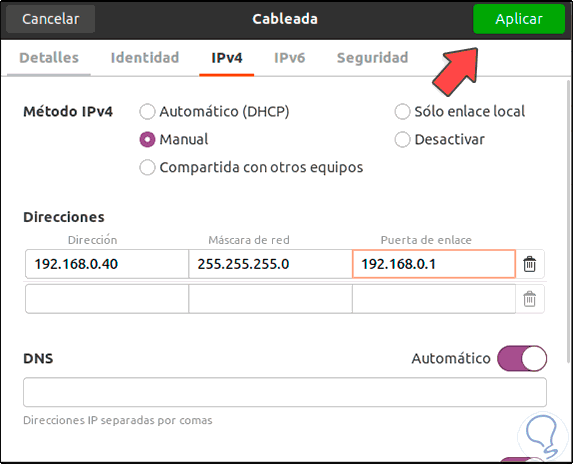
Step 6
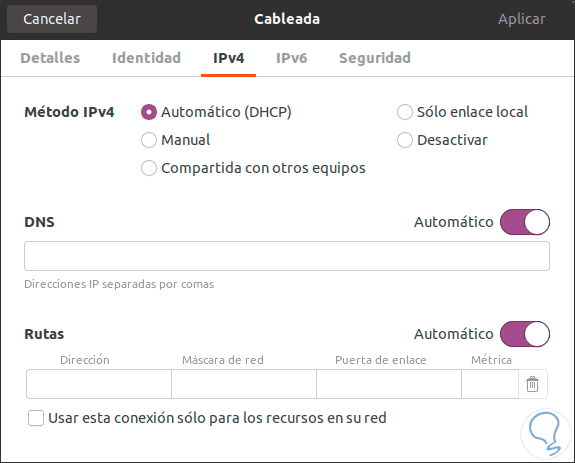
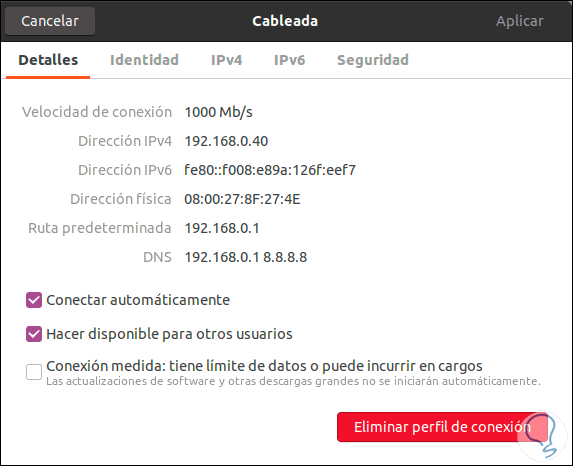
It is possible to add more IP addresses in the lower fields. We can see that in the DNS section the default value is "Automatic", there we click on this switch to make it manual and proceed to enter the DNS address to use:
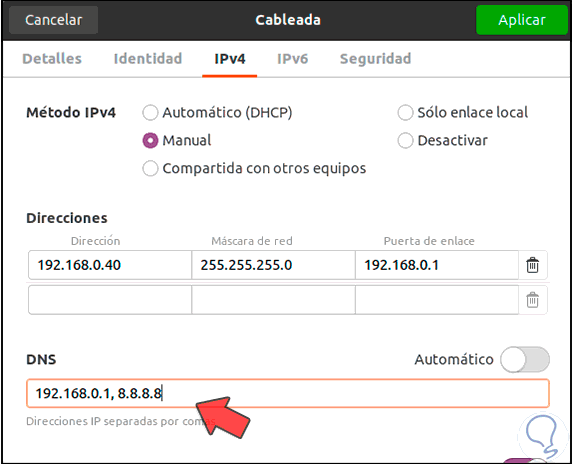
Step 7
In this case we will use the IP of the gateway and Google's public DNS. We click Apply to complete the process. In the main Network window we must click on the network switch to deactivate it temporarily:
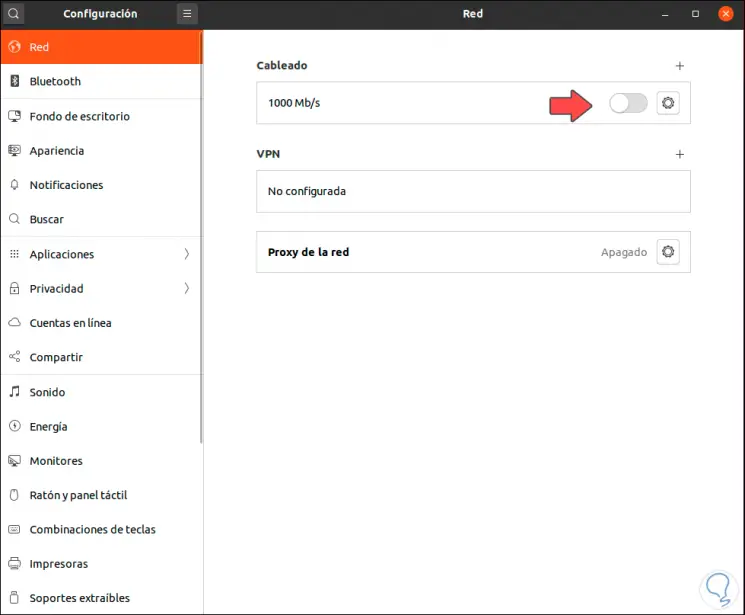
Step 8
After a moment we activate it again so that the changes we have made are applied:
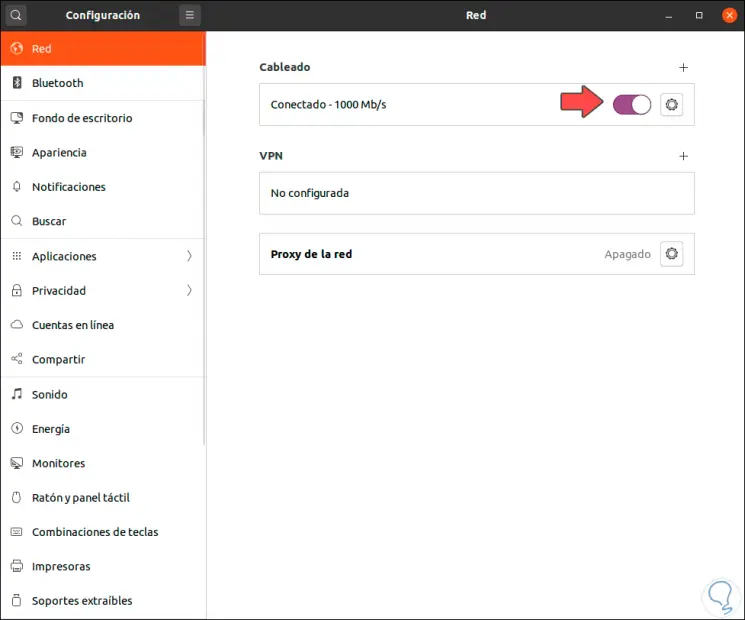
Step 9
We click again on the gear icon to access the network configuration, we will see that the assigned IP and DNS has been established according to our criteria:
2. Configure a static IP address on Ubuntu Server 20.04
In the case of Ubuntu Server 20.04, it is important to note that the Netplan network configuration file by default is found in the path /etc/netplan/00-installer-config.yaml.
Step 1
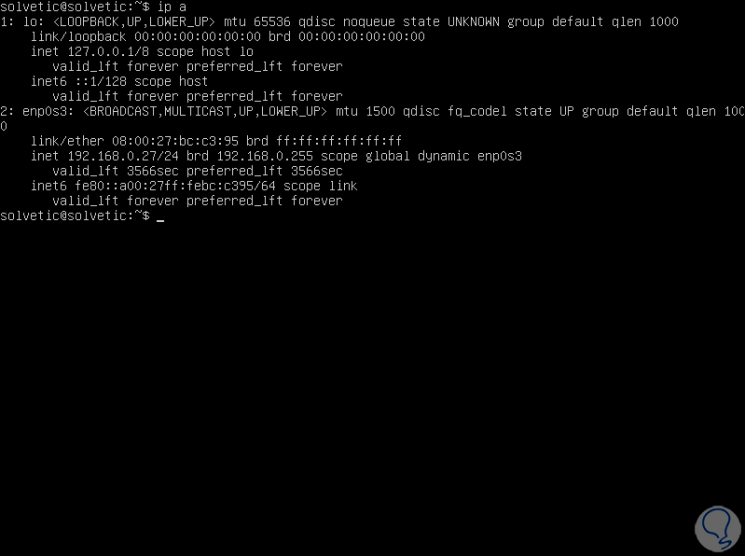
We are going to detect the current network interface with the command ip a:
Step 2
In this case the adapter is “enp0s3” with the IP address “192.168.0.27”. It is time to validate that CloudInit does not manage the network interface, for this we will open the configuration file with our desired editor:
sudo nano /etc/cloud/cloud.cfg.d/subiquity-disable-cloudinit-networking.cfg
Step 3
There we must validate that the following line exists, if it is not there we can enter it manually:
network: {config: disabled} 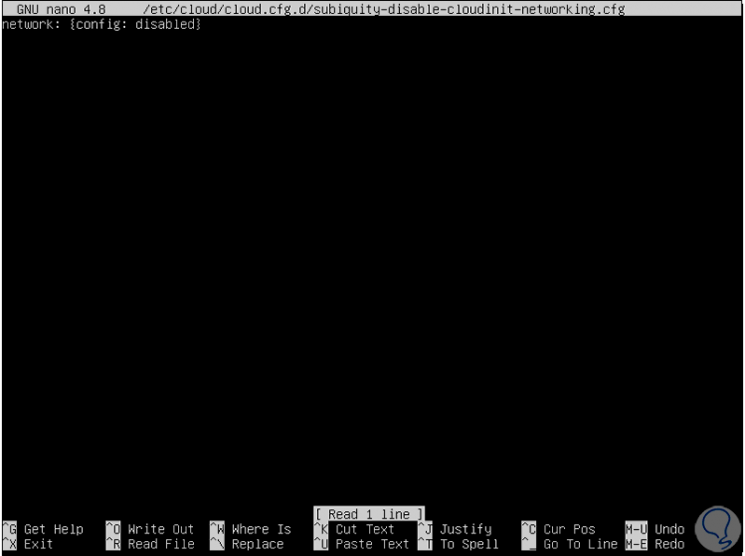
Step 4
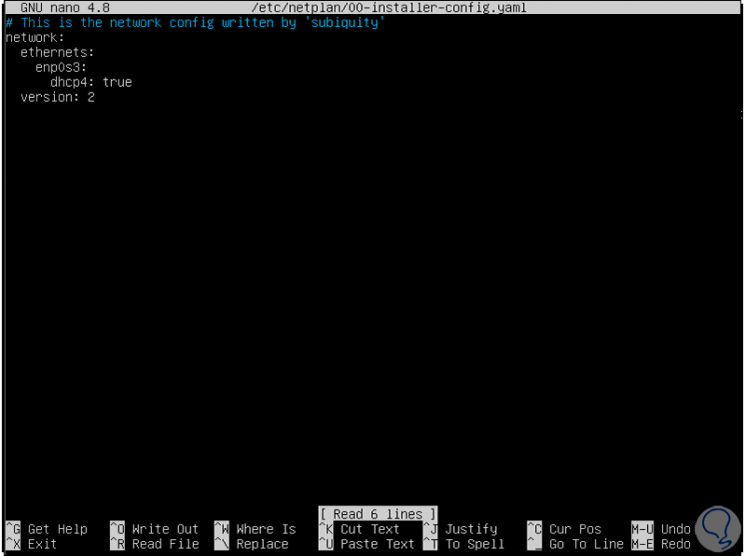
We save the changes if applicable and after this we will open the Netplan configuration file with the following command. There we verify that the network adapter has the dhcp protocol in “true” state, this means that it uses DNS for IP addresses.
sudo nano /etc/netplan/00-installer-config.yaml
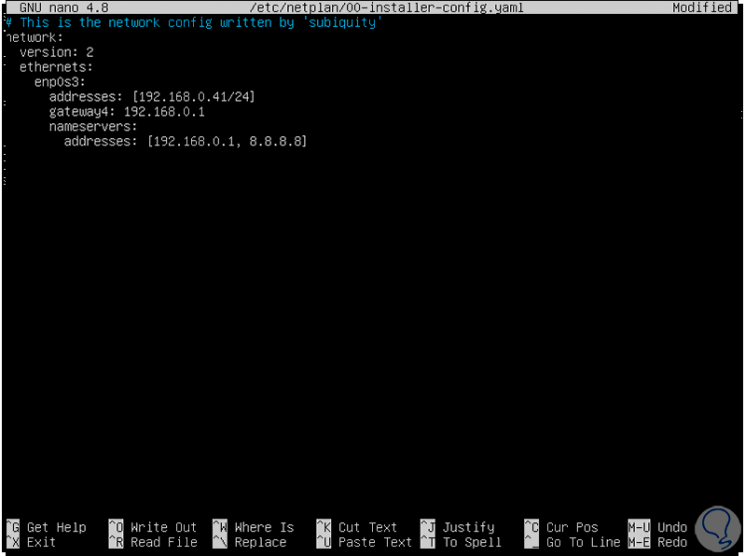
Step 5
We must delete these lines and enter the following with the desired data:
network: version: 2 ethernets: enp0s3: addresses: [192.168.0.41/24] gateway4: 192.168.0.1 nameservers: addresses: [192.168.0.1, 8.8.8.8]
Step 6
We save the changes using the following key combination:
Ctrl + O
We leave the editor using:
Ctrl + X
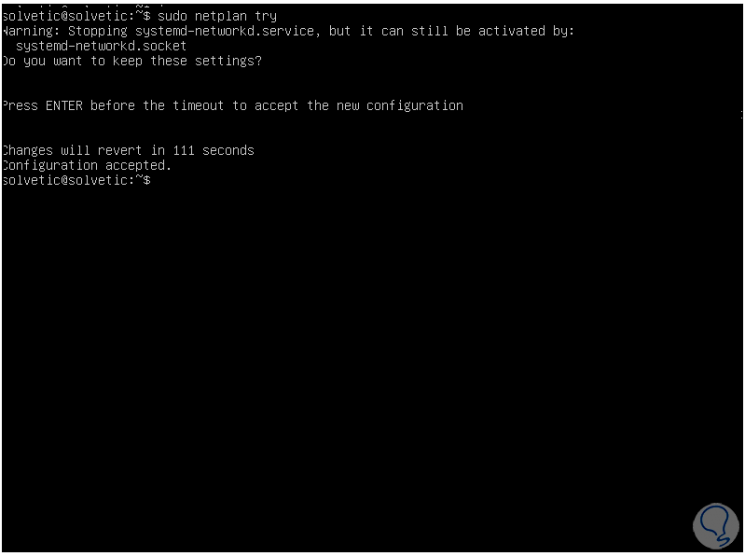
Step 7
We check that there are no errors with the following command:
sudo netplan try
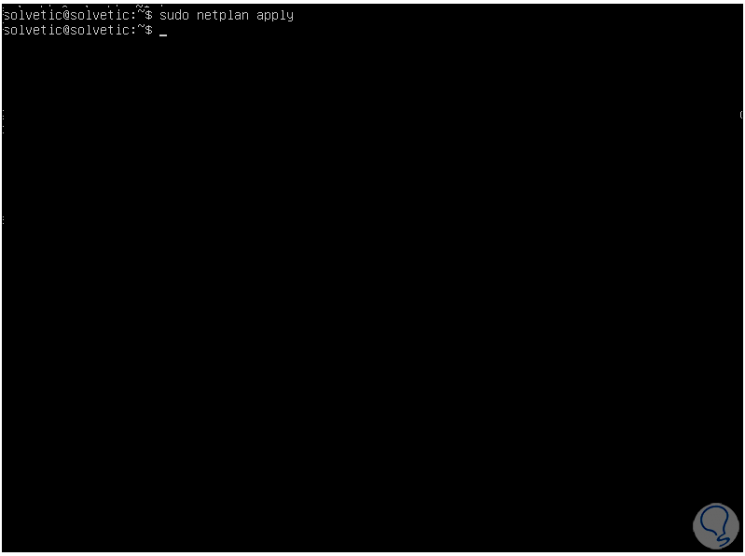
Step 8
If everything is correct we apply the changes with the following command:
sudo netplan apply
Step 9
We restart the system to complete the change process:
sudo reboot
Once we log in, we execute the command "ip a" again to verify that the changes made to the network have been applied correctly. There we will see the new established IP.
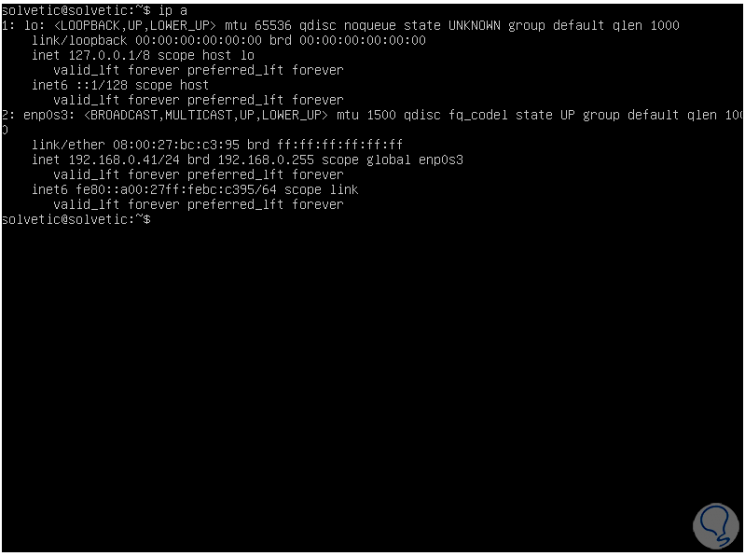
With this process we have established a static address in Ubuntu 20.04 Server or GUI..