The administration of servers with Windows Server 2019 is a task that requires various security functions as well as performance and versatility in the execution of services and roles, in terms of security there is an essential part that is network connectivity and that is why in a way By default , Windows Server 2019 Firewall has been configured to block all incoming ICMP traffic to the server..
What is ICMP
ICMP (Internet Control Message Protocol) is a protocol that performs checks such as:
- Validate the life of a package
- Control whether or not a package can reach the destination
- Analyze if the header carries an unauthorized value
- Define if the package is an echo or response and more.
The use of commands when working with networks is important as it facilitates and streamlines management and support tasks. There are many commands with which to administer, but a fast one of use is undoubtedly PING that will give us problems of having them in the network connections.
This limitation in Windows Server 2019 allows us to be more secure, but it is possible to allow some ICMP actions such as echo requests of the ping command with which we can check if a computer or domain is active, as well as determine variables such as latency time of packets, routers to the destination and much more..
Today TechnoWikis will explain how to enable ping in Windows Server 2019 for administrative tasks.
To keep up, remember to subscribe to our YouTube channel! SUBSCRIBE
1. Manual what it is and how to use Windows PING command
As we can see, the PING command is a powerful tool to be able to quickly know the status of the connections between different equipment, thus being able to verify its operability. It is based on the sending of packages and on a response whose information must match that of ia. Depending on the waiting time or latency, we can establish whether or not there is an error in our network connections. Thus, a quick response indicates a greater degree of success while a long wait or a null response denotes connection problems.
Before seeing how we can enable PING in Windows Server, we propose a complete manual to know in depth what the PING command is and how to use it within Windows 10 systems..
2. How to enable PING in Windows Server 2019
Step 1
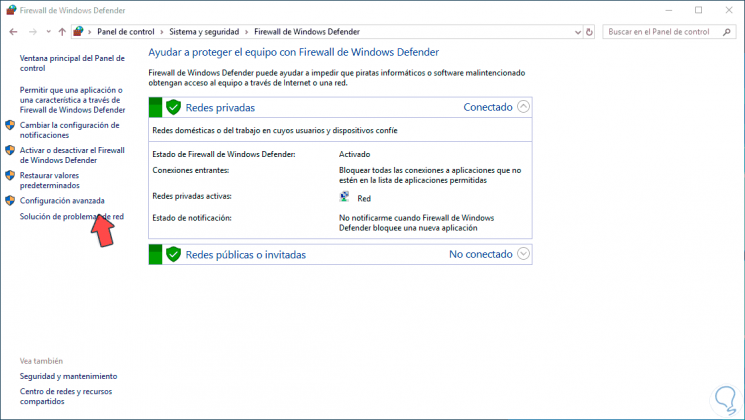
For this task we must access the Firewall configuration options in the following route:
- Windows Defender Firewall
Step 2
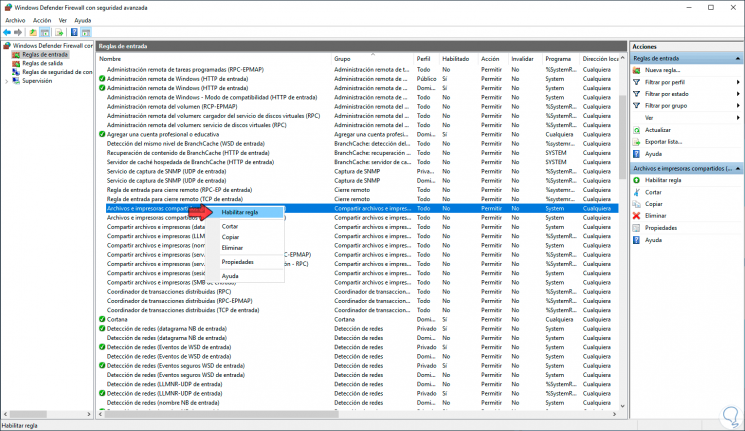
There we click on the “Advanced configuration†line and in the window that will be displayed we go to the “Inbound rules†section and there we will locate the rule called “Shared files and printers (echo request: input ICMPv4)â€, we right click on it and select the option "Enable rule":
Step 3
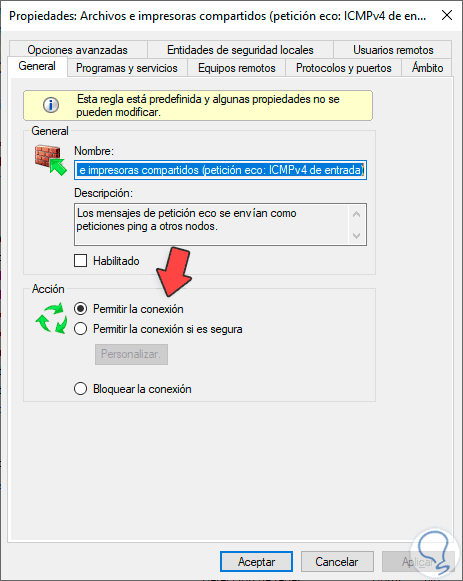
Alternatively, we can double-click on the rule to learn more about its function and from there activate the "Allow connection" box:
Step 4
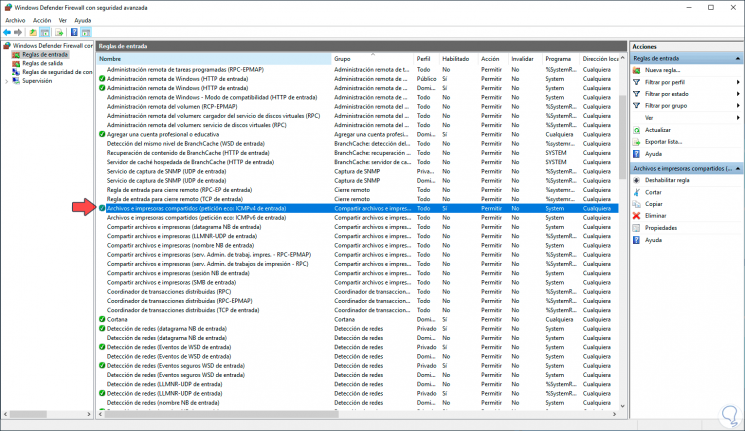
Once the rule is enabled we can see a check sign on its side:
Step 5
With this rule enabled we can access the command prompt and from there ping either an IP address or a domain name to analyze its details:
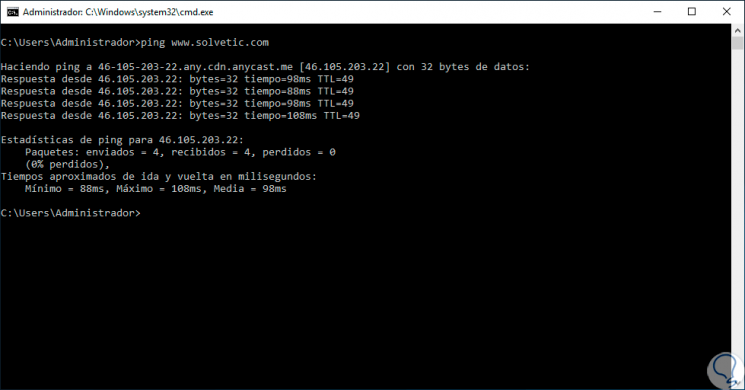
With this simple step it will be possible to activate ping in Windows Server 2019 and in this way have this support option in this dynamic operating system. As in Windows Server, you also have the possibility to enable the PING command on Windows 10 systems and thus test connectivity issues.