In all Microsoft operating systems, there are certain functions already integrated into the system through which it is possible to execute certain actions both at the system level and at the applications, one of the most recognized and used is the recycle bin . Normally, when we delete an item, it goes directly to the trash and after a while we proceed with its total elimination, unless we use the Shift + Delete key combination and thus permanently delete the objects..
In the case of Windows Server 2016 and 2019, the recycle bin plays a fundamental role since it is not only where the deleted items are directed , but also has additional functions such as the following.
Features Recycle Bin
- Possibility of recovering objects such as user, equipment, OUs and other elements of the active directory that were accidentally deleted.
- The forest functional level is required to be a minimum Windows Server 2016 R2.
- The objects remain in the recycle bin for 180 days.
- Its use can be through a graphical interface and not through Windows PowerShell.
- After activation it will not be possible to disable it.
- It is not possible to retrieve sub-objects of an object in a single process.
- Activating the recycle bin automatically increases the size of the Active Directory database.
In this case we will use the Windows Server 2019 version but it is also valid for the 2016 version. If you want to know more about this latest version you can consult this tutorial:
Now TechnoWikis will explain how we can activate this bin in Windows Server 2019 and this same process applies to Windows Server 2016..
To keep up, remember to subscribe to our YouTube channel! SUBSCRIBE
Activate Recycle Bin in Windows Server 2019
Step 1
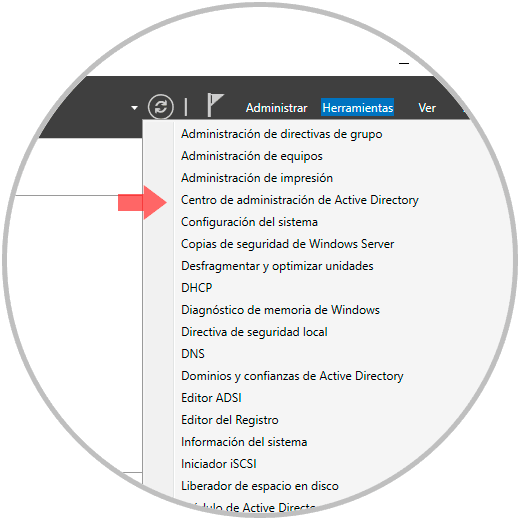
For this, we access the Server Administrator and in the "Tools" section select "Active Directory Administration Center":
Step 2
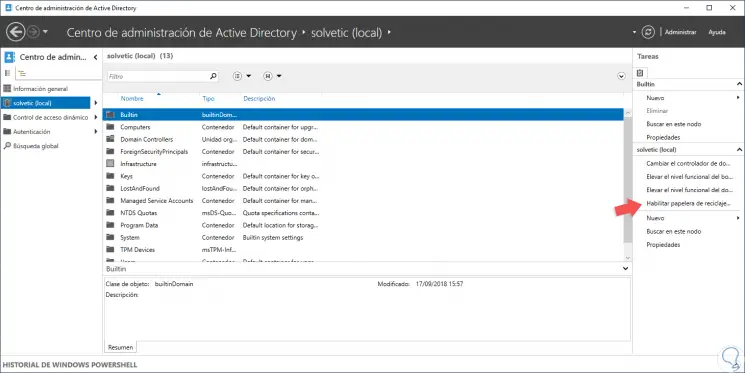
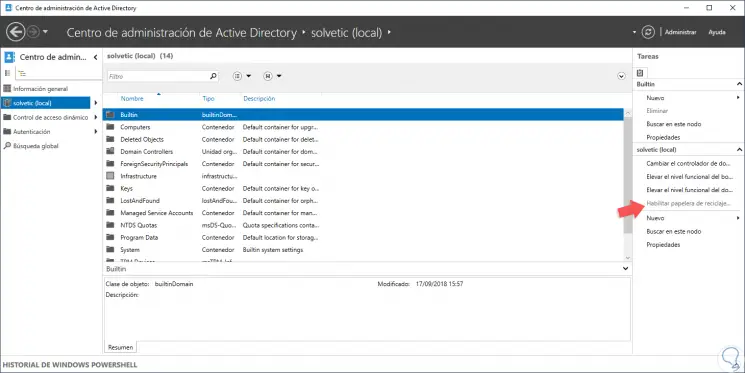
The following window will be displayed where we will go to the left side section where we find the name of the server and the indication (local):
Step 3
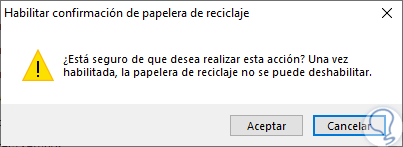
On the right side we find the “Enable recycle bin†line, we will click on it and the following message will be displayed. Click OK to confirm the enable of the recycle bin in Windows Server 2019.
Step 4
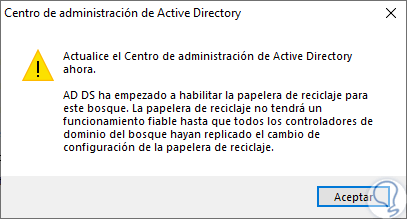
After this we will see that the process of enabling the recycle bin in the domain begins. Click OK to exit the wizard.
Step 5
There we update the Active Directory administration center and we will see that the trash is already enabled:
Step 6
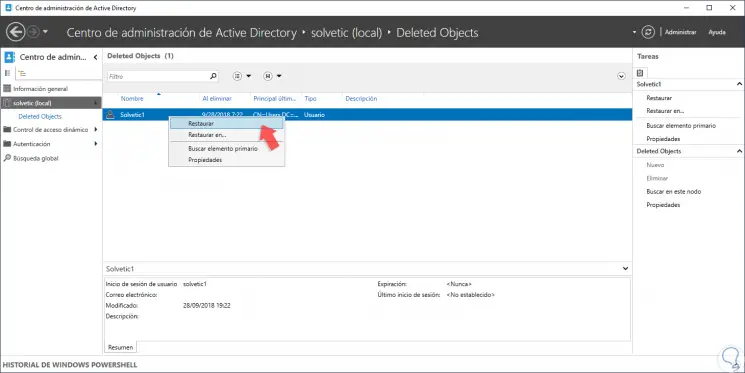
Now, when an object is deleted, it will be placed in the “Deleted Objects†folder, and there it is enough to right click on the deleted object and select the option to restore that object to the same root from which it was deleted or select a different option:
In this way, it is possible to enable the recycle bin in Windows Server 2016/2019 to take full advantage of its features in case any object is deleted without cause.