Windows Server 2016 or Windows Server 2019 handle a special parameter called "Network Discovery" which, as its name implies, allows you to see or find other computers and devices on the network and allows other computers on the network to see our server in Windows Server..
Network discovery options
There are basically three network detection options:
- Active: This option allows the server to see other computers and devices on the network and the others to see the active server.
- Disabled: This option prevents us from seeing other devices on the network and others from seeing our server.
- Custom: with this option we can adjust the settings associated with network discovery in order to allow only some of them.
Windows Server 2016 or 2019 may present an error when detecting other computers on the network, thereby affecting normal work, so in TechnoWikis we will explain how to activate network detection in Windows Server 2016 or 2016.
To stay up to date, remember to subscribe to our YouTube channel! SUBSCRIBE
Activate Network Detection Windows Server 2019, 2016
The first step will be to validate that the detection is failing, for this we go to the File Explorer and there we will go to the "Network" section where we will see a network access error..
Step 1
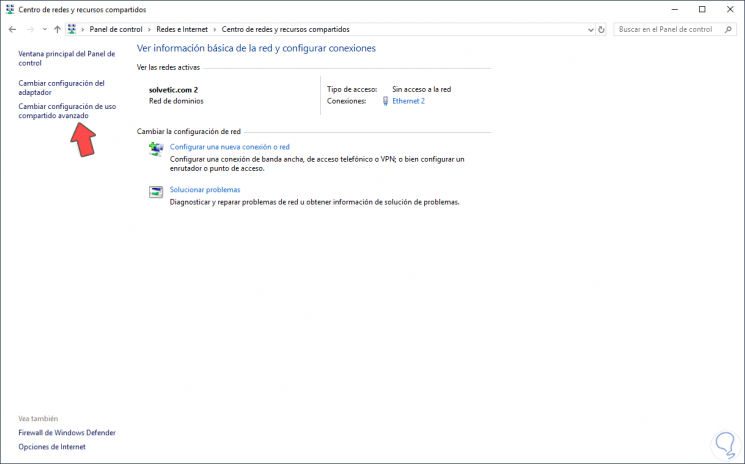
To correct it we must go to the following route:
- Center network and sharing
Step 2
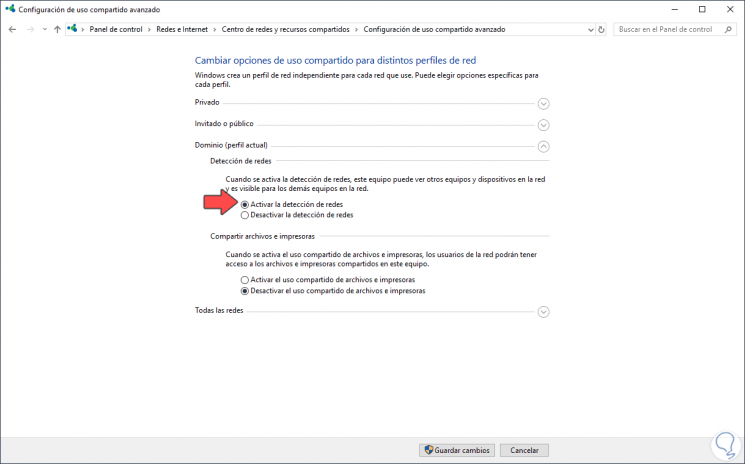
We click on the line "Change sharing settings" on the left side and in the new window that will be displayed we go to the "Domain" section and there we activate the "Activate network detection" box:
We click "Save changes" to complete the process.
Step 3
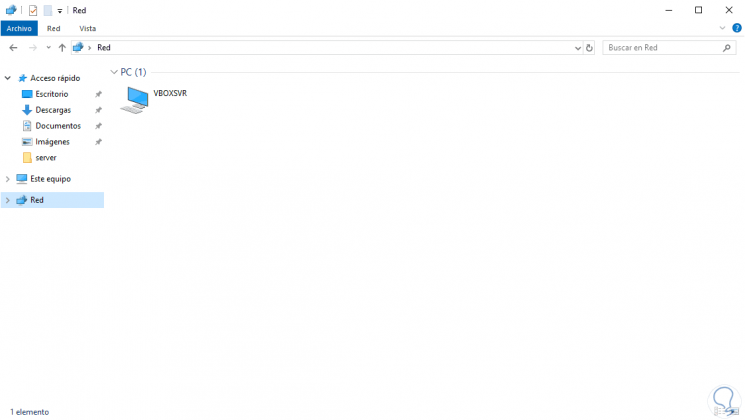
After this we can go to the Explorer and we will see that devices are detected on the network:
Step 4
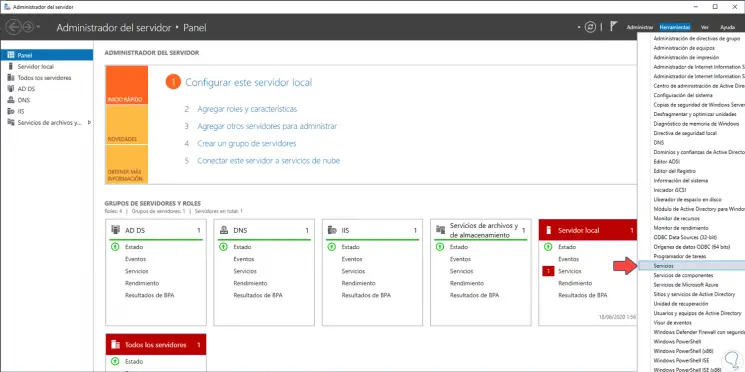
It is time to activate some services which allow the optimal operation of network detection, for this we go to the Server Administrator and there we go to "Tools" and select "Services":
Step 5
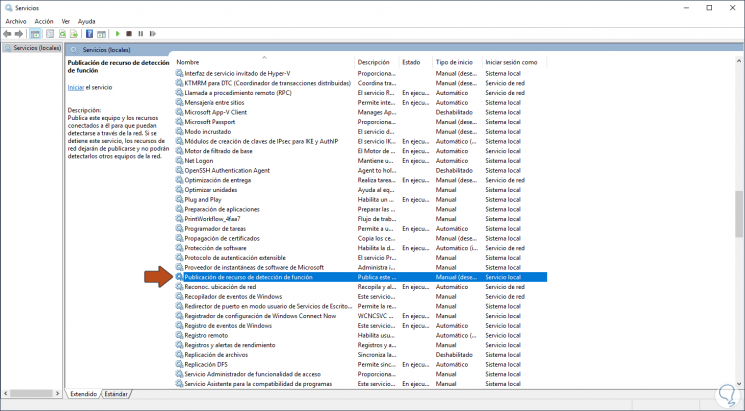
First, we locate the service called "Feature Detection Resource Publication":
Step 6
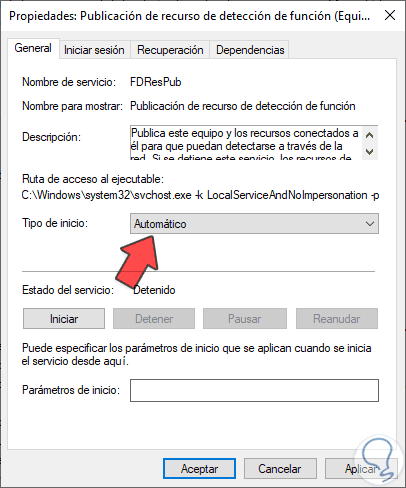
We double-click on it and set its value to "Automatic" in the "Startup type" field:
Step 7
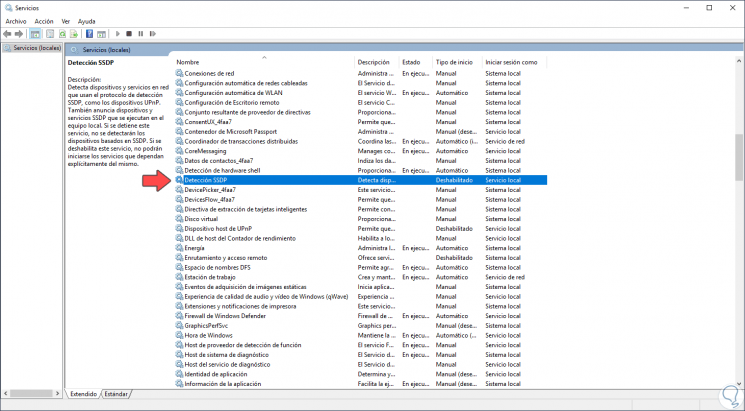
We click Apply and then we click Start, we accept the changes. We are looking for the service called "SSDP Detection":
Step 8
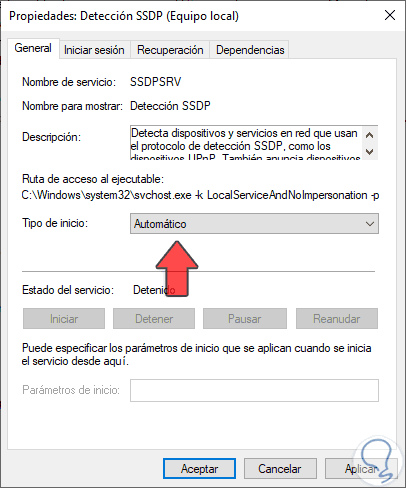
We double-click on it and select its start in "Automatic", apply the changes and start the service:
Step 9
Finally we look for the service called "UPnP Host Device":
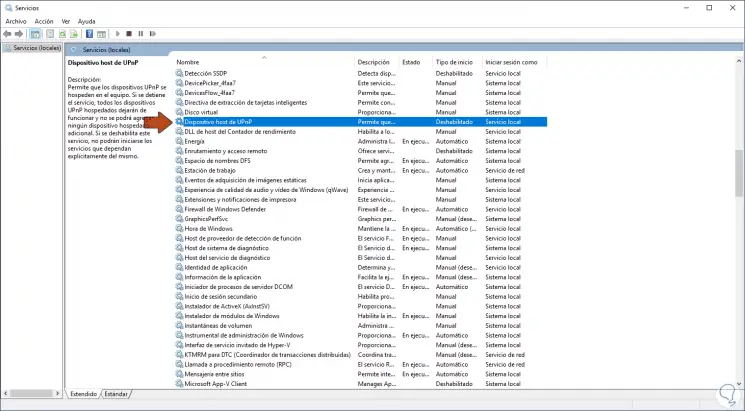
Step 10
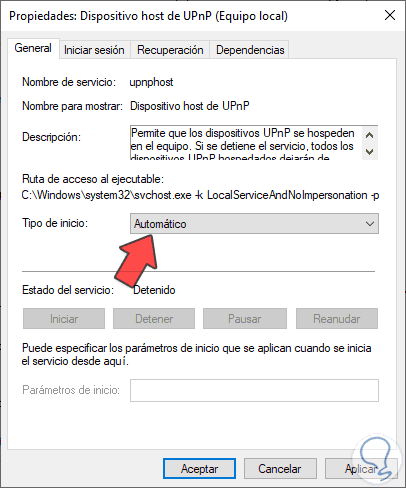
Like the previous ones, we double-click on it and select "Automatic" as the start type:
We apply the changes and start the service..
With this, the detection of networks will be an automatic process that will be carried out in Windows Server 2016 or 2019 and with it we can check the network devices on the local network.