Windows Server 2016 or Windows Server 2019 is one of the most used corporate operating systems for security , performance, compatibility and functionality features. But with all this there is a key factor that as administrators we must keep in mind and is the security of users and domain objects, when we install a new domain on Windows Server by default it will handle two group policy objects that are:
Group Policy Objects
- The default domain policy.
- The default domain controllers policy.
The domain policy is linked only at the domain level while the domain controller policy is linked to the organizational unit created on the server's domain controllers..
Password Policy Settings
The domain policy manages some settings (passwords) that are:
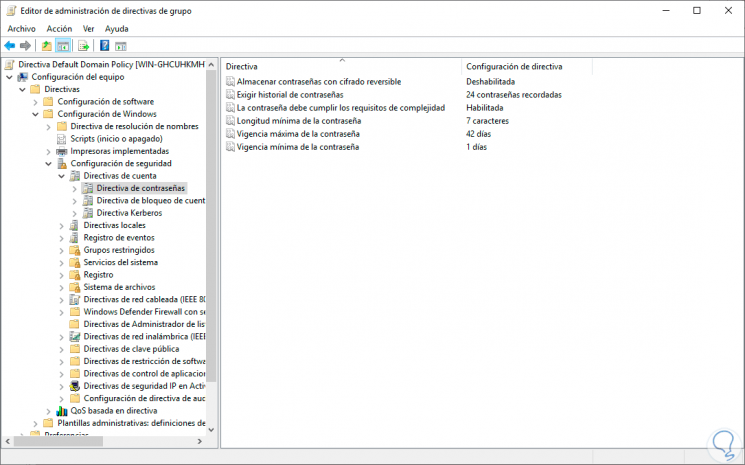
- Require password history: it is a policy that prevents the user from using the same password twice based on the password period indicated. The default value is 24, that is, only when the password has been changed 24 times can it be reused.
- Maximum password validity: this policy expires the password automatically after the specified number of days, the default value is 42.
- Minimum password validity: allows you to define the minimum password time in order to prevent the user from changing the password frequently.
- Minimum password length: As the name implies, indicates the minimum password length, the default value is 7 characters.
- The key must meet the complexity requirements: it is a policy that makes the password much more secure since it does not allow the password to be the username or part of the full username, it must be at least 6 characters long, contain at least one character either uppercase (A to Z), lowercase (a - z) or a numeric digit (0 to 9) and non-alphabetic characters such as $% #).
- Store passwords with reversible encryption: it is a policy that TechnoWikis recommends you not to enable since it hosts the password in plain text and can be accessed by other users.
Now TechnoWikis will explain how to change the default policy of Windows Server 2016 or 2019.
To keep up, remember to subscribe to our YouTube channel! SUBSCRIBE
1. See password policies in Windows Server 2019, 2016
Step 1
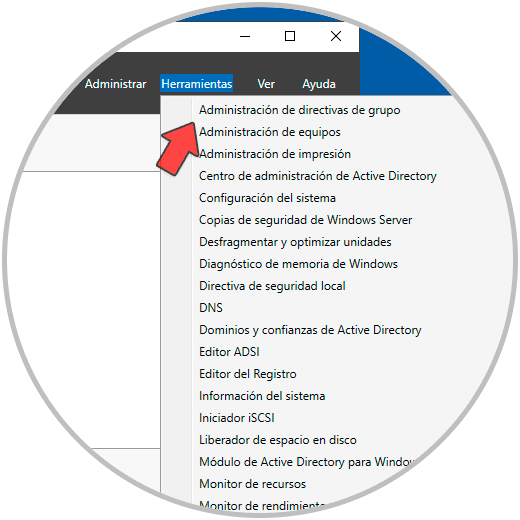
To start this process we will go to the Server Administrator and from "Tools" we select the option "Group Policy Management":
Step 2
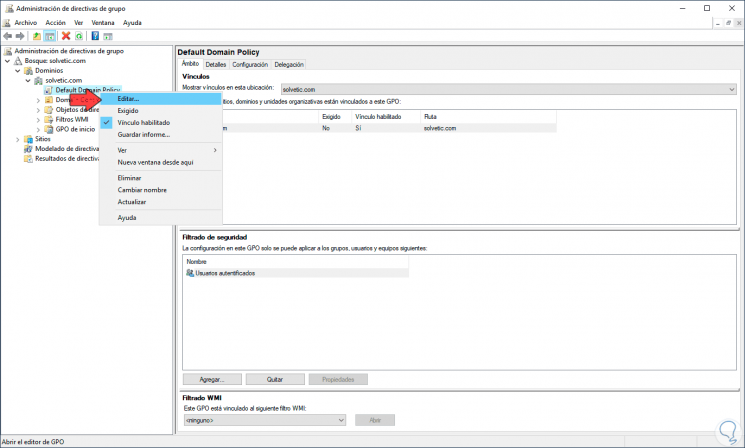
In the deployed administrator we display the Domains options and we will right click on the “Default Domain Policy†line and select “Editâ€:
Step 3
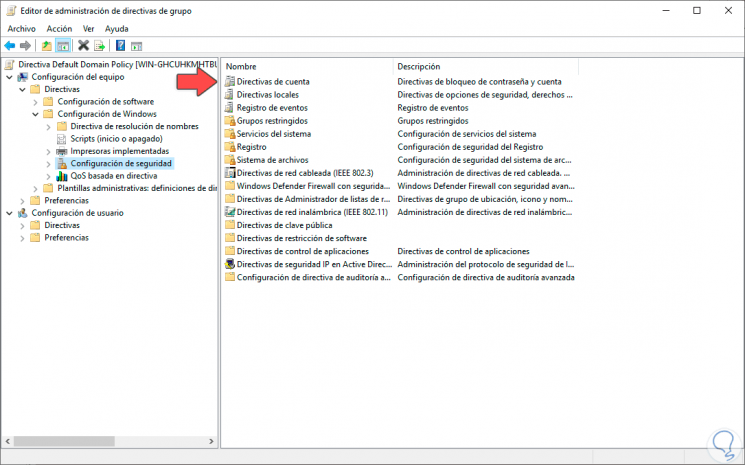
In the next window displayed we go to the route:
Step 4
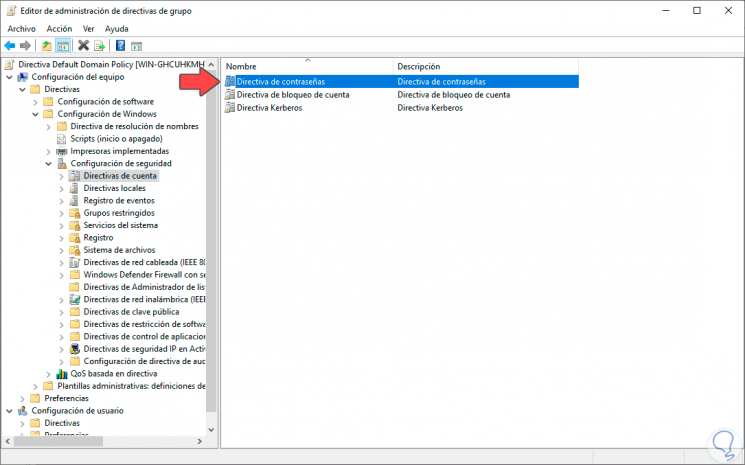
In the central policies we double-click on the “Account Directives†policy:
Step 5
We double click on “Password Policies†and we will see the options that TechnoWikis has mentioned above associated with the password in Windows Server 2016/2019:
2. Edit password policies in Windows Server 2019, 2016
Step 1
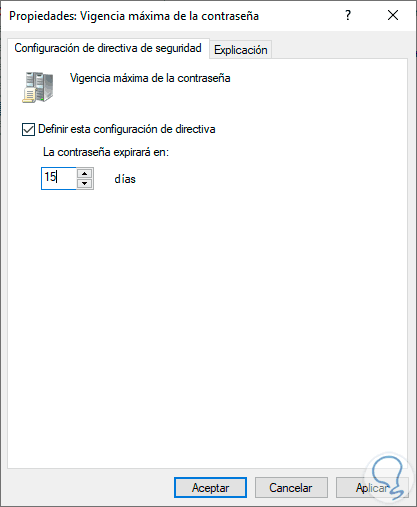
From this point we can edit the policies as necessary, but taking into account the general security of the server, for example, we can double click on the policy “Maximum password validity†and assign a new period of time. We click Apply and Accept to save the changes.
Step 2
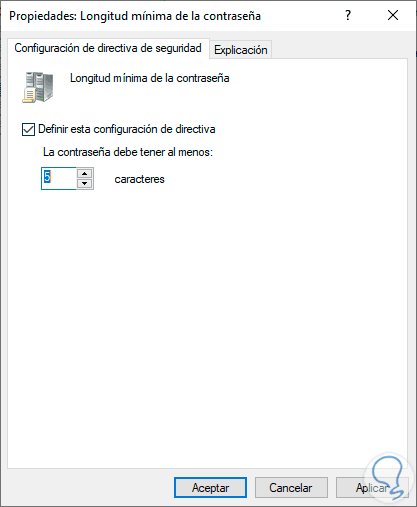
We can edit the minimum password length:
Step 3
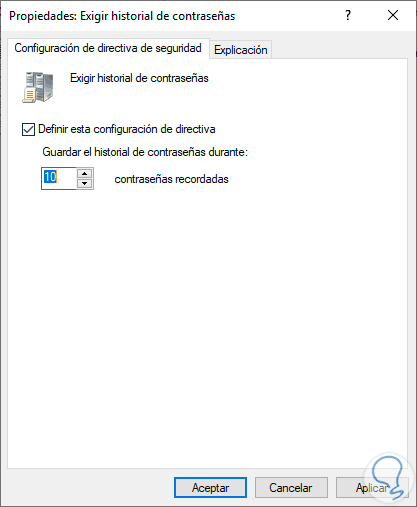
Or we can edit the password history:
Step 4
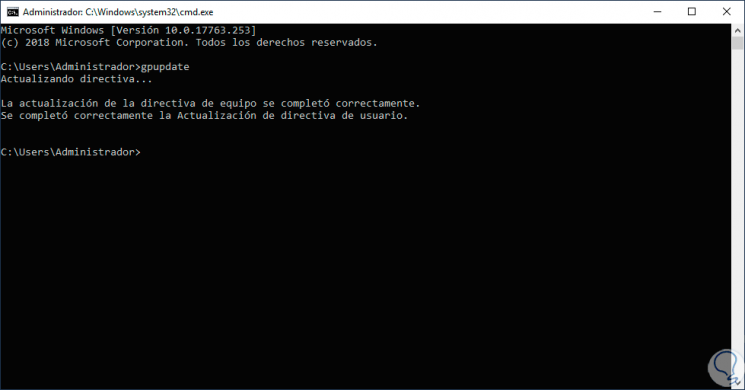
When we have made the necessary changes we can close the policy manager and access the command prompt console and there we execute the following. We do this in order to update the policies that have been modified in real time and we should not wait until the next restart of Windows Server and with this we will have the edition made.
gpupdate
As we see, it is a simple process, but very carefully edit the password policies in Windows Server 2016 or 2019 thanks to TechnoWikis..