The Firewall in Windows Server 2016 and Windows Server 2019 fulfills an essential role of security since the Firewall has the mission of preventing that attacking connections can access the server and cause damage or loss of information which in a server environment can trigger multiple failures, hence the importance of the Firewall there, now, for some administrative or support tasks, we can temporarily disable the Firewall either through CMD or GPO..
Thanks to the Firewall or firewall we can manage and control the security of our equipment by having the possibility of applying access and exit filters . Through the use of rules we can allow or deny the information traffic by our team, something that allows much more control of everything that happens on the PC. With TechnoWikis you will learn to disable Firewall Windows Server 2019 and Server 2016 using one of these methods.
Then we also leave you the video tutorial to be able to disable the Firewall in Windows Server 2019 or Server 2016..
To stay up to date, remember to subscribe to our YouTube channel! SUBSCRIBE
1. Disable Windows Server 2019 and 2016 CMD Firewall
To make use of this method in Windows Server we go to the command prompt and there we access the PowerShell sequence by executing "powershell".
Step 1
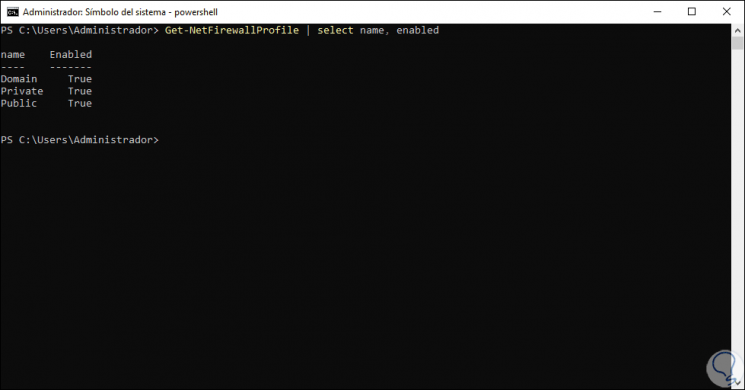
After this we enable the Firewall by executing:
Get-NetFirewallProfile │select name, enabled
Step 2
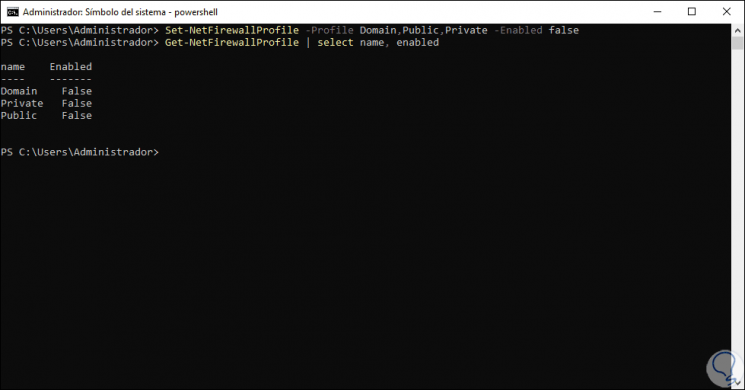
Then to disable the Firewall in Windows 10 we will execute the following:
Set-NetFirewallProfile -Profile Domain, Public, Private -Enabled false
Step 3
With the parameter "false" it has been indicated that the Firewall in public, private and domain environments is disabled, we can check the status by executing again:
Get-NetFirewallProfile │select name, enabled
Step 4
If at any time we want to enable the Firewall again in Windows Server 2016 or 2019 we will execute the following:
Set-NetFirewallProfile -Profile Domain, Public, Private -Enabled true
2. Disable Windows Server 2019 and 2016 GPO Firewall
Local group policies are another of the mechanisms available to enable or disable Firewall in Windows Server
Step 1
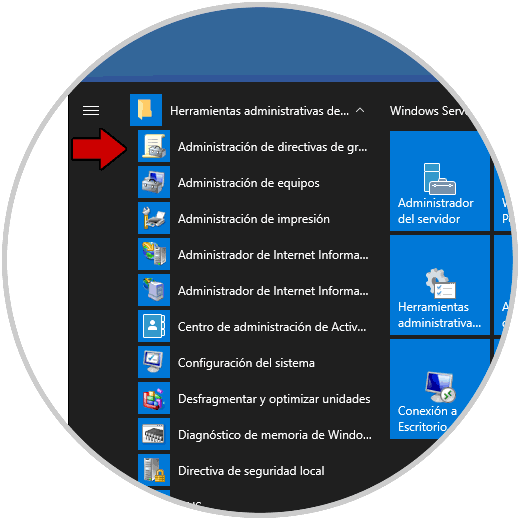
For this we go to the Start menu and in the group "Windows Administrative Tools" we select "Group Policy Management":
Step 2
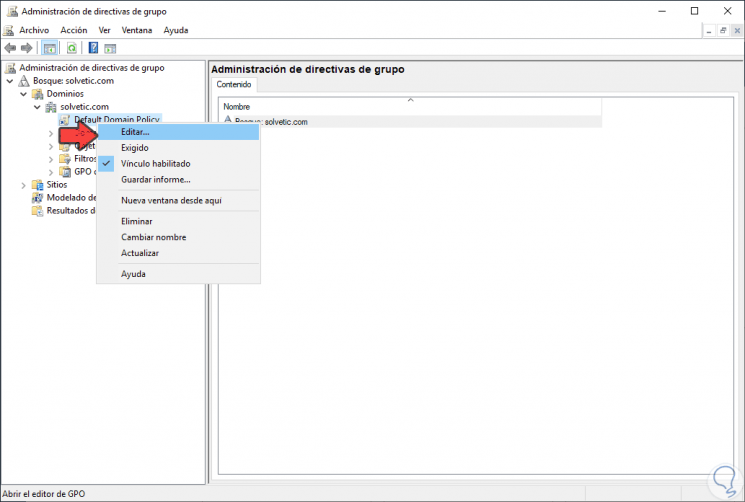
In the displayed editor we expand the domain and right-click on the “Default Domain Policy†option and select Edit:
Step 3
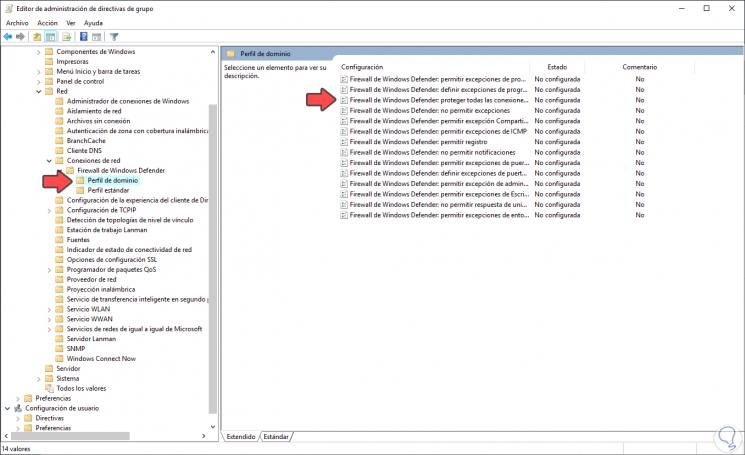
Now we go to the path:
- Windows Defender Firewall
Step 4
We select "Domain Profile" and then we select the policy called "Windows Defender Firewall: protect all network connections":
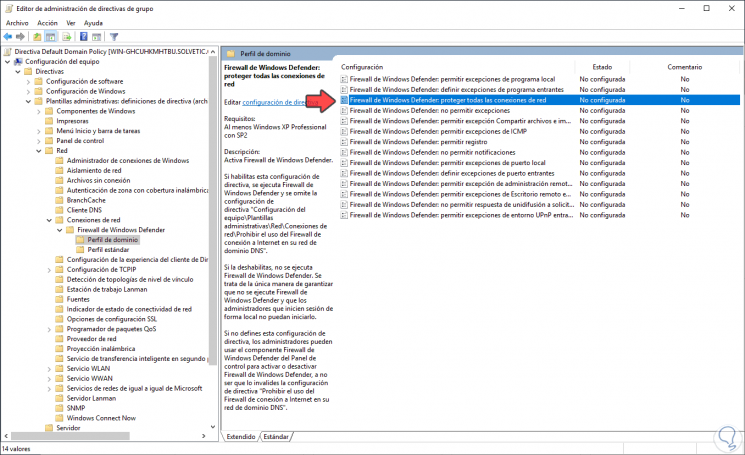
Step 5
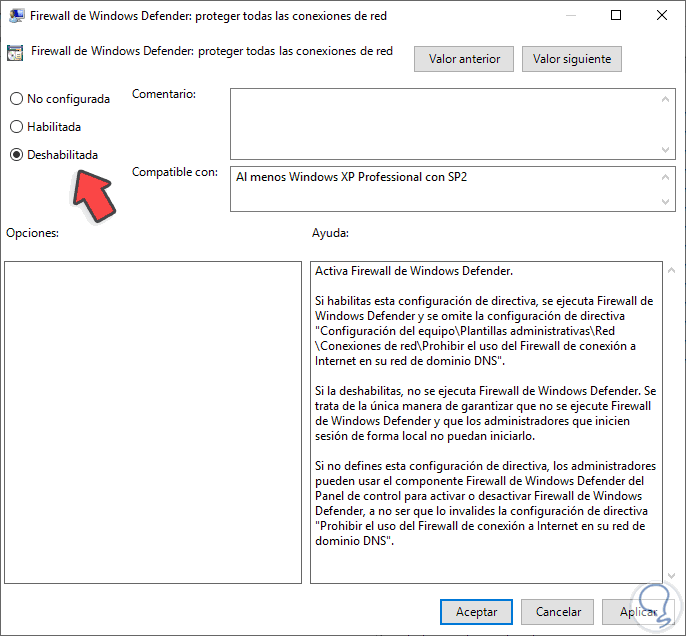
We double click on this policy and activate the "Disable" box to configure the Windows Server Firewall in this way. We click Apply and OK to save the changes.
Step 6
Now we go to the following route:
- Firewall with advanced security
Step 7
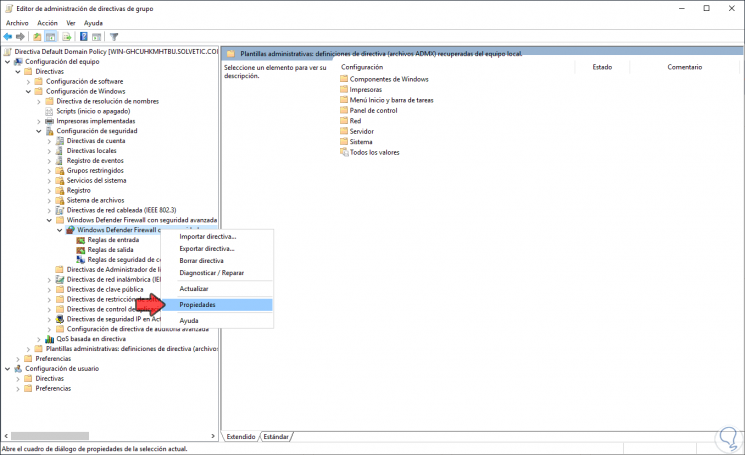
We right click on "Windows Defender Firewall with advanced security" and select "Properties":
Step 8
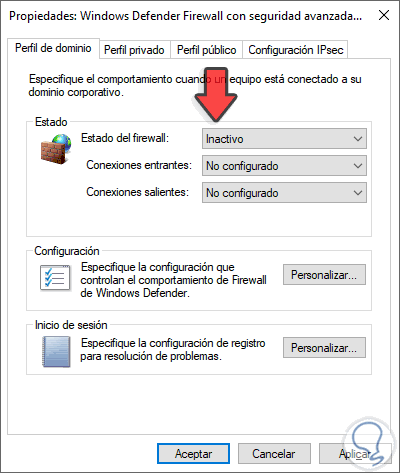
In the displayed window we will go to each of the profiles (public, private and domain) and set the "Firewall Status" field to "Inactive". We click on Apply and OK to save the changes and restart the system to apply the changes.
Step 9
After this we will go to the following route:
- Windows Defender Firewall
Step 10
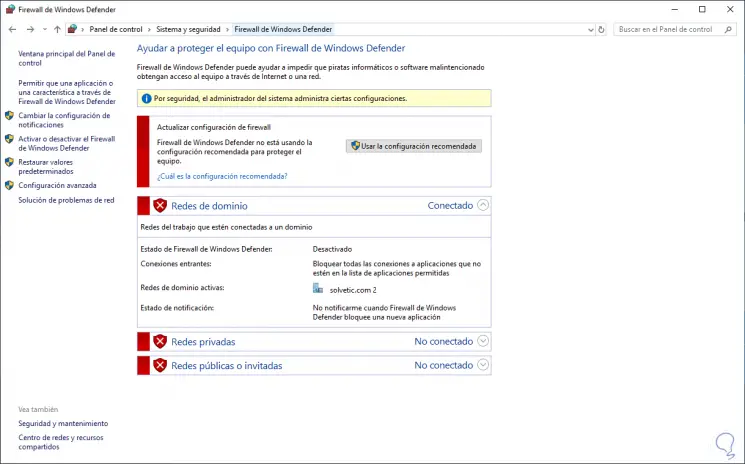
There we validate that the Firewall in Windows Server 20106 or 2019 is disabled:
With these simple steps we can disable Firewall Windows Server 2019 and Server 2016 when necessary..