It is normal for many users to have access to a Windows 10 computer either because of administration, support or simply because they do not have the option of a computer to use..
Although this may not represent security flaws, if there is a critical point and it is the storage of the hard disk , it is well known that current hard drives can have up to 2 TB capacity, if there are several users who use the equipment this little space little by little it is filled to the point that the disk can remain without more space and this produces abnormal effects on the system such as reboots, slowness, sudden shutdowns and more.
The problem is that Windows 10 does not prevent the desired accounts from being created in Windows 10, but that each of these accounts will have the possibility of using the total size of the hard disk without any restriction, which is somewhat delicate if the user does not He is aware of the way he manages space..
To solve this, Windows 10 has disk quotas which allow a specific user to use only a certain amount of disk space and, if this limit is exceeded, he will receive a notification indicating that he has exceeded the established limit.
It is important to consider some aspects such as:
- To effectively use disk quota is only possible on disks that have the NTFS file system.
- The disk quota applies to each volume.
- It can be used for a particular user, but not in a group of active users of the system.
- It can be used in editions of Windows 10 Home
TechnoWikis will analyze how we can carry out this quota configuration in Windows 10 and thus have a much more direct administration on the space on the hard disk avoiding unnecessary expenses..
To keep up, remember to subscribe to our YouTube channel! SUBSCRIBE
1. Create quotas by volume in Windows 10
This option allows us to define the storage limit for all users of the system since it is applied directly to the desired partition.
Step 1
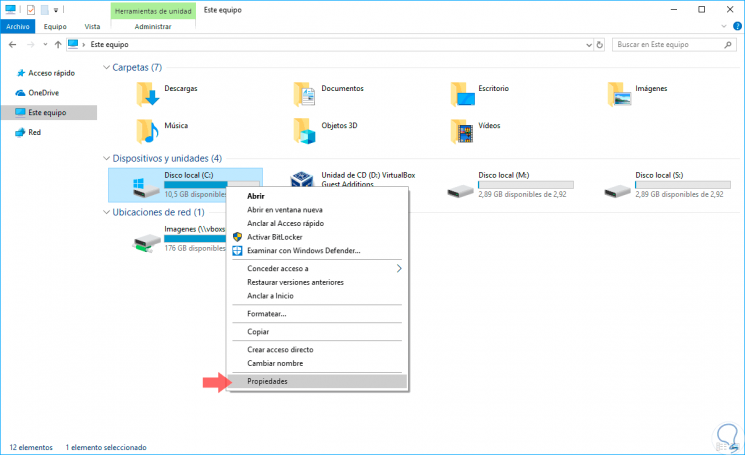
To do this, we open the Windows 10 file explorer using the following keys or by pressing the folder icon in the taskbar and once there, we will right click on the unit where the quota is to be set and select the option “Properties†:
+ E
Step 2
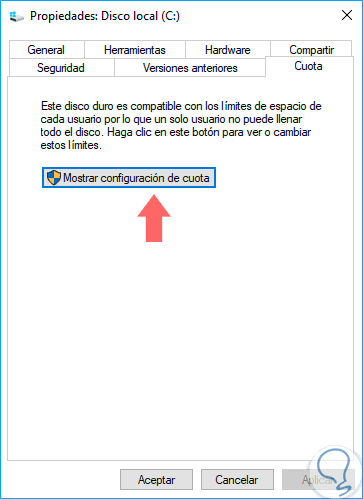
In the displayed window we go to the “Fees†tab and we will see the following:
Step 3
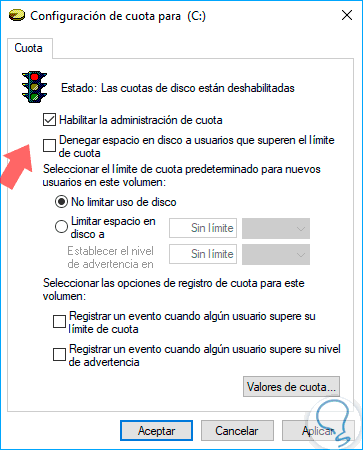
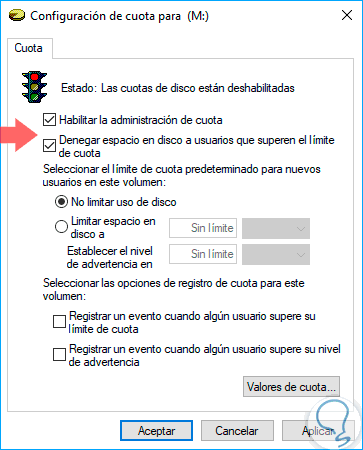
There we click on the "Show quota settings" button and in the next window we must check the "Enable quota management" box:
Step 4
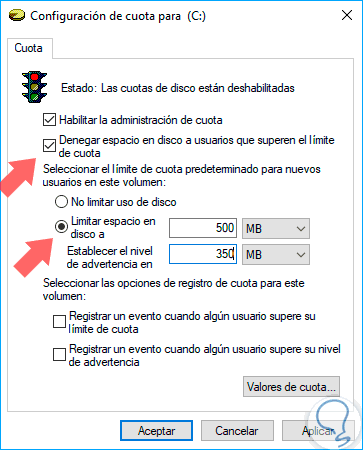
Alternatively, we activate the “Deny disk space to users that exceed the quota limit†box and activate the “Limit disk space to†box and enter the amount in KB, MB or GB:
Step 5
In this way we create a warning to the user and finally, if ignored, its storage will be prevented. Click on Apply and Accept to save the changes.
Once these points are defined, we proceed to restart the system.
If we want to edit the quota limit, simply access the “Fees†tab in the unit's properties and define the new values.
Once the system is restarted, all users will receive a warning as configured and it will no longer be possible to store files if it exceeds the indicated limit.
2. Create quotas for a specific account in Windows 10
The next option available in Windows 10 is to set a storage limit for a particular user and not for the entire volume.
Step 1
In this case we must go to the same route indicated above:
Step 2
There, we activate the “Enable quota management†and “Deny disk space to users exceeding the quota limit†boxes:
Step 3
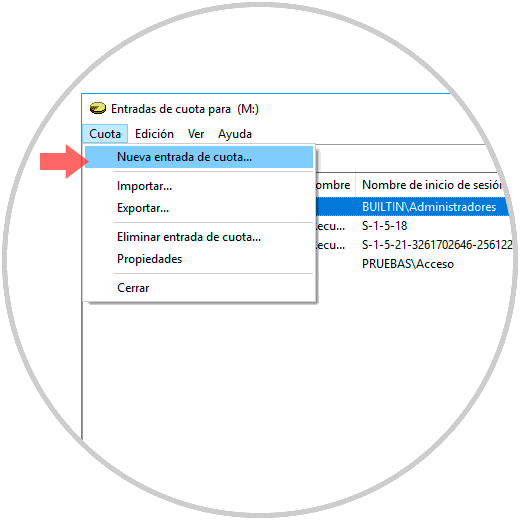
Now, click on the "Quota Values" button and in the window that appears, go to the "Quota" menu and select the "New quota entry" option:
Step 4
The following will be displayed:
Step 5
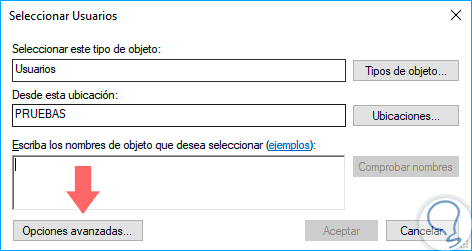
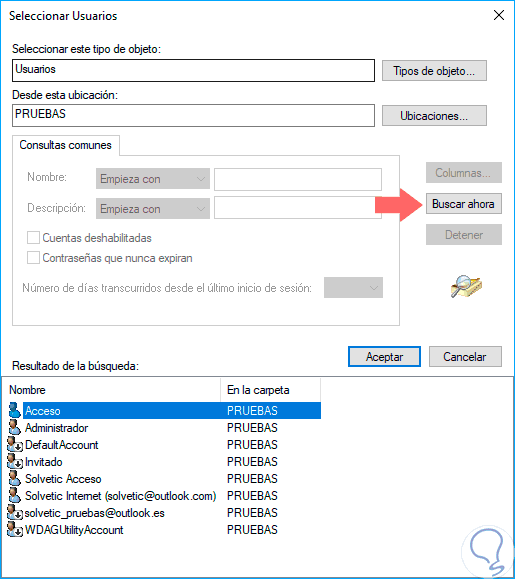
There we click on the "Advanced Options" button and in the new window click on the "Search Now" button and select the account to restrict:
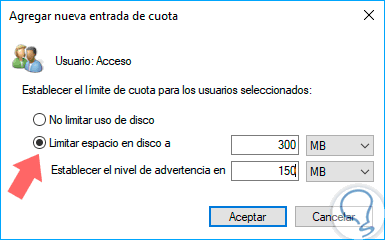
Step 6
Click on OK and then the following window will be automatically displayed where we will define the storage limit. Click on OK to save the changes.
Step 7
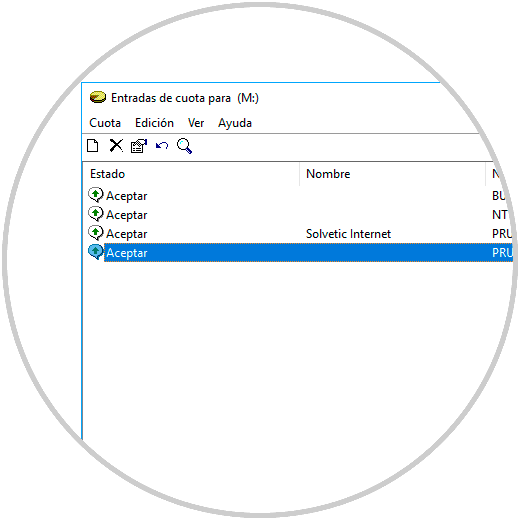
As the user adds files we can see the amount used and available:
Step 9
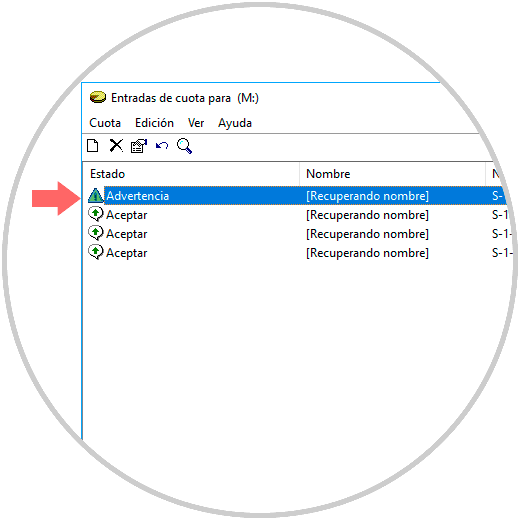
We can see that when the warning limit is exceeded, it will be reflected in that window:
Step 10
When the storage limit is reached, we will see the following message, even if the unit has enough space:
3. Delete a disk quota in Windows 10
Step 1
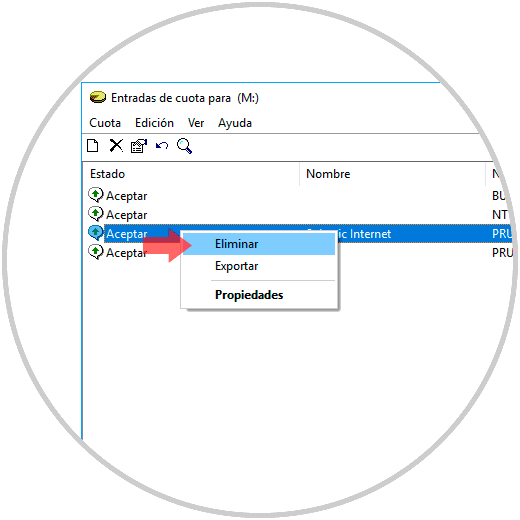
The process is simple, just go back to the "Quota Values" option and right click on the account to delete the quota and select the "Delete" option:

Step 2
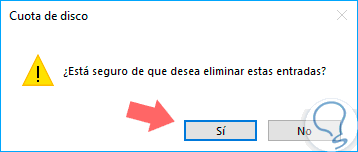
We will see the following message:
Step 3
Click on YES and in the open window, we will select the used files and click on the "Take possession" button:
This will cause that fee to be deleted and we can click on the "Close" button to exit the wizard.

We have seen how Windows 10 allows us to easily manage local storage avoiding misuse.