One of the essential elements, sometimes not so much, in Windows environments are the services, which act in the background but thanks to them it is possible to carry out tasks such as system update, enable system audio , access network and many more actions..
The services in Windows 10 have a degree of priority and they automatically start or stop, depending on the circumstance, but like any operating system, at any time a failure can occur and see how a certain application or system parameter falls and There we must take action to correct this.
TechnoWikis today will analyze how we can perform actions such as stopping, pausing or restarting a service in Windows 10 and thus recover the optimal operation..
1. Validate services in Windows 10
Windows services, regardless of edition, is based on MMC (Microsoft Management Console), which is part of the administrative tools in Windows.
Step 1
To access the services we can access as follows:
- Go to the Windows 10 search box, enter the term "services" and then select the Services application.
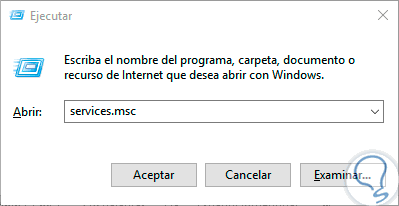
- Use the following key combination and execute the services.msc command and press Enter or OK.
+ R
Step 2
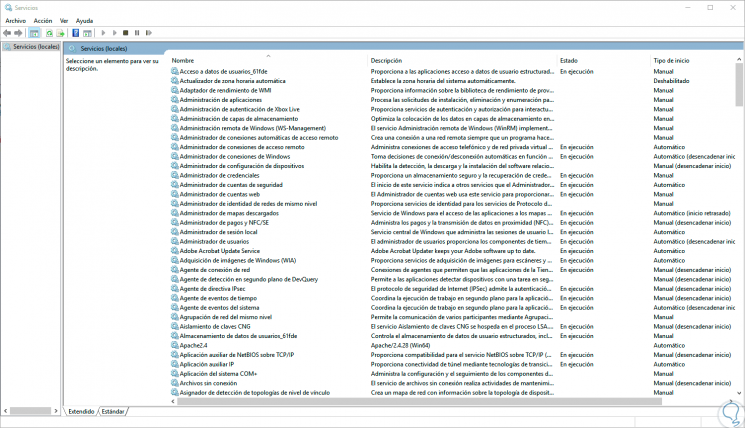
When accessing the services we will see the following:
Step 3
There we can see the complete list of Windows services with details such as:
- Windows service description
- Current status of the service
- Type of service start (Manual or automatic)
Step 4
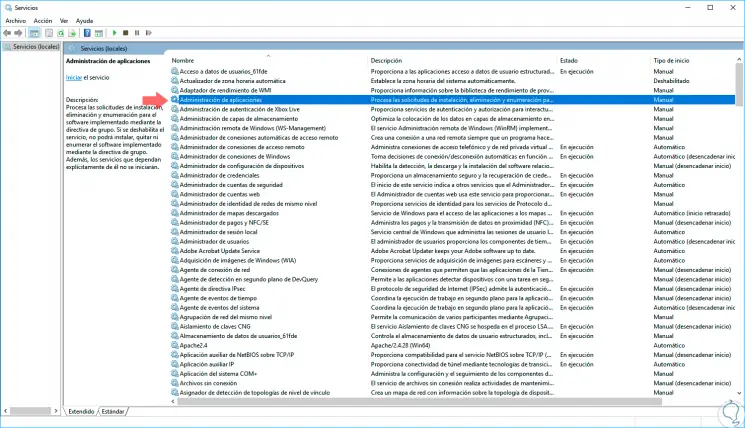
If we want to see in detail the general function of a service, just select it and on the left side we can see the full explanation of this process. In addition, we can validate if a service is running or not, just look at its current status in the "Status" column and there we have two options:
2. Start services in Windows 10
Step 1
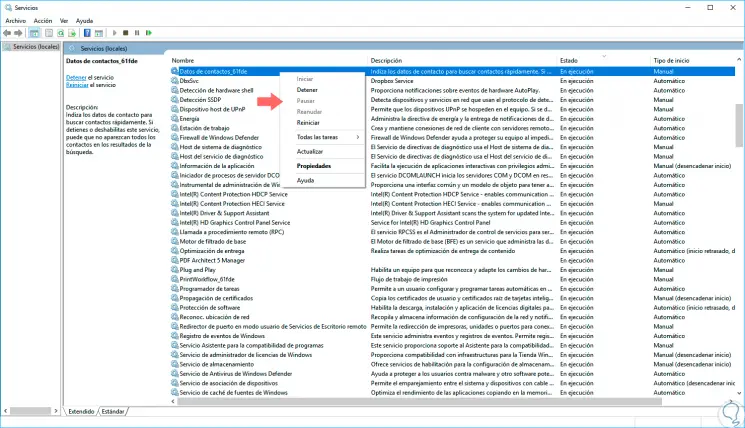
If the service is running we can see the legend "In execution" and in addition to this, by clicking on the service, the option "Start" will be disabled:
Step 2
If, on the other hand, a service is not active, no legend will appear in the Status column and by right clicking on it we will only see the “Start†option available:
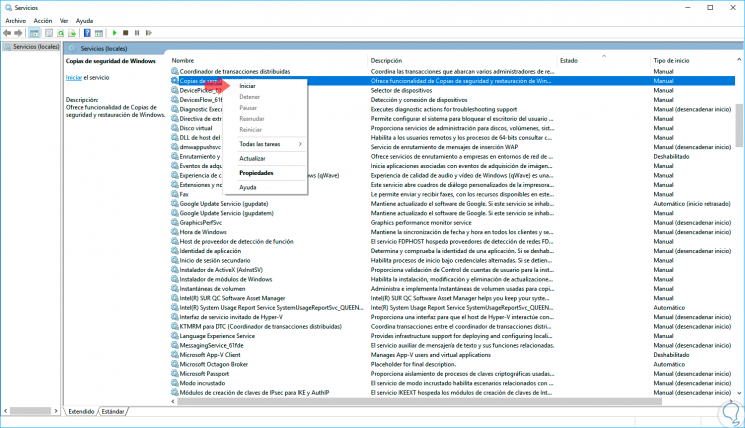
Step 3
We can note that in the Status column some services are in manual mode and others automatic, the main difference is that the automatic services are started at the time with Windows 10 and the manuals will only be started when we run the application associated with that service.
In case we consider that some service that is in manual mode must be automatic, its change process is simple, for this we will right click on it and select the “Properties†option, or simply double click on it:
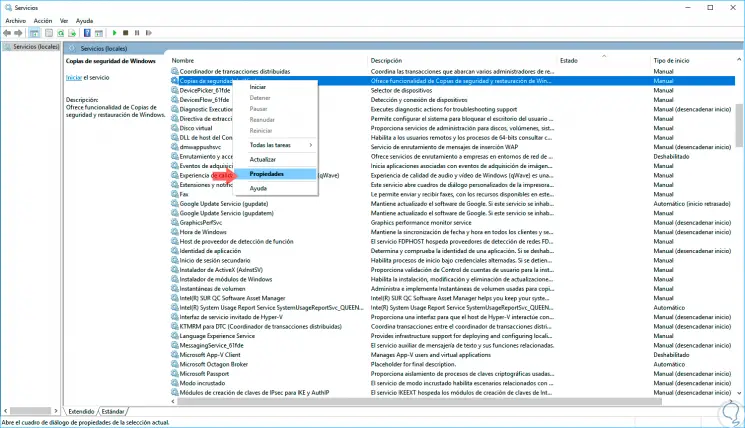
Step 4
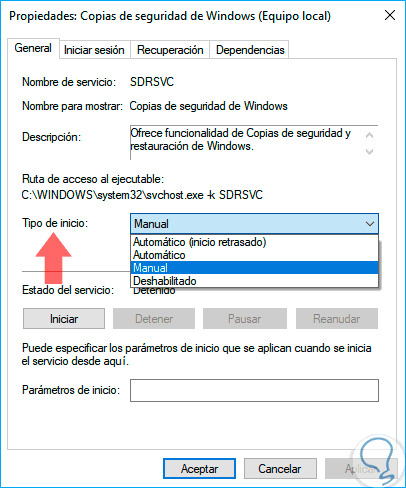
The following window will be displayed where we go to the “General†tab where we can see detailed information of the service, as well as define its type of start:
Step 5
We can see that we have the following Start Type options:
Automatic (delayed start)
There, the start of the service will be active after Windows 10 is fully started.
Automatic
The service will be started when Windows 10 starts.
Manual
The service will not start automatically, but it can be started by another process or device in the system.
Disabled
The service will not be started unless we enable it from the Services interface.
Step 6
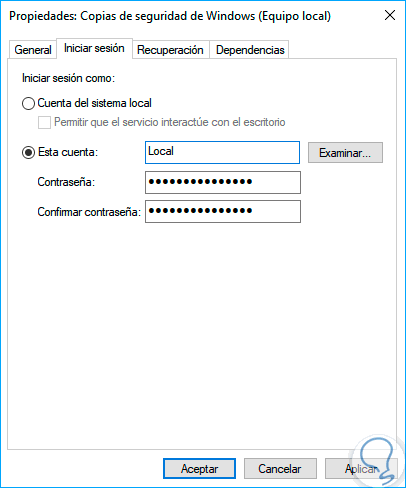
In the "Login" tab we have the opportunity to select with which system account or Windows Domain the service can be executed:
3. Restart or stop services in Windows 10
Step 1
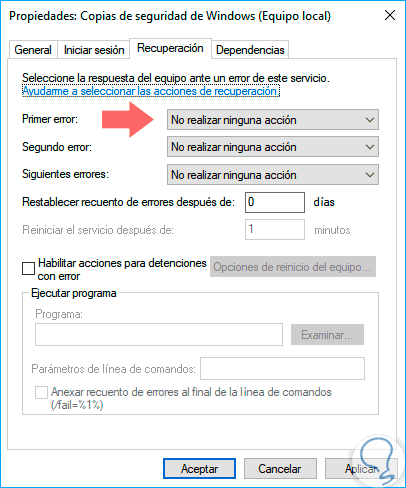
In the "Recovery" tab we can define certain triggers to restart the service in case something bad happens on the computer:
Step 2
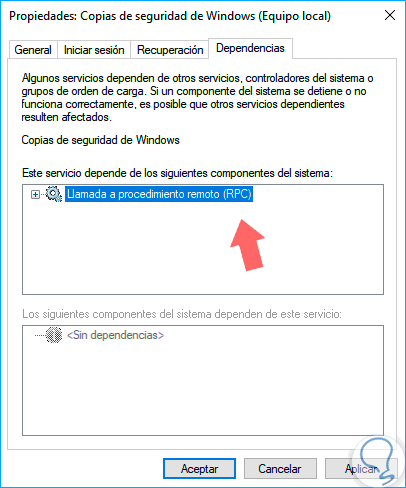
Finally, in the “Dependencies†tab we can see what other services or parameters depend on, it is ideal to verify this before making any changes in the service so as not to affect all the general behavior of the service:
Step 2
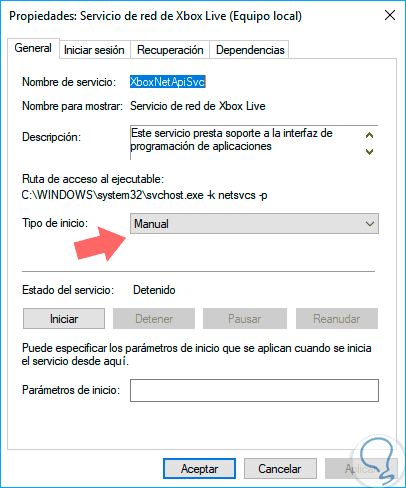
Finally, we can start a service from the "General" tab and clicking on the "Start" button:
Step 3
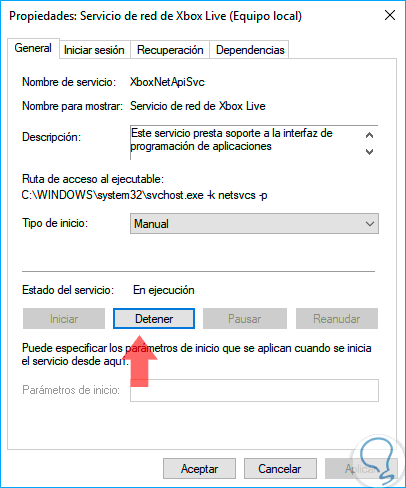
Once started we will see that the only option available is "Stop":
It is important and fundamental that we be clear about what kind of services we can or cannot stop or start so as not to affect the optimal behavior of Windows 10.