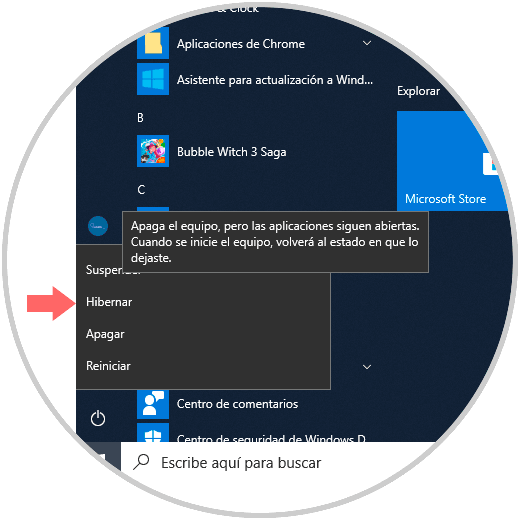
Windows 10 includes useful features to better manage hardware and energy resources and one of the best known is hibernation , this allows the computer to enter a sleep mode without closing all programs and applications which allows us to quickly access to these when activating the system again .
Today we will learn to activate this option in the Windows 10 Start menu..
To keep up, remember to subscribe to our YouTube channel! SUBSCRIBE
1. Activate hibernation in the Start menu using the Control Panel in Windows 10
Step 1
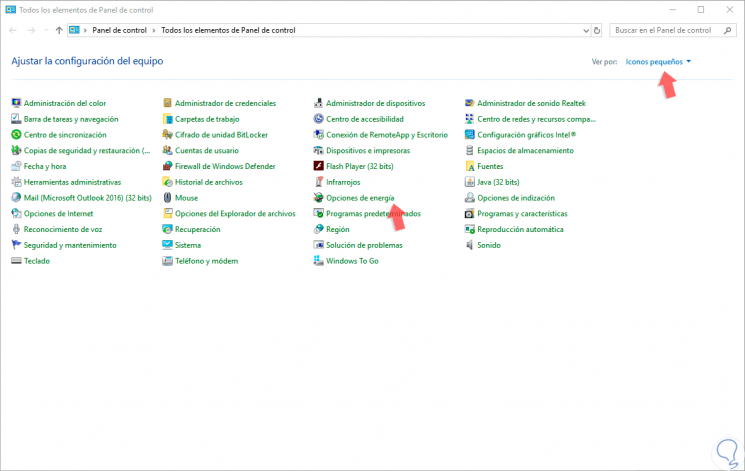
To activate hibernation in the Start menu using this method, we go to the control panel and there we select "Small icons" in the "View by" field:
Step 2
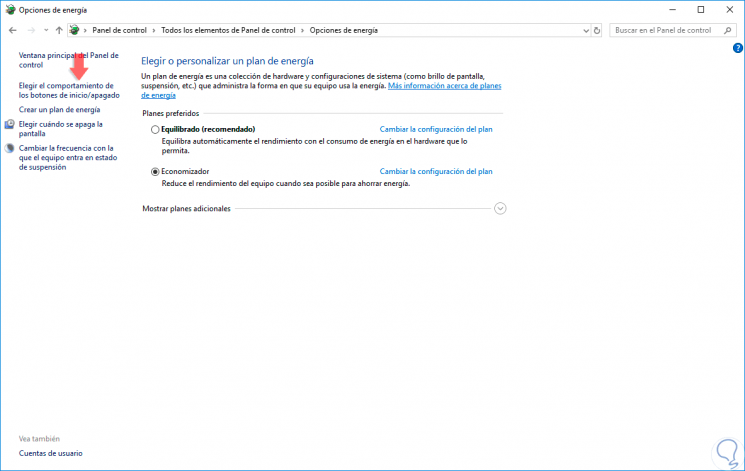
There we select the line “Energy options†and the following will be displayed:
Step 3
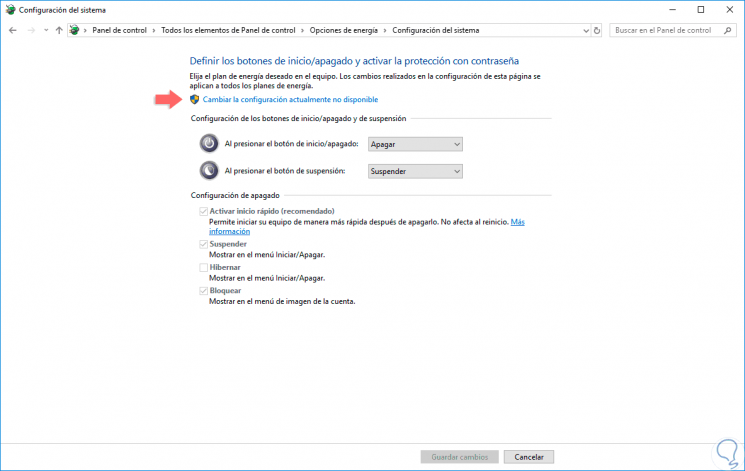
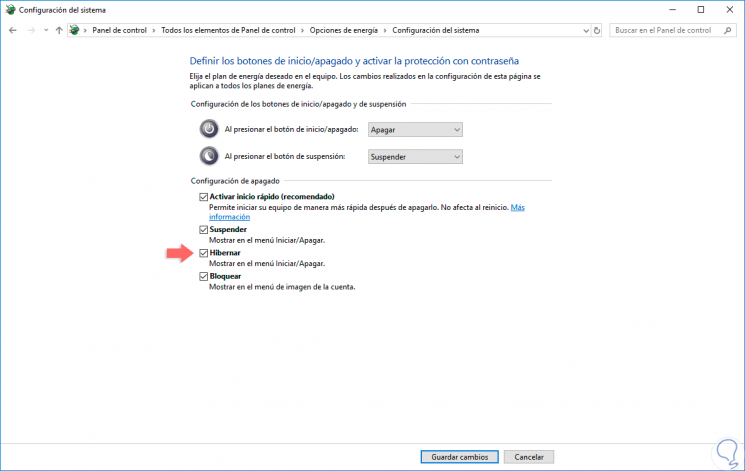
Now, we will click on the line “Choose the behavior of the start / shutdown buttons†and we will be directed to the following window:
Step 4
There we click on the “Change currently unavailable settings†line to make changes and now we will activate the “Hibernate†box. Click on the "Save changes" button to apply the changes made.
2. Enable or disable hibernation in Start Menu with commands in Windows 10
Step 1
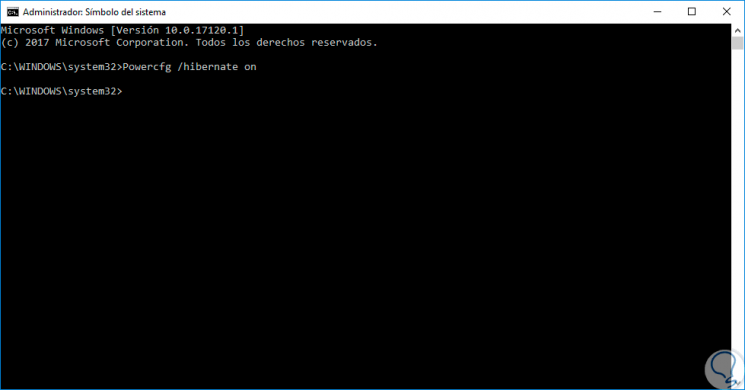
This process is simple, for this we must access the command prompt as administrators and run the following line to enable hibernation:
Powercfg / hibernate on
Step 2
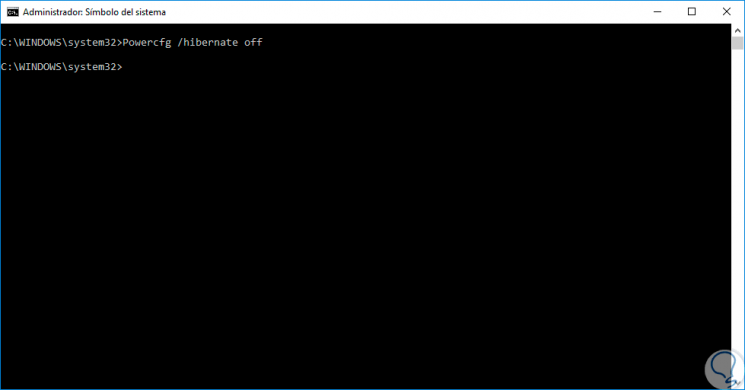
This process is useful when in the previous step we do not have the option to Hibernate active and we must remember that the hibernation function consumes approximately 7.5 GB of space on the system's hard disk. At the moment we want to eliminate the hibernation function we will execute the following:
Powercfg / hibernate off
Step 3
Now, when we press the shutdown button we will see the hibernation option available there:
