When you use the Windows 10 or Cortana search box to search for a term, you can see in the web tab that all the results displayed will be opened with the Bing search engine . Bing is the browser that took over from Live Search from Microsoft. It entered into operation in 2009 and its main objective has been to follow its Chrome opponent closely with Google and although it has evolved over time, it has not been able to reach its level. Its structure basically consists of a main page with background content that varies every day. We also found the main search box to find what we need..
This process involves that everything we seek through this method is redirected to Microsoft servers, which represents a security and privacy flaw so that one of the new options that are integrated and focused on improving the security of Windows use is to disable web integration with Bing search. But it is important to clarify that if we use Cortana we cannot disable Bing, in that case we should disable Cortana, but the process works without problems if we use the search box on the Start menu.

TechnoWikis will explain how to disable Bing in the Windows 10 Start menu..
To keep up, remember to subscribe to our YouTube channel! SUBSCRIBE
How to disable Bing in Windows 10
First of all, you must understand that the process to be carried out will be done using the registry editor, so we advise you to create a backup copy since a bad configuration of these can trigger general operating system errors.
Step 1
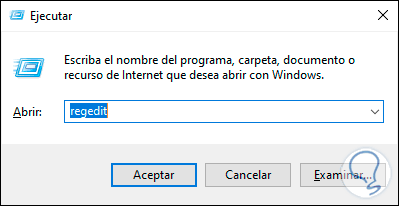
To access the Registry Editor we will use the following keys and execute the “regedit†command:
+ R
regedit
Step 2
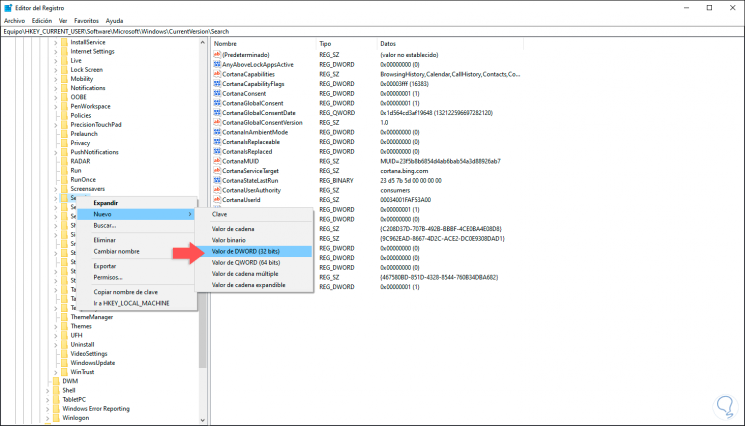
Click on Accept, we accept the message of UAC (User Account Control) and in the window we will go to the following route:
HKEY_CURRENT_USER \ SOFTWARE \ Microsoft \ Windows \ CurrentVersion \ Search
Step 3
There we right click on the Search key and select the New / DWORD Value option (32 bits):
Step 4
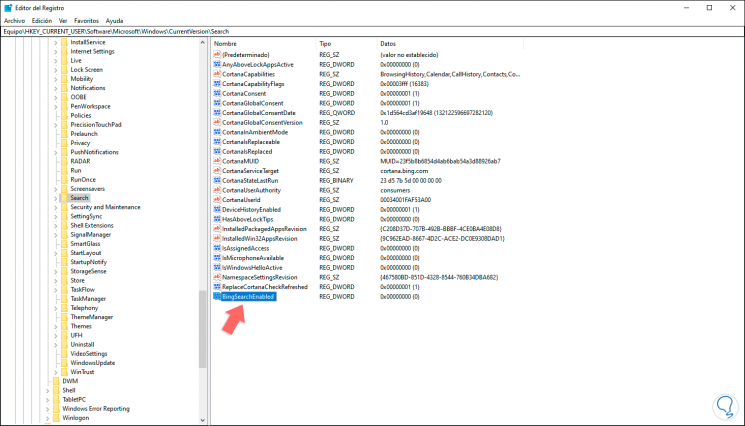
This new DWORD value will be called "BingSearchEnabled":
Step 5
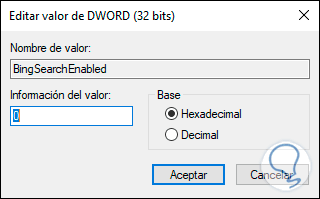
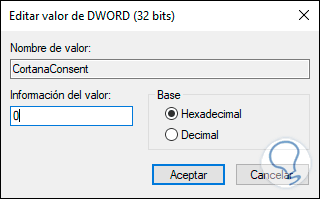
Next, we double-click on this value, (or right-click / Modify) and in the displayed window we must enter in the Value type field the number zero (0):
Step 6
Click OK to apply the changes and in the main window we find an existing DWORD value called CortanaConsent:
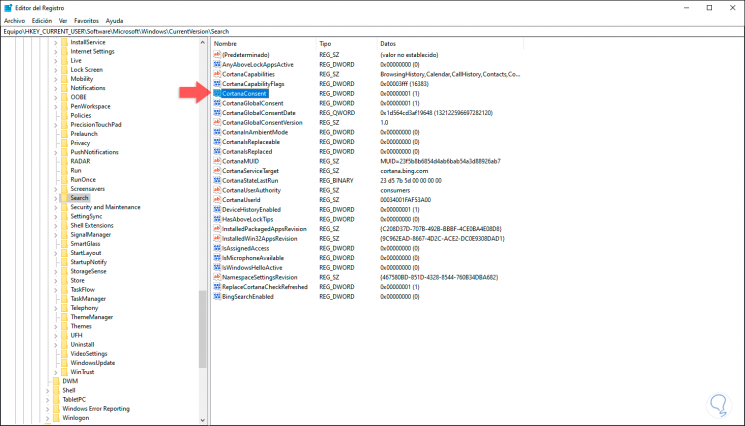
Step 7
We must double click on this DWORD value and modify its value from one (1) to zero (0). Click on OK to save the changes.
Step 8
If CortanaConsent does not exist, we must right click on Search and choose New / DWORD Value (32 bits) and assign the name to the new DWORD value. We can close the registry editor of Windows 10 and now when we try to perform a search from the Start menu we can see that no web results will be displayed:
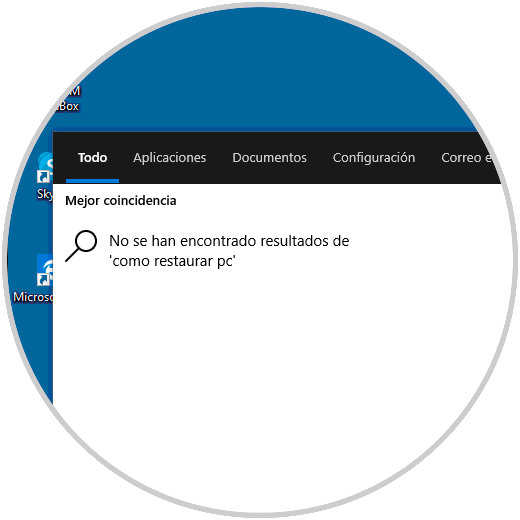
Note
You can see that even the "Web" tab has been disabled from the Start menu, which will prevent our searches from being redirected to Microsoft servers where our data can be manipulated significantly affecting our privacy and in extreme cases security.
With these simple steps that TechnoWikis has explained to you, it will be simple to improve somewhat the privacy of searches in Windows 10.