When we work with our computer, we like that the system settings and preferences are configured in the best possible way, so that the user experience is as appropriate as possible. That is why it is interesting to know the characteristics of our team to be able to access them at any time..
Windows 10 integrates a series of features that are developed so that the system is much more functional, compatible and at the service level is more complete. Some of these features are focused on messaging clients, others on browsers and some more on security policies. Similarly, we must bear in mind that the installation or uninstallation of some features requires a restart or not of the equipment.
TechnoWikis will explain how we can enable or not the features from CMD, PowerShell or graphic menu and from here have the best control of these features of the operating system..
1. How to activate a feature from the Windows 10 command prompt console
Step 1
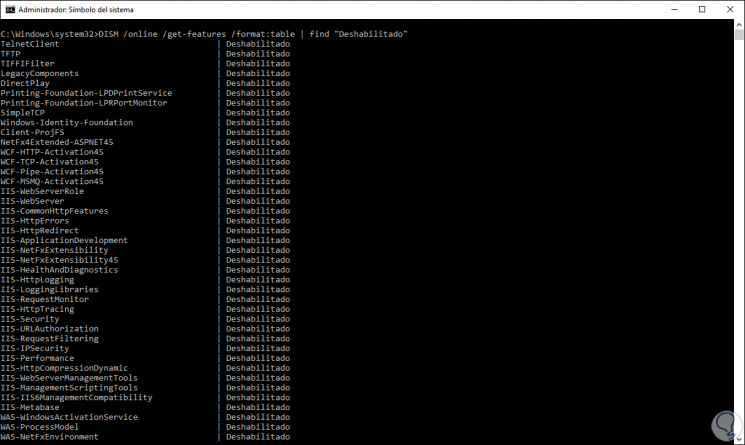
The first step to take will be to access the command prompt console as administrators, once there we are going to list the features that are disabled with the following command:
DISM / online / get-features / format: table | find "Disabled"
Step 2
DISM (Deployment Image Servicing and Management) is a Windows functionality thanks to which it is possible to maintain and prepare the images of the Windows operating system. When executing this command we will obtain the complete list of the features that are currently disabled:
Step 3
On the left side we find the name of the feature, this is key to define which one has to be activated, then we use the following syntax for its activation:
Dism / online / Enable-Feature / FeatureName: "Name" -All
For example, if we are going to activate "TFPT" we enter:
Dism / online / Enable-Feature / FeatureName: "TFTP" -All
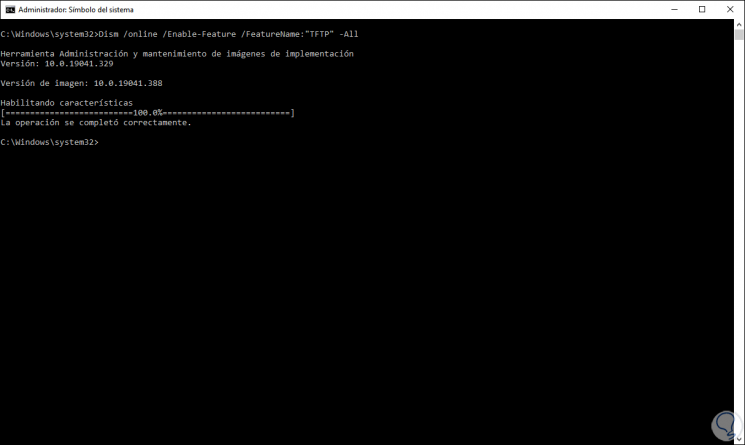
We see that the result has been completed correctly.
2. How to disable a feature from the Windows 10 command prompt console
Now, if the objective is to disable any feature from CMD or the command prompt, we must first validate which features are active.
Step 1
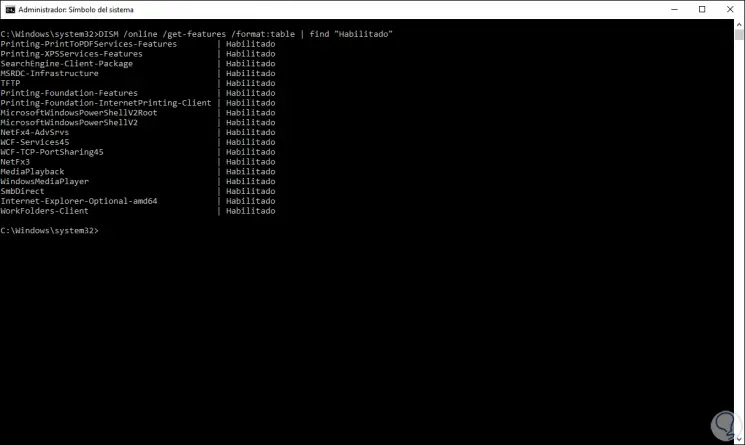
For this we execute the following command:
DISM / online / get-features / format: table | find "Enabled"
We will look at the list of active features at the moment in Windows 10.
Step 2
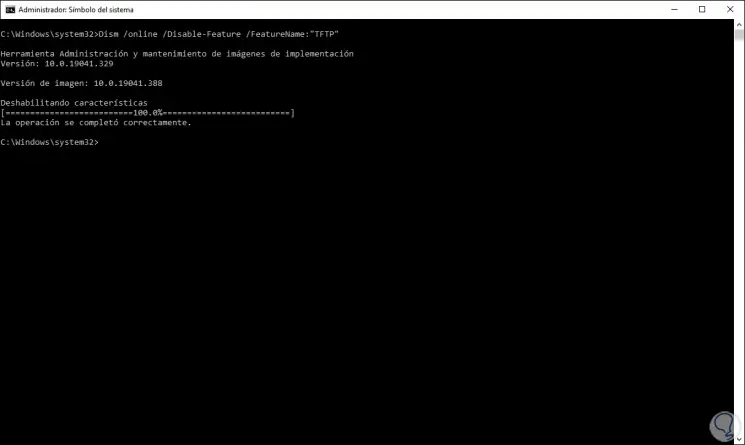
To disable it we will use the following syntax:
Dism / online / Disable-Feature / FeatureName: "Name"
To disable TFTP we execute the following:
Dism / online / Disable-Feature / FeatureName: "TFTP"
So we have the command prompt console to manage the features in Windows 10..
3. How to activate a feature from PowerShell Windows 10
PowerShell has been becoming the management console on current Windows 10 systems, gradually replacing CMD since PowerShell is more comprehensive due to the use of cmdlets.
Step 1
Therefore, to activate a feature through this method, we must first know which are disabled, we execute the following in the PowerShell console as administrators:
Get-WindowsOptionalFeature –Online | Where-Object {$ _. State –eq “Disabled”} 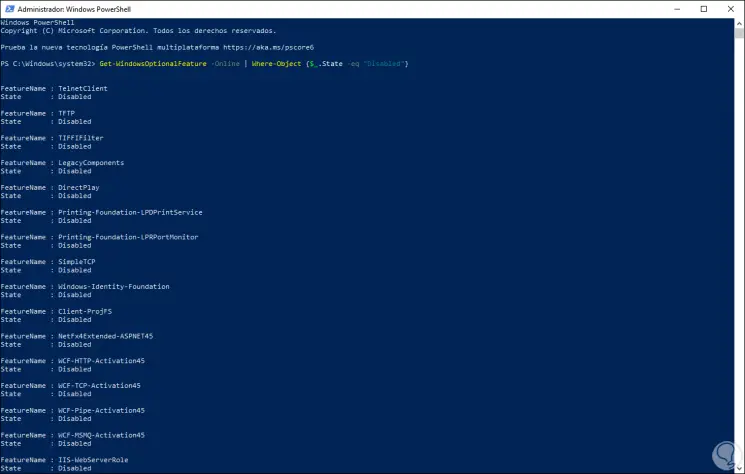
Step 2
We can see the name of the feature in the field “FeatureName, if we want more details of each available feature we must execute the following:
Get-WindowsOptionalFeature -FeatureName * –Online | Where-Object {$ _. State –eq “Disabled”} Now we use the following syntax to enable the feature in Windows 10 through PowerShell:
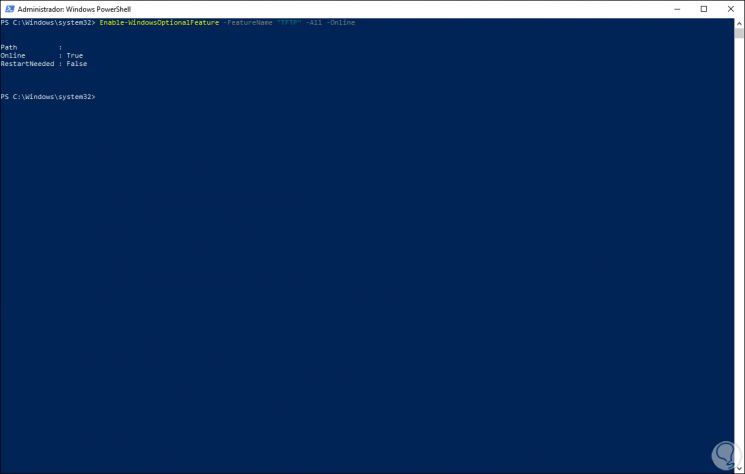
Enable-WindowsOptionalFeature –FeatureName "Name" -All -Online
Step 3
For example, to activate TFTP we enter the following:
Enable-WindowsOptionalFeature –FeatureName "TFTP" -All -Online
Note
In some cases it will be requested to reboot the system.
4. How to disable a feature from PowerShell Windows 10
For this process the first thing is to know in detail which features are active in Windows 10.
Step 1
To know this we must execute the following line:
Get-WindowsOptionalFeature –Online | Where-Object {$ _. State –eq “Enabled”} 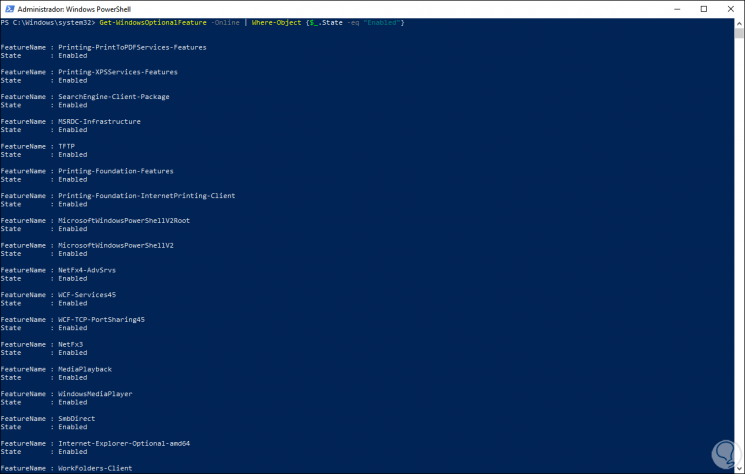
Step 2
To access more complete details we must execute the following:
Get-WindowsOptionalFeature -FeatureName * –Online | Where-Object {$ _. State –eq “Enabled”} With this in mind we will use the following syntax to disable the desired feature:
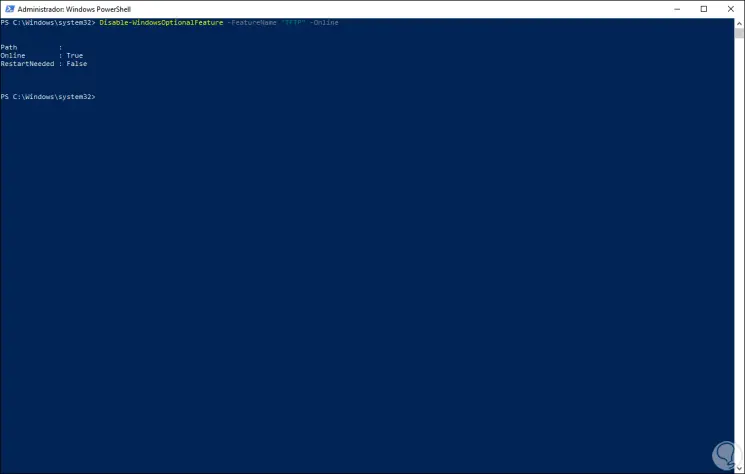
Disable-WindowsOptionalFeature –FeatureName "Name" -Online
Step 3
In this case to disable TFTP we enter the following:
Disable-WindowsOptionalFeature –FeatureName "TFTP" -Online
With this method we have seen how to activate or deactivate a feature in Windows 10 using the PowerShell console.
5. How to activate a feature from Windows 10 graphical mode
Step 1
This is one of the most popular and simplest methods of doing this, for this we access the following route:
- Programs and characteristics
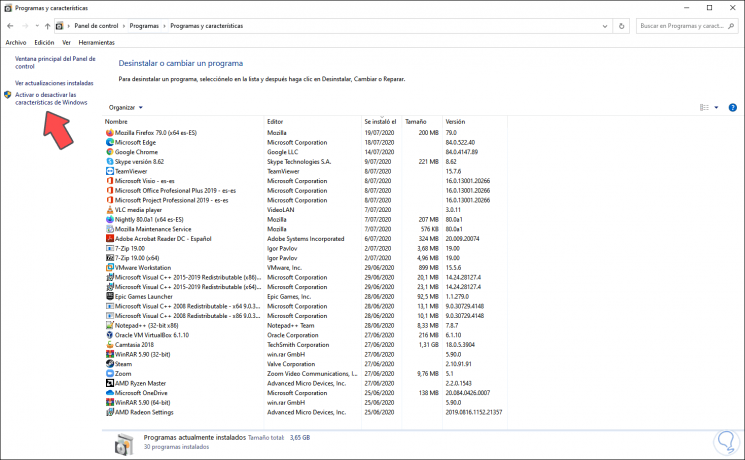
Step 2
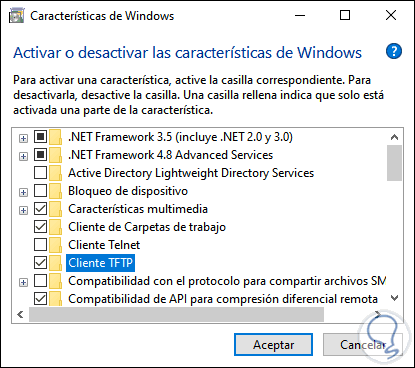
We click on "Activate or deactivate Windows features" on the left side and the following pop-up window will open, there we must activate the box for the desired feature:
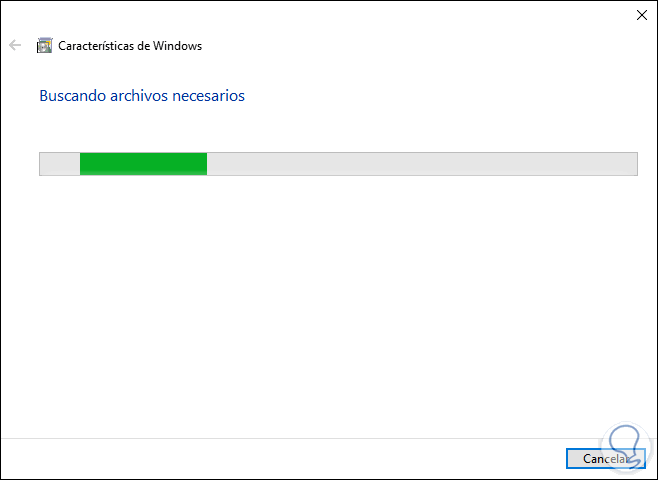
Step 3
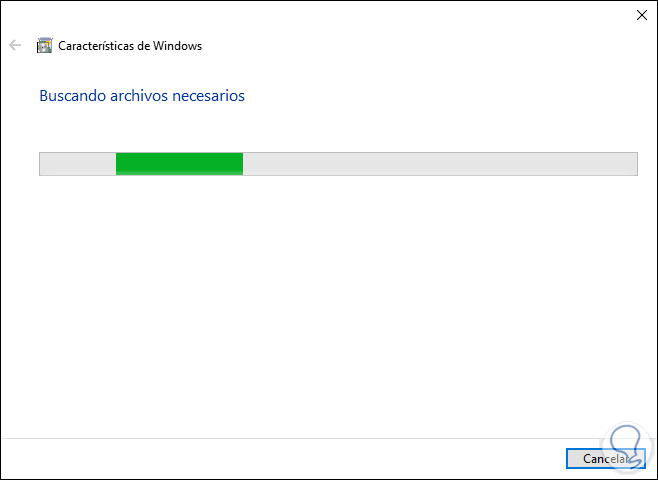
We click on OK and Windows 10 will be in charge of finding the necessary complements of said feature:
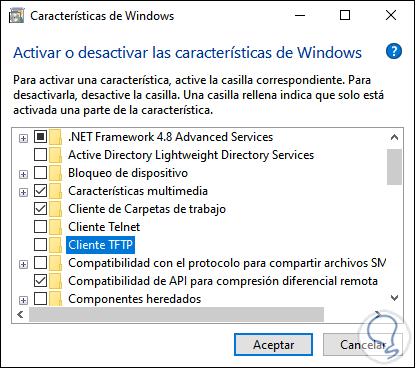
Step 4
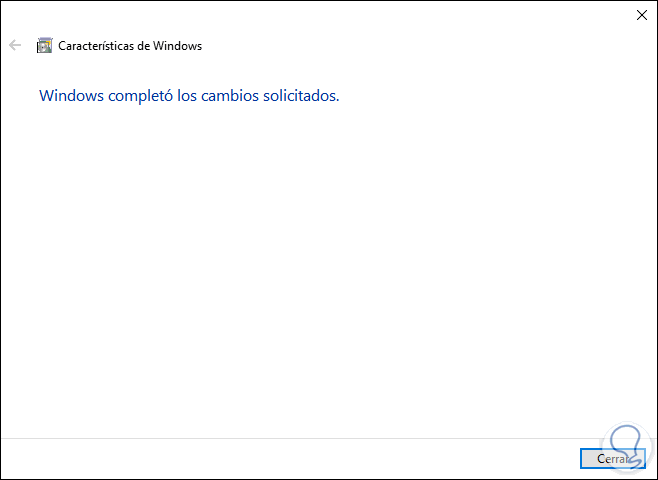
This feature will automatically be installed on the system:

We click Close to exit the wizard.
6. How to disable a feature from Windows 10 graphical mode
If the goal is to disable some feature using this method.
Step 1
We must go to the mentioned route and this time deactivate the feature box:
Step 2
We click OK and again Windows 10 is responsible for searching the files and applying the changes:
Step 3
At the end we will see the following:
As we can see, the options to activate or deactivate a feature in Windows 10 are varied and each one is fully functional.