One of the most optimal security measures in Windows 10 is undoubtedly the integrated Windows 10 Firewall since it manages both incoming and outgoing rules in order to control which network packets, applications, services and processes are in communication constant with the system and runs constant scans to determine whether or not these items are reliable. Anyone who is not validated will simply be prevented from accessing the system. the Firewall Windows 10 works on the following networks available in:
Firewall networks
- Private networks (discoverable)
- Public networks (not recognizable)
The problem is that in some situations the Firewall can detect false positives and prevent the execution of an application, assuming it as dangerous when in reality it is not. Therefore, if we need to perform administrative or support tasks in Windows 10 without being affected by the Firewall, we can deactivate it and thus work safely, but remember that this Firewall is one of the many security measures in Windows 10, we are going to know some methods practical to disable the Firewall in Windows 10..
To stay up to date, remember to subscribe to our YouTube channel! SUBSCRIBE
1. Disable Firewall in Windows 10 from Control Panel
The Control Panel is a central point in Windows 10 from where it is possible to control hardware devices or elements of the system.
Step 1
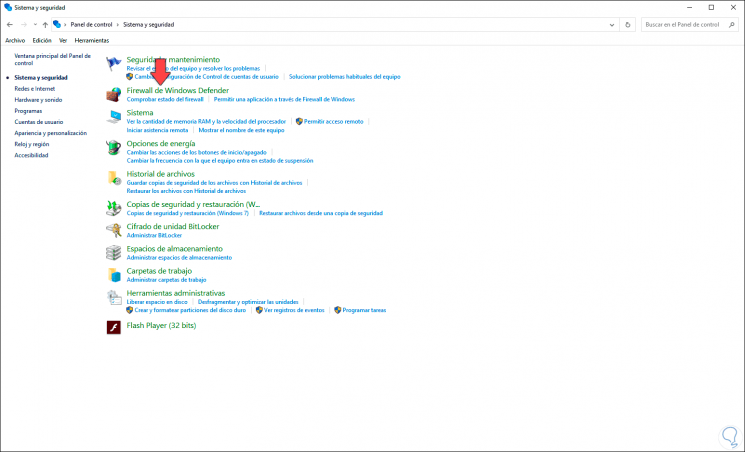
To disable the Firewall from there we access the Control Panel and we will go to the following route:
Step 2
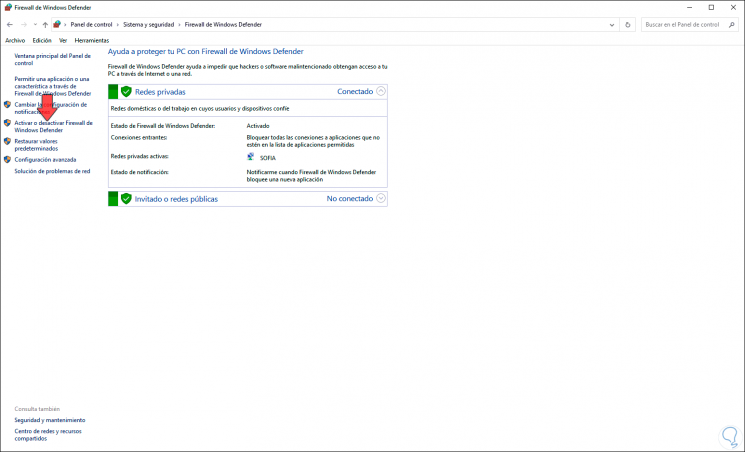
We click on the line "Windows Defender Firewall" and we will see the following:
Step 3
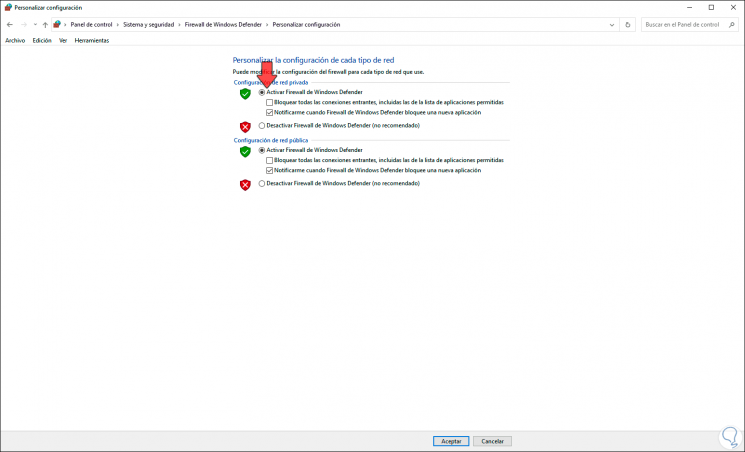
We click on the line "Activate or deactivate Windows Defender Firewall" and in the next window we will see the current networks of the computer in use:
Step 4
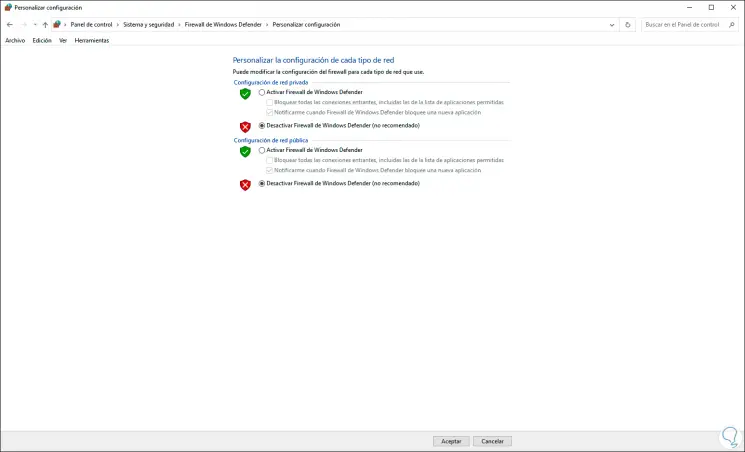
To disable the Firewall simply check the boxes "Disable Windows Defender Firewall (not recommended)". We click on the OK button to apply the changes.
Note
to activate it again we must check the box "Activate Windows Defender Firewall".
2. Disable Firewall in Windows 10 from Settings
The Configuration utility is another of the tools integrated into Windows 10 with which we will have a centralized administration of many aspects of the system.
Step 1
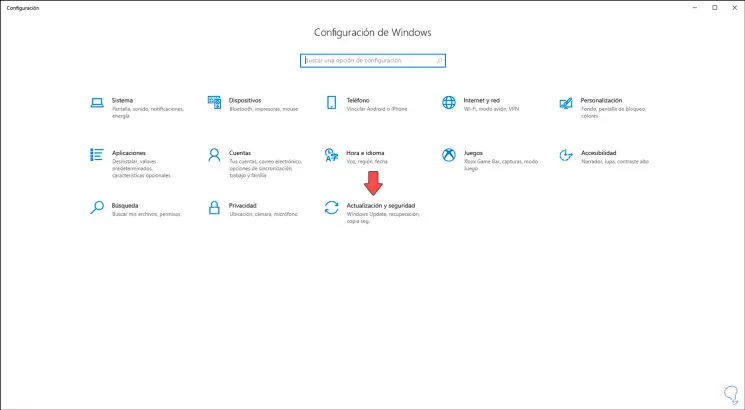
To use this method we go to Start - Settings, we will see the following:
Step 2
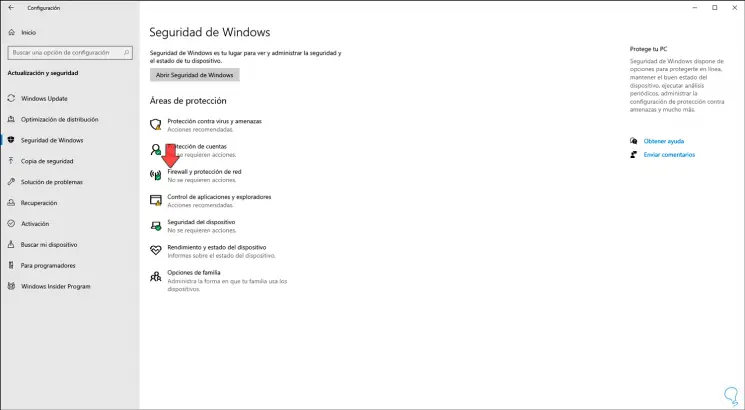
Let's go to "Update and security - Windows Security":
Step 3
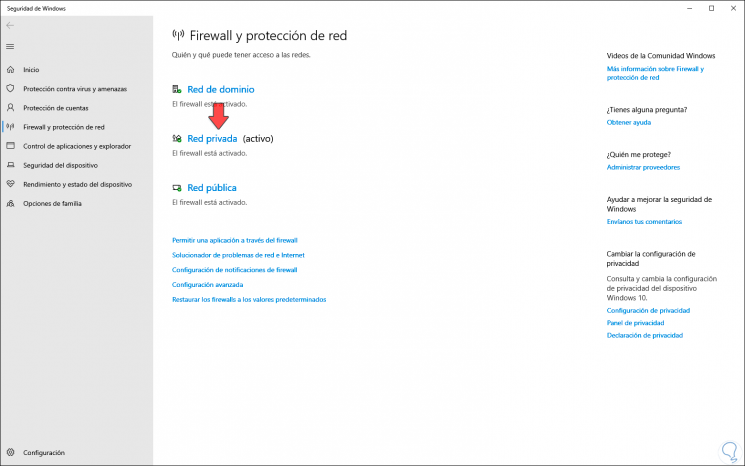
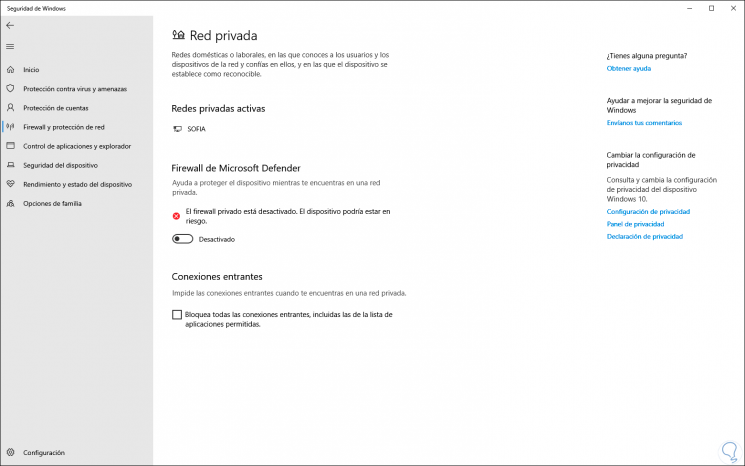
We will click on the "Firewall and network protection" section and we will be redirected to the Windows Security utility where we will see the current networks and their status:
Step 4
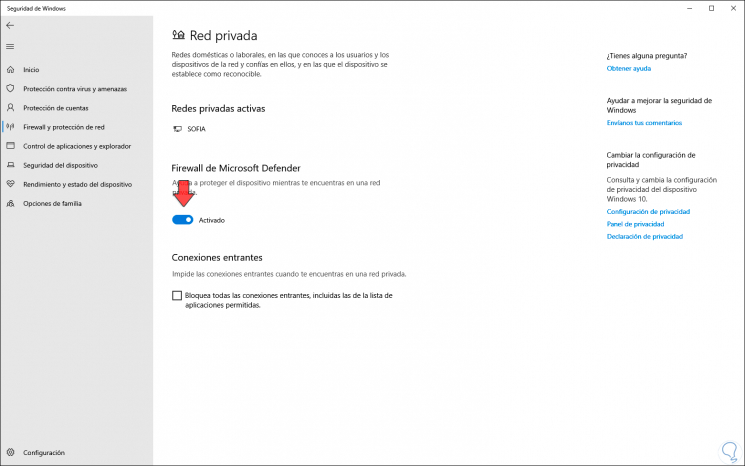
We click on the current network and the following will be displayed:
Step 5
To deactivate the Firewall we click on the "Activated" switch in the "Microsoft Defender Firewall" line:
We repeat this same process with each of the available networks if we wish.
Note
to activate it again we simply click on the switch.
3. Disable Firewall in Windows 10 PowerShell
The PowerShell console is another option in Windows 10 to perform complete management tasks.
Step 1
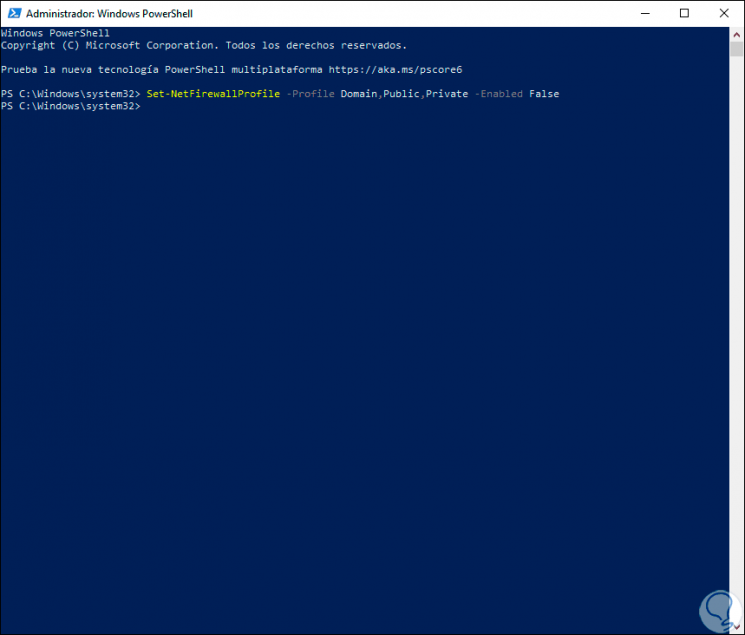
In this case we must access PowerShell as administrators and execute the following in the console. With this, the different network profiles of the Firewall have been deactivated.
Set-NetFirewallProfile -Profile Domain, Public, Private -Enabled False
Note
to activate it again we must execute:
Set-NetFirewallProfile -Profile Domain, Public, Private -Enabled True
4. Disable Windows 10 CMD Firewall
Finally, the Command Prompt is another of the options available to carry out the process of deactivating the Windows 10 Firewall.
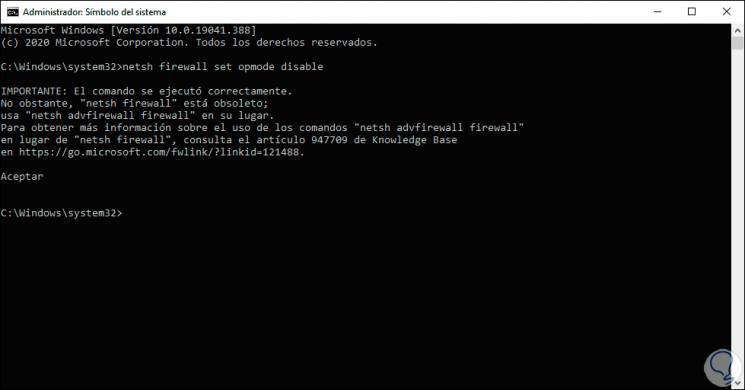
For this we access as administrators and execute:
netsh firewall set opmode disable
Note
To activate the Firewall again we execute "netsh firewall set opmode enable".
Regardless of the selected method, each of these options is ideal to disable the Firewall in Windows 10..