Logging in automatically has its advantages as well as its disadvantages in any of the systems we are using. On a positive level we highlight the fastest access without having to enter the traditional password (which we often forget or find it hard to remember), but without a doubt we can say that it is a more dangerous method; since by automatically logging in any other person who has access to the equipment can enter without any problem and restriction to our session and make unauthorized changes..
But if you are completely sure that nobody will access your device then it will be quite useful to activate the automatic login and you will be able to enable automatic login in Ubuntu , TechnoWikis will explain how to perform this process in Ubuntu 19 and thus have this functionality.
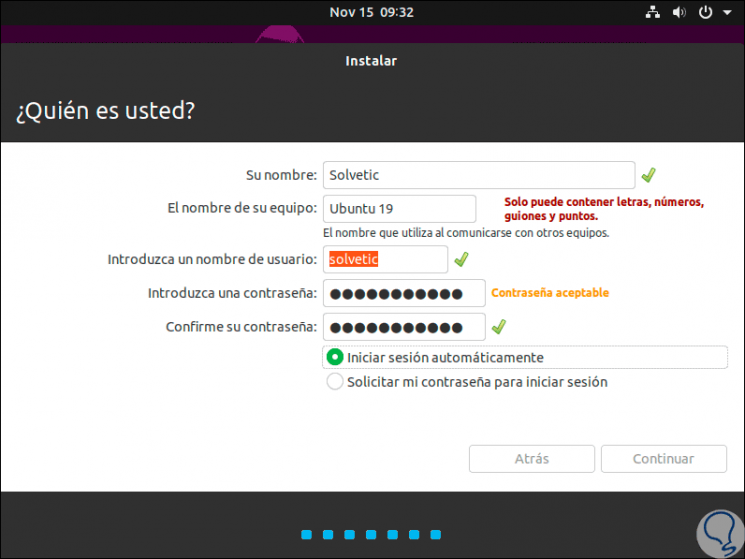
It is important to clarify that from the moment that Ubuntu 19 is installed we have the option of enabling or not the automatic login in the user configuration section. There we have the following:
- Check the box "Start session automatically" to enable it.
- Check the "Request my password to log in" box to disable this functionality.
Logically many of us already have the system installed and configured, with which TechnoWikis will explain how to perform this process directly in Ubuntu 19..
1. How to enable or disable automatic login in Ubuntu from Settings
It is one of the simplest methods and for this we will perform the following steps:
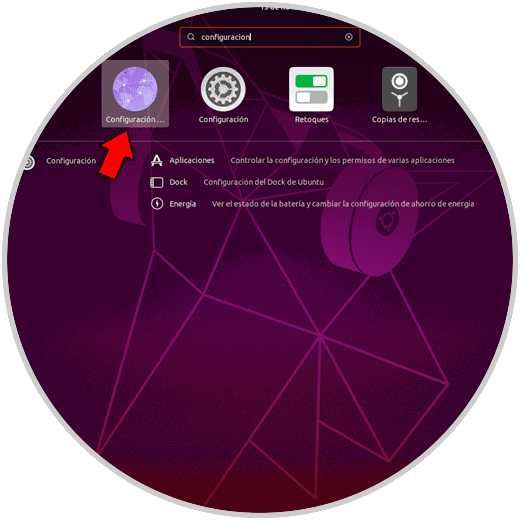
Step 1
We go to the Ubuntu 19 activity search engine (or other editions) and enter the term "configuration", the following will be displayed. We click on "Settings".
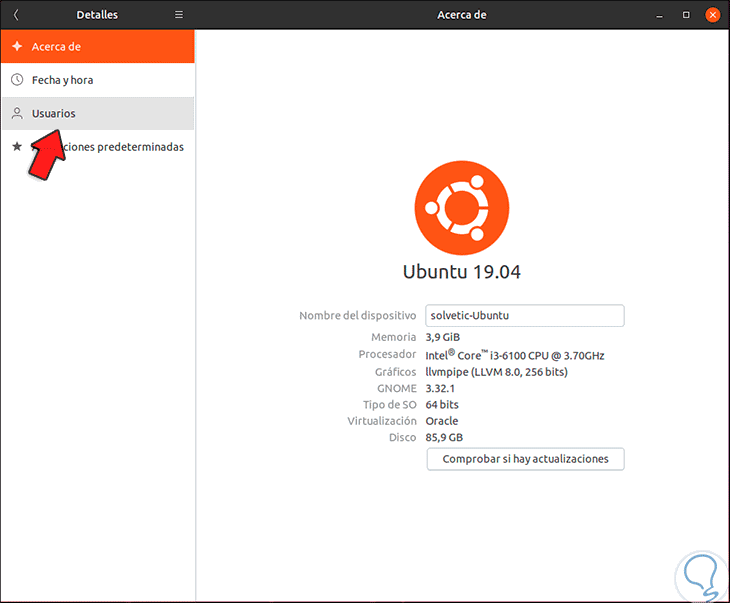
Step 2
In the window that will be displayed we go to the "Details" section where we will see the following. There we select the "Users" section.
Step 3
This is where we will see current Ubuntu users. Select the desired user and click on the "Unlock" button located at the top.

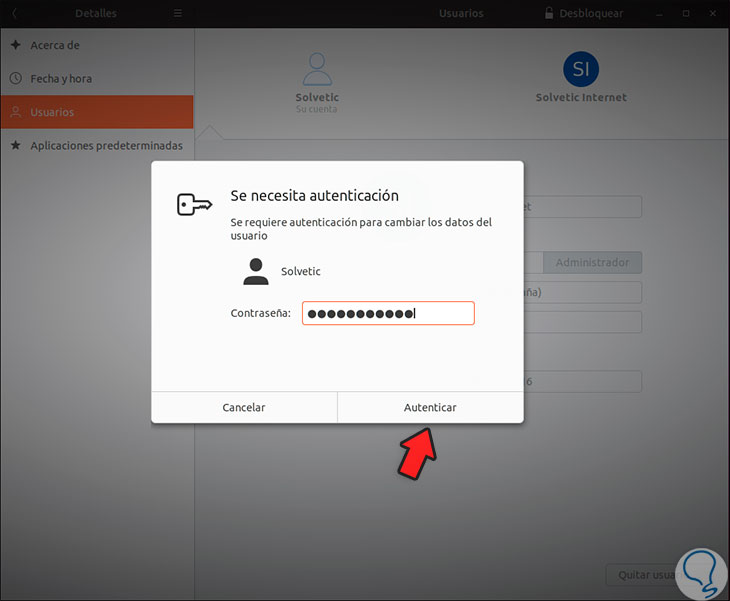
Step 4
We will need to enter the administrators password. We click on "Authenticate".
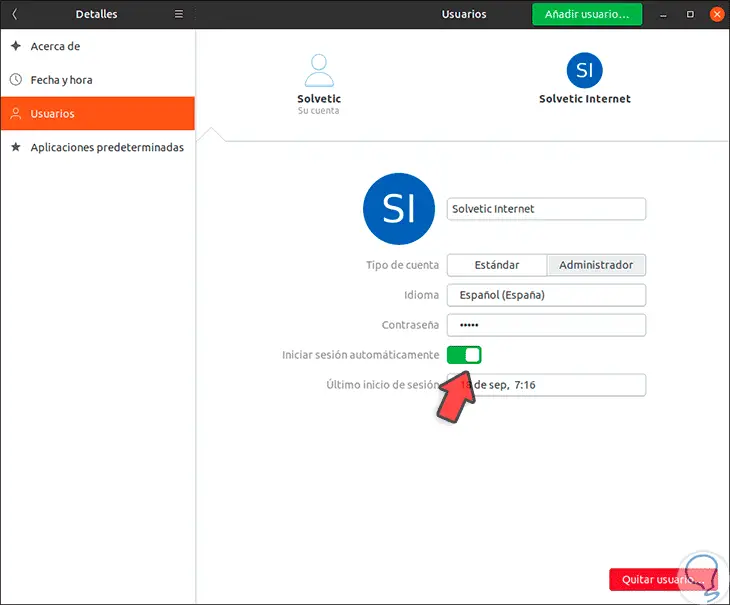
Step 5
To activate the session automatically, click on the “Start session automatically†switch to make it active:
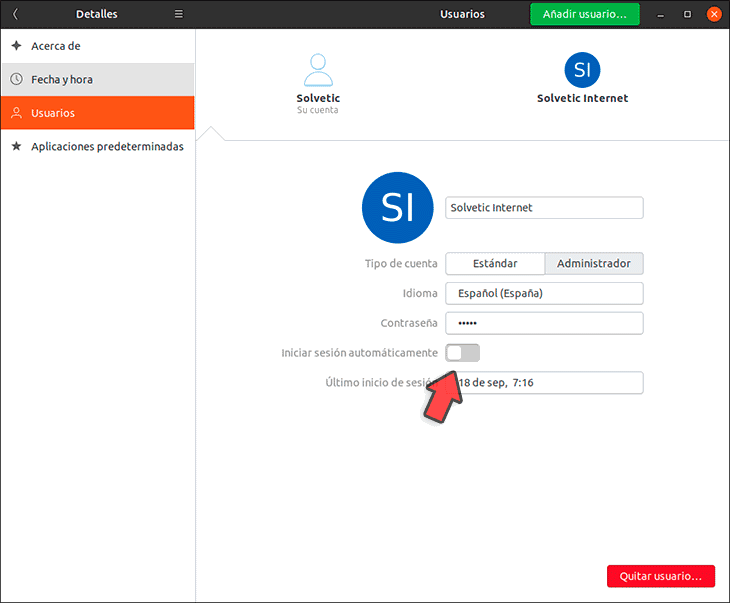
Step 6
If we wish to disable the session automatically press again on the switch so that it is deactivated. Thus we have enabled or not the automatic login in Ubuntu 19 through Settings.
2. How to enable or disable automatic login from the Ubuntu terminal
Another of the methods available to activate or not the automatic login is through the terminal, and for this we will do the following:
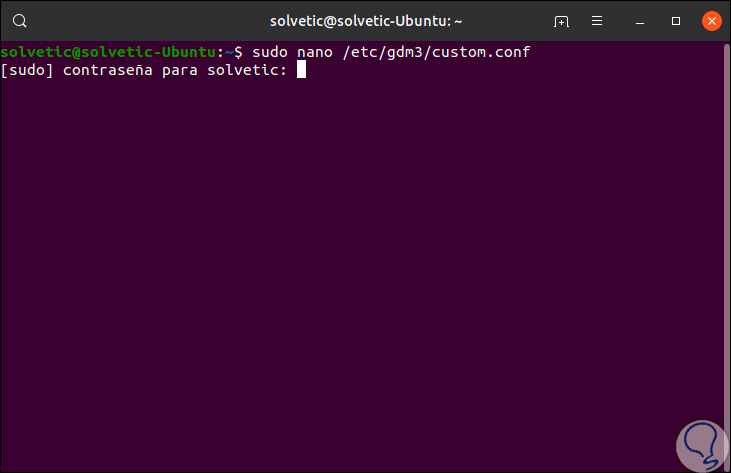
Step 1
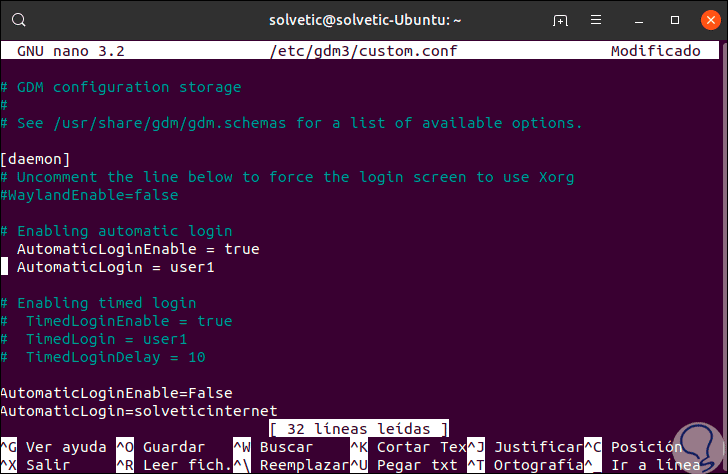
We access this and we must edit the custom.conf file with some text editor:
sudo nano /etc/gdm3/custom.conf
Step 2
Enter the administrator password and in the deployed file we will see the following:
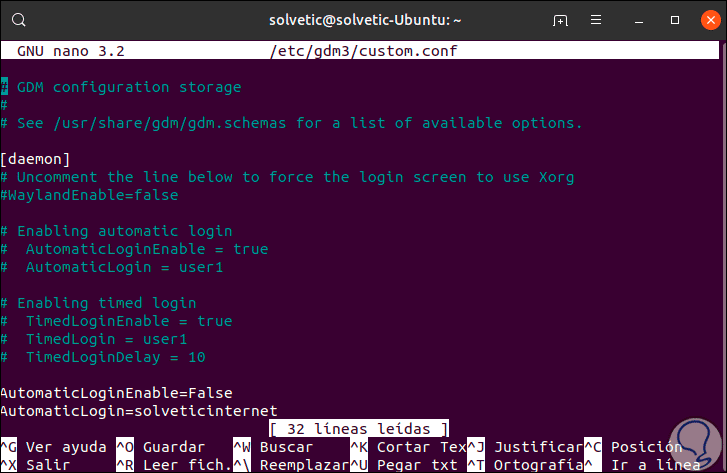
Note
To take into account, a commented line has a # character at the beginning of the line, so the interpreter ignores the commented lines when reading a configuration file in Linux.
Step 3
In the previous example we can see that the AutomaticLogin line of user1 is commented on so that the automatic login will be ignored and will require a password, so to enable this type of login we must remove the # sign from the AutomaticLogin and AutomaticLoginEnabled lines:
We save the changes using the following keys:
+ O Ctrl + O
We leave the editor using the keys:
+ X Ctrl + X
Step 3
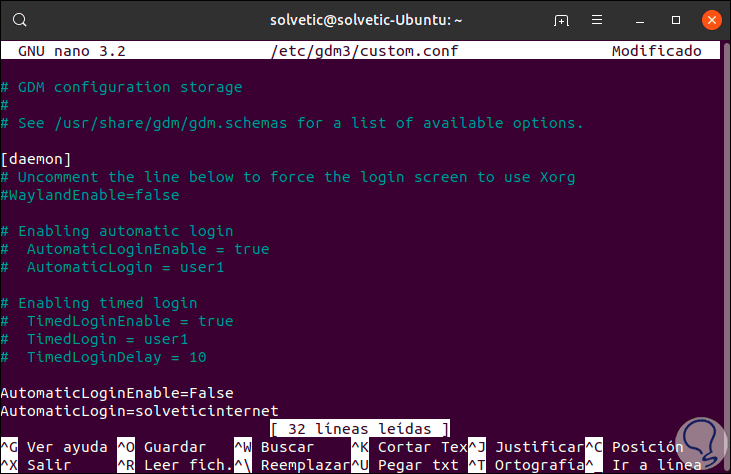
If the goal is to disable the automatic login, we must comment on the previous lines by adding the # sign at the beginning of them:
Again we save the changes with the following keys:
+ O Ctrl + O
We leave the editor with the following keys:
+ X Ctrl + X
3. How to enable or disable automatic Ubuntu login with the nopasswdlogin group
Ubuntu integrates a special group called “nopasswdlogin†which, as the name implies, manages logins without a password.
Step 1
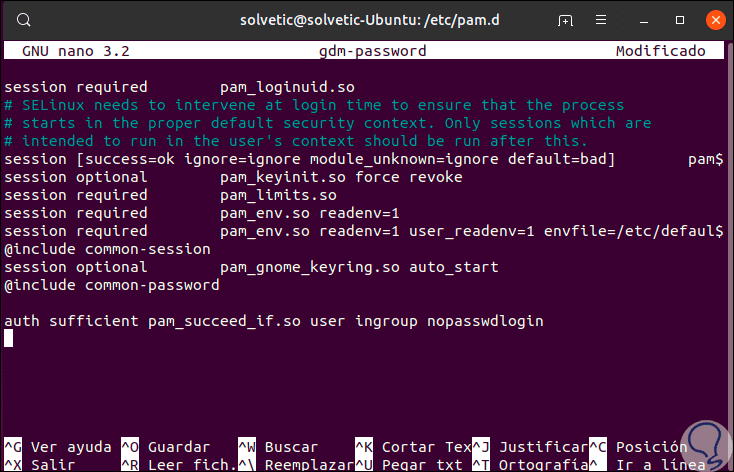
To enable automatic login in Ubuntu we must access the following route with a text editor:
sudo nano /etc/pam.d/gdm-password
There we will add the following line:
auth sufficient pam_succeed_if.so user ingroup nopasswdlogin
We save the changes with the keys:
+ O Ctrl + O
We leave with the following keys:
+ X Ctrl + X
Step 2
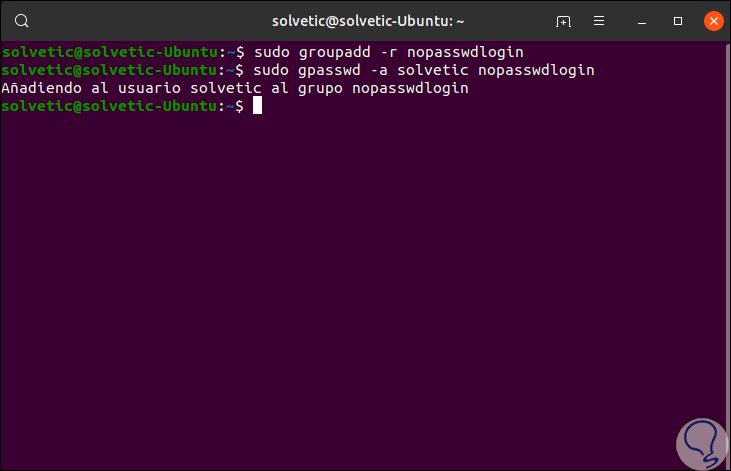
After this, we execute the following lines:
groupadd -r nopasswdlogin
(Here add the group nopasswdlogin)
gpasswd -a solvetic nopasswdlogin
(add the user TechnoWikis to that group)
With this you can automatically log in to Ubuntu 19.
Note
At the moment we do not want this type of login, we must delete the line that we have previously added:
auth sufficient pam_succeed_if.so user ingroup nopasswdlogin
With any of these methods it will be possible to automatically log in to Ubuntu 19 (or earlier versions) but remember what TechnoWikis has told you about security with this type of startup for privacy and security issues..