Wi-Fi connectivity is essential in portable computers and mobile devices because thanks to it we can connect to the Internet network and from there access to hundreds of available programs and applications as well as have access to our choreography , streaming platforms and more . In addition to the connectivity of a Wi-Fi network, it is required that said network has the corresponding access to the Internet since it is useless to establish a connection if we do not have access to the network . This is what happens to many Windows 10 users who can connect to a Wi-Fi network but their status is “No internetâ€..
TechnoWikis will give a series of practical tips to establish that the Wi-Fi network of our Windows not only connects to the network, but can also connect to the Internet.
1. How to modify the DNS address of the Windows 10 network adapter
The DNS server (Domain Name System) is a system by which IP addresses are converted into a domain name and vice versa. By default this DNS server is assigned through the ISP (Internet Provider) and due to the boom in connections the addressing of this DNS can present faults or saturation. So a good practice is to change the DNS IP address which does not affect the operation of the equipment at all.
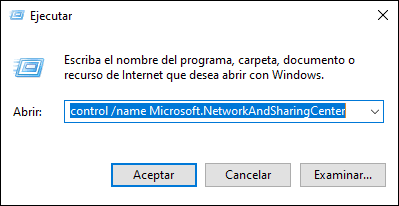
Step 1
To do this, we will use the Windows + R keys and in the pop-up window we will execute the following:
control / name Microsoft.NetworkAndSharingCenter
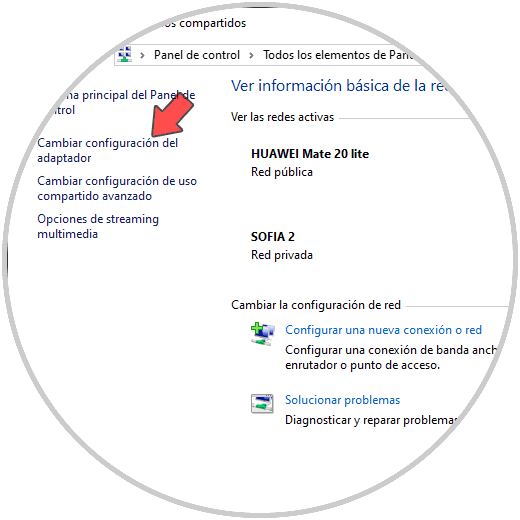
Step 2
Click OK, or use the Enter key, and we will be redirected to the next window. There we click on the line “Change adapter settingsâ€
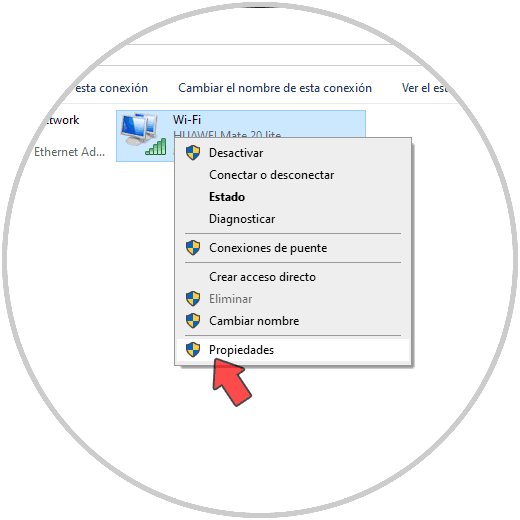
Step 3
Then we right click on the Wi-Fi network adapter and in the displayed options select “Propertiesâ€:
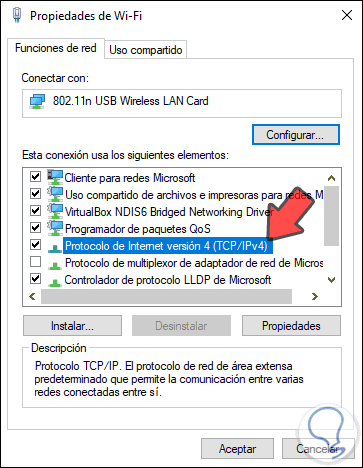
Step 4
In the pop-up window we select the line "Internet Protocol version 4":
Step 5
We click on the Properties button and then check the box “Use the following DNS server addresses†and define the following:
- In the Preferred DNS Server field, enter 8.8.8.8
- In the Alternative DNS Server field, enter 8.8.4.4
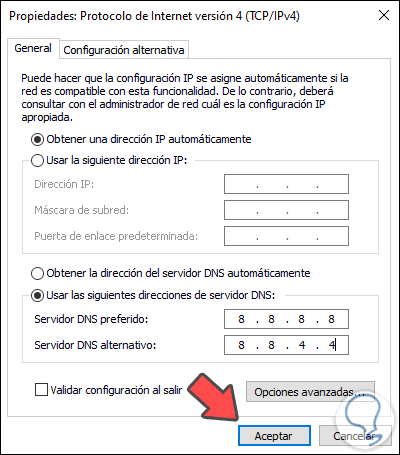
These addresses refer to the public DNS server of Google which is available as an alternative for connectivity of this type, click OK and we can exit the wizard..
With this we will use a new DNS server address with which it is possible to allow the Internet connection of the Wi-Fi network.
2. How to disable quick start in Windows 10
As the name implies, quick start is a function created specifically to optimize Windows 10 boot making it much faster. However, it is a function that can have an impact on the behavior of the network.
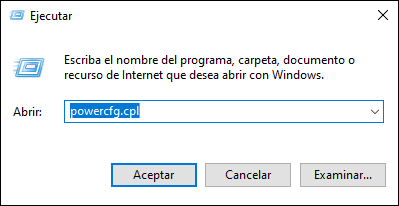
Step 1
To disable it and rule out that this is the cause of non-connectivity, we will use the Windows + R keys and execute the following:
powercfg.cpl
Step 2
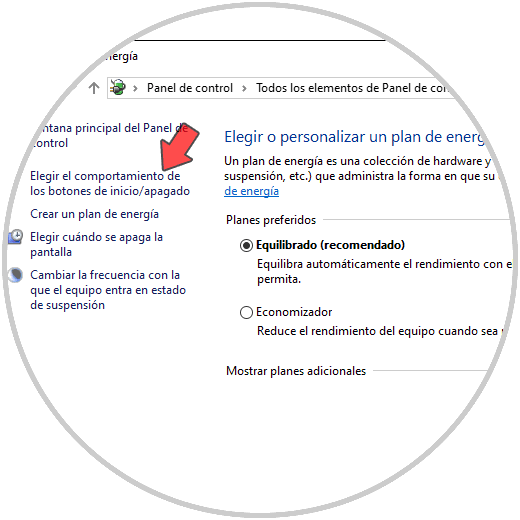
This will redirect us to the system power options where we will see the following. We click on the line “Choose the behavior of the start / stop buttonsâ€
Step 3
To edit the preferences we must click on the line “Change the configuration currently not available†and after that we deactivate the “Activate quick start†box:
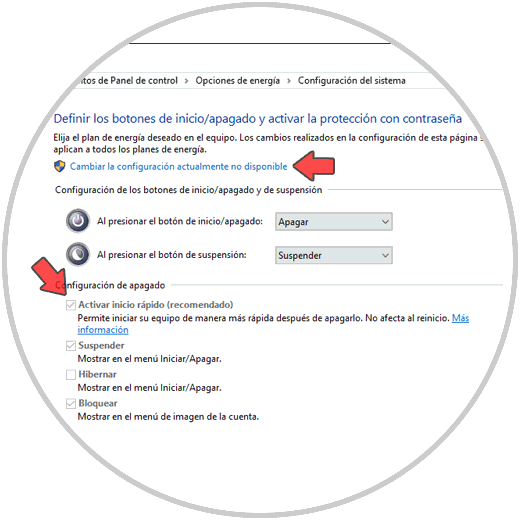
We click on Save changes to complete the process..
3. How to empty the Windows 10 DNS
As we browse the web, each website hosts small elements in the system that will make access to it much faster. The problem is that many times this can cause a connection level conflict. To avoid this we must empty the Windows 10 DNS, for this we access the command prompt as administrators and there we will execute the following:
ipconfig / flushdns (Empty system DNS) ipconfig / release (Free IP address) ipconfig / renew (Renew the IP address)
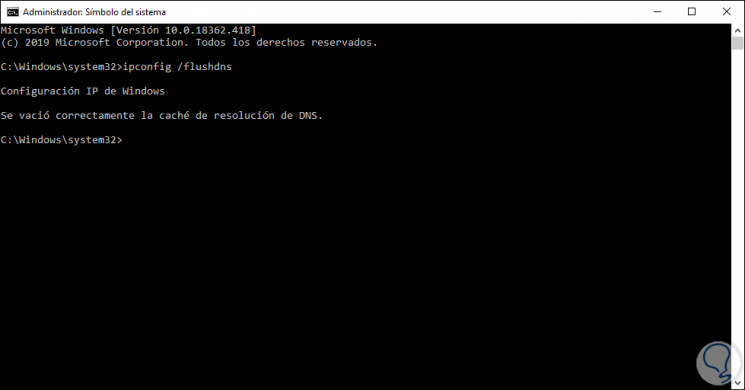
Then we can exit the command prompt.
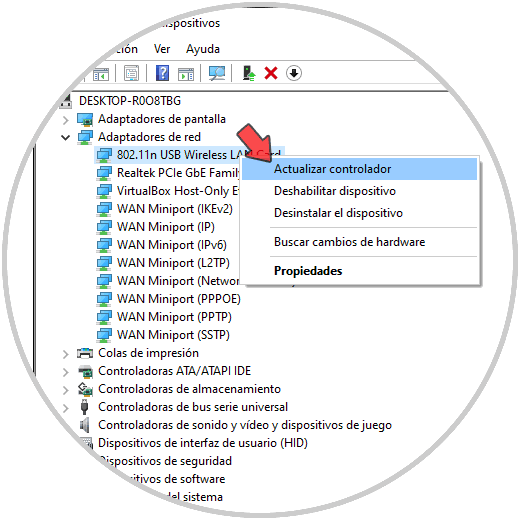
4 . How to update the Windows 10 Wi-Fi network driver
An outdated network controller may create a conflict with web connectivity services.
Step 1
To update them we must access the Device Manager from the Start context menu and once there go to the "Network adapters" section, right click on the Wi-Fi network adapter and select "Update driver":
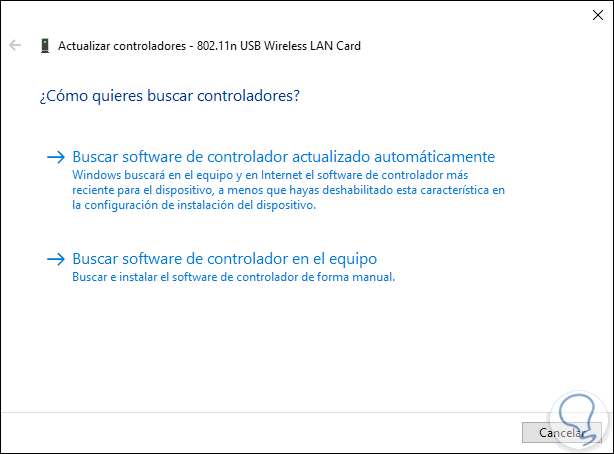
Step 2
In the following window we can update the controller either manually or automatically:
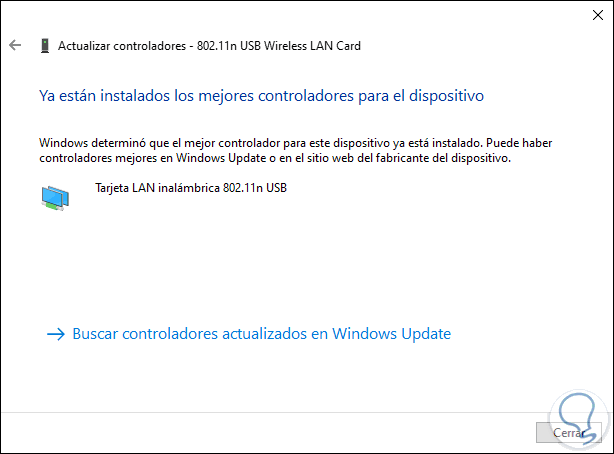
Step 3
We will see the results of the driver update:
5. How to run the Windows 10 troubleshooter
Windows 10 integrates a problem solver which, as the name implies, has the mission of analyzing, detecting and correcting problems associated with various system components where the network adapter is included.
Step 1
For this we will go to the following route:
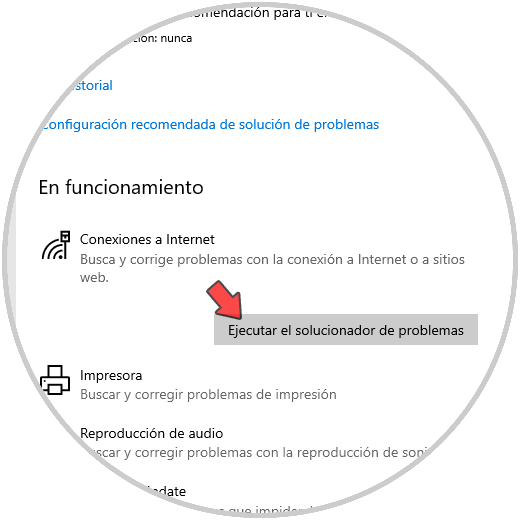
Home / Settings / Update and security / Troubleshoot
There we click on the category "Internet Connections" and the button "Run the troubleshooter" will be activated:
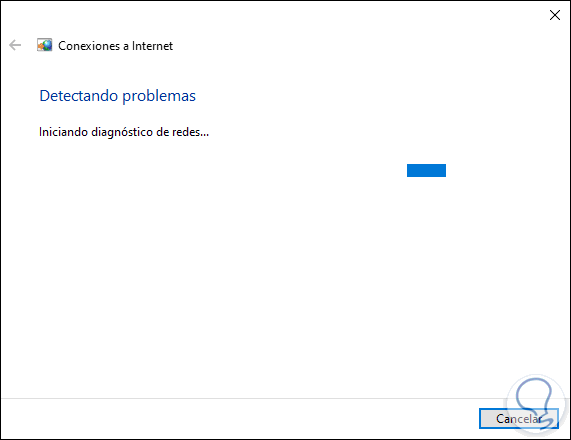
Step 2
We click on this to start the analysis of the network adapters:
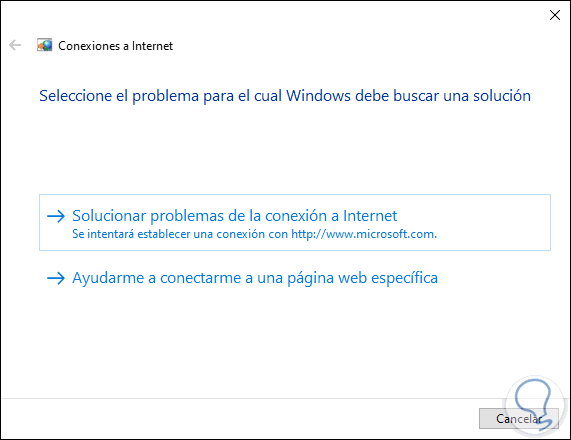
Step 3
Some tests will be run:
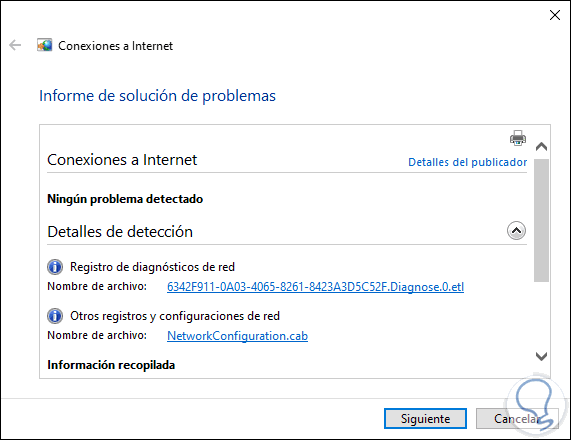
Step 4
The possible errors will be displayed below or if we do not get any error we can access “Detailed information†to see what tasks were executed:
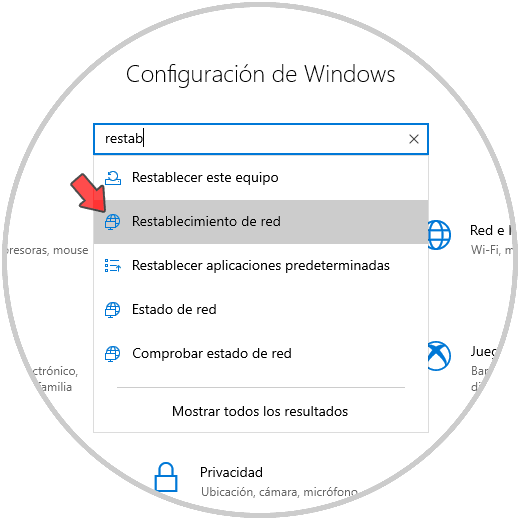
5. How to reset the network in Windows 10
Windows 10 allows us to restore the network's values ​​and services to their original state, this implies reloading their configuration.
Step 1
To do this we go to the Start menu and there we select the Configuration utility and in the search field we enter “Reset†and in the options listed we select “Network Resetâ€:
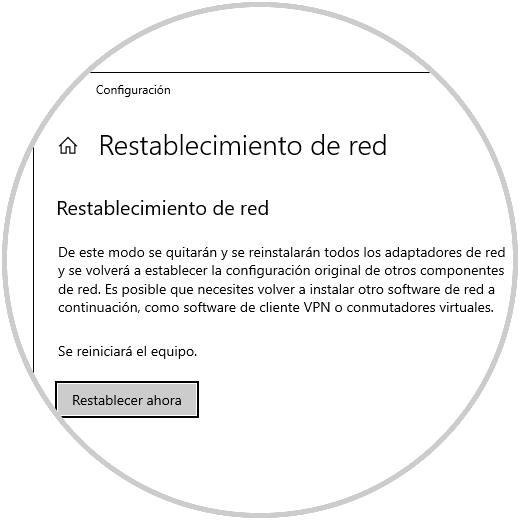
Step 2
The following window will be displayed where we click on the “Reset now†button. Next we follow the steps of the assistant.
6. How to reset the Windows 10 network adapter
Finally, we can restore the configuration of the network adapter, for this we access the command prompt as administrators and there we execute the following;
netsh int ip reset
Press Enter and the result will be as follows:
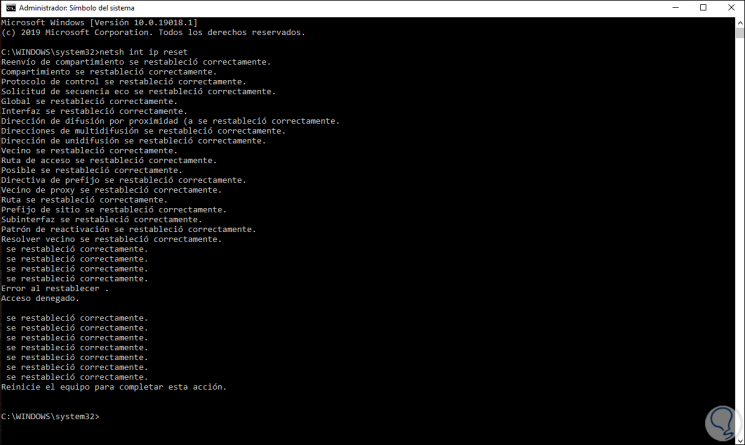
There we observe that the adapter has been restored correctly.
It is not in vain that before performing any of the steps described above we check the connections of the network adapters or call the ISP provider to verify that it is not a maintenance in the area or sector.
With the solutions that TechnoWikis has given you, you will be able to recover Internet connectivity when your device connects to a Wi-Fi network using Windows 10 and thus enjoy the world of Internet.