It is no secret to any of us that the growth of wireless or Wi-Fi networks is dizzying based on the amount of existing mobile devices, both PCs and mobile phones, and the use of these Wi-Fi networks is essential to launch the “ mobility â€of both the user and the device itself and it is not to alarm us that there is a projected growth of around 3 billion devices that will have the ability to connect to a Wi-Fi network , but something we should put All our attention is when your Windows 10 device simply does not connect to the Wi-Fi network, thereby affecting the entire process of connections and normal work..
When we experience errors in our connections, it is common to feel afraid to think that something has been "broken." A connection problem can be due to multiple factors both physically and at the software level. So much so that we can also experience that the fault is not ours but of the service provider that has suffered a service outage or also that the hardware is damaged and is affecting the connection. If we have made sure to monitor the primary elements and we are working with a WiFi network , it is possible that the system itself is denying the connection for some reason.
Recall that when we connect frequently to a Wi-Fi network , Windows 10 stores it in a part of the system as a common network and when it is detected automatically it proceeds with the connection to it thus avoiding the entire process of searching the network and Enter password, but if for some reason your Windows 10 device does not connect to the Wi-Fi network as it should be, TechnoWikis will explain some steps to correct this error and allow the Wi-Fi connection to be optimal..
1. Add the Wi-Fi network again in Windows 10
This is the essential step that we must take and consists of basically removing the stored network from Windows 10 and reconnecting it, this will make all connection services and processes restored and the connection as stable as possible.
Step 1
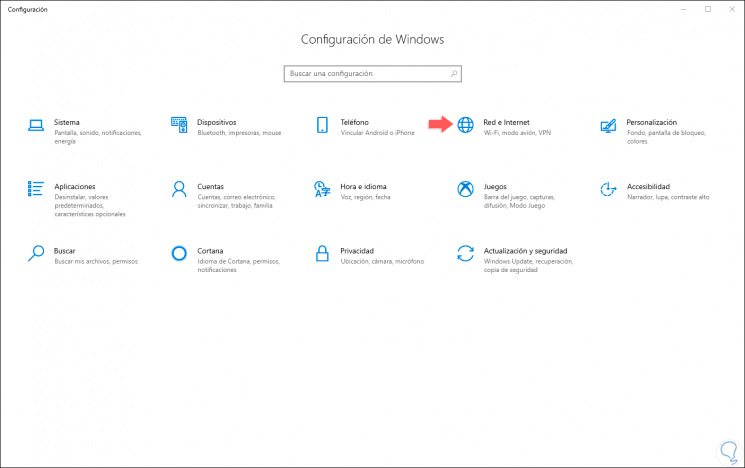
To forget the Wi-Fi network and add it again we must go to the Start menu and there select the Configuration utility where we will see the following:
Step 2
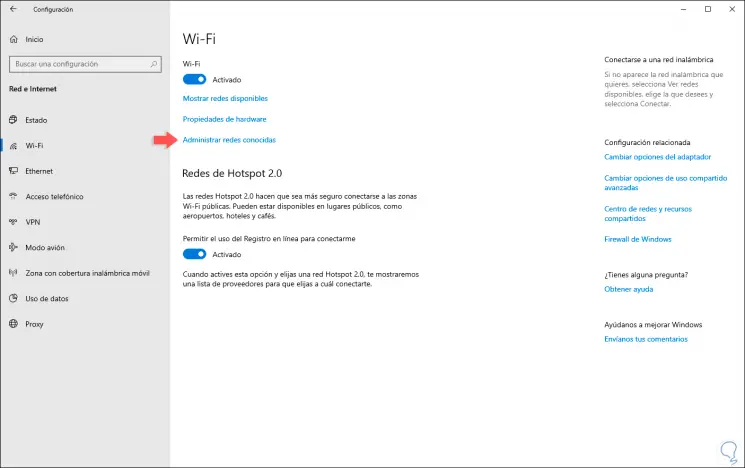
There we select the “Network and Internet†category and in the next window we go to the “Wi-FI†section:
Step 3
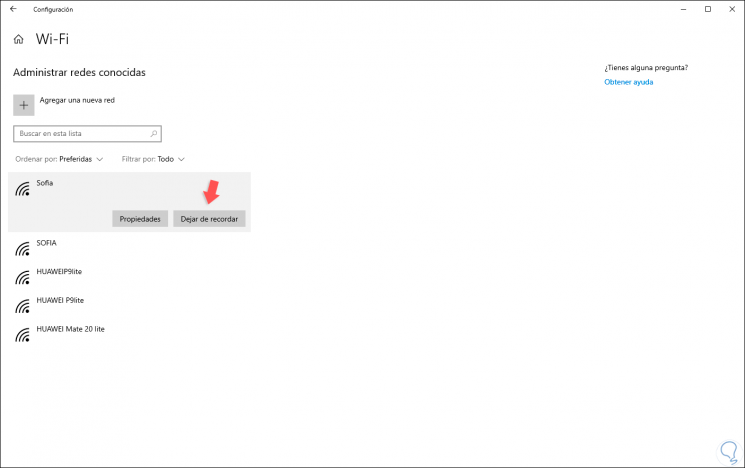
We click on the “Manage known networks†line and in the next window we click on the network that we will forget and the “Stop remembering†button will be activated:
Step 4
We click on said button in order to have said network removed from the system:

Step 5
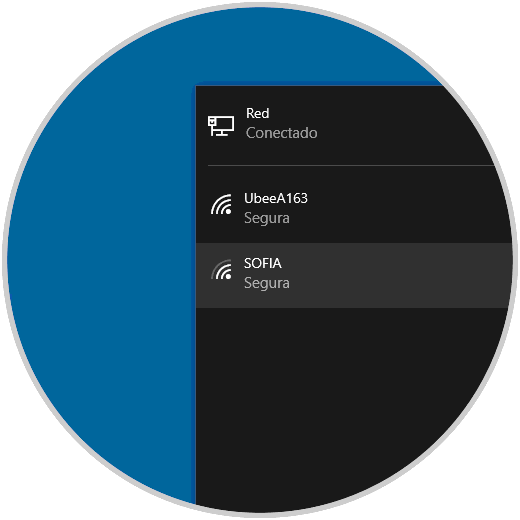
Once we do this, we click on the Wi-Fi icon located in the taskbar and there the networks in the coverage area will be displayed:
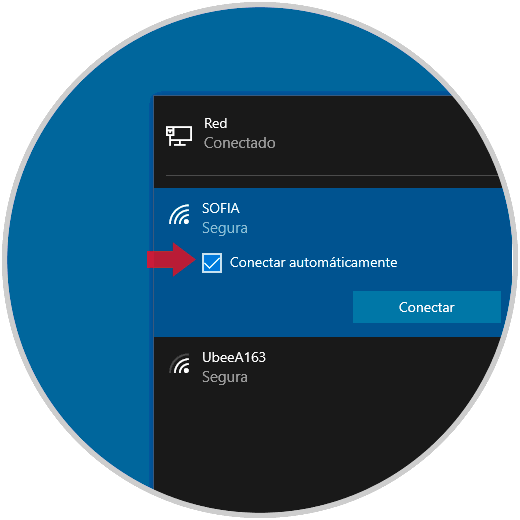
Step 6
We click on our Wi-Fi network and in the displayed window we activate the “Connect automatically†box:
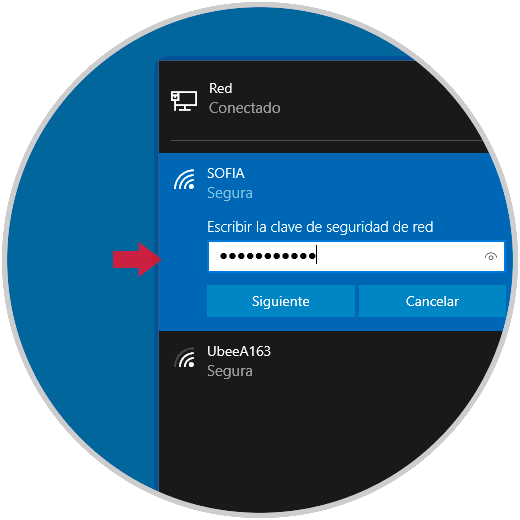
Step 7
We click on “Connect†and proceed to enter the connection password:
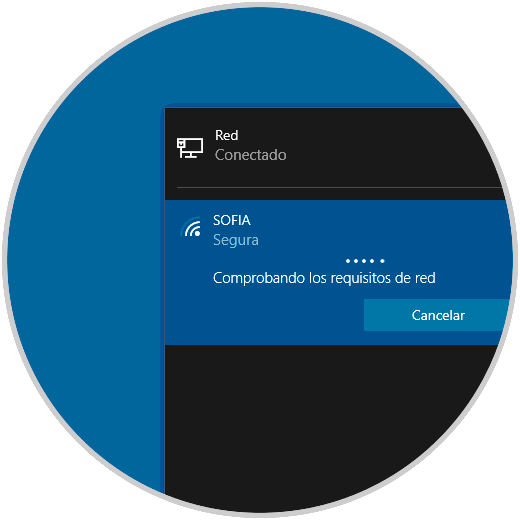
Step 8
We click Next and there will start the process of connectivity with the selected network:
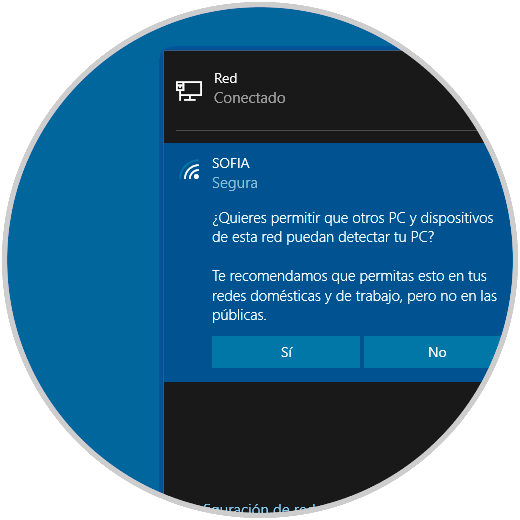
Step 9
There we confirm or not if the network enables access to the equipment and then it proceeds with the connection:
2. Check the power saving of the Wi Fi adapter in Windows 10
For reasons of economy, Windows 10 integrates a function that allows you to turn off the Wi-Fi adapter if the computer is idle for a period of time, this helps improve the life of the adapter, but if for some reason it remains inactive it will be impossible to access the W-Fi network.
Step 1
To verify this functionality and enable it or not, we must access Device Manager using any of the following options:
Step 2
Once the Device Manager is open, we will go to the “Network adapters†section and there we will display the available options and we will right click on the Wi-Fi adapter and select Properties:
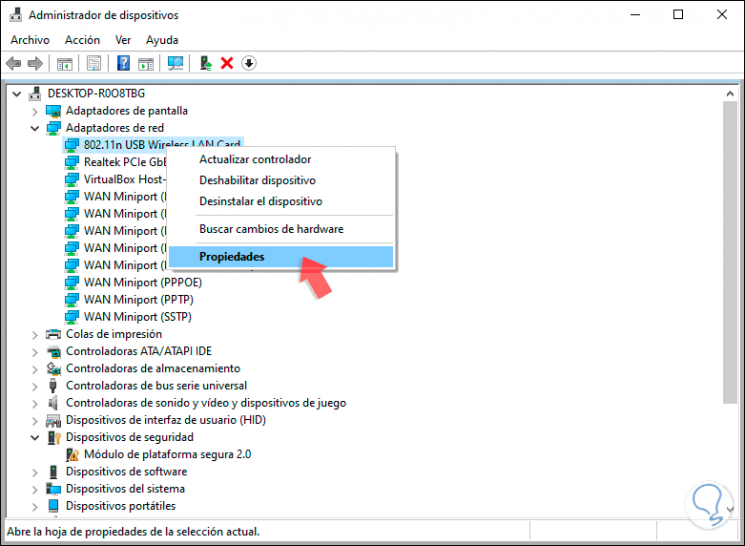
Step 3
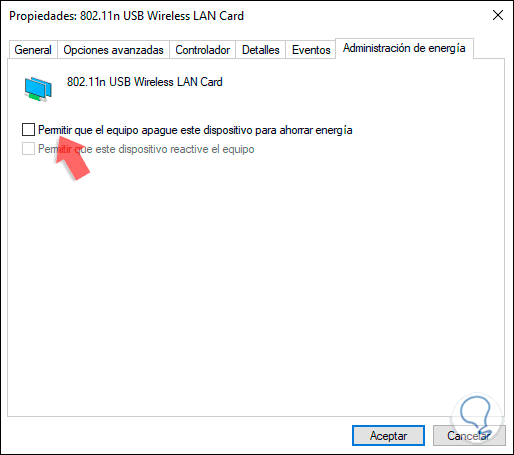
In the window that will open we will go to the tab "Power Management" and there we deactivate the box "Allow the device to turn off this device to save energy". Click on OK to save the changes.
3. Disable the Microsoft virtual network adapter in Windows 10
This is an integrated connection mechanism in Windows 10 which allows virtualization to be used to offer network integrity, but sometimes it can affect the connection of the real adapter.
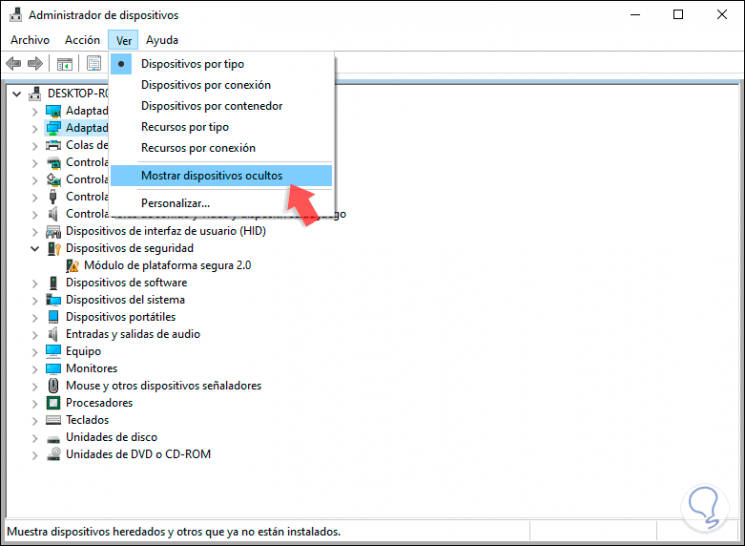
Step 1
To validate this, we access Device Manager again and there we go to the "View" menu and select the "Show hidden devices" line:
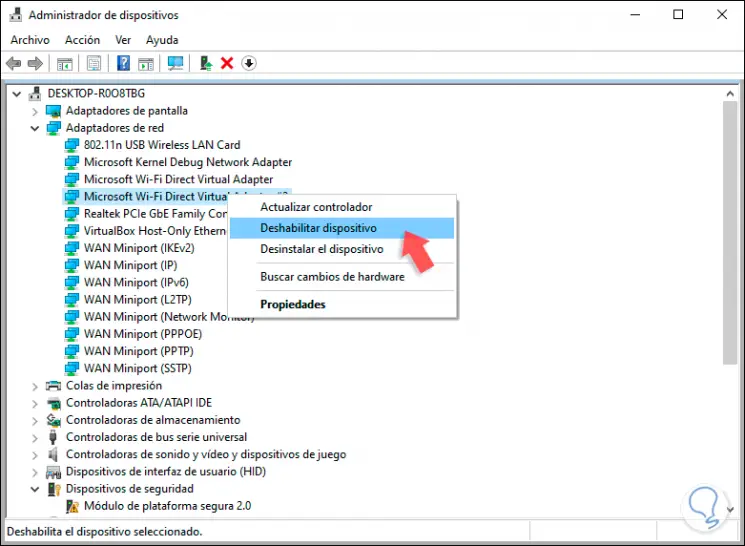
Step 2
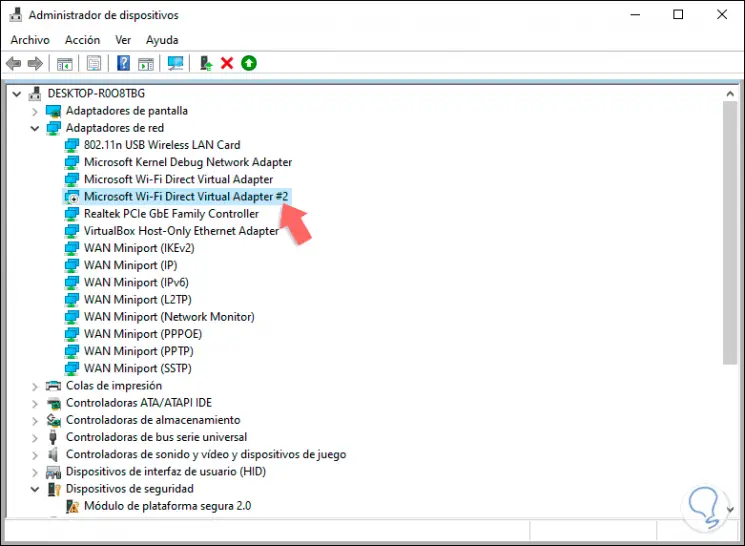
Now we will go to the “Network adapters†section and there we find one or more adapters called “Microsoft Wi-Fi Direct Virtual Adapterâ€:

Step 3
Now we must right click on each of these virtual devices and select the option “Disable the deviceâ€:
Step 4
The following message will be displayed:

Step 5
Once this is done we will see that the virtual adapter has been disabled:
Note
In case the failure continues, a slightly more drastic solution will be to replace the Wi-Fi adapter, but for this we find these devices from very cheap prices in the market.
With any of the solutions that TechnoWikis has given you, it will be possible to recover the optimal functioning of the Wi-Fi network and thus enjoy full connectivity.