The use of Wi-Fi networks has grown significantly in recent years, many of our computers are portable and all our Smartphones require this type of connection and when we use Windows 10 we can see as always when looking for a new network the system allows us to select the automatic connection to said network:
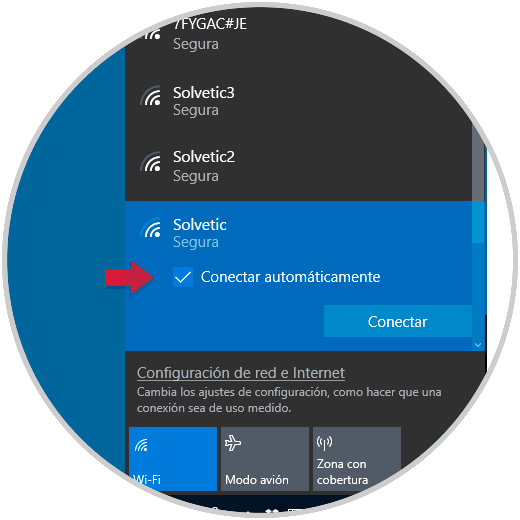
This option is ideal if it is a network that we use every day , but it can be annoying if it is not or if for some reason the owner of the network does not want more devices to be connected to it for performance or similar issues..
Today in TechnoWikis we will see some ways to prevent Windows 10 from connecting to a Wi-Fi network automatically.
To keep up, remember to subscribe to our YouTube channel! SUBSCRIBE
1. Do not connect WiFi automatically with Network Options in Windows 10
Step 1
The first method, and perhaps the simplest, is to click on the network icon in the taskbar and when the available networks are displayed, uncheck the box “Connect automaticallyâ€:
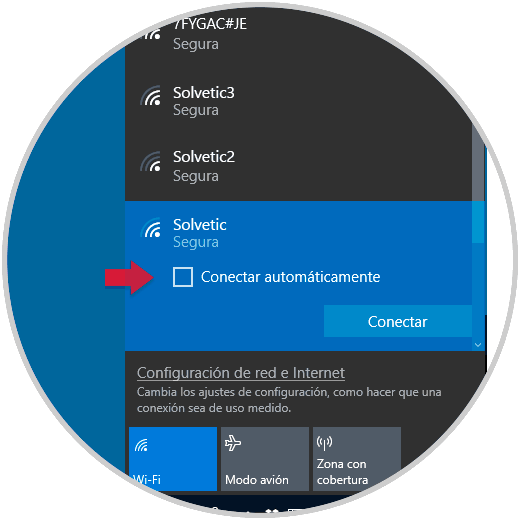
Thus, we will connect to this Wi-Fi network, but it will not be automatically when we are in its range..
2. Do not connect WiFi automatically with System Settings in Windows 10
Step 1
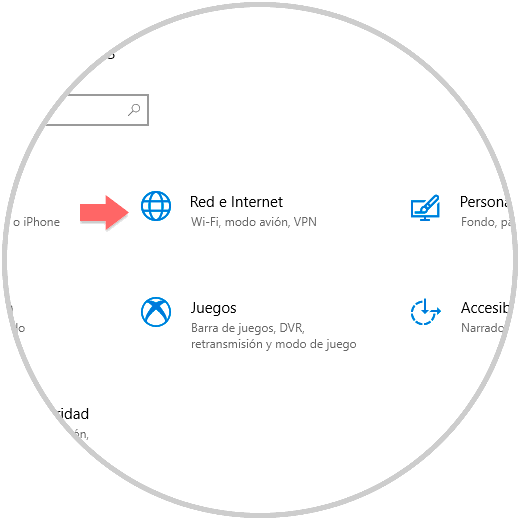
This method involves going to the Start menu and there selecting the "Configuration" utility, we will see the following:
Step 2
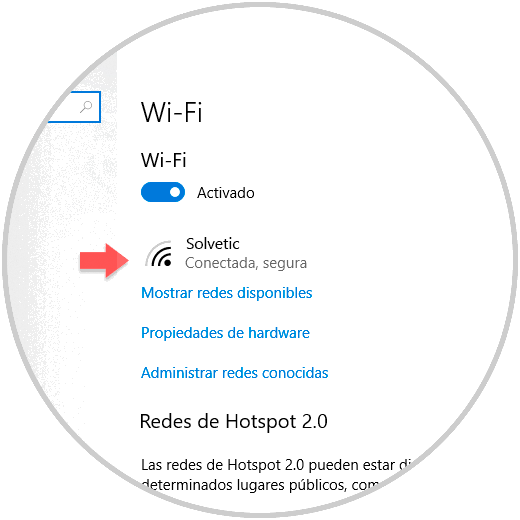
Click on the "Network and Internet" option and in the window displayed go to the Wi-Fi section where we will see the following:
Step 3
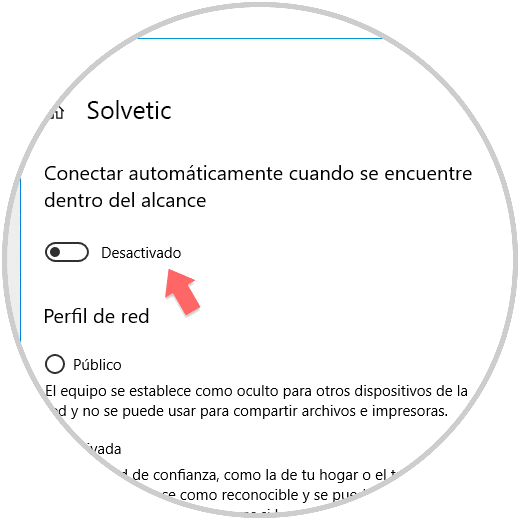
There we click on the name of our connected network and in the following window we click on the switch of the option “Connect automatically when it is within rangeâ€:
3. Do not connect WiFi automatically with Adapter Options in Windows 10
Through the Wi-Fi network adapter it will be possible to make a series of configurations including automatic connection.
Step 1
For this we will go to the next route.
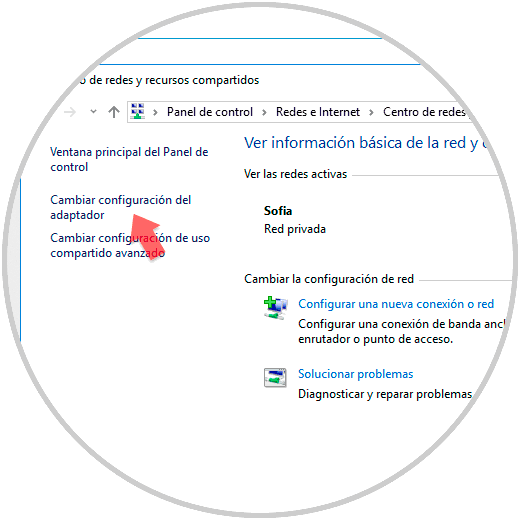
- Center network and sharing
Step 2
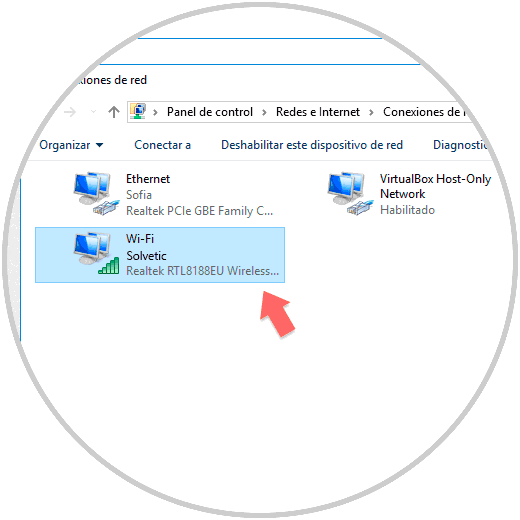
There we click on the "Change adapter settings" option and in the window we will double click on the Wi-Fi network adapter to access the "Properties":
Step 3
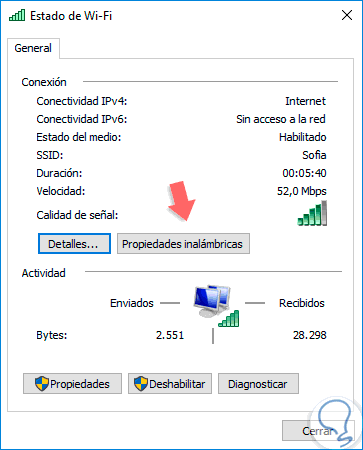
The following window will be displayed:
Step 4
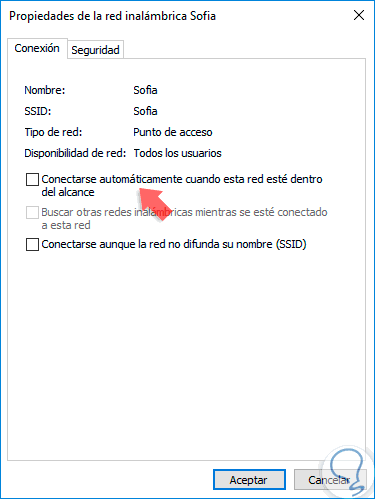
Click on the “Wireless Properties†button and in the next one we validate that the “Automatically connect when this network is within range†box is unchecked. Click on OK to save the changes.
4. Do not connect WiFi automatically with Netsh in Windows 10
Step 1
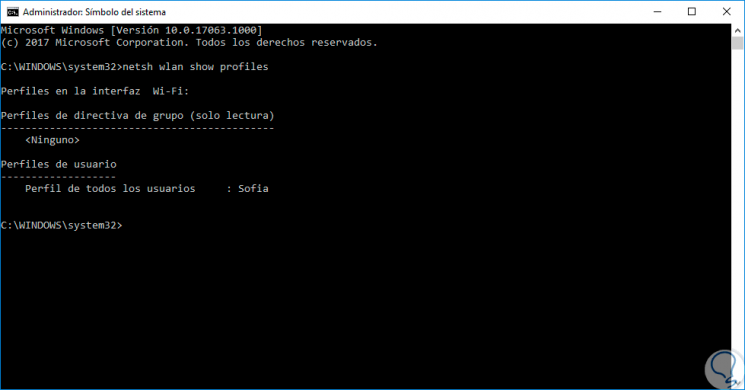
To make use of this option we must access the command prompt as administrators and there execute the following command:
netsh wlan show profiles
Step 2
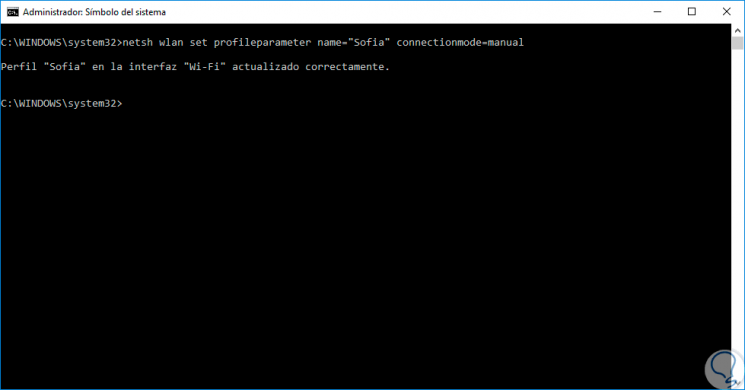
There we will see the network to which we are connected at this time, and to avoid automatic connection to this network we will execute the following:
netsh wlan set profileparameter name = "Sofia" connectionmode = manual
Step 3
We must replace the profile name with the one displayed to each one.
Step 4
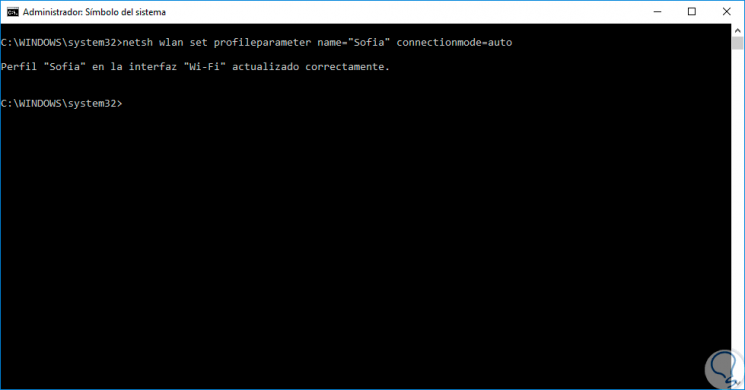
If we want to restore the default connection type, automatic, we will execute the following:
netsh wlan set profileparameter name = "Sofia" connectionmode = auto
Step 4
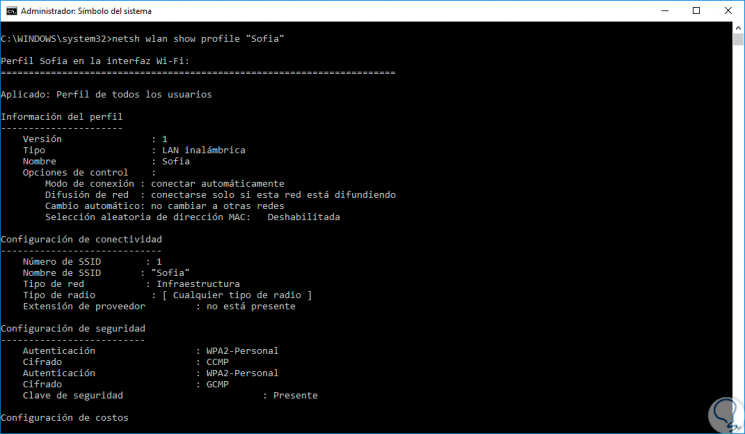
Finally, if we want to see the current network status, we can use the following command. In the "Connection mode" box we will see the current configuration.
netsh wlan show profile "Sofia"
It's that simple we can prevent our adapter from automatically connecting to a Wi-Fi network in Windows 10.