We are in a world where technology every day takes a more important place in people's lives without mentioning all the impact it has on a special population such as teenagers and young people. Here there is a special segment, videogames , whether live, local, etc., because they have a very popular boom that every day requires more and more technical specifications of the equipment on which these games are installed.
In fact, we can see even global championships where you can win a lot of money. Inside, a game that stands out is Minecraft which is a construction game based on the open world style, there it will be possible to create and destroy various types of blocks, all this is achieved using a character which is in a three-dimensional environment to carry out everything that our mind guides us.
Minecraft Compatibility
Minecraft is a game that is available for platforms such as:
Minecraft minimum requirements
Within the minimum requirements for Minecraft to be installed we have:
- CPU: Intel Pentium D or AMD Athlon 64 (K8) 2.6 GHz
- RAM: 2GB minimum and 4GB recommended
- GPU (Integrated): Intel HD Graphics or AMD Radeon HD with OpenGL 2.1
- Graphics card: Nvidia GeForce 9600 GT or AMD Radeon HD 2400 with OpenGL 3.1
- Hard disk: Minimum 200 MB free, but 1 GB recommended
- Java: Java 6 Release 45 and recommended Java 7
On this aspect TechnoWikis wants to talk today and it is the way you can allocate more RAM to your Minecraft game with the aim of making it much more versatile and its performance surprises us, remember that RAM plays a key role in the way applications perform in a system.
This process will be done in Windows 10 but it is the basis for you to apply it on other systems and you can enjoy Minecraft without pixels and without freezing, when your memory is not high enough for Minecraft you can find a scenario like this:
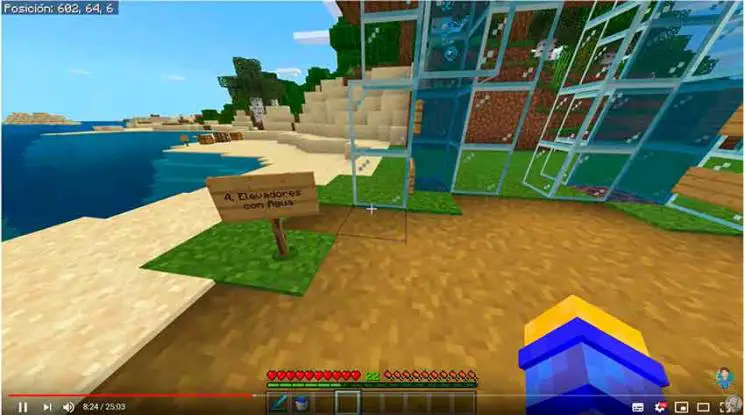
This is undoubtedly annoying since being a 3D game we wish the best of the best to feel at ease, follow the advice that we will give you below and so you will enjoy a much more complete game.
Let's see the process to grant more RAM for Minecraft.
1. View RAM memory available in Windows 10
The first step we must take is knowing with certainty how much physical RAM our computer has.
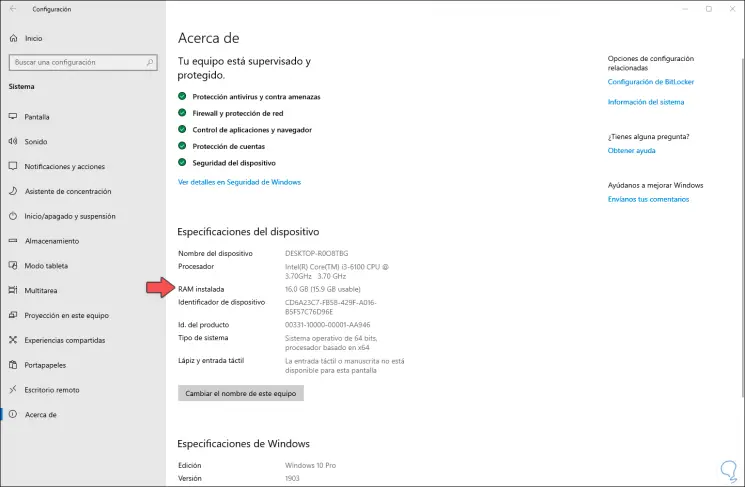
For this we go to the next menu and in the section "Device specifications" we find the line "RAM installed". There we determine the total available RAM.
For the correct operation of Minecraft, half of the available RAM must be available, in our case it would be 8 GB.
2. Assign RAM using Java in Windows 10
Step 1
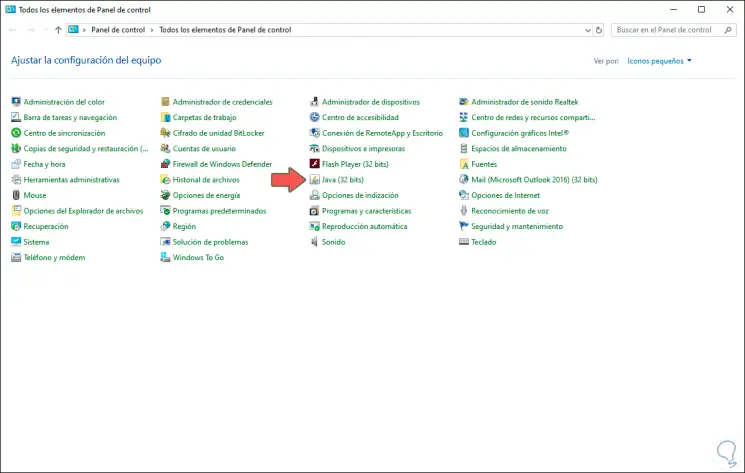
Minecraft has a Java-based edition, so the first option to use will be editing these variables, for this we go to the Control Panel and in the "View by" field we select one of the following options:
Step 2
There we find the option "Java (32 bits)", in case it is not visible, you must download Java in the following link:
Java
Step 3
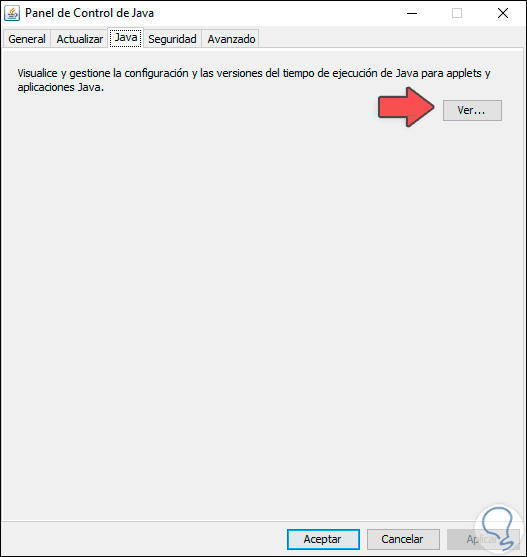
We click on Java (32 bits) and the Java Control Panel will open, there we will go to the Java tab where we will see the following:
Step 4
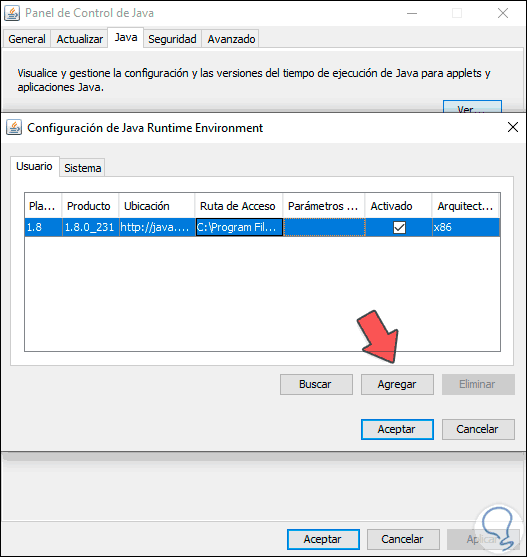
We click on "View" and the following will be displayed:
Step 5
There we find a column called "Runtime Parameters" in which the memory can be allocated to Java, the options available based on the amount of RAM to be used are:
Step 6
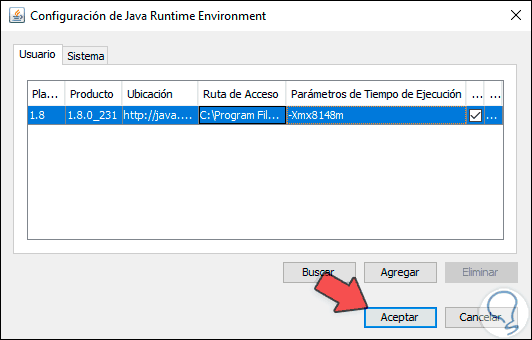
There we double click on this field and paste the correct parameter based on the RAM to be used, in this case we will enter the value -Xmx8148m. Click on OK and in the next window click on Apply / Accept to exit the Java Control Panel.
Step 7
We close the Control Panel and access Minecraft and proceed to play to validate if the performance is adequate: 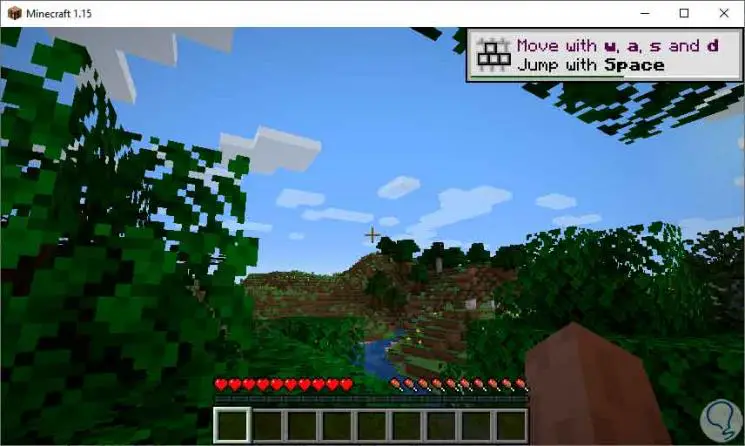
3. Allocate RAM using advanced system settings in Windows 10
In case the game still does not show improvement, another option available to allocate more RAM to Minecraft is through the advanced system settings.
Step 1
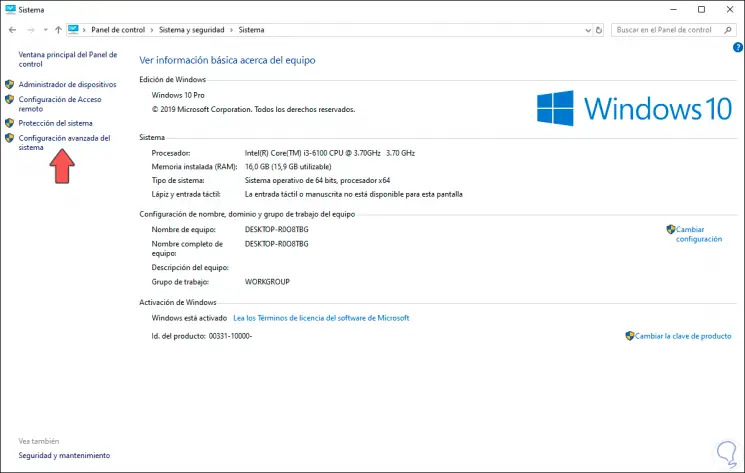
To do this we will go to the following route:
Step 2
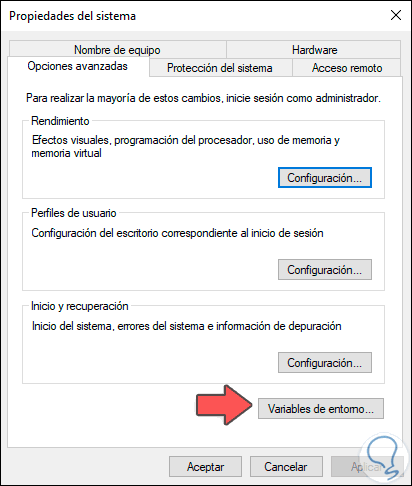
There we click on the "Advanced system configuration" line located on the left side and the following window will be displayed:
Step 3
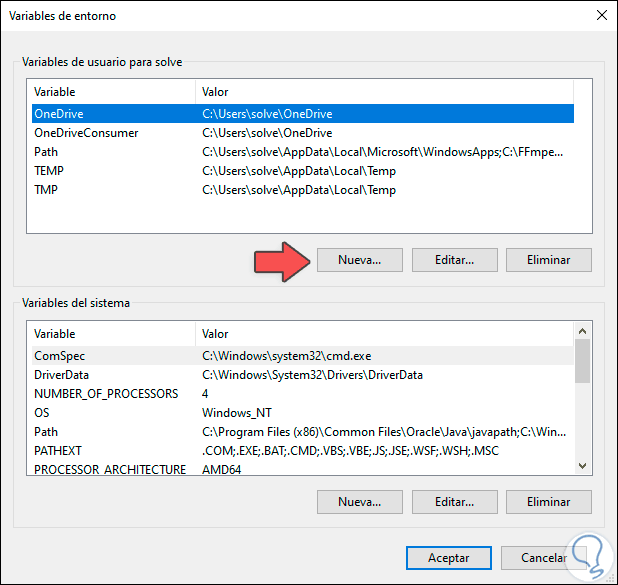
There we click on the line "Environment variables" and the following will be displayed:
Step 4
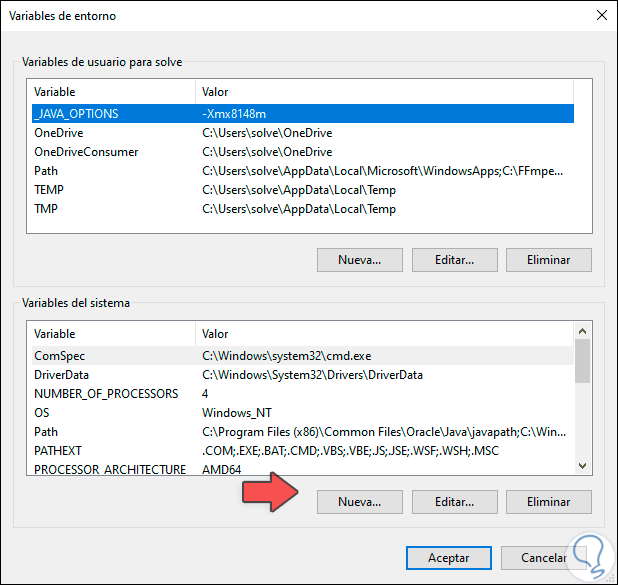
There we will create a new variable called _JAVA_OPTIONS, for this we click on the "New" button and add this name in the "Variable Name" field and in the "Variable Value" field we can use any of the options that you We have indicated based on the available RAM:

Step 5
Click on OK and we will see that the variable is integrated:
Step 6
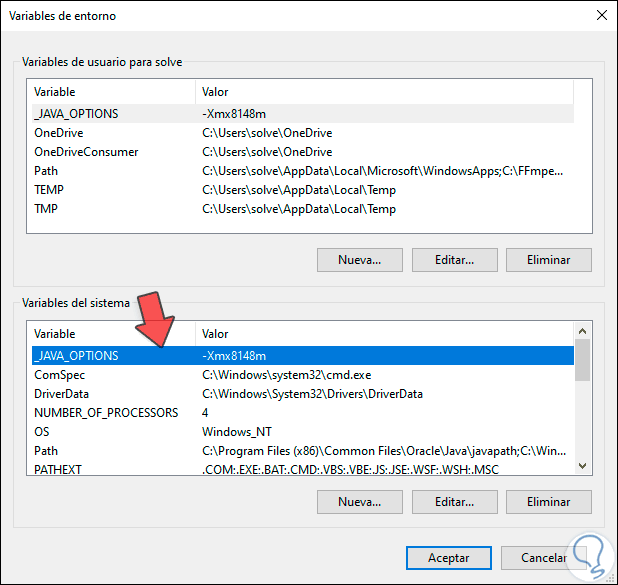
We repeat this same process in the "System variables" section. We click on Accept and in the advanced options window we also click on Accept to complete the process.
Step 7
After this we access Minecraft again to check its performance: 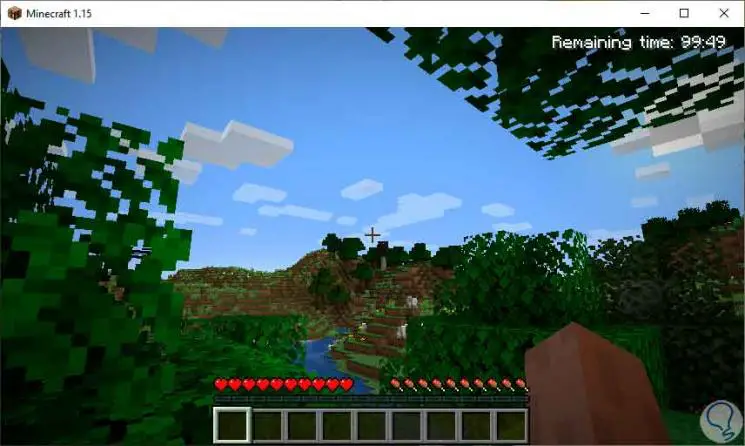
4. Allocate RAM using Minecraft Launcher in Windows 10
Step 1
It is possible to edit the RAM parameters from the launcher or launcher of the program, for this we open Minecraft Launcher and in the window we will go to the "Installations" tab: 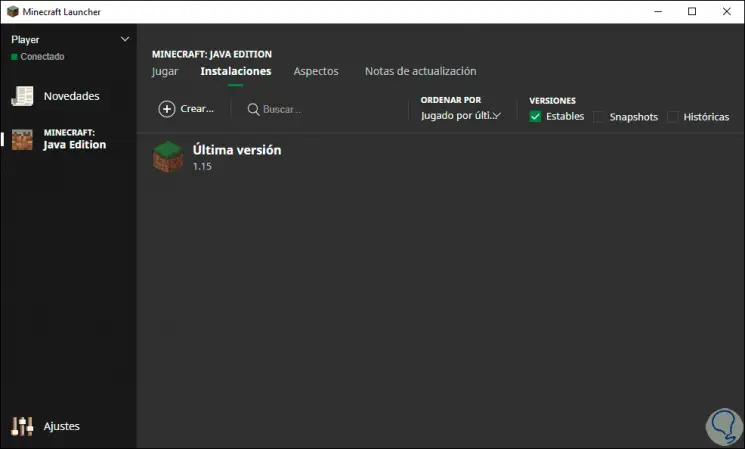
Step 2
There we find the latest version, we hover over this field and a button with three horizontal dots will be activated: 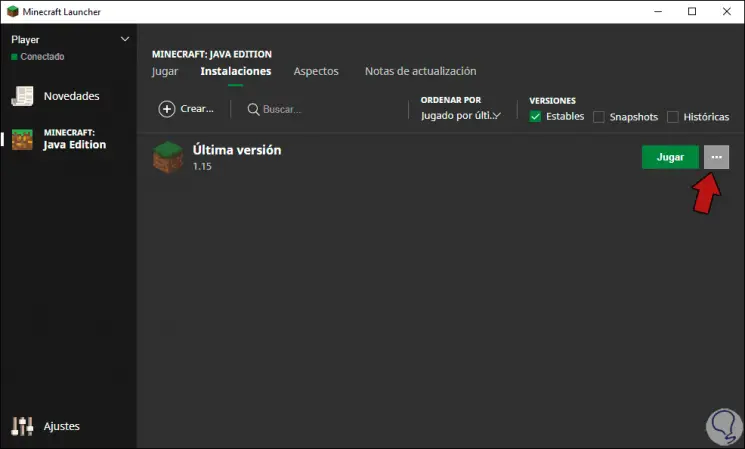
Step 3
We click on them and select Edit, then in the pop-up window we click on "More options" and we will go to the "JVM Arguments" line: 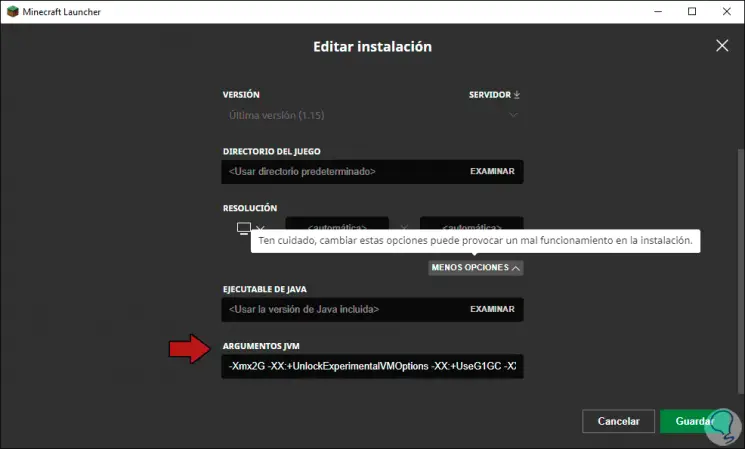
Step 4
As we see, at the beginning of this line is the value -Xmx2G which indicates the amount of RAM to use, 2 means 2 GB of RAM, we change this value to 8 to use 8 GB of RAM in Minecraft. We click on Save to complete the process. 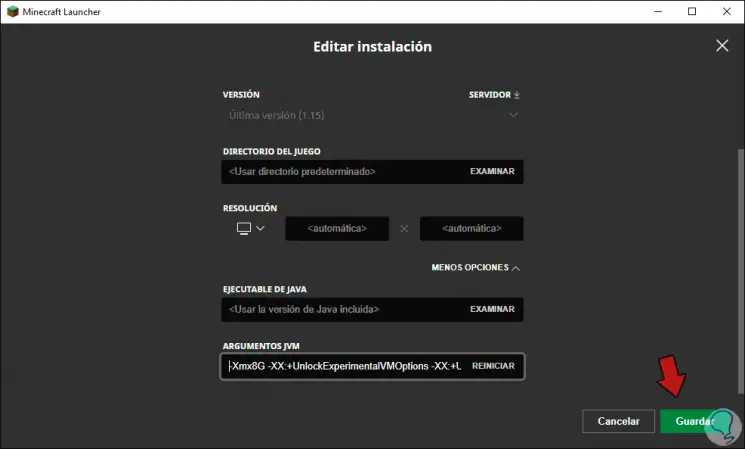
With any of the methods described we have the opportunity to allocate more RAM to our game of Minecraft and thereby make the most of the game regardless of the day or time.