To stay up to date, remember to subscribe to our YouTube channel!
SUBSCRIBE ON YOUTUBE
Minecraft is a game in which we can explore our creativity and has become one of the most popular in the world due to its different added functions. Minecraft requires the following hardware to function and run optimally:
Requirements
- Operating System: Windows 11, 10, macOS Mojave (10.14.5) or later versions, Linux (Ubuntu, Fedora).
- Processor: Intel Core i3-3210 or AMD A8-7600 APU or similar.
- RAM memory: 4 GB recommended 8 GB.
- Graphics Card: Intel HD Graphics 4000 or AMD Radeon R5 with OpenGL 4.4 or higher versions.
- Storage: 4 GB available space.
- Internet Connection: Required to download the game and to play online which is key.
Now, RAM is one of the most essential parts for the game to flow, if we do not have adequate RAM we will see slowness in the game, crashes, freezes, etc..
Based on this, TechnoWikis will explain how to increase the RAM (based on what the PC has) and thus enjoy Minecraft to the fullest.
1 Check available RAM memory Windows 11
Step 1
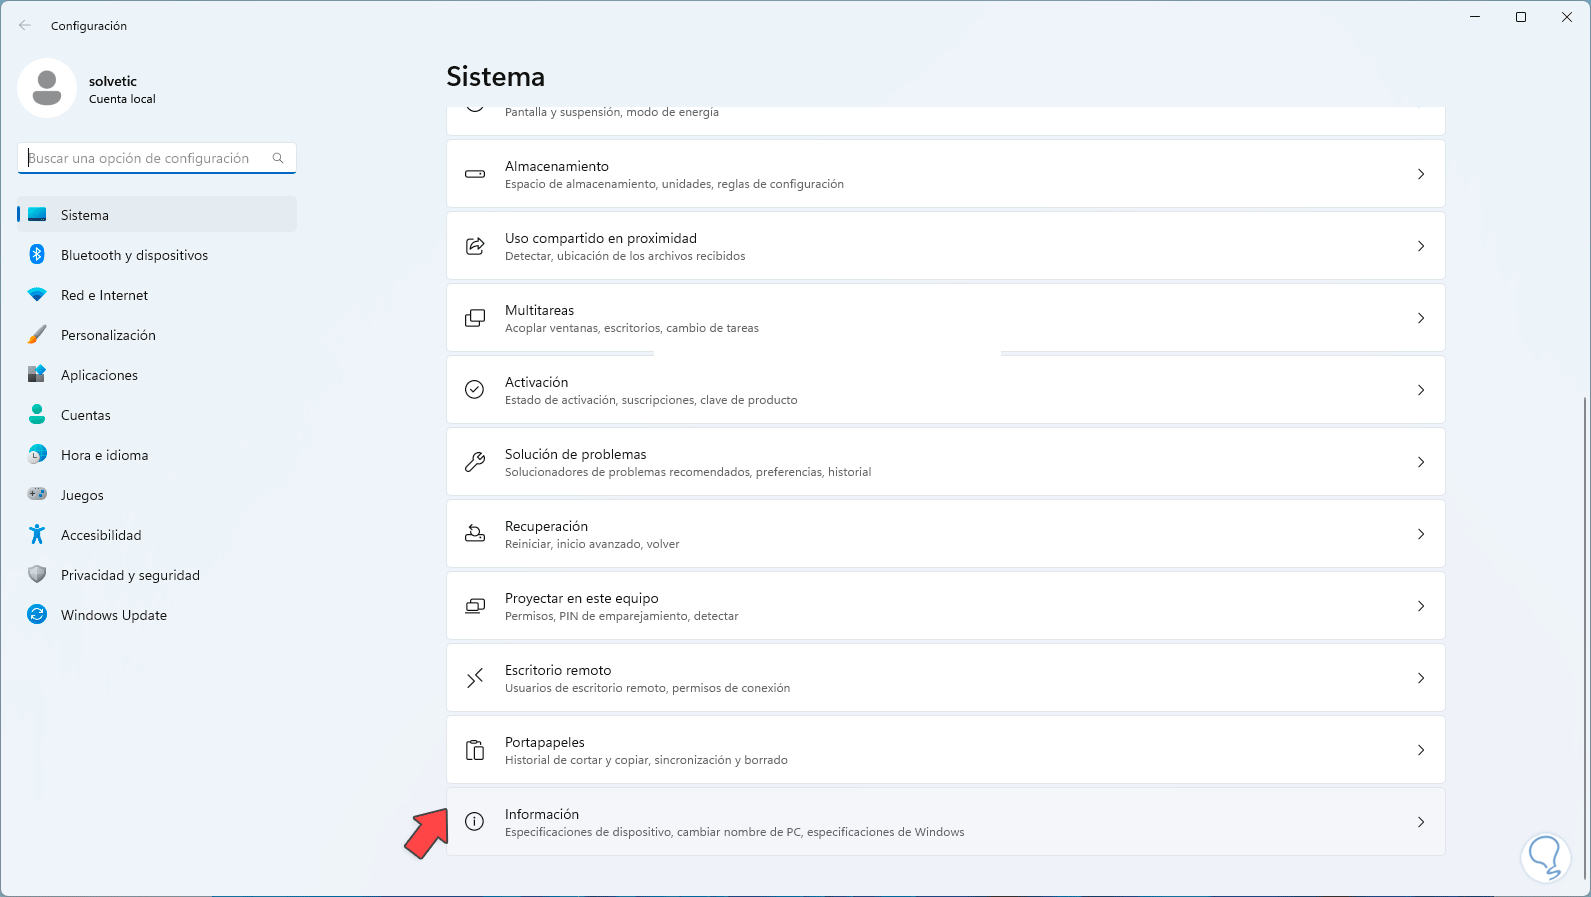
The first thing will be to know the RAM that we have on the computer. For this we will go to the route:
Step 2
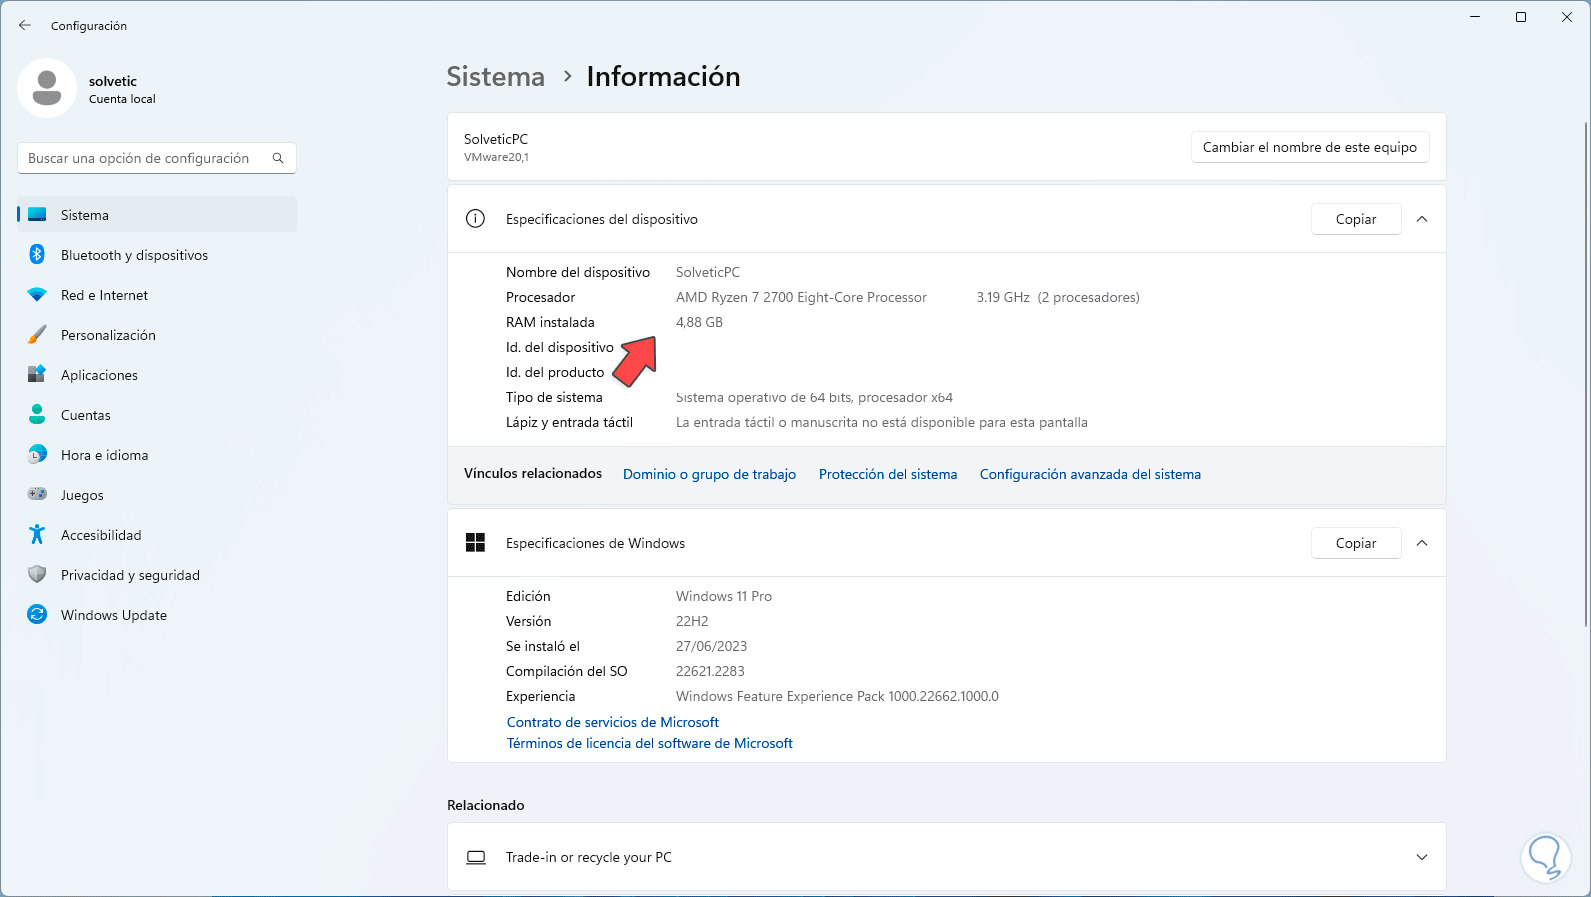
Then, in the “Device specifications” section, we will see the available RAM:
2 Increase RAM in Minecraft from Advanced Options
Step 1
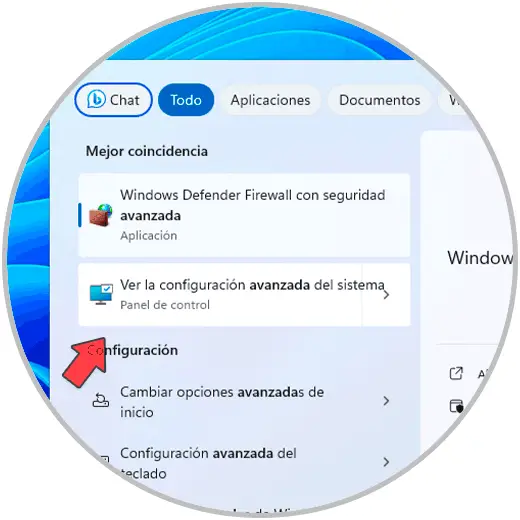
This will be our first method to increase RAM for Minecraft, in this case in the search engine we enter “advanced”, click on “See advanced system settings”:
Step 2
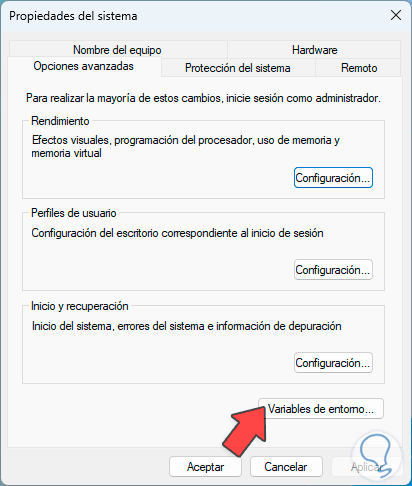
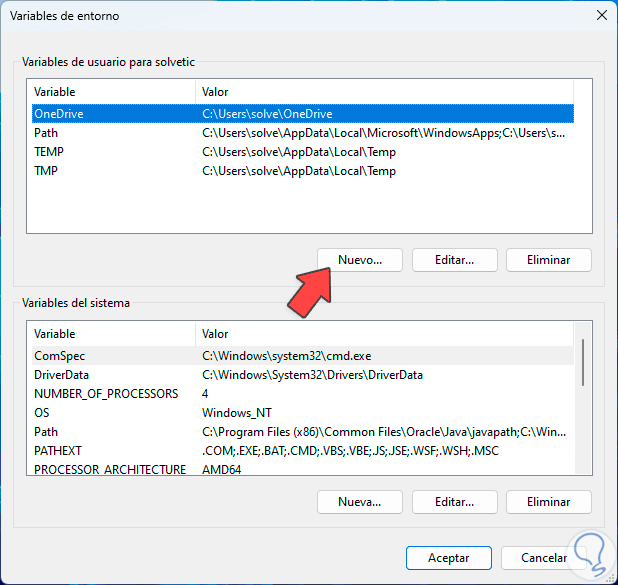
The following will open. We click on the “Environment variables” option, the following will open:
Step 3
Now, in the “User variables” section, we click on “New”, then we assign the following:
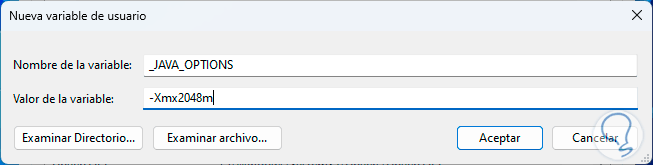
Step 4
In the “Variable name” field we enter the name “_JAVA_OPTIONS”.
Step 5
In the “variable value” field we assign one of the following values based on the RAM to be used:
• -Xmx2048m: 2 GB • -Xmx4096m: 4 GB • -Xmx6144m: 6 GB • -Xmx8148m: 8 GB • -Xmx10240m: 10 GB
Step 6
We apply the changes.
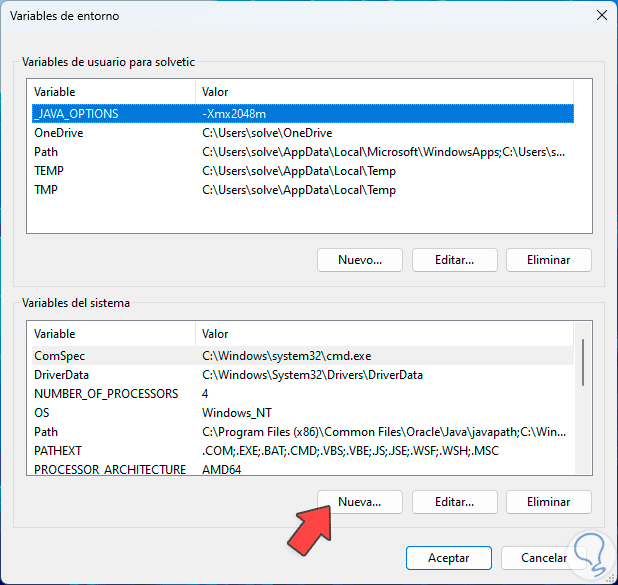
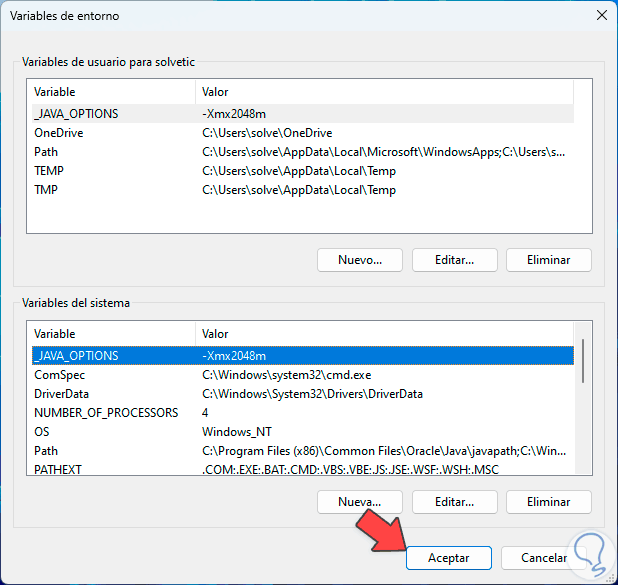
Step 7
Then, in “system variables”, we click on “New” and assign the same values as the previous one:
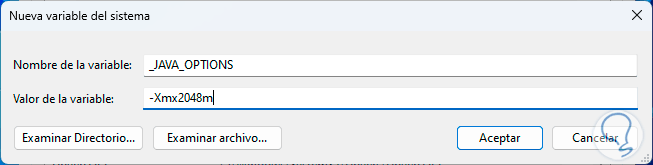
Step 8
We apply the changes.
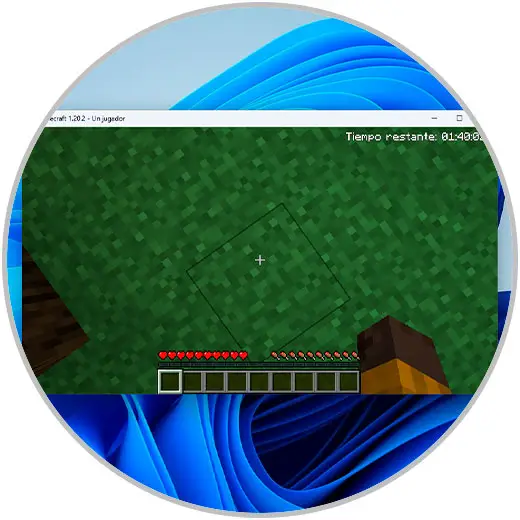
Step 9
After this, we open Minecraft:

Step 10
The environment will be loaded:

Step 11
We will be able to play Minecraft in a more fluid way:
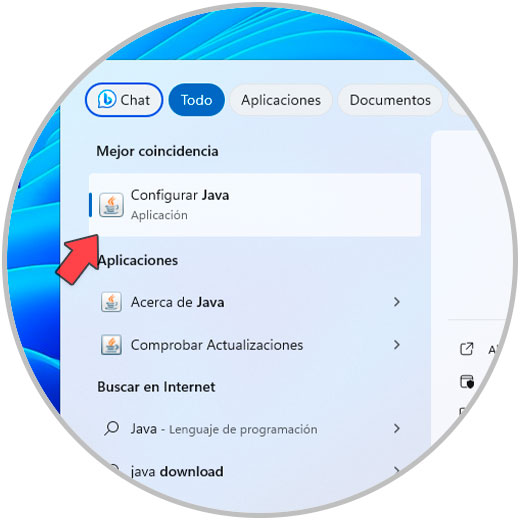
3 Increase RAM in Minecraft from Java
Step 1
Java is an essential part of how Minecraft works. By managing Java we can increase its RAM. To achieve this, in the search engine we enter “java”, then click on “Configure Java”:
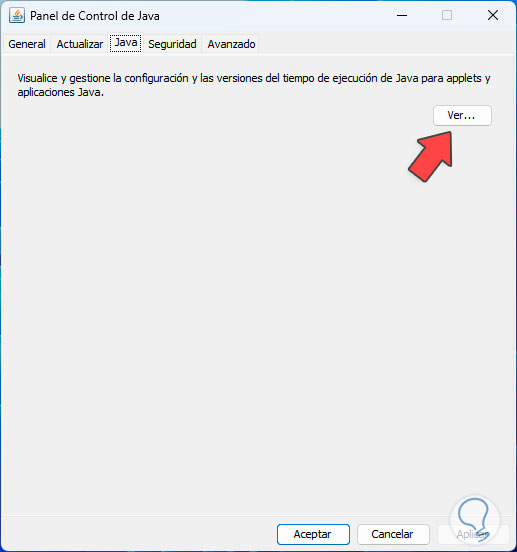
Step 2
In the displayed window, we go to the “Java” tab. We click on the “View” button, the following will open:
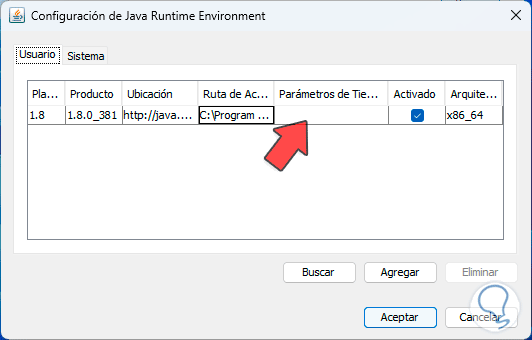
Step 3
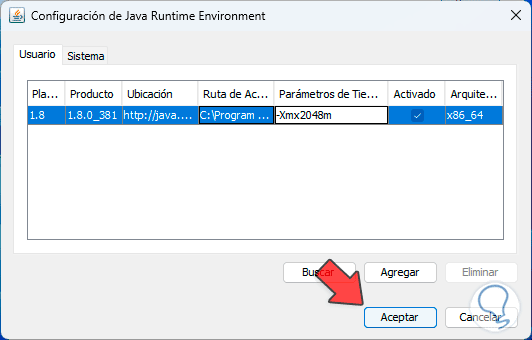
Now we double click on the “Runtime Parameters” field and enter the desired RAM value:
Step 4
This parameter indicates a group of configurations and options that will be used when running any Java application. Minecraft is based on Java, so when it opens it will be loaded with this RAM memory value.
We apply the changes.
Step 5
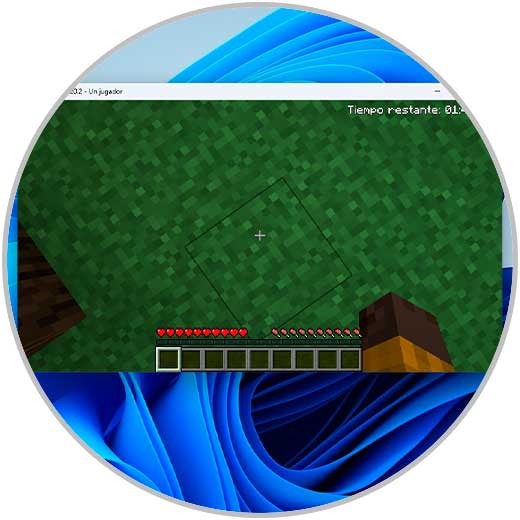
Then, we open Minecraft:
4 Increase RAM in Minecraft from Minecraft Launcher
Step 1
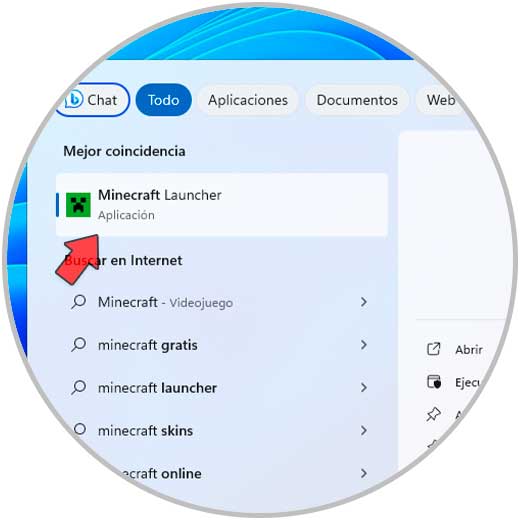
The Minecraft launcher itself allows us to configure certain attributes such as RAM, in this case, we open Minecraft Launcher from the Start menu:
Step 2
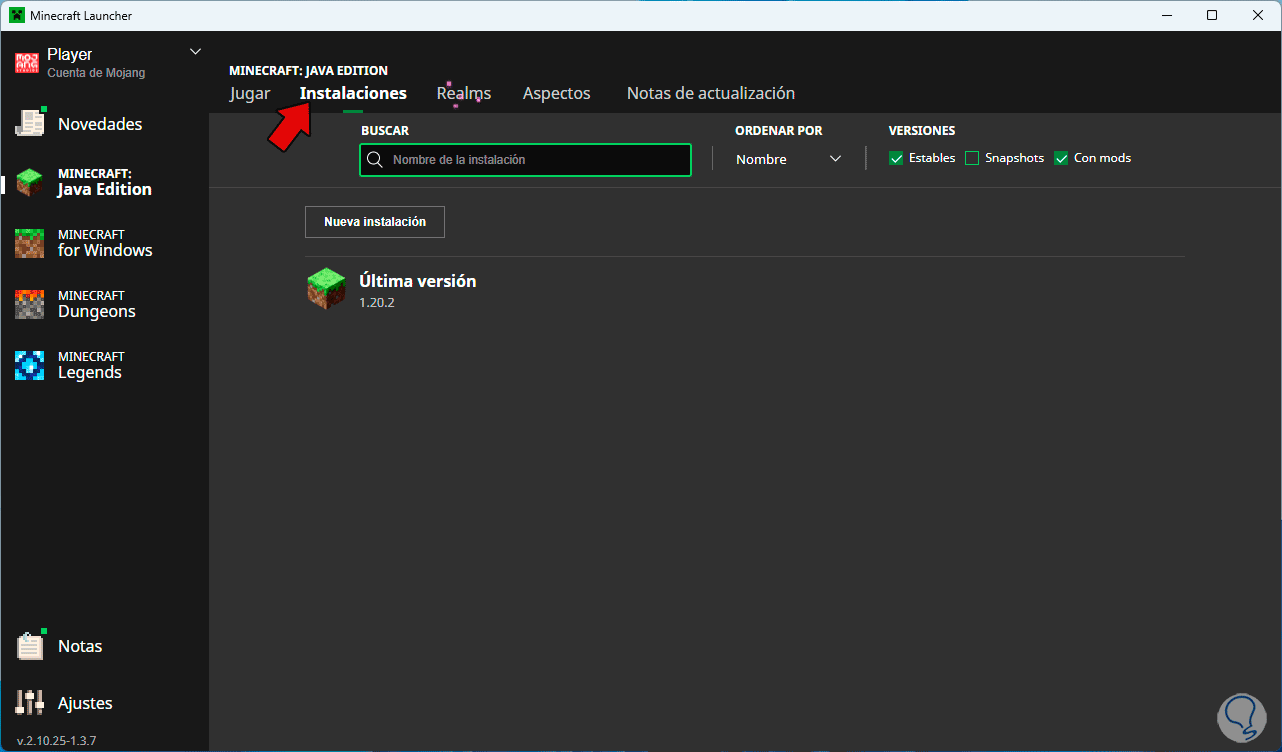
In the utility, we go to “Installations”:
Step 3
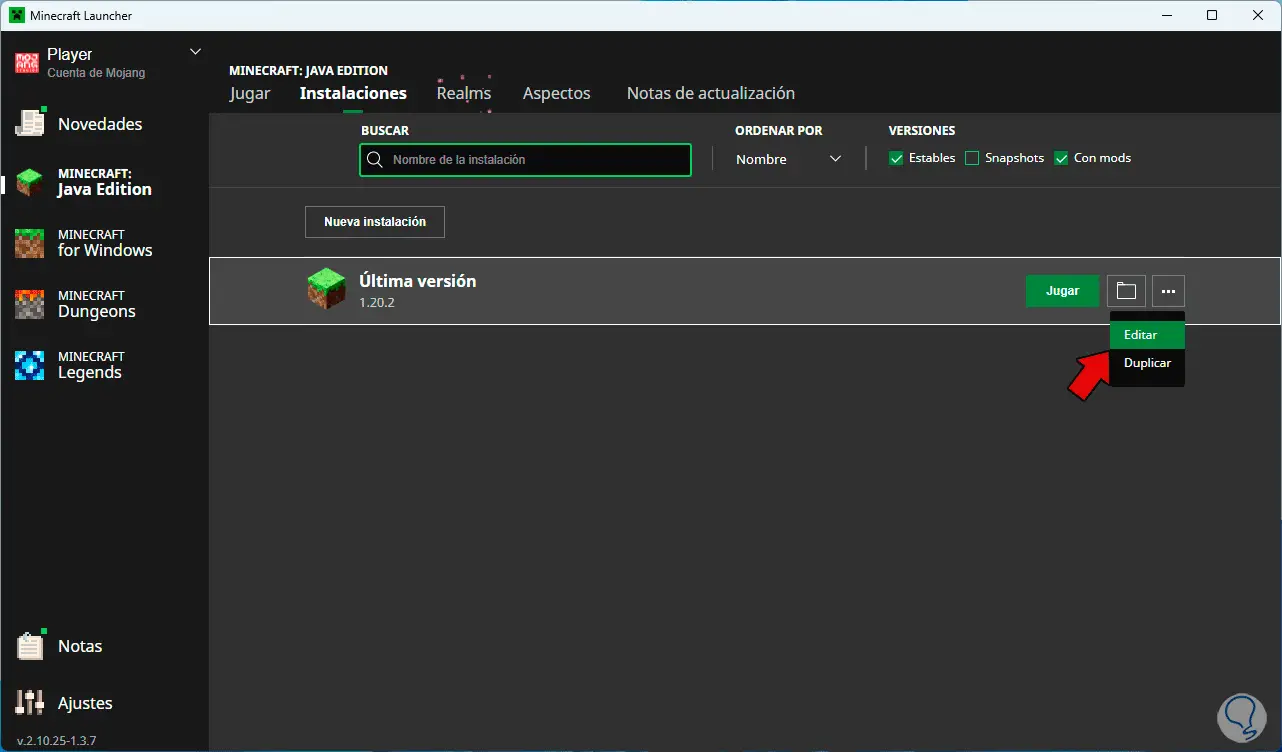
There, we hover over the version to activate the menu, click on “Edit”:
Step 4
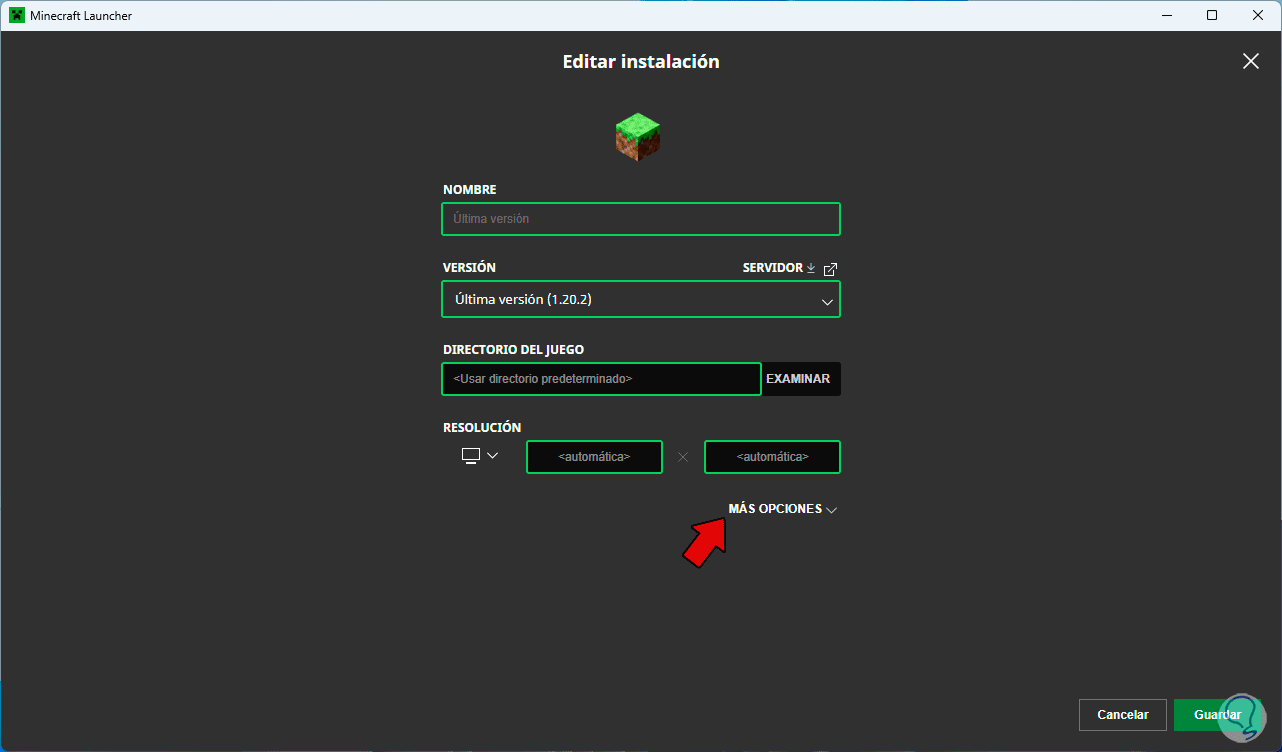
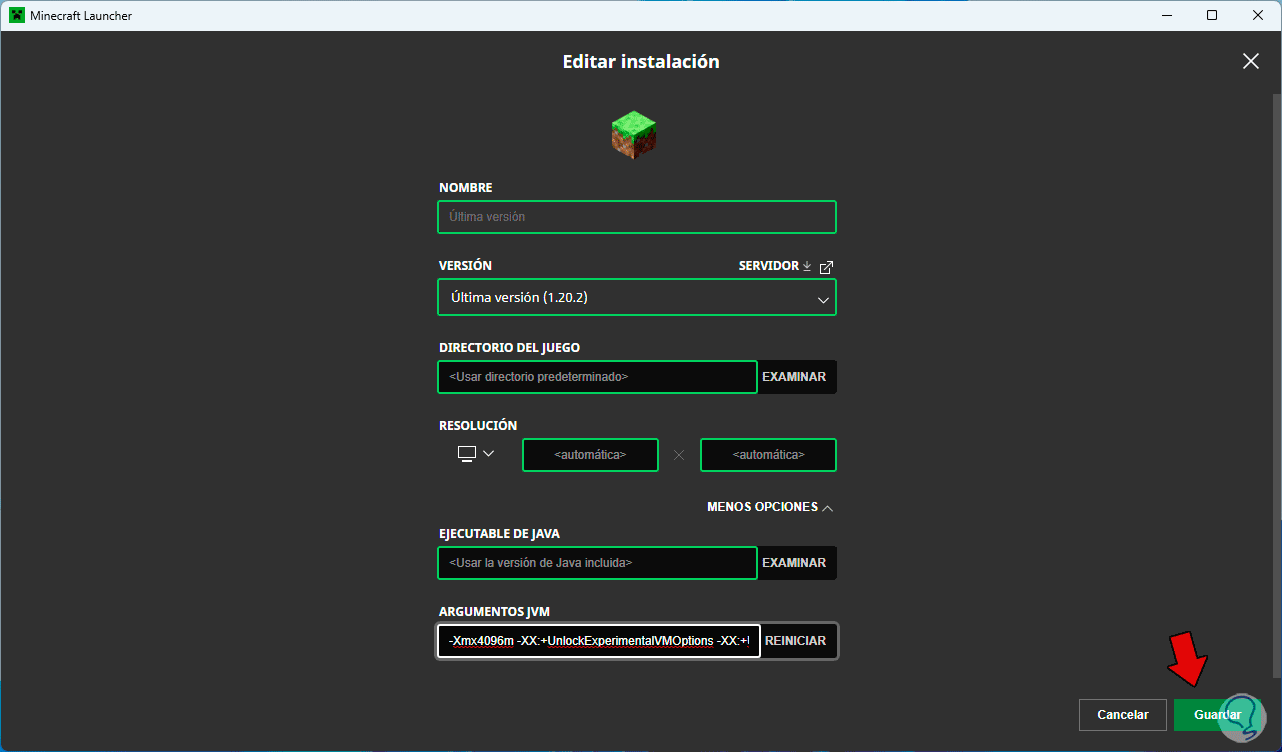
Then we will see the following: We click on “More options”:
Step 5
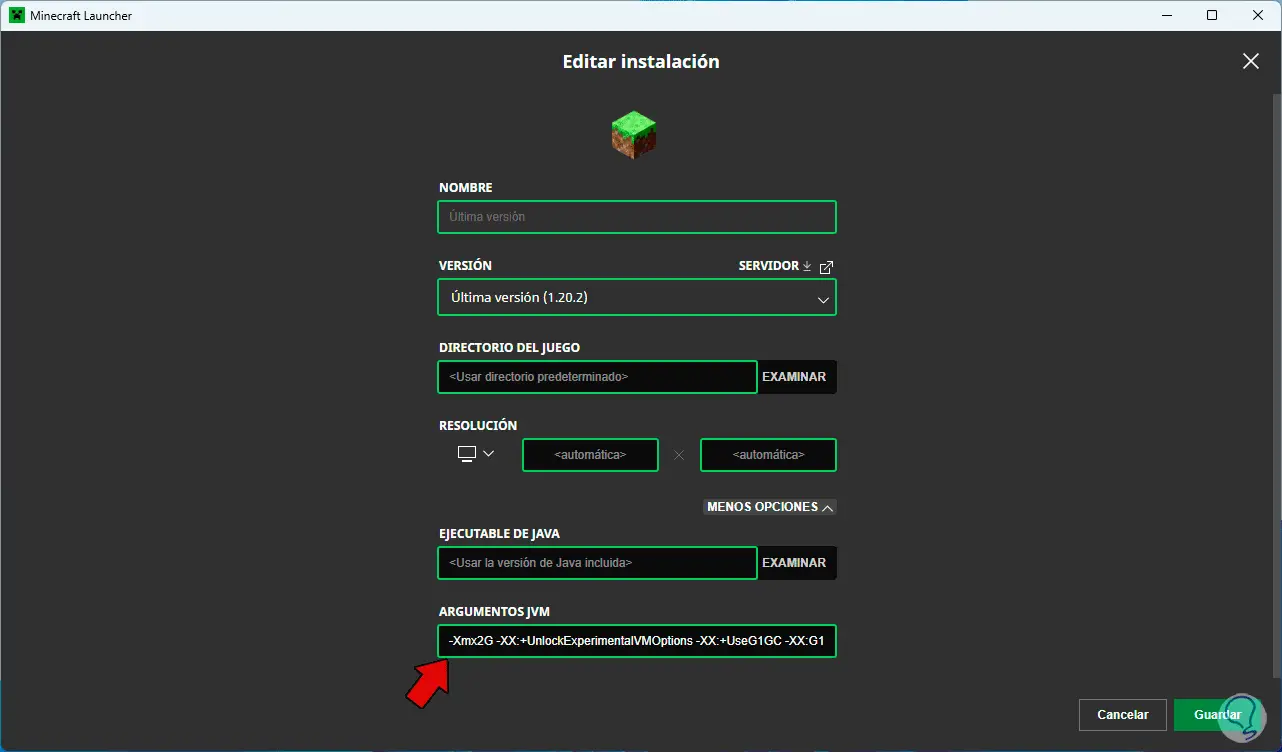
Here, at the beginning of the “JVM Arguments” field, we set the desired RAM value:
Step 6
We click on “Save”.
Step 7
Then we access Minecraft:

With these ways, it will be possible to add more RAM memory to Minecraft in Windows 11.