Hard disk space management is an issue that we must take into account to optimize the use of the disk since a bad distribution of this can lead to problems of saving, reading and writing as well as other symptoms. It is normal that we keep sensitive files on the disk as well as the respective system installations and applications since. By default, this type of installation (including the installation of the Windows operating system) is done on the C drive..
So if the disk only has that unit we run an imminent risk of losing this information since in case of viruses, software failures or management tasks it is necessary to format the disk, that is, everything will be erased. In this case it is best to create a partition on the disk and host the information there , so only the drive where the system is located is formatted but not the files. In addition, the use of partitions is practical for hosting backups and other management tasks .
When we acquire a device, one of the elements that we must take into account is the type of disk and its final available space. Although today external disks are the order of the day and are increasingly powerful with large capacities, the truth is that starting from a good internal base will make our work easier and make us more independent of additional hardware. If we have space on the disk or an existing partition and want to allocate more space to one of them or reduce it, TechnoWikis brings the way to know how we will do it in Windows 10 and this process works the same way for Windows 7 and Windows 8
To keep up, remember to subscribe to our YouTube channel! SUBSCRIBE
1. Resize the hard drive using Windows 10 Disk Manager
Step 1
This is an option integrated in the system for the management and control of Windows storage units and to access it we have the following options:
Disk Manager
Step 2
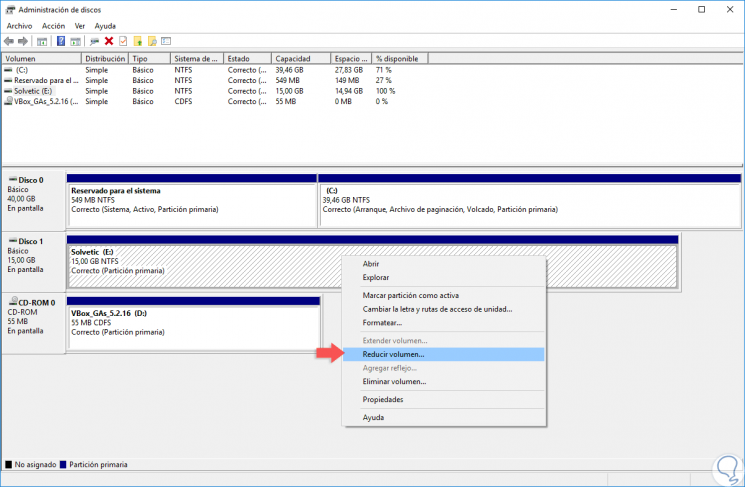
In the deployed console we will go to the partition to manage and there we have two options. If the partition does not have unallocated space, right clicking on it will only be the option to reduce its size:
Step 3
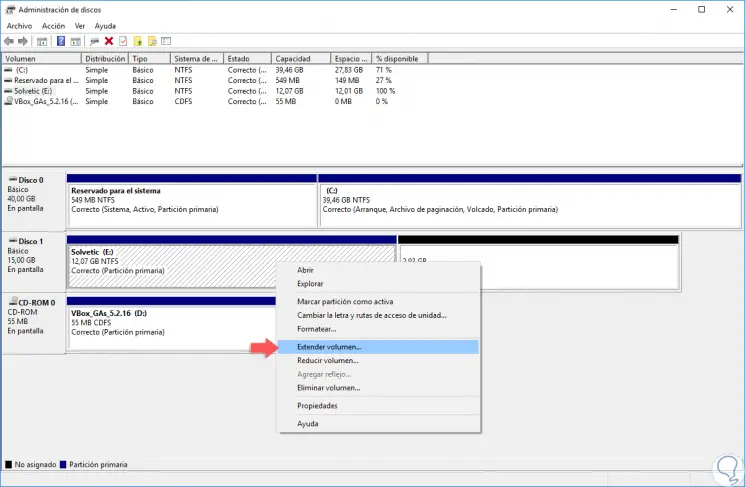
Now, if the selected partition has unallocated space, we can increase the partition size or reduce it:
Step 4
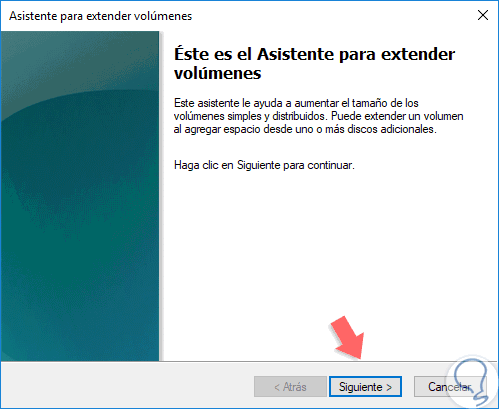
As the objective of TechnoWikis is to explain how to allocate more space to a unit, we must do this in situations where there is unallocated space on the disk, in this case we select the option “Extend volume†and the following wizard will be displayed:
Step 5
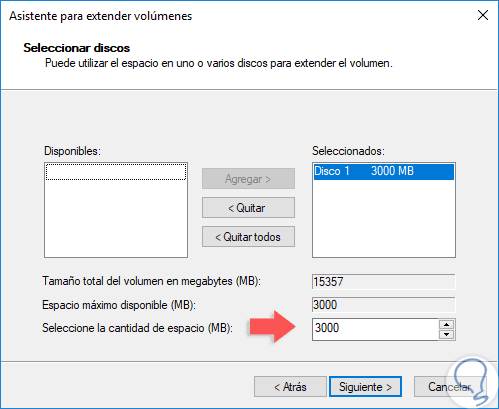
Click Next and it will now be possible to see how much space can be added to the selected partition, the amount of space to add depends on the amount of free space available, so by default, the wizard will select all the free space that is not is assigned:
Step 6
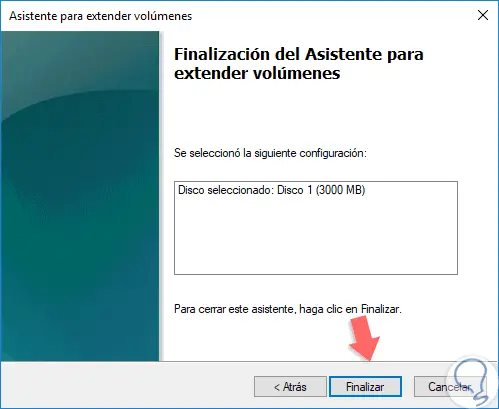
There we can eliminate that free space or assign the quantity to be added in the "Select the amount of space (MB)" field. Click on Next and we will see a summary of the task to be executed:
Step 7
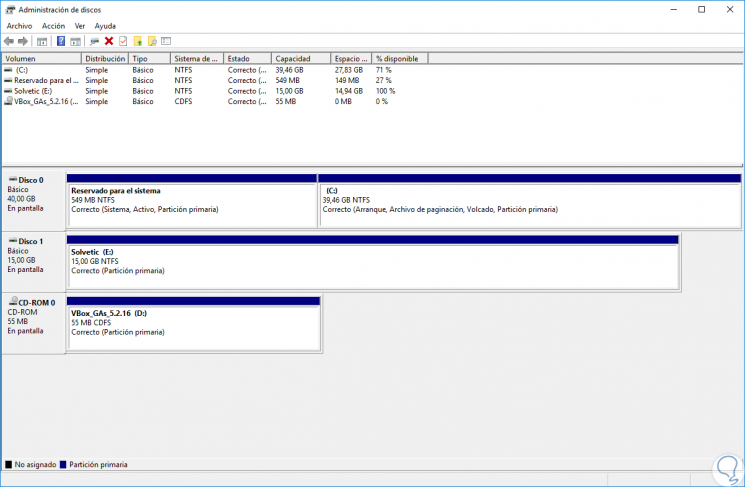
Click on "Finish" to complete the action and now we will see that the selected partition takes all the unallocated space which increases its size:
Step 8
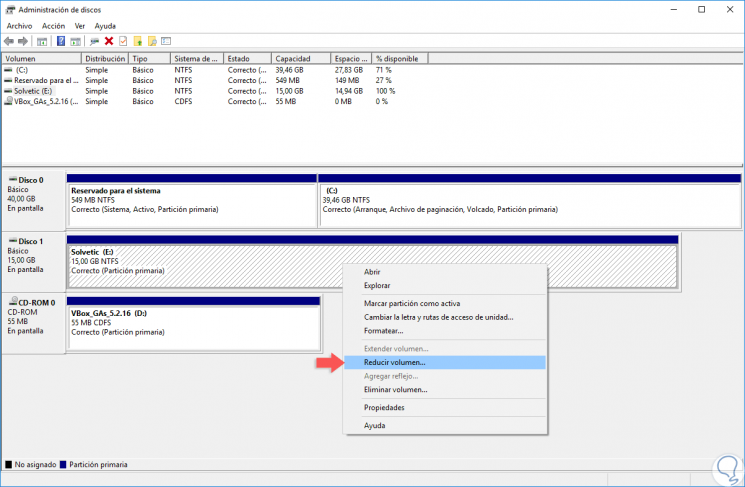
At this point we have seen how to extend the size of the partition using the unallocated space, now, if the objective is to reduce the size of the partition we must select the option “Reduce volumeâ€:
Step 9
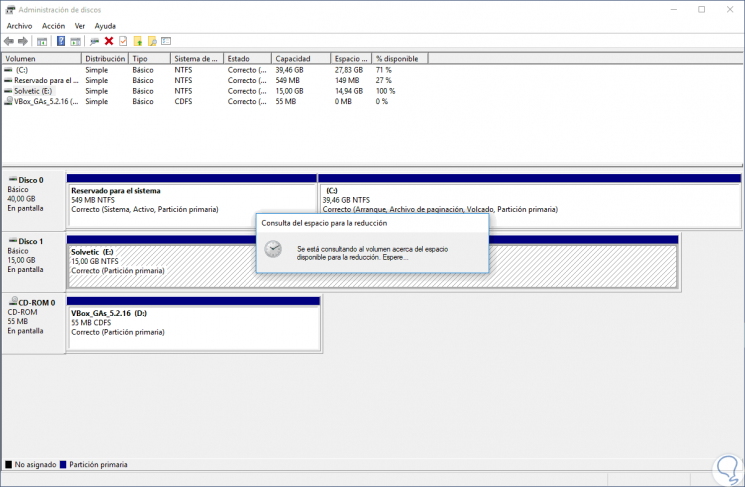
This will display the Windows wizard which is responsible for analyzing the amount of space you can reduce on the selected partition:
Step 10
Once this is defined, we will see the maximum amount that we can reduce the selected partition and in the field "Size of the space you want to reduce in MB" we can enter a size range that does not exceed the maximum allowed:
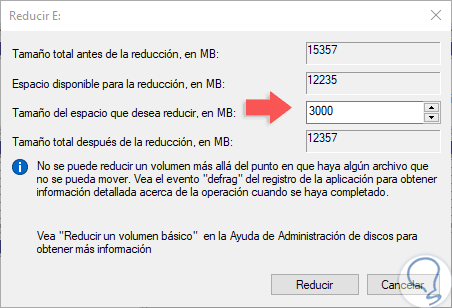
Step 11
Click on the "Reduce" button and we will see that the selected partition is reduced and the defined space will be as unallocated space:
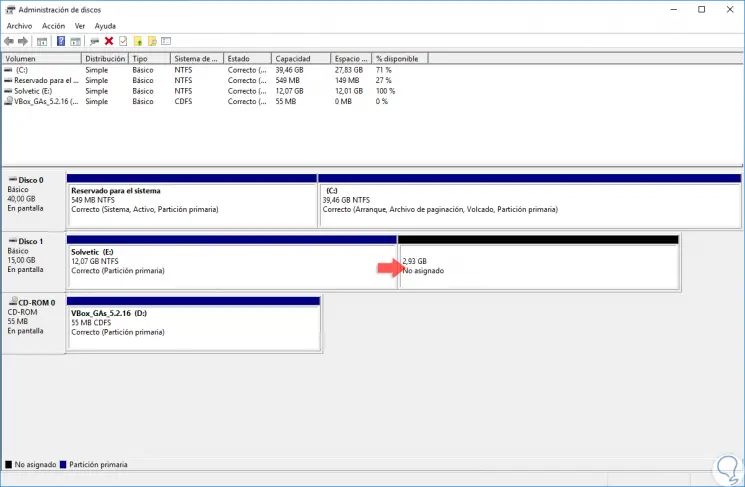
Step 12
If we want to use this space, we must right click on it and select the option “New simple volumeâ€:
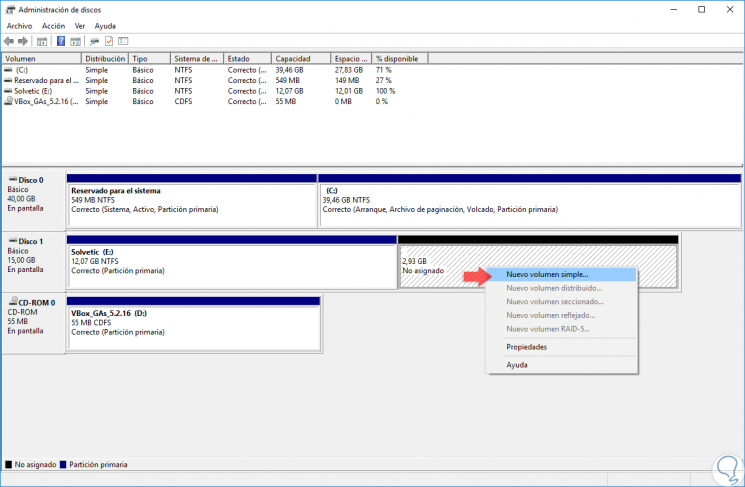
Step 13
The wizard will be displayed where we will define the amount of space to allocate:
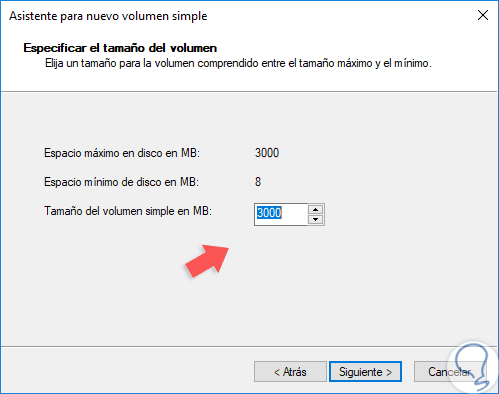
Step 14
Click on Next and then select the letter to assign for the unit:
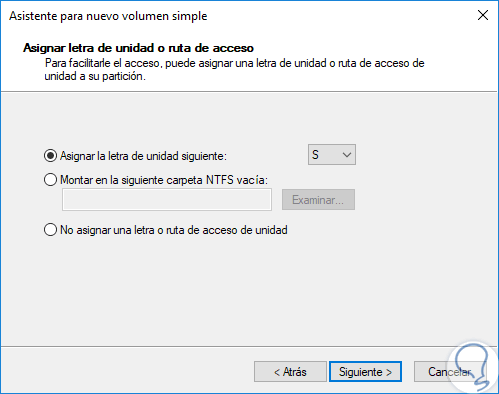
Step 15
In the following window we define a name for the unit and set the format option:
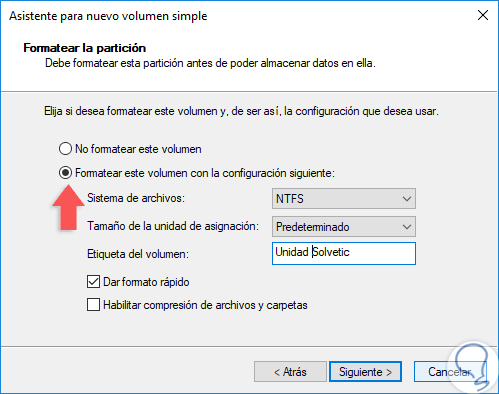
Step 16
Click Next and a summary of the task to be executed will be displayed:
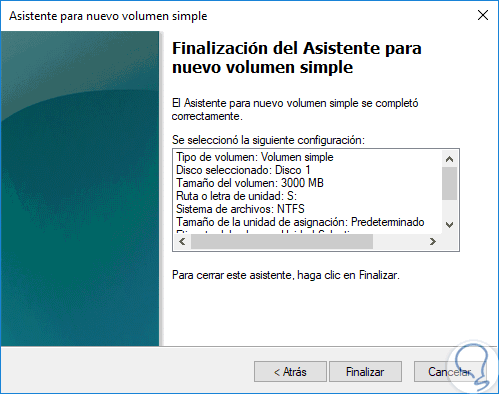
Step 17
Clicking Finish will complete the action and the partition created will be ready for use:
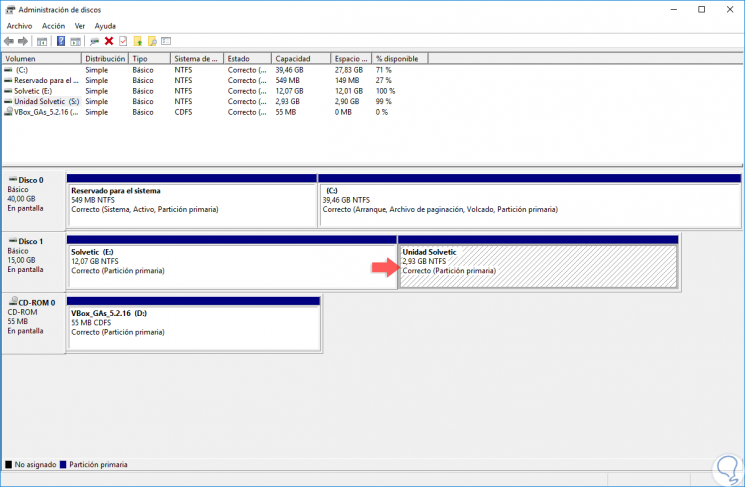
2. Resize the hard drive using Windows PowerShell or CMD Windows 10
This option can be executed both by the Windows PowerShell console and by the command prompt terminal.
Step 1
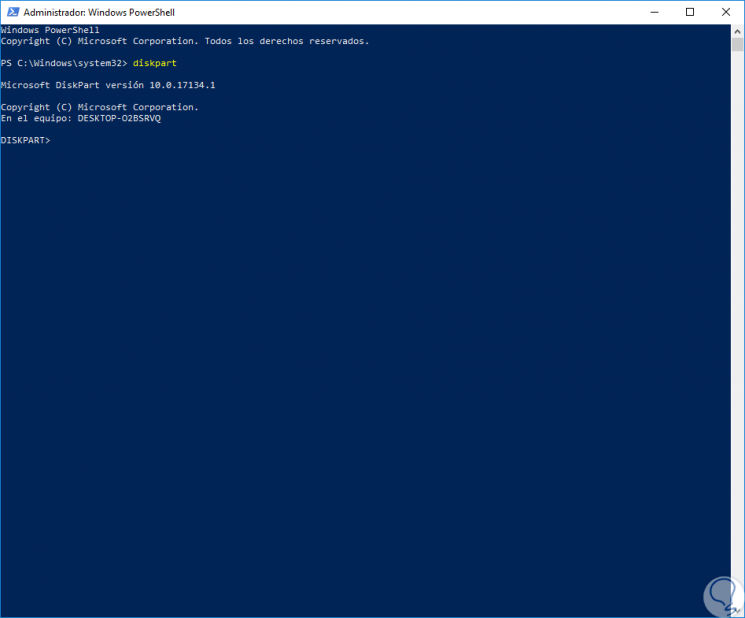
For this case we will use Windows PowerShell, when accessing the console we execute the following command:
diskpart
Step 2
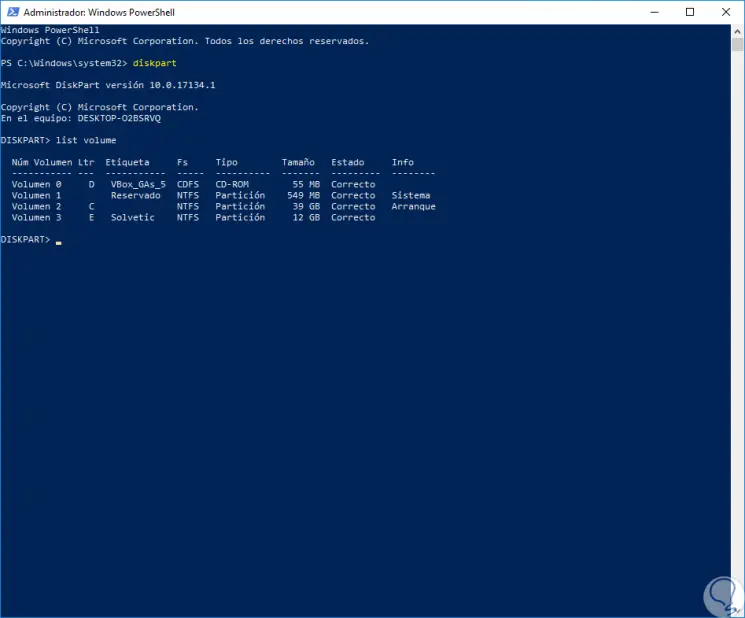
Diskpart is an integrated Windows utility thanks to which it is possible to perform numerous actions on the storage units. Once this command is executed, we enter the following line to list all the storage units connected in the equipment:
Step 3
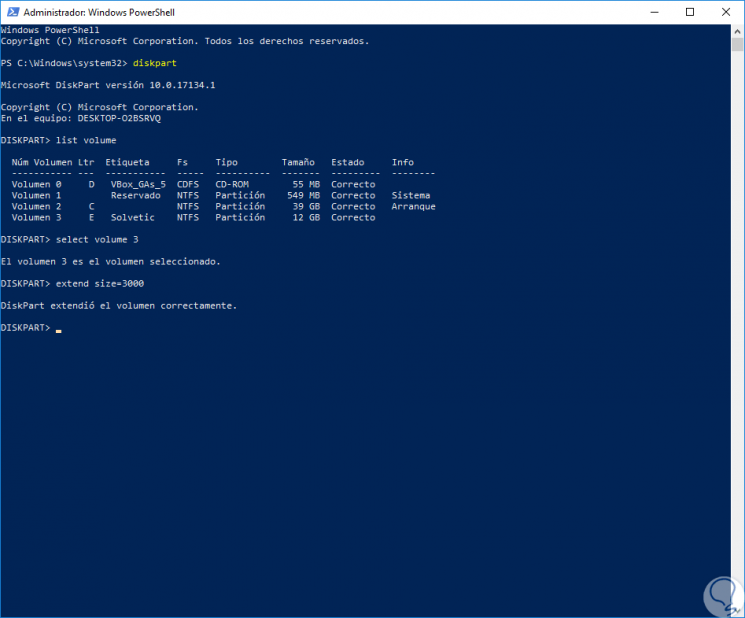
Now we select the partition that we are going to extend using the following syntax:
select volume # (we must replace the symbol # with the correct volume)
Step 4
Selected the volume, we will execute the following syntax:
extend size = â€sizeâ€
Step 5
Now, if the goal is to reduce the volume we must execute the following:
shrink desired = â€sizeâ€
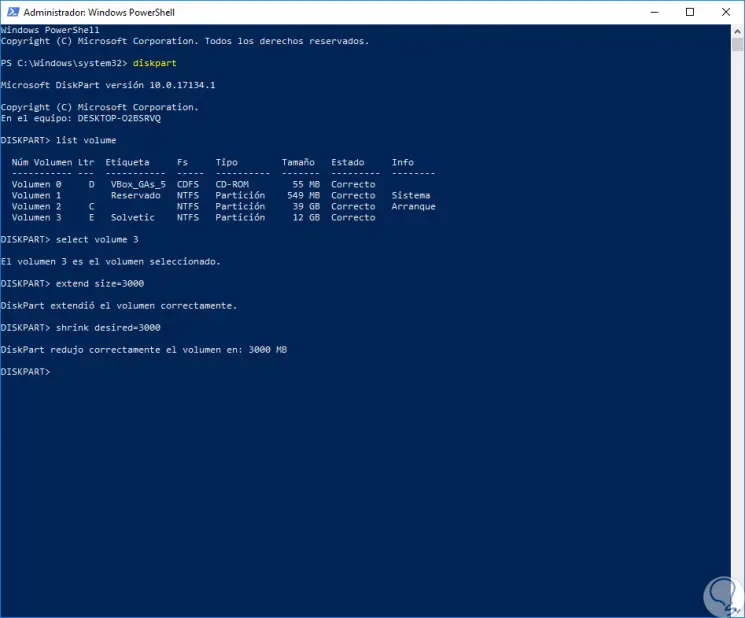
Thus, we have practical and comprehensive solutions that will help us extend Windows partitions, provided there is space available for such action..