Current computers use UEFI instead of BIOS to control the Windows 10 boot of each of the system components and each of these has its own data structure. The GPT structure is the one set by default when Windows 10 is installed on the GPT disk, this allows that EFI partition to integrate and host the boot loader configuration for the installed operating system, as well as manage device driver files , system utility programs and many more services..
If we delete the EFI partition, the result may simply be that the system may not boot . But beyond EFI, we have GPT, at the time that Windows is deployed on a computer that is based on UEFI, the hard disk must be formatted with the GUID partition table (GPT) file system and the extra drives available they can use either the GPT file format or the master boot record (MBR). But some users may experience problems using either their main EFI drive or any other drive (USB or partition) that is EFI or GPT.
This is why TechnoWikis will explain how to give a comprehensive solution to this error and erase that partition with failures..
Delete EFI or GPT system partition in Windows 10
Step 1
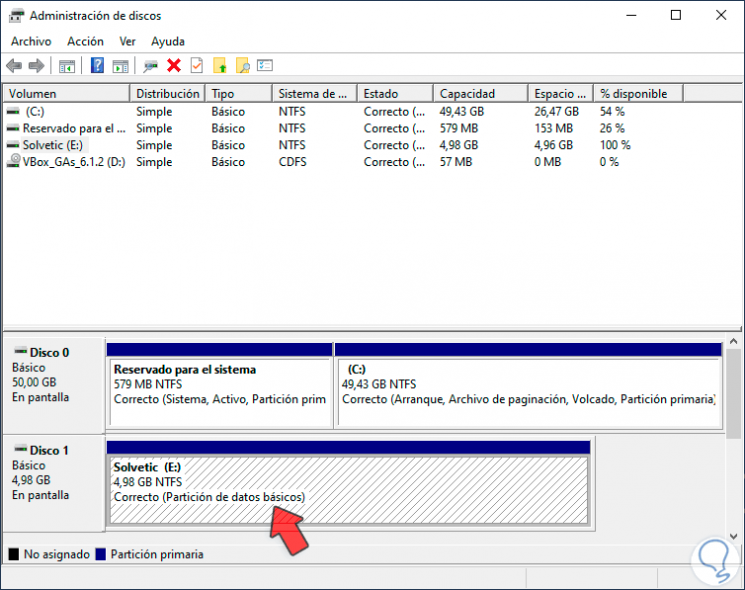
For this case we can access the Disk Administrator and there observe the disk to be deleted. In this case it will be disk 1.
Note
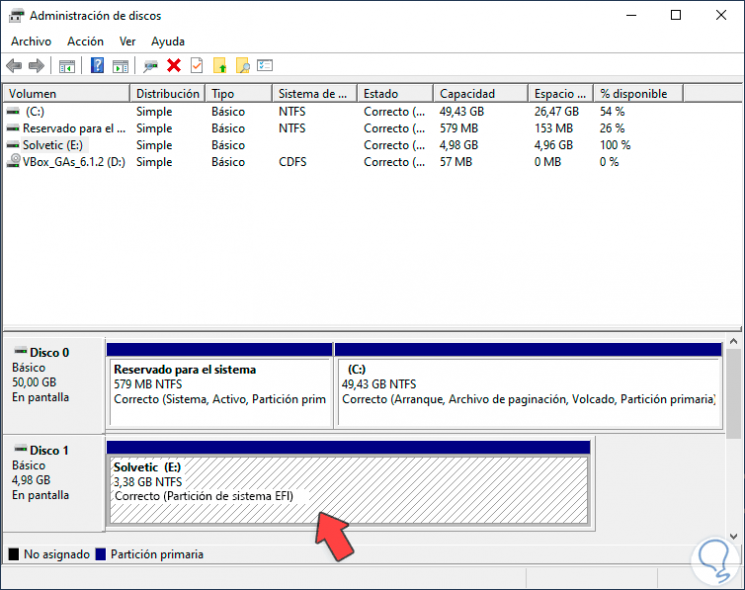
We can use this process equally for GPT or EFI partitions as we see here:
Step 2
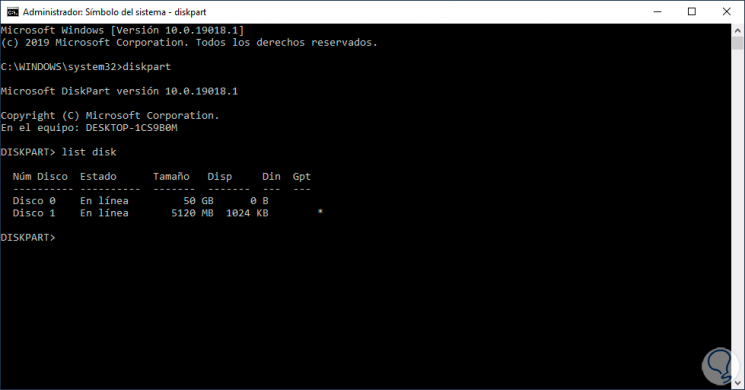
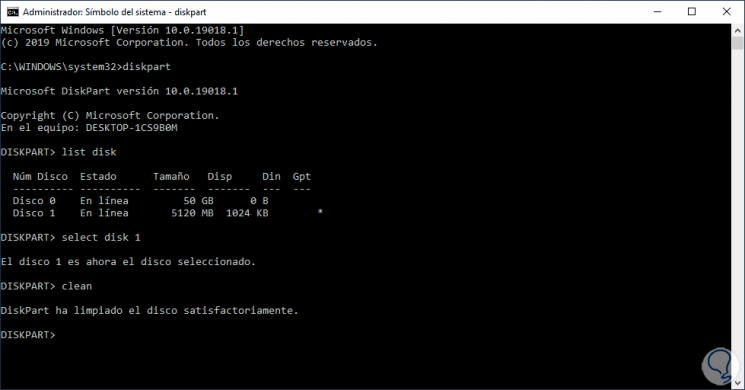
After this we access the command prompt console as administrators and there we execute the "diskpart" command.
Step 3
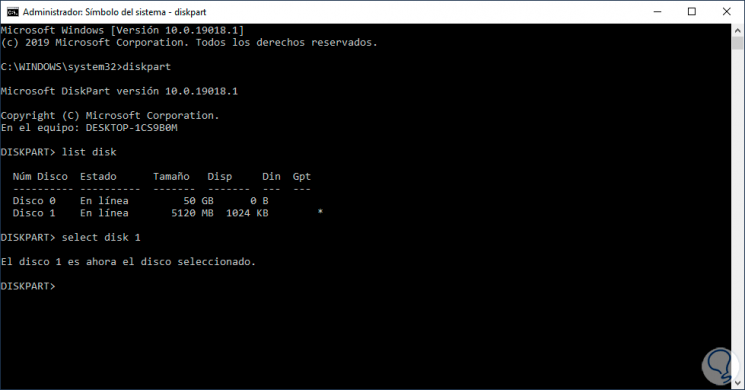
Once we access the "diskpart" utility, we will execute the "list disk" command to list the current disks of the computer. Note that disk 1 (which will be the disk to be removed), has an asterisk in the GPT column which indicates that its schema is based on GPT. Now we execute the following command to select that disk:
select disk 1
Note
The disk number must be based on the one that diskpart deploys on your computer.
Step 4
Once the disk is selected, we simply execute the following command for cleaning:
clean
Step 5
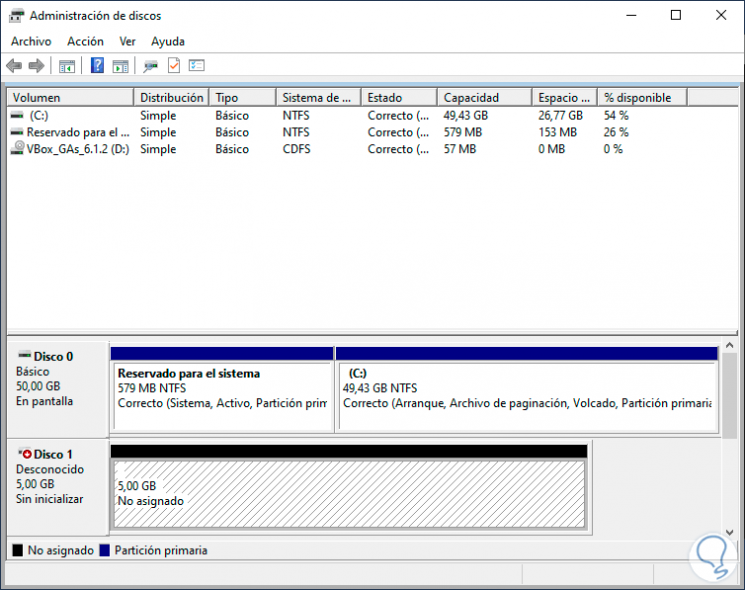
We see that Diskpart has executed the order correctly, after this we access the Disk Manager again and there we observe that disk 1 is ready to be configured from scratch:
Step 6
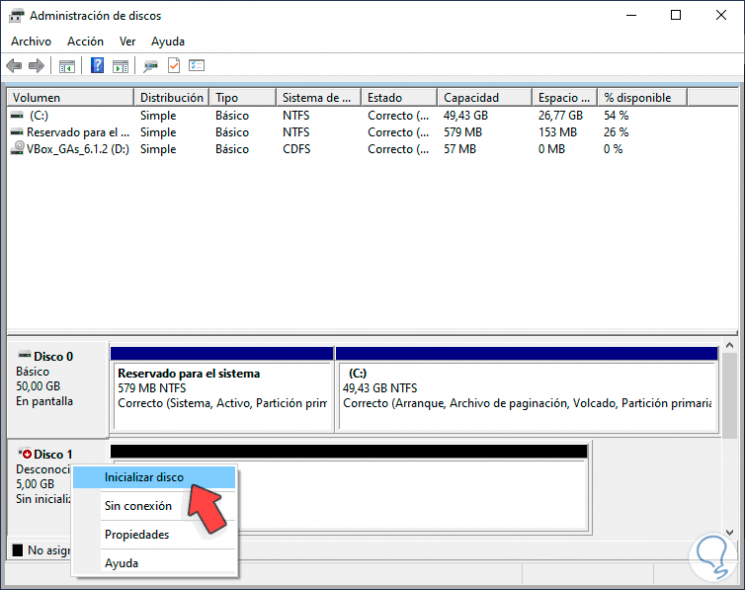
The first step will be to right click on the left side corner and there select “Initialize diskâ€:
Step 7
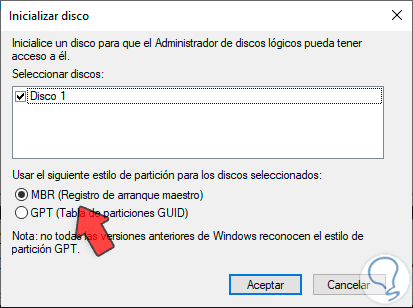
Selecting this option will display the following window where we recommend activating the MBR box for compatibility issues in the Windows installation:
Step 8
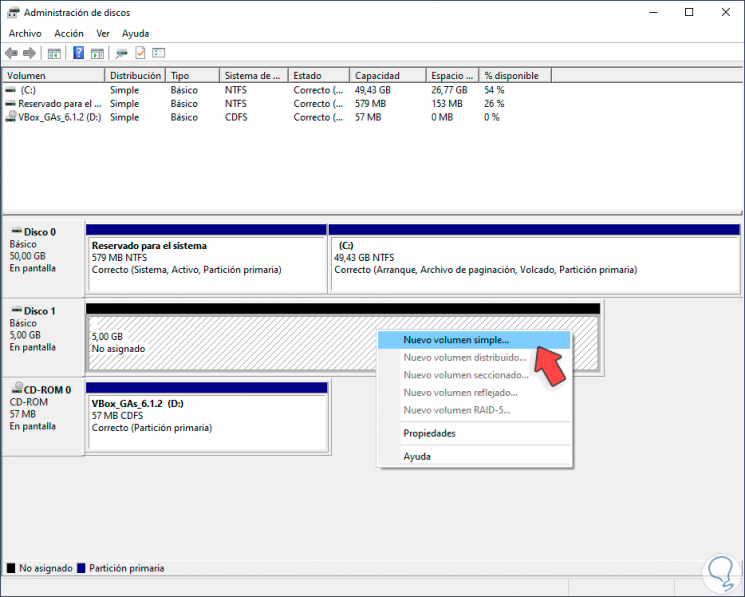
Click OK and then we can right click on the disk to create a new volume:
Step 9
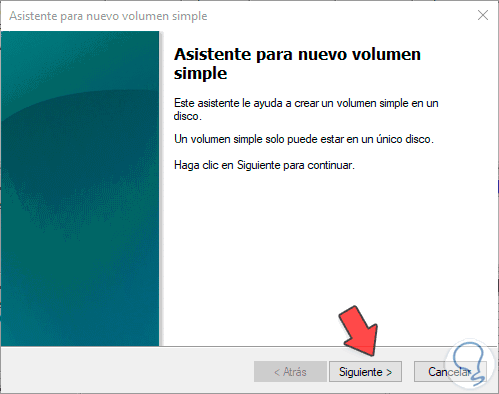
The following wizard will be displayed:
Step 10
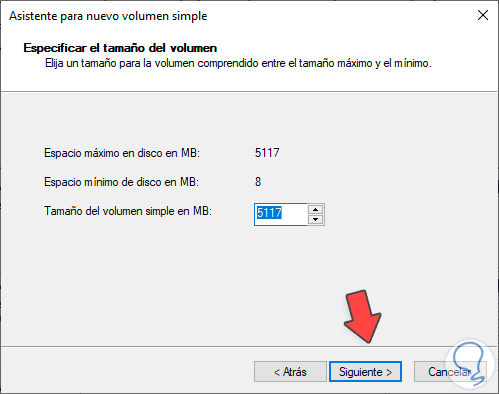
We click Next and now define the disk space to use:
Step 11
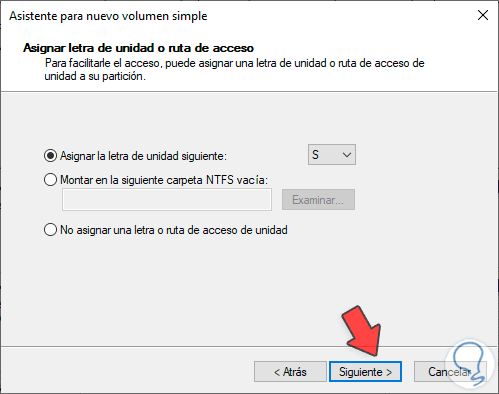
Next, we define the letter to assign to the disk:
Step 12
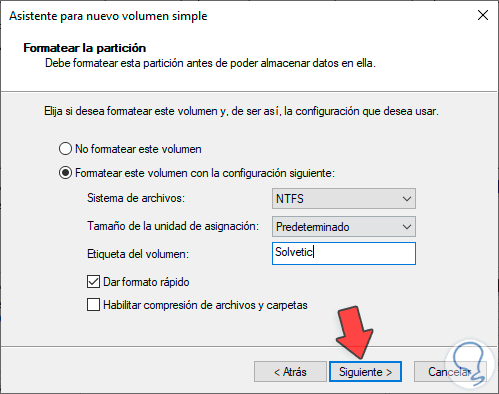
We click Next and now we define:
Step 13
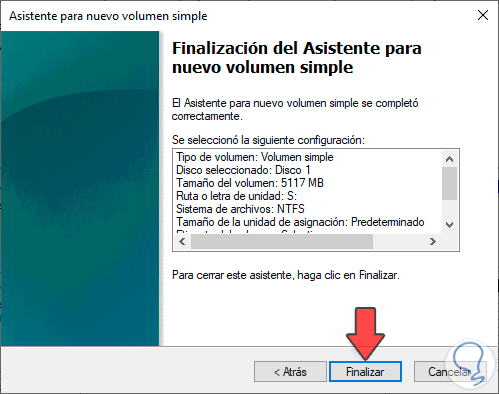
In addition, we can apply a quick format, we click on Next to see a summary of the task to be executed on the selected disk:
Step 14
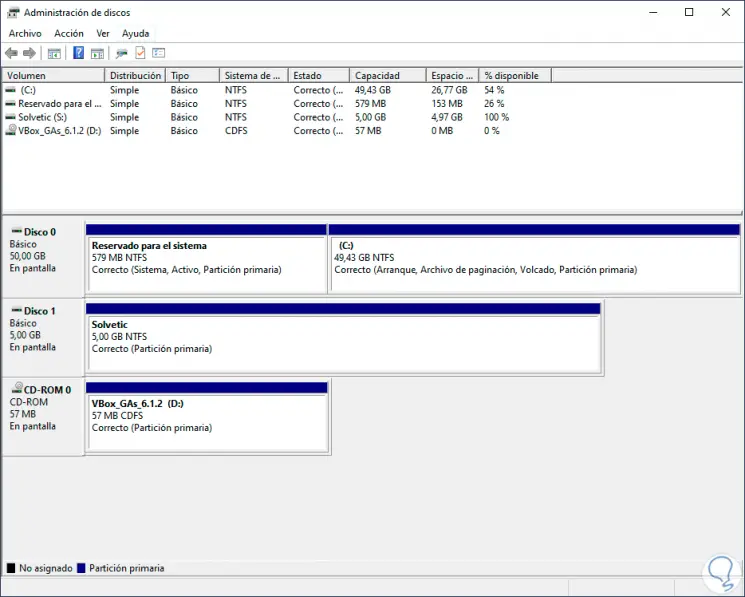
We click on “Finish†and we will see that the EFI or GPT partition has been deleted and the disk is ready to be used for full functions:
We can perform this method only when the disk fails because if we do it with the system installed we can create instability of it.