Windows 10 is composed of a series of add-ons that have been integrated to optimize the use of the system and with which it is possible that each part works in the correct way, so when we access the C drive (where the operating system is hosted) , we can see a folder called Windows10Upgrade :
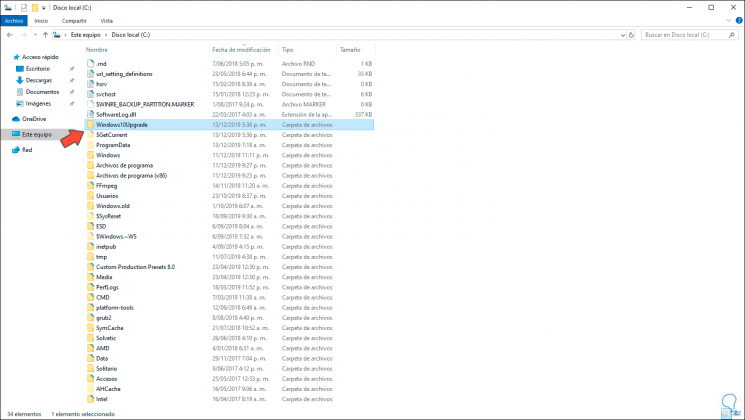
This folder allows the Windows 10 image ESD file to be downloaded there and the system update processes can be carried out comprehensively. This folder is not available in the first steps of the system, it is created at the time of installation and use of the Windows 10 Update Wizard which is a tool designed by Microsoft with which it is possible to update Windows 10. It is normal that when We update our system, there is a folder that houses these installation files but that we can then delete so that it does not take up space ..
TechnoWikis will explain the correct way to execute this elimination.
To keep up, remember to subscribe to our YouTube channel! SUBSCRIBE
1. How to use the Windows 10 update wizard
Step 1
We can update the system the latest version with the update tool and it is available in the following link:
Windows 10 update assistant
Step 2
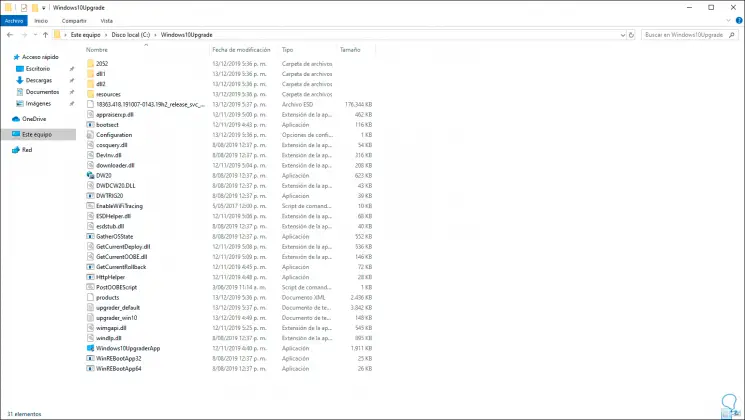
When accessing this folder we will see the necessary files for the update tasks:
Step 3
The Windows 10 update tool allows us to download and install feature updates in Windows 10 and this is an access known to all:
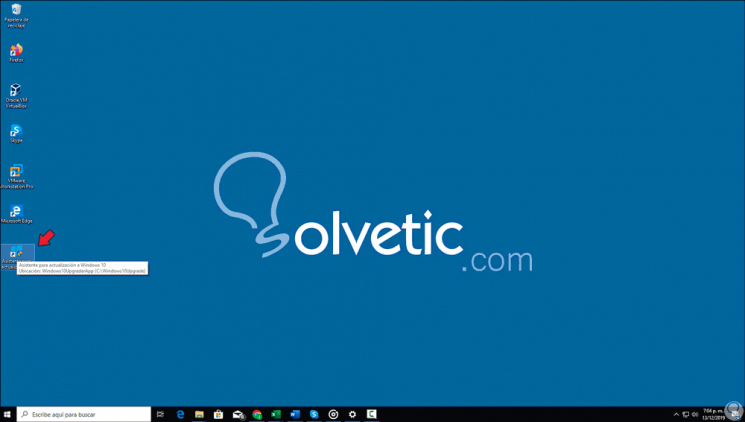
When you run the utility, ESD files are temporarily stored there and once everything has been updated correctly these ESD files will be automatically deleted from the system. By this action when the updates are being downloaded, this folder can weigh more than 5 GB occupying a considerable space of the hard disk, so if the Windows update process was correct and everything is in perfect condition, we can delete this folder in a safe way. Although the traditional method teaches us to delete the folder from Windows Explorer, it is not always the most complete method since the tool will leave residues in drive C so we will see how to delete it..
2. How to delete Windows10Upgrade folder from Windows 10
Step 1
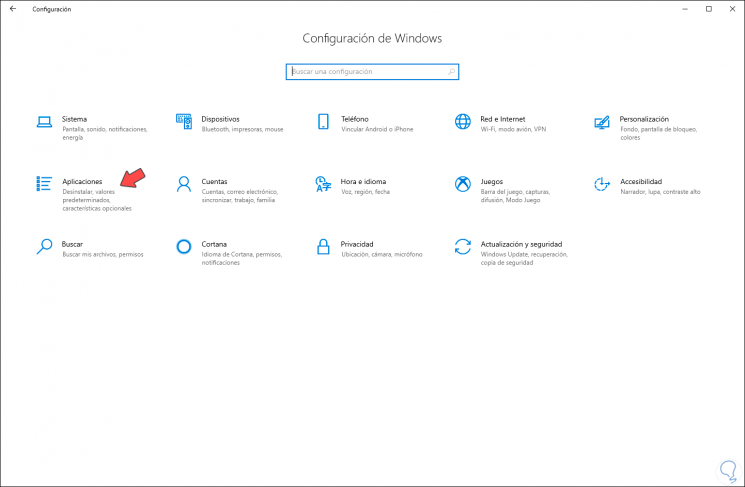
For this, we will go to the Start menu and there we select the Configuration utility:
Step 2
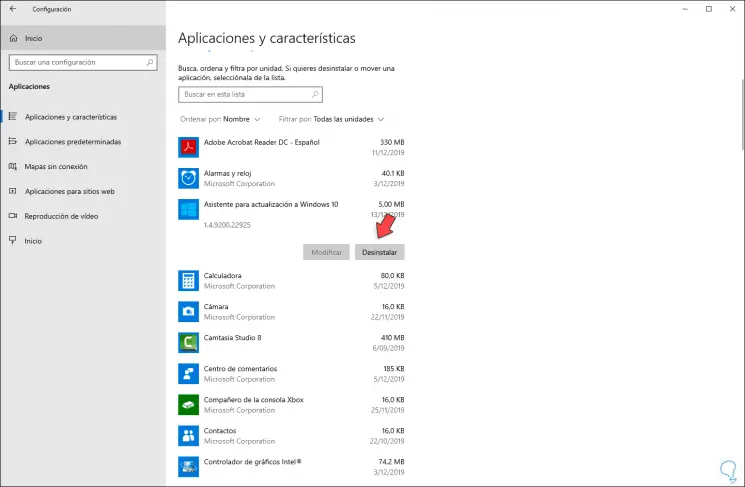
We go to the category "Applications" and after this we go to "Applications and features" and there we will locate the line "Assistant for update to Windows 10", click on it and see that the button "Uninstall" is displayed:
Step 3
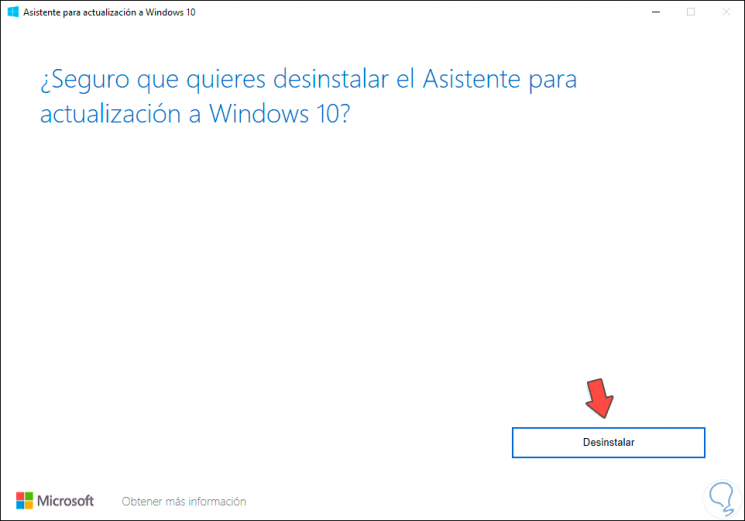
We click on this button and with it we not only uninstall the Windows 10 update utility but also automatically delete the Windows10Upgrade folder, when we click there we must confirm the uninstallation of the wizard. We click on "Uninstall" to complete the process.
Step 4
As an optional way, we can access the Control Panel / Programs and features or use the following key combination and execute the “Appwiz.cpl†command.
+ R
Appwiz.cpl
Step 5
After this we select the Update Assistant and click on the Uninstall button located at the top:
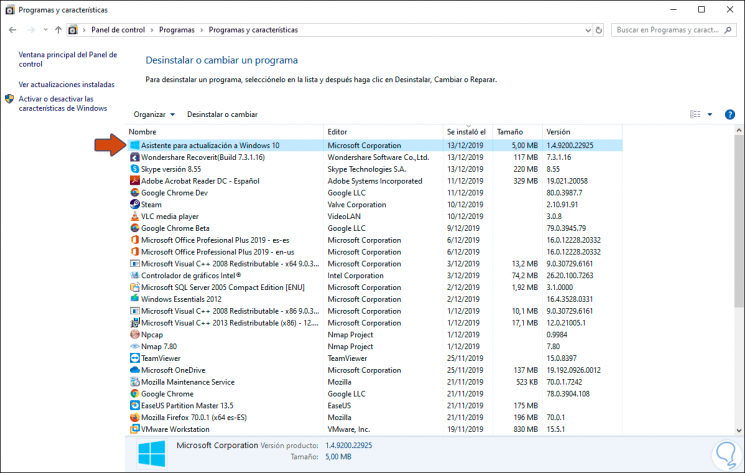
With the method we select, the Windows10Upgrade folder on drive C will no longer be available.