For Linux operating systems we have several free features (open source) with which it is possible to maximize the system independent of the use of this (server or home) and this has a direct impact on the productivity of each of us. We know very well that Linux has different distributions with special approaches such as RedHat , CentOS , Ubuntu , etc., and TechnoWikis will talk in this tutorial about an ideal utility if we work with the PHP language such as Yii PHP Framework..
What is Yii PHP Framework
Yii has been developed as a PHP framework based on special components that offer the end user high performance and this translates into the ability to develop modern web applications in a much more efficient and comprehensive way and best of all, it will be possible to develop any type of web applications based on PHP.
If your job is to develop large-scale applications, there is nothing to worry about, since Yii has a component-based architecture which in turn integrates a modern caching support which is compatible with management systems. content (CMS), e-commerce projects, RESTful web services and much more.
Yii Advantages
Some of the advantages of using Yii are:
- Add various features available to the developer such as query creators and ActiveRecord for relational and NoSQL databases, RESTful with API development support, multi-level caching support and many more.
- An MVC architectural model (Model-View-Controller) is integrated.
- It is possible to customize many core code parameters.
Yii features
Among its main features we find:
- Component based architecture
- RESTful API development support
- Manage database tables as objects
- Authentication and authorization integrated
- Unit test and functional test function and more
TechnoWikis will explain how to install Yii PHP Framework in popular distributions such as Debian, CentOS and Ubuntu..
1. How to install Apache on Ubuntu 19
To install Yii PHP in Ubuntu 1910 we must have Apache installed.
Step 1
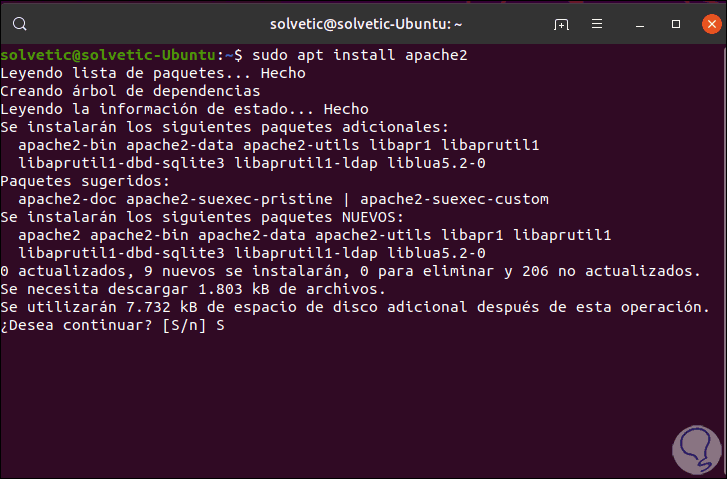
For this we access the console and execute the following command:
sudo apt install apache2
Step 2
Enter the letter S to confirm the download and installation of Apache in Ubuntu 19:
Step 3
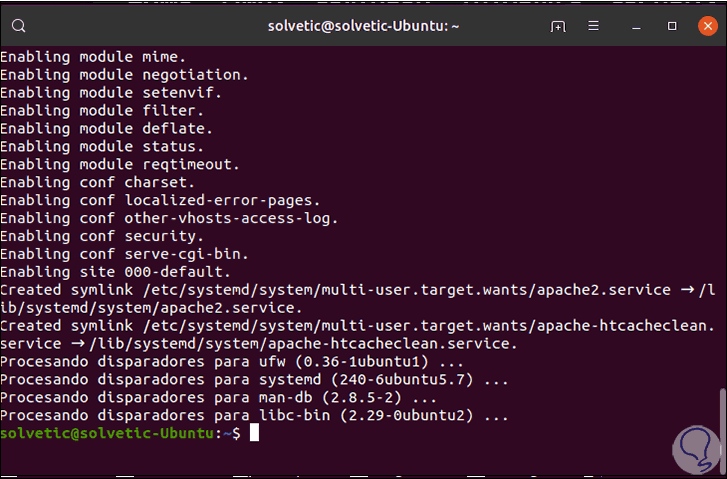
After this we will enable and start the Apache service by running:
sudo systemctl enable apache2 (Enable Apache service) sudo systemctl start apache2 (Start Apache in Ubuntu)
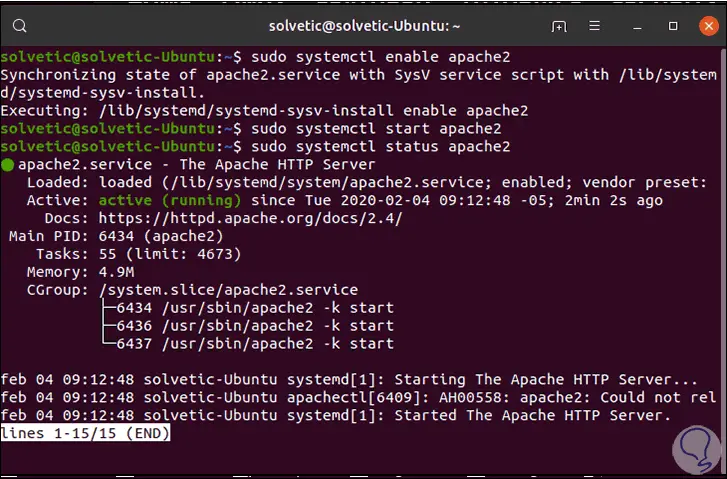
Step 4
We can run “sudo systemctl status apache2†to see the current state of Apache:
Step 5
To verify that it has been installed correctly we access a browser and enter the following in the address bar:
http: // localhost

2. How to install Yii PHP Framework on Ubuntu 19
Once we verify that Apache is installed correctly it is time to install Yii PHP.
Step 1
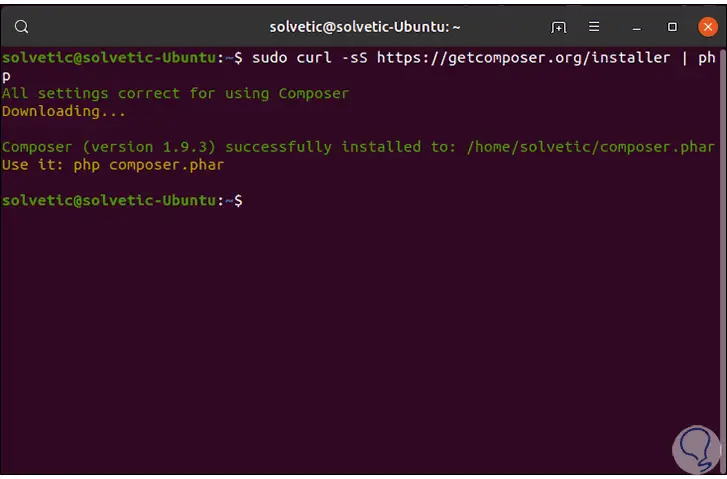
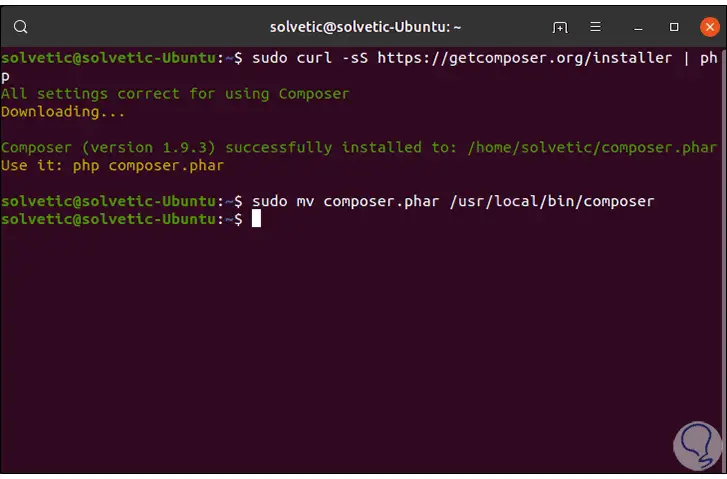
For this we access the terminal and we will use the “composer†command to download Yii as follows:
curl -sS https://getcomposer.org/installer | php
Note
If you do not have PHP installed, you must run “sudo apt install php7.2-cliâ€.
Step 2
Now we are going to allow Composer to be available to all Ubuntu users by running the following:
sudo mv composer.phar / usr / local / bin / composer
Step 3
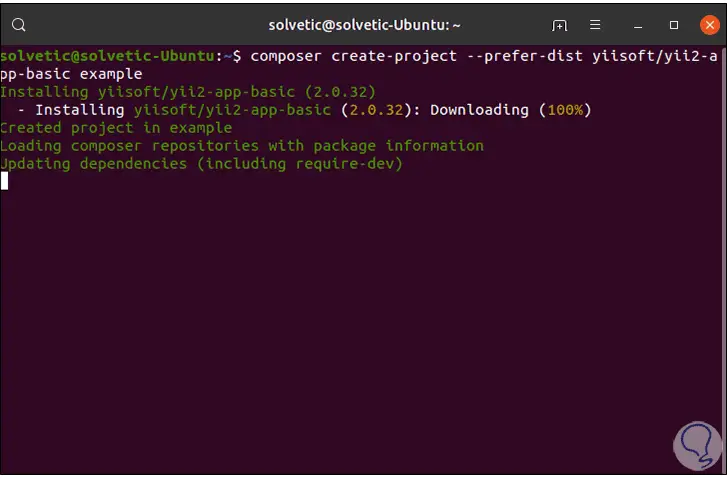
We proceed to install Yii with the Composer command as follows:
composer create-project --prefer-dist yiisoft / yii2-app-basic example
Step 4
Once this process reaches its end we will see the following:
Step 5
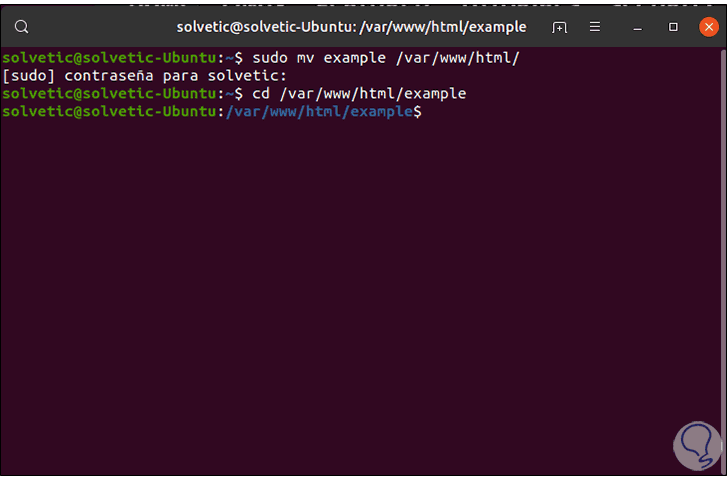
Let's move the created folder:
sudo mv example / var / www / html /
Step 6
We access this folder:
cd / var / www / html / example
Step 7
In order that we do not have problems with Composer's dependencies, we will edit a file within this folder, for this we execute:
sudo nano composer.json
Step 8
In the open file we enter the following:
"replace": { "bower-asset / jquery": "> = 1.11.0", "bower-asset / inputmask": "> = 3.2.0", "bower-asset / punycode": "> = 1.3.0", "bower-asset / yii2-pjax": "> = 2.0.0" }, 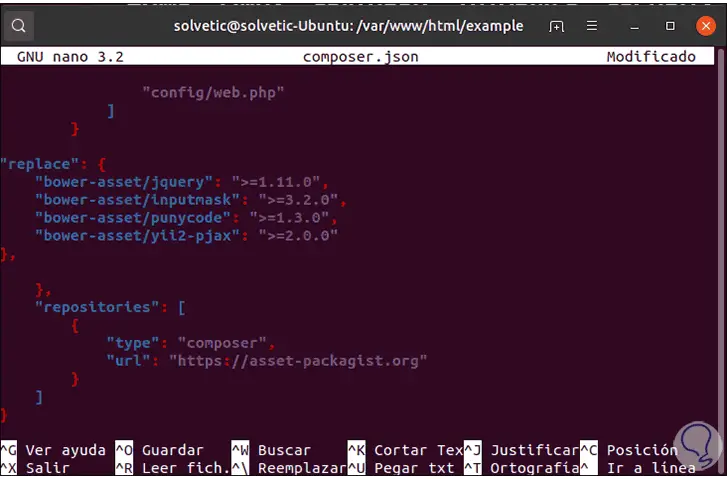
Step 9
We save the changes using the following key combination:
+ O Ctrl + O
We leave the editor using:
+ X Ctrl + X
Step 10
The next step is to create a Virtualhost for Yii PHP, to achieve this we must copy the configuration file from the default Apache site and then edit it:
sudo cp /etc/apache2/sites-available/000-default.conf /etc/apache2/sites-available/yii.conf sudo nano /etc/apache2/sites-available/yii.conf
Step 11
There we will enter the following:
RewriteEngine on RewriteCond% {REQUEST_FILENAME}! -F RewriteCond% {REQUEST_FILENAME}! -D RewriteRule. index.php RewriteRule ^ index.php / - [L, R = 404] 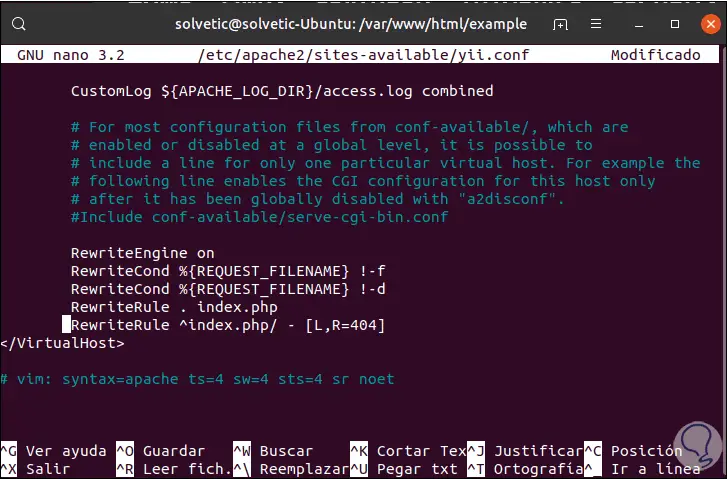
Step 12
For all cases the syntax of the root document will be:
/ var / www / html / PROYECT / web
Step 13
We save the changes using the following key combination:
+ O Ctrl + O
We leave the editor using:
+ X Ctrl + X
Step 14
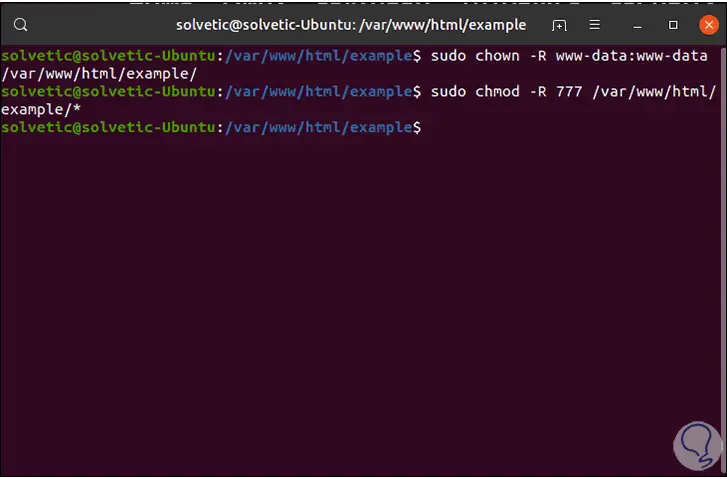
We assign the permissions:
sudo chown -R www-data: www-data / var / www / html / example / sudo chmod -R 777 / var / www / html / example / *
Step 15
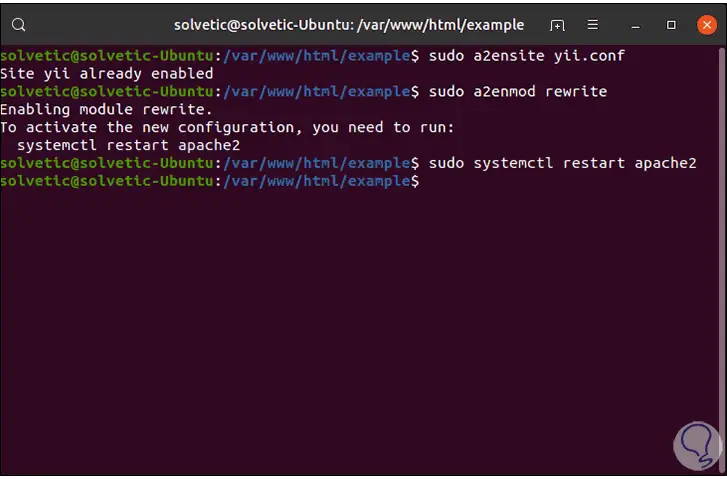
Now we are going to enable VirtualHost, the rewrite module and then restart Apache:
sudo a2ensite yii.conf sudo a2enmod rewrite sudo systemctl restart apache2
Step 16
After this we check Yii from a browser with the following syntax:
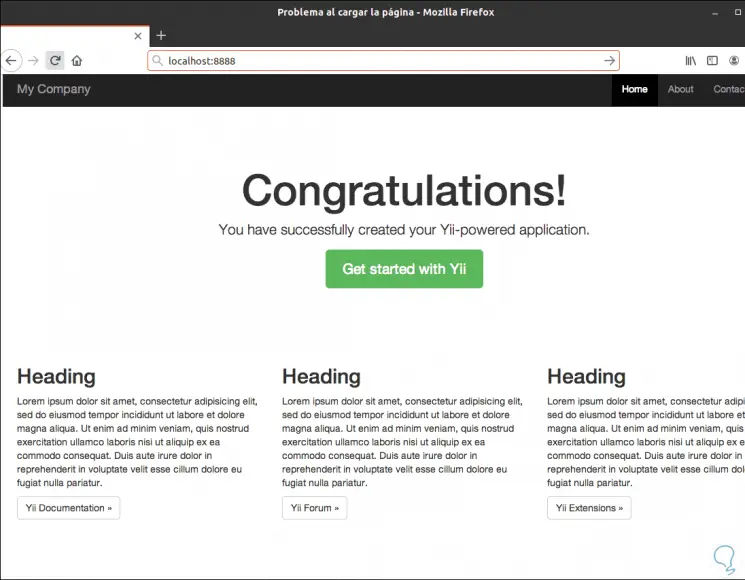
http: // localhost: 8888
2. How to install Yii PHP Framework on CentOS 8
CentOS 8 is one of the most popular distributions for corporate environments where Yii PHP will be a good ally, to install it there, we must first install Apache and in the following TechnoWikis link you will see how to do it simply:
Step 1
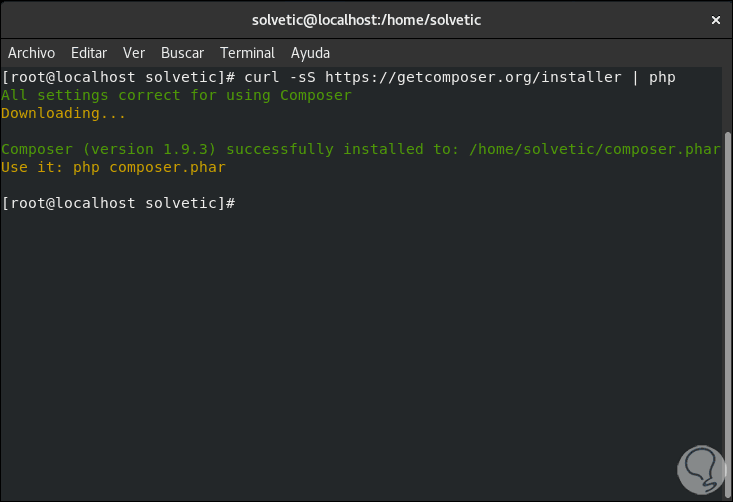
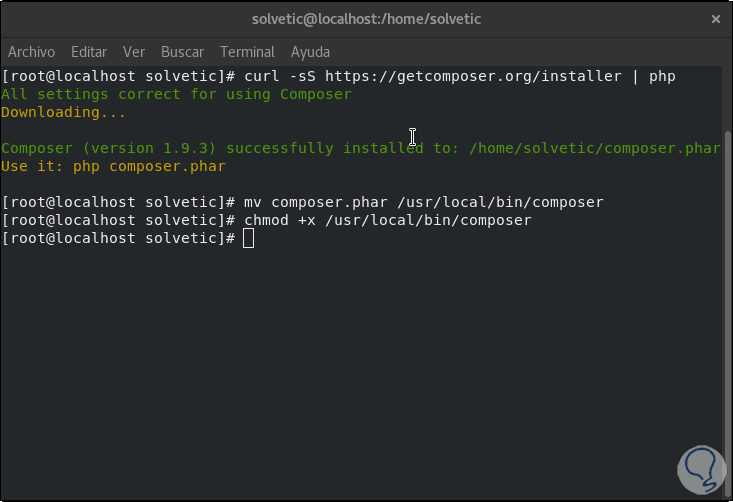
Once we validate that Apache is installed, we will install Composer on CentOS 8 by running the following:
curl -sS https://getcomposer.org/installer | php
Step 2
We move the downloaded file:
mv composer.phar / usr / local / bin / composer
Step 3
We grant the necessary permissions:
chmod + x / usr / local / bin / composer
Step 4
After this, we access the Apache root directory:
cd / var / www / html /
Note
If you use Nginx you must go to the following directory: cd / usr / share / nginx / html /
Step 5
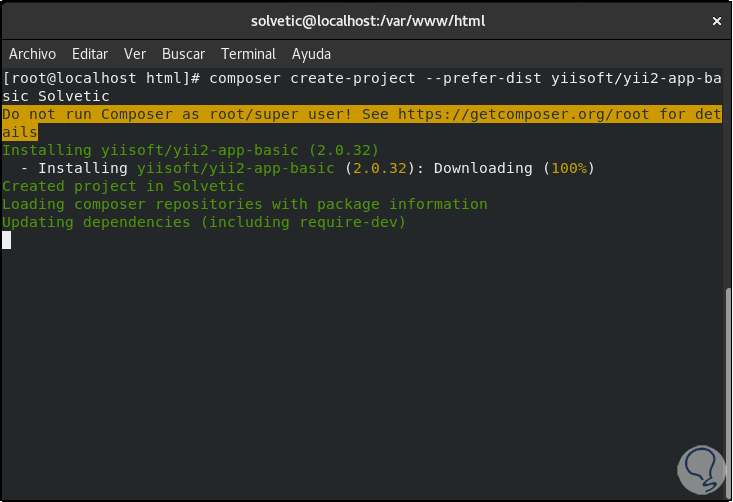
Once there we will install Yii PHO by assigning the name of the desired project:
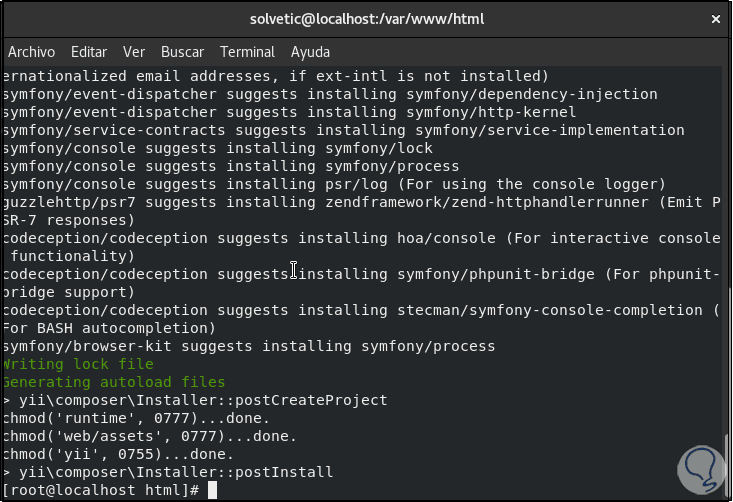
composer create-project --prefer-dist yiisoft / yii2-app-basic TechnoWikis
Step 6
Once this process is finished we will see the following:
Step 7
We access the project folder:
cd TechnoWikis
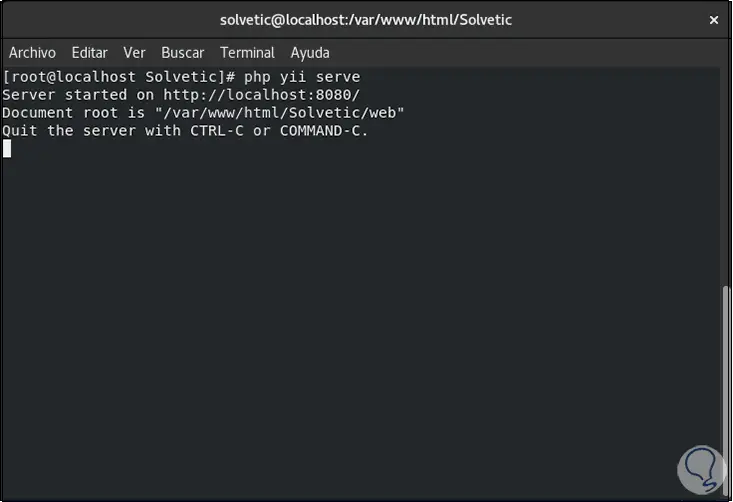
Step 8
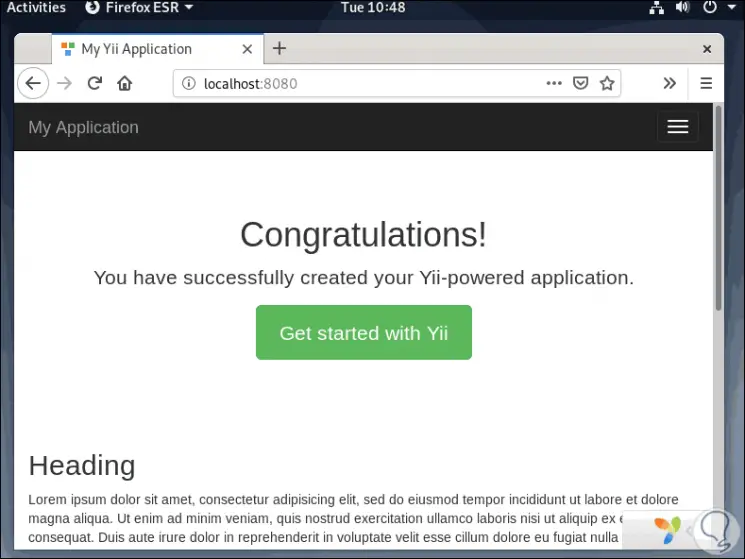
And there we execute the following line with which we know the port through which Yii communicates (by default it is port 8080):
php yii serve
Step 9
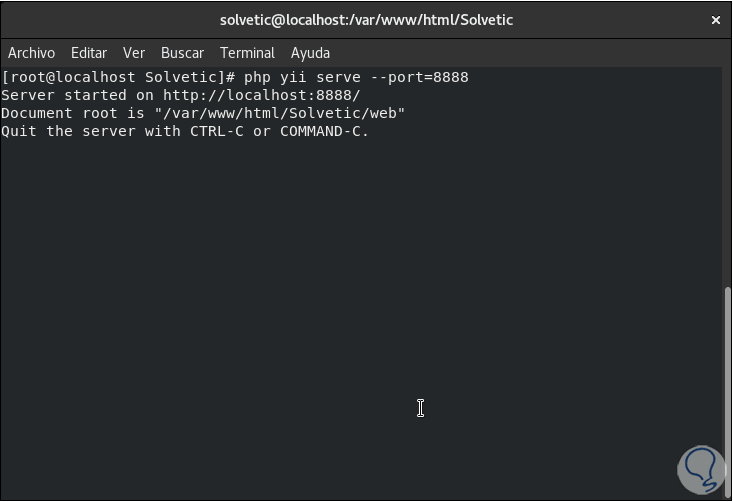
This port can be edited by entering the –port parameter and entering the desired port:
php yii serve --port = 8888
Step 10
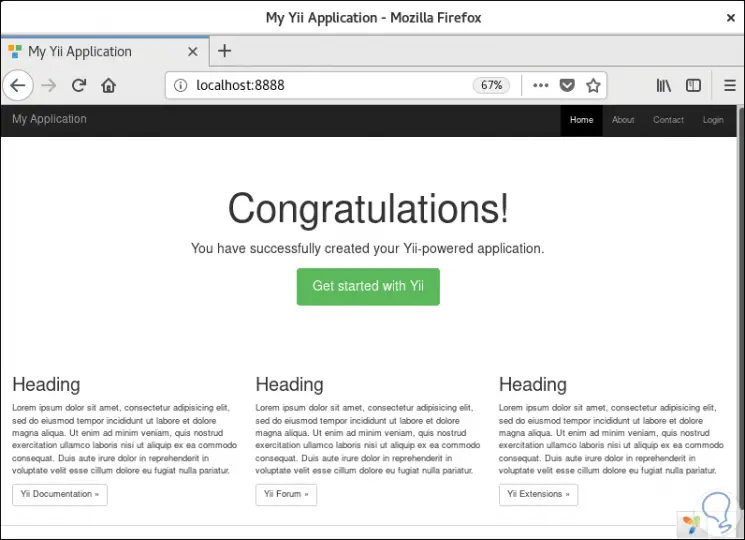
We must leave this command active to access Yii from a browser using the syntax. From this point on we are able to use Yii PHP Framework for all the required tasks.
http: // localhost: 8888
4. How to install Yii PHP Framework on Debian 10
The first step is to install a web server to from there execute the development tasks.
Step 1
In this case we will use Apache and for its installation we will execute the following command:
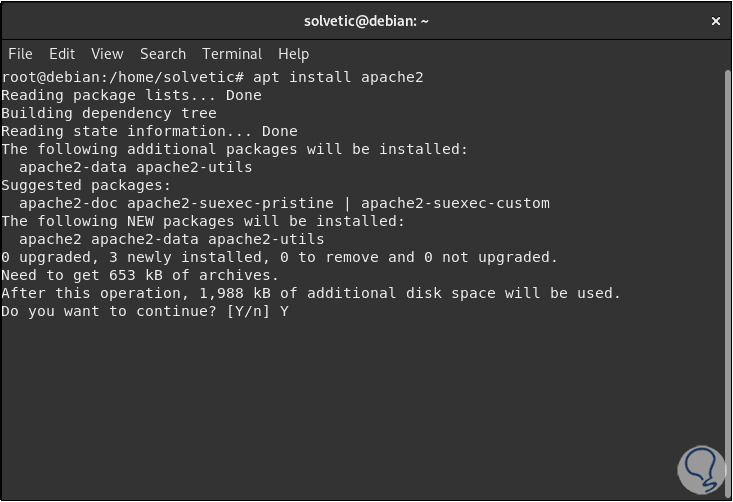
sudo apt install apache2
Step 2
Enter the letter Y to confirm the download and installation of Apache, after this and Apache has been installed we must execute the following:
sudo systemctl enable apache2 (Enable Apache service) sudo systemctl start apache2 (Start Apache)
Step 3
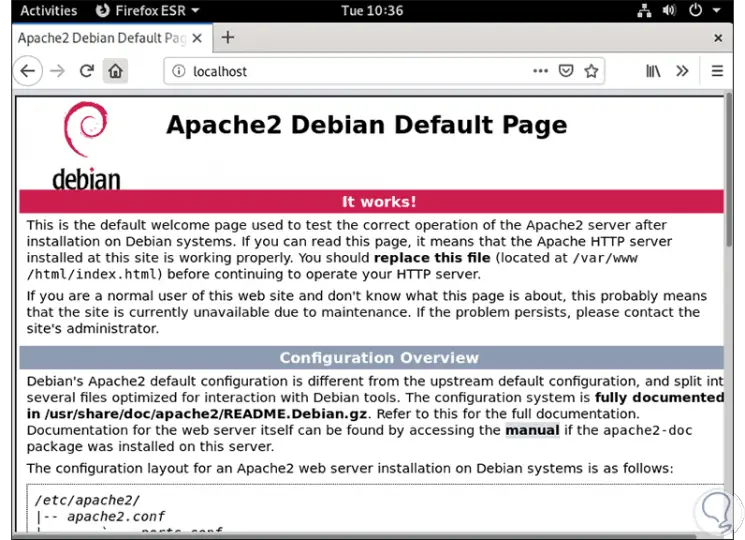
We validate that Apache is active by accessing a browser and entering "localhost" there:
Step 4
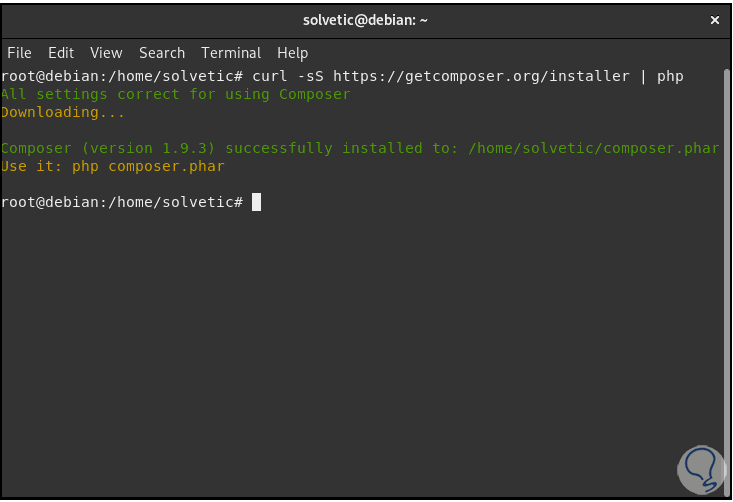
We proceed to install Composer to install then Yii by executing the following:
curl -sS https://getcomposer.org/installer | php
Step 5
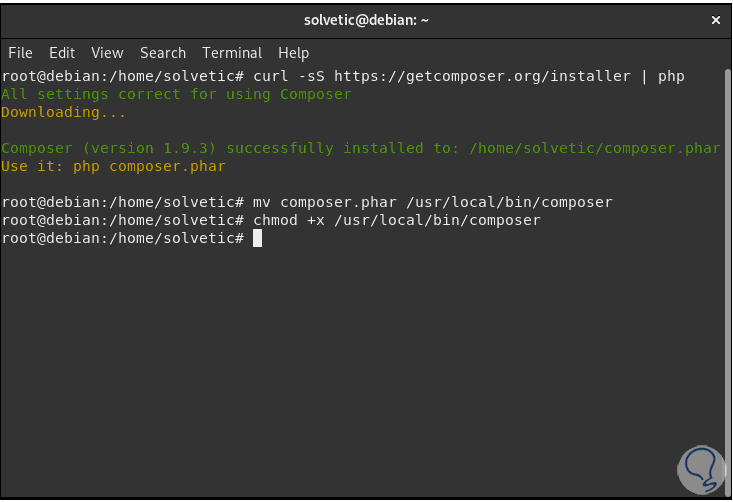
After this we move the file that has been downloaded and provide the respective permissions:
mv composer.phar / usr / local / bin / composer chmod + x / usr / local / bin / composer
Step 6
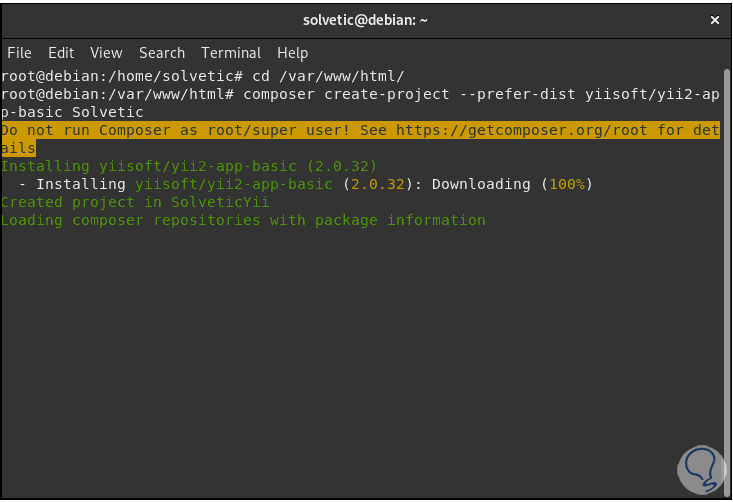
We access the Apache root:
cd / var / www / html /
Step 7
There we will use Composter to install Yii by assigning the name of the project:
composer create-project --prefer-dist yiisoft / yii2-app-basic TechnoWikis
Step 8
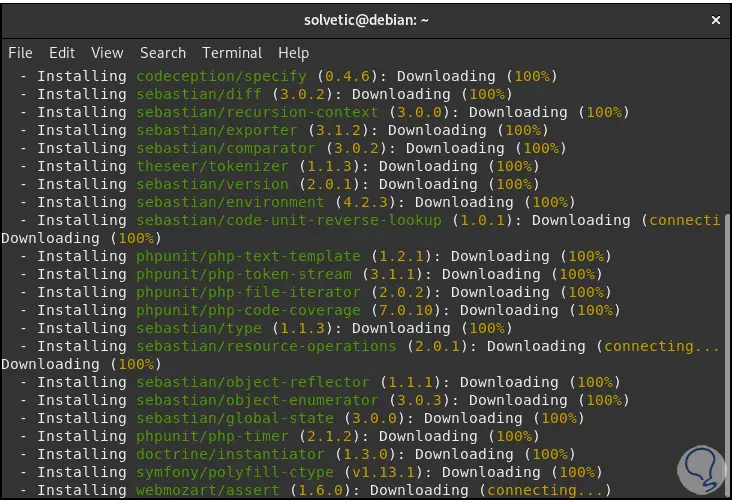
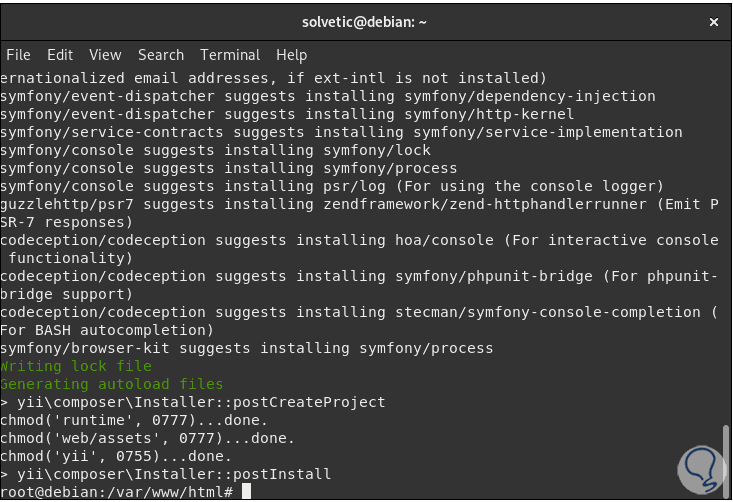
We can see the entire installation process:
Step 9
When this process ends we will see the following:
Step 10
We access the project folder:
cd TechnoWikis
Step 11
Then we execute the following to visualize the access port to Yii:
php yii serve
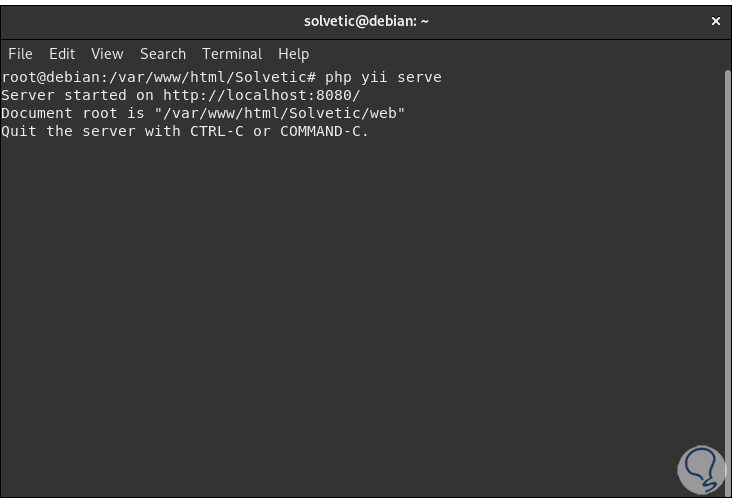
Step 12
By default it is 8080 but as we have seen, it is possible to use –port (# port) to establish a new port, this is checked by accessing a browser and entering the following in a new window:
http: // localhost: 8080
We can see how practical and simple it is to install Yii PHP Framework on these popular systems and thus have an ally when performing tasks in PHP.