Many Linux operating systems have Java by default in their system and thanks to this it is possible to compile and run development applications from multiple developers..
Java, developed by Oracle, is one of the most used programming languages ​​in the world for its various functionalities and development and compatibility capabilities.
Java is defined in the following categories:
Software developers
For this type of users, JDK (Java SE Development Kit) is required, which is focused for Java developers. It includes complete JRE plus tools to develop, debug and monitor Java applications centrally.
Administrators running applications on a server
For this case, Server JRE (Server Java Runtime Environment) is needed, which is designed to implement Java applications on servers. It includes tools for JVM monitoring and the tools required for server applications, but does not include browser integration (the Java plug-in), automatic update, or an own installer.
End user running Java in a desktop environment
For this type of user, JRE is required: (Java Runtime Environment) which covers most of the needs of end users. It contains everything you need to run Java applications in the system efficiently.
Java 9 features
Now, Java presents its edition 9 which has features such as:
- The hash of the TLS session and extended support of the master secret extension has been added
- The default provider key size is automatically updated
- Exportable encryption suites are disabled
- JNLP files will not start from IE11 in the Windows 10 Creators creators update
Now, we will see how to install Java 9 on some of the main Linux distributions..
1. Install Java 9 on CentOS 7
This same process applies to RedHat and Fedora. To install Java 9 on CentOS we have two options:
Step 1
The first is to go to the following link and download the last available rpm file:
Java 9
Step 2
There we have the following rpm file options:
jdk-9.0.4_linux-x64_bin.rpm jre-9.0.4_linux-x64_bin.rpm
Step 3
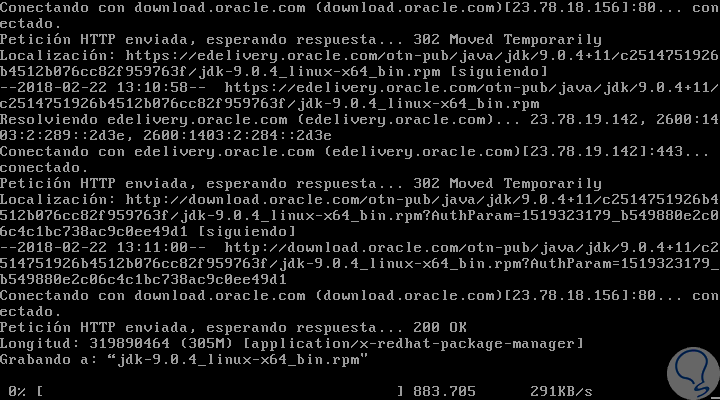
In case of not using the method of downloading the rpm files, we can use the wget command as follows. To download Java SE JDK:
wget --no-cookies --no-check-certificate --header "Cookie: oraclelicense = accept-securebackup-cookie" http://download.oracle.com/otn-pub/java/jdk/9.0.4+11 /c2514751926b4512b076cc82f959763f/jdk-9.0.4_linux-x64_bin.rpm
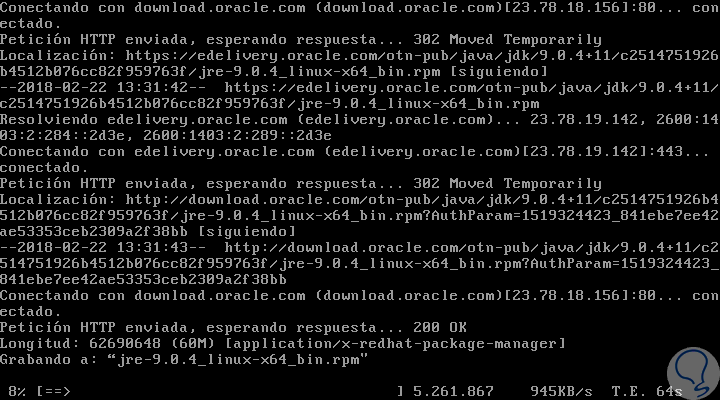
Step 4
To download Java SE JRE:
wget –no-cookies –no-check-certificate –header “Cookie: oraclelicense = accept-securebackup-cookie†http://download.oracle.com/otn-pub/java/jdk/9.0.4+11/c2514751926b4512b076cc82f959763f/ jre-9.0.4_linux-x64_bin.rpm
Step 5
There we download the type of Java that we consider necessary to use. Once the RPM package has been downloaded, we must go to the route where it was downloaded and run the following line:
In RHEL, CentOS 7
yum install jdk-9.0.4_linux-x64_bin.rpm yum install jre-9.0.4_linux-x64_bin.rpm
In Fedora 22 and higher
sudo dnf install jdk-9.0.4_linux-x64_bin.rpm sudo dnf install jre-9.0.4_linux-x64_bin.rpm
Step 6
In this example we are using CentOS 7 so we execute the first commands:
To install Java JDK:
yum install jdk-9.0.4_linux-x64_bin.rpm
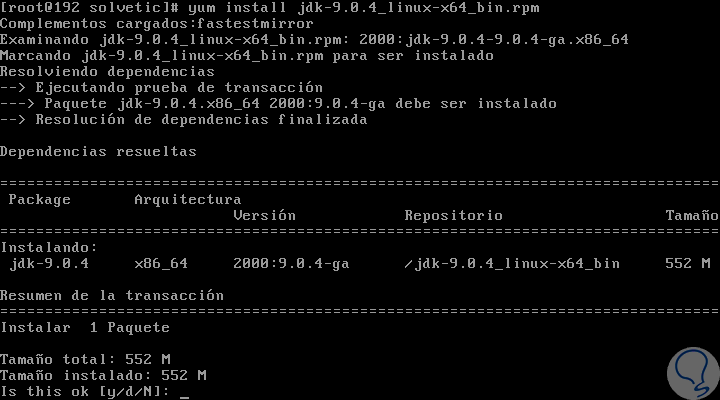
Step 7
Enter the letter
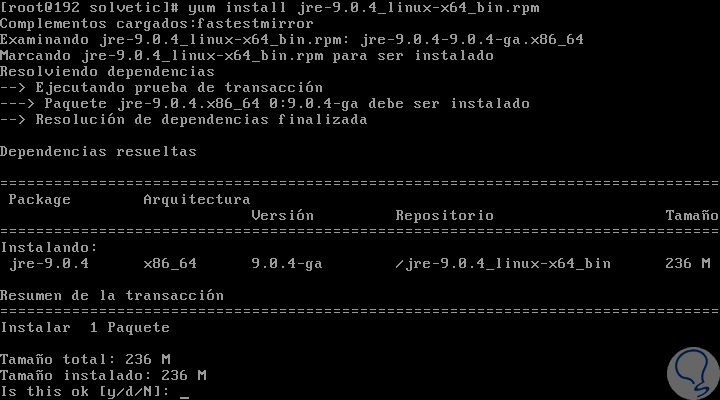
y to confirm the download and installation of Java 9 JDK. To install Java JRE we will put the following. Similarly, we enter the letter
and to confirm the download and installation.
yum install jre-9.0.4_linux-x64_bin.rpm
2. Set the Java environment variables in CentOS 7
Next, we are going to insert the Java environment variables and the path of the executable files into the $ PATH variable of CentOS 7, this is necessary to ensure that the Java environment variables and the executables will be accessible throughout the system, to We will execute the following commands:
Step 1
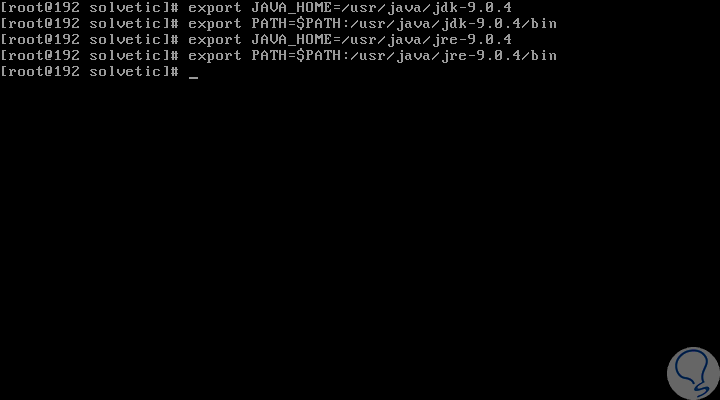
Set JAVA_HOME and JDK Variable Path
export JAVA_HOME = / usr / java / jdk-9.0.4 export PATH = $ PATH: /usr/java/jdk-9.0.4/bin
Step 2
Set JAVA_HOME and JRE Variable Path
export JAVA_HOME = / usr / java / jre-9.0.4 export PATH = $ PATH: /usr/java/jre-9.0.4/bin
3. Verify Java version in CentOS 7
Step 1
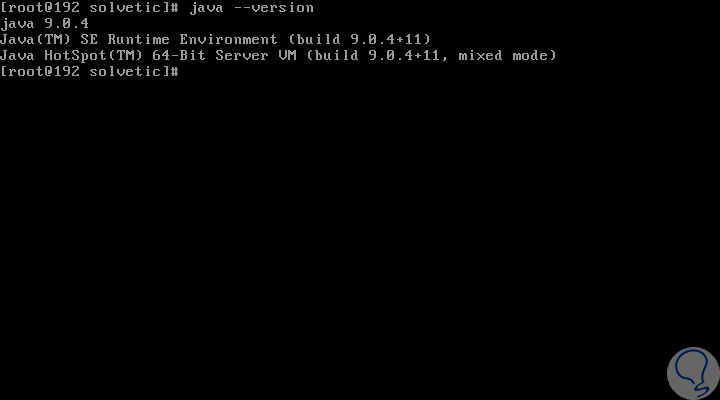
Finally, we will verify that we have Java 9 in CentOS, for this we execute the following:
java –version
Step 2
If we want to enable JDK / JRE support in Firefox, it will be necessary to execute the following commands to enable:
alternatives --install /usr/lib/mozilla/plugins/libjavaplugin.so libjavaplugin.so /usr/java/jdk-9.0.4/lib/libnpjp2.so 20000
4. Install Java 9 using PPA repositories on Debian
Another of the known and most used distributions of Linux at corporate level, let's see how to install Java 9 there.
For this task we have two options and the first is using repositories.
Step 1
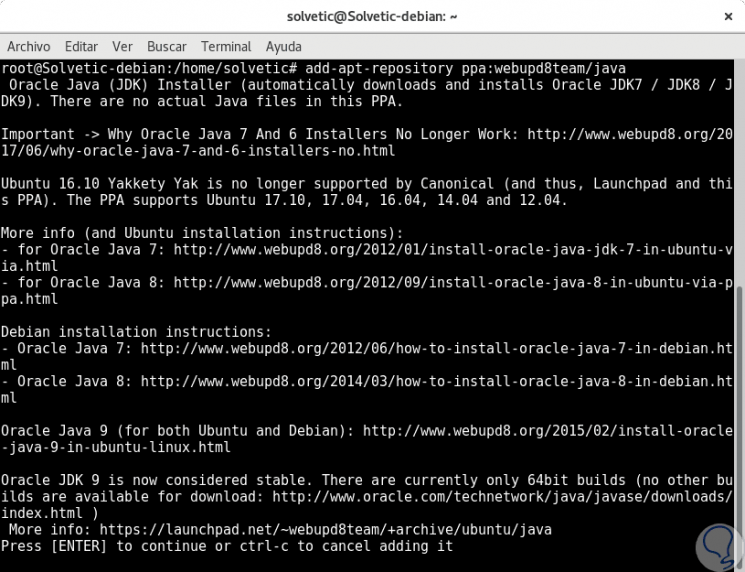
To add this unofficial repository in Debian 9 we will run the following line:
sudo add-apt-repository ppa: webupd8team / java
Step 2
Enter the letter Enter to accept the installation of said repository. Once we have done this, we proceed to update the repository by executing the following:
sudo apt-get update
Step 3
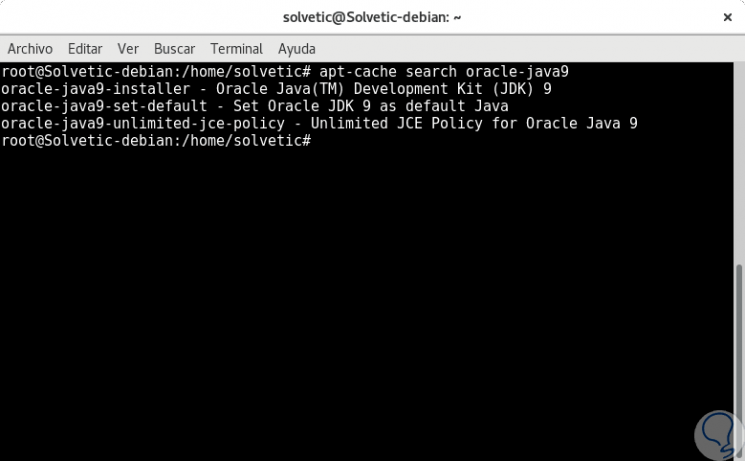
As soon as the PPA has been added and updated, we must look for the packages with the name oracle-java9 as follows:
apt-cache search oracle-java9
Step 4
This result confirms that Java 9 is available to install through the following command:
apt-get install oracle-java9-installer
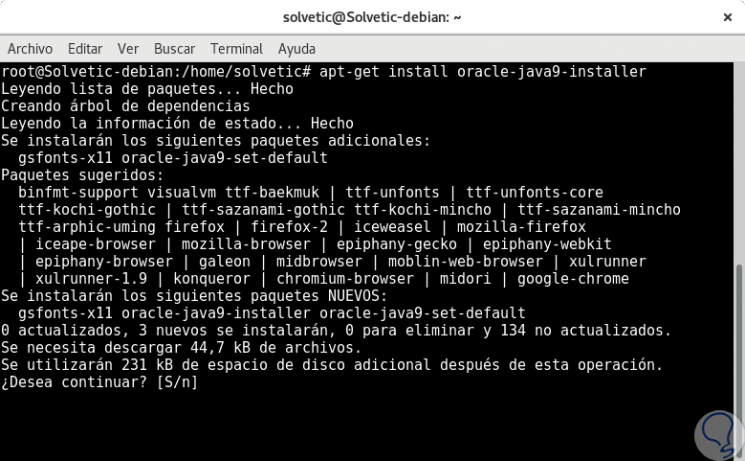
Step 5
Press the Enter key to confirm the download and during the installation process we will see the following. There we must accept the terms of the Oracle license.

Step 6
If you have more than one Java installed on Debian, we can install the oracle-java9-set-default package to set Java 9 by default:
sudo apt-get install oracle-java9-set-default
5. Install Java 9 using the font in Debian
Another alternative to install Java 9 is to download the respective Java 9 SE SDK file from the following link:
Java 9 SDK
Step 1
There we must accept the license agreement to start the download process of the latest version of the tarball package.
Java does not offer precompiled packages in the form of .deb packages for Linux distributions based on Debian, so we must use the gzip compressed file to perform this installation.
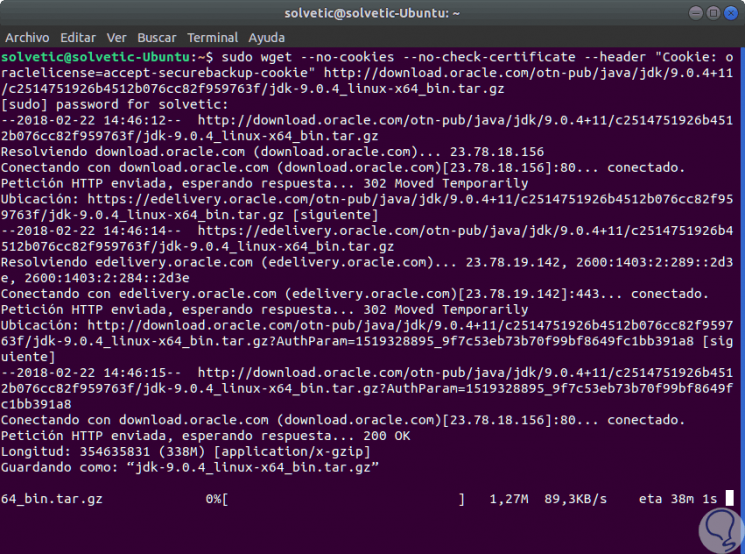
Now, as an alternative, we can download this file using the wget command as follows:
wget --no-cookies --no-check-certificate --header "Cookie: oraclelicense = accept-securebackup-cookie" http://download.oracle.com/otn-pub/java/jdk/9.0.4+11 /c2514751926b4512b076cc82f959763f/jdk-9.0.4_linux-x64_bin.tar.gz
Step 2
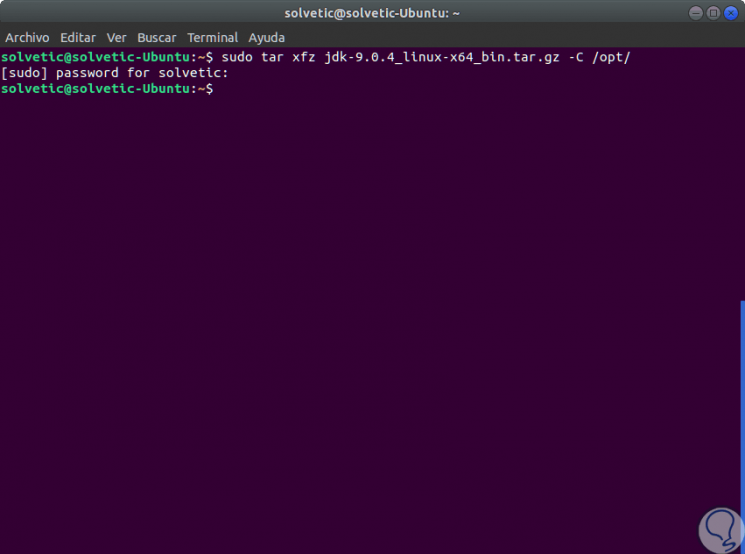
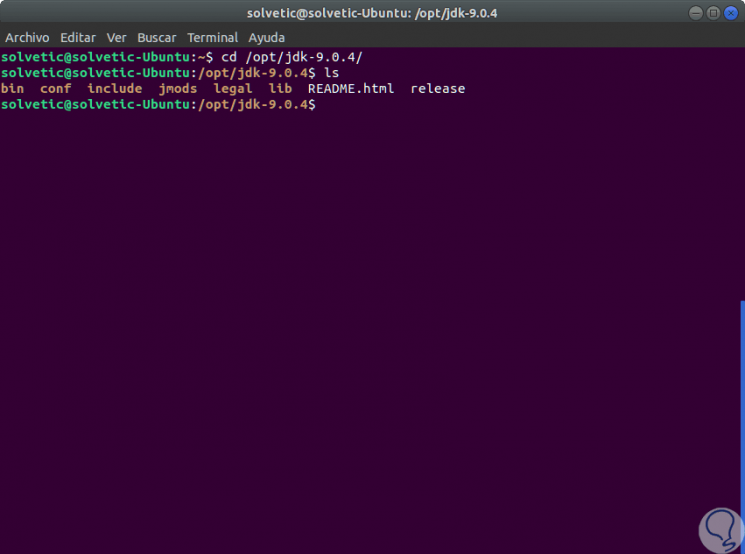
We go to the path where Java was installed and we will execute the following commands which will decompress the Java tarball file directly in the / opt directory, then we will enter the path extracted from java from the / opt directory and execute the
ls command to display the contents of the directory Java executable files are located in the bin directory:
sudo tar xfz jdk-9.0.4_linux-x64_bin.tar.gz -C / opt / cd /opt/jdk-9.0.4/ ls
Step 3
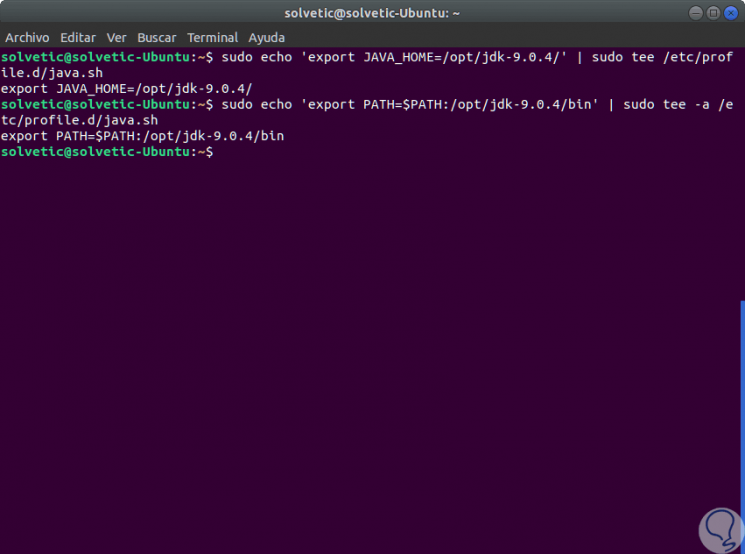
Finally we will export the Java variables by executing:
sudo echo 'export JAVA_HOME = / opt / jdk-9.0.4 /' | sudo tee /etc/profile.d/java.sh sudo echo 'export PATH = $ PATH: /opt/jdk-9.0.4/bin' | sudo tee -a /etc/profile.d/java.sh
Step 4
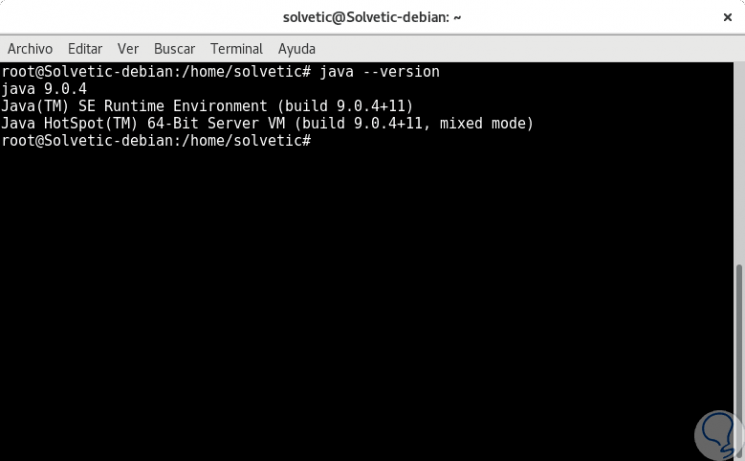
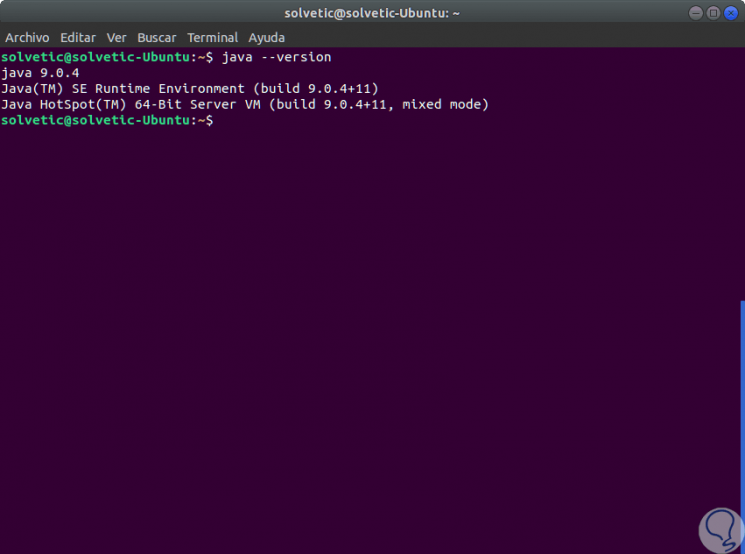
In both cases, to know the Java version we will execute the following command:
java –version
6. Install Java 9 on Ubuntu 17
The same commands that we used in Debian 9 are useful for installing Java 9 on Ubuntu 17.
Step 1
In this case the first option is to use a PPA repository using the following commands:
sudo add-apt-repository ppa: webupd8team / java (Install the repository) sudo apt-get update (Update repository packages) sudo apt-get install oracle-java9-installer (Search for available packages to install) sudo apt-get install oracle-java9-set-default (Install Java 9)
Step 2
But in this case, we will use the second method that is to download the file directly from the official site at the following link:
Java 9
Step 3
Or we can use the wget command like this:
wget --no-cookies --no-check-certificate --header "Cookie: oraclelicense = accept-securebackup-cookie" http://download.oracle.com/otn-pub/java/jdk/9.0.4+11 /c2514751926b4512b076cc82f959763f/jdk-9.0.4_linux-x64_bin.tar.gz
Step 4
After Java 9 is downloaded, we will go to the directory where it was downloaded and there we will execute the following commands to install Java:
sudo tar xfz jdk-9.0.4_linux-x64_bin.tar.gz -C / opt / cd /opt/jdk-9.0.4/ ls
Step 5
These commands will decompress the Java tarball file directly in the / opt directory, we will enter the path where the Java content was extracted from the / opt directory and we will execute the
ls command to display the directory content.
Step 6
Java executables are located in the bin directory.
Step 7
The next step to take is to insert the Java environment variables and the path of the executable files in the $ PATH system variable, for this we will use the following commands:
sudo echo 'export JAVA_HOME = / opt / jdk-9.0.4 /' | sudo tee /etc/profile.d/java.sh sudo echo 'export PATH = $ PATH: /opt/jdk-9.0.4/bin' | sudo tee -a /etc/profile.d/java.sh
Step 8
Finally, we can validate the version of Java 9 using the following command:
java –version
In this way we have learned to install Java 9 in some of the most used Linux distributions.