We know that one of the main advantages of using Linux distributions is the ability to extend the functionality of the server by adding thousands of open source applications and utilities, this obviously depending on the hardware resources available to them..
We find utilities for all kinds of tasks and one of these applications is NetBeans IDE which is the official IDE of Java 8 and we will see how to install this utility in the main distributions of current Linux.
What is NetBeans IDE?
NetBeans IDE (Integrated Development Environment), is stipulated as the official IDE for Java 8. This utility has its own editors, code analyzers and converters, which results in an efficient update of Java-based applications. 8 such as functional operations and method references.
NetBeans batch analyzers and converters have been designed to allow searching across multiple applications simultaneously, which results in the conversion patterns matching the new Java 8 language constructs..
NetBeans can be run on Linux, Windows and macOS without problems and has a wide variety of tools, templates and samples ready to be used by us.
This application aims to develop Java-based desktop, mobile and web applications, as well as HTML5 applications with HTML, JavaScript and CSS. NetBeans IDE is listed as one of the best IDE for C or C ++ programming, and offers essential tools for PHP programmers..
NetBeans IDE features
Among the various features of this Java utility we find:
- Quick and intelligent code editing: The NetBeans IDE Editor has multiple special tools for better control of the data to be used, such as lines, matching words and square brackets, highlighting the source code at a syntactic and semantic level. This editor supports multiple programming languages, from Java, C / C ++, XML and HTML, to PHP, Groovy, Javadoc, JavaScript and JSP and because the editor is extensible, it is possible to connect support for many other languages.
- Better support for the latest Java technologies: This Java editor is constantly improving which translates into new integral functions and a wide range of tools, templates and samples, NetBeans IDE allows us to set the standard for the development of new technologies.
- Easy and efficient project management: NetBeans IDE offers us different views of the administrator data, from multiple project windows to useful tools in order to configure applications and manage them efficiently.
- Rapid development of the user interface: NetBeans IDE allows us to design GUIs for Java SE, HTML5, Java EE, PHP, C / C ++ and Java ME applications quickly and without any problem thanks to the use of editors and drag tools and place in the IDE.
- Write error-free code: NetBeans IDE has static analysis tools, especially associated with integration with the FindBugs tool, which allows identifying and solving common problems in the Java code. In addition to this, we have the NetBeans IDE debugger which allows you to place breakpoints in the source code, add field clocks, cycle through the code, execute various methods, take snapshots and monitor the execution as we enter data into it.
Now we will see its installation process in the indicated distributions.
1. Install Java JDK 8 on CentOS, RedHat or Fedora
For this case we will use Fedora 27 but the same commands are used in CentOS or RHEL.
We will start with the installation of Java JDK 8. The first point to indicate is that NetBeans cannot run in Java 9 which is the latest version of Java available, so we must install Java 8.
Step 1
To install Java 8 JDK in the selected distribution, we will go to the official Java SE site in the following link and there we download the last binary package .rpm:
Java JDK 8
Step 2
There, we will download any of the following packages based on the architecture used:
Step 2
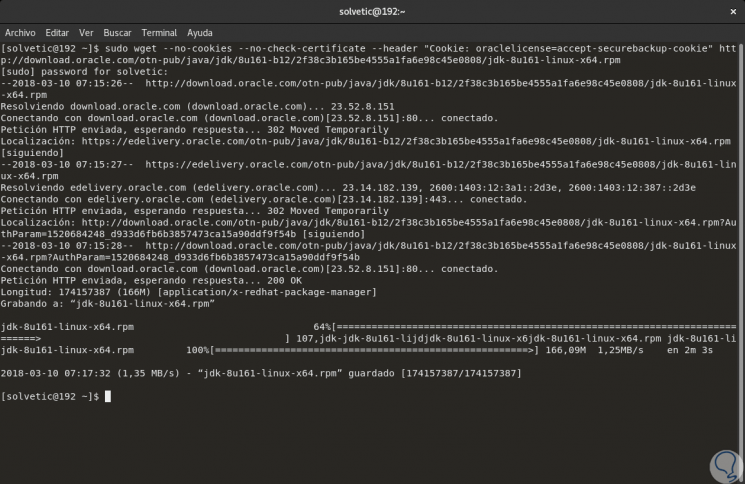
Now, if we want to use the wget command to download them directly from the terminal it will be possible with the execution of the following line:

Step 3
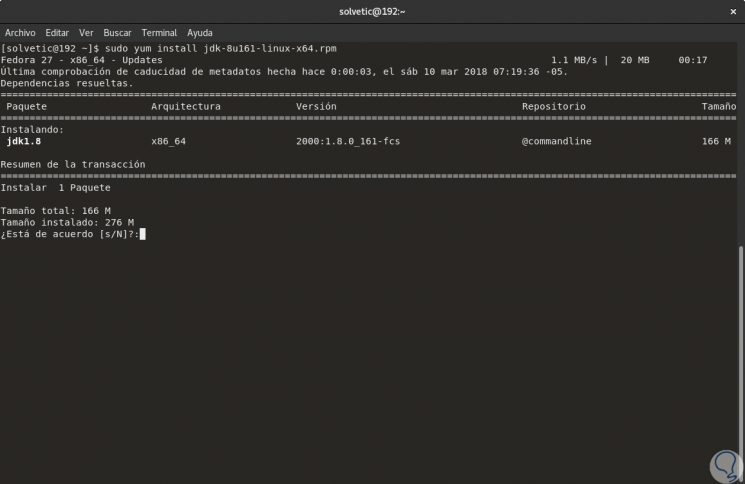
After downloading the Java .rpm file, we will go to the directory where the Java package was downloaded and install Java 8 JDK using the following command:

Step 4
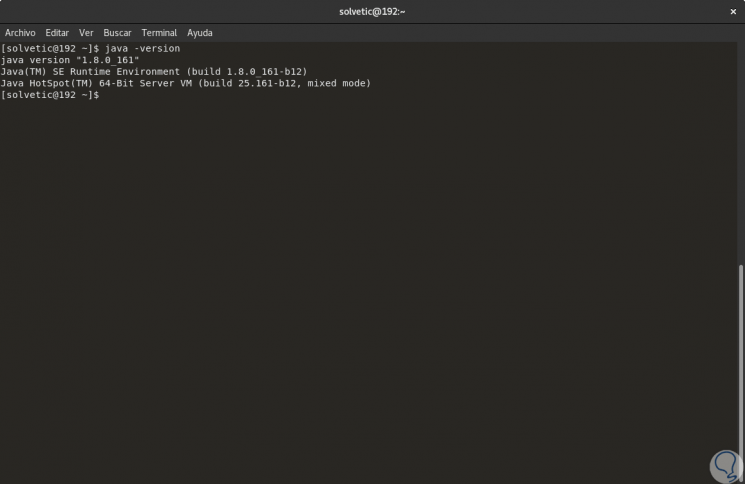
Enter the letter S to confirm the installation of the selected package. We can confirm the version of Java installed by running the following:
java -version


Login Join up!