NVIDIA is a company that begins to gain weight in the field of video games from the 90's and that today is one of the companies with more presence in terms of gaming hardware and components in general. NVIDIA cards represent a quality leap in terms of the graphic section, since in each model they have been improving and expanding capacities for the user. Having an NVIDIA graphics card means having graphics quality within our equipment and we can improve GPU graphics card performance ..
Like any hardware element we can experience errors that end up influencing our user experience. This is the case of the NVIDIA Kernel Mode Driver error that causes slowdowns and strange effects of power failure. Users report this type of warning on different monitor models, so we have worked to compile possible solutions that have helped users to repair this NVIDIA graphics card error.
Next, we leave you a complete manual with different possible solutions that will help you repair the error that the NVIDIA Kernel Mode Driver stopped working in Windows 10..
1. Change graphics card power options to fix NVIDIA Kernel error
Sometimes the power options can harm rather than help and in this case the graphics card can be affected by giving errors in operation, so we will change the configuration.
Step 1
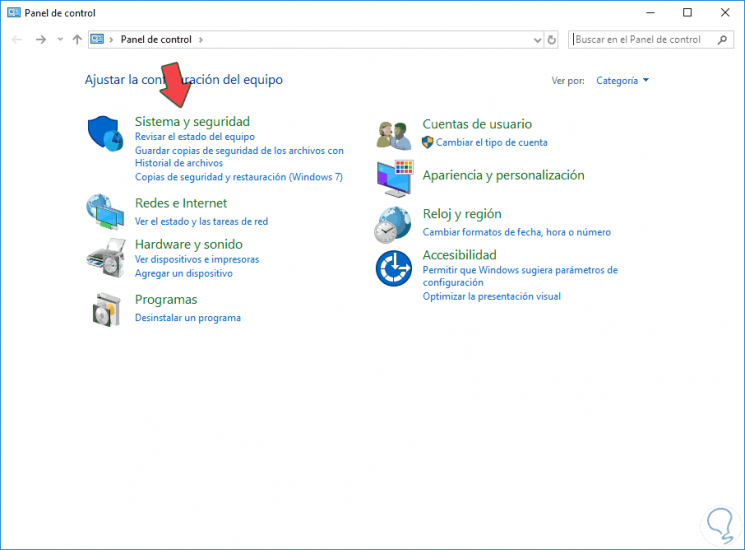
The first thing we will do is enter the Control Panel from the following route:
Open Control Panel
Step 2
Here we will click on “System and securityâ€
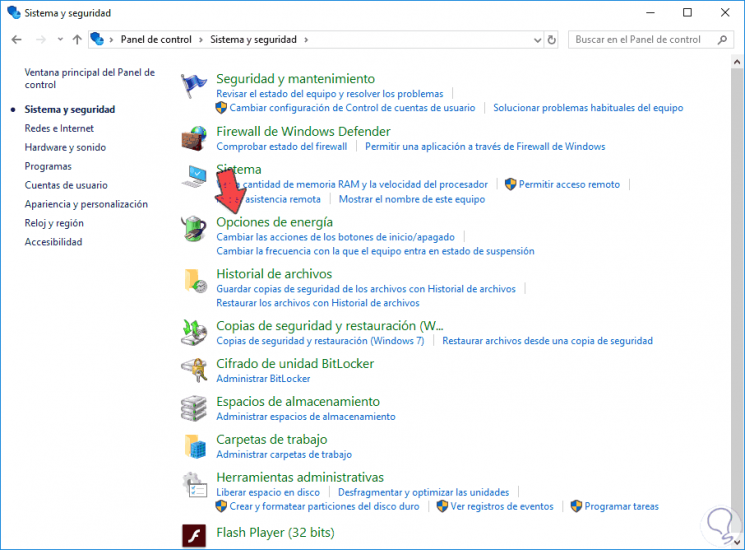
Step 3
Now click on the option "Energy options".
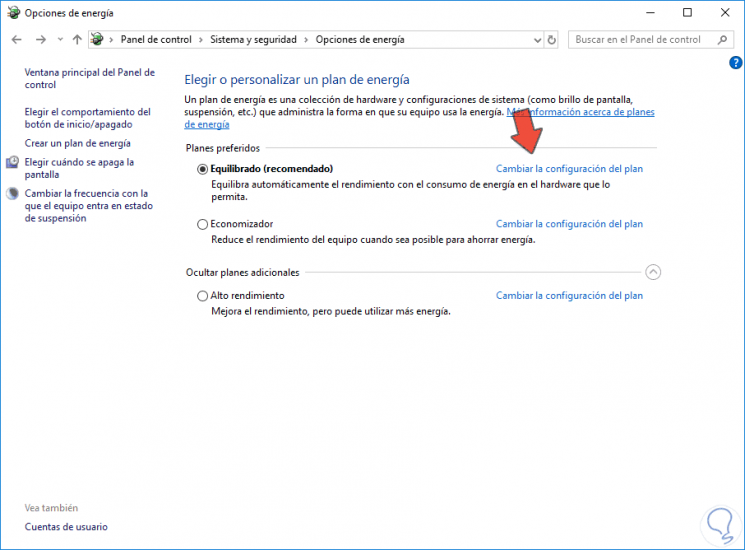
Step 4
Next, we will click on the option “Change plan settingsâ€.
Step 5
In the next window we will click on “Change advanced power settingsâ€.
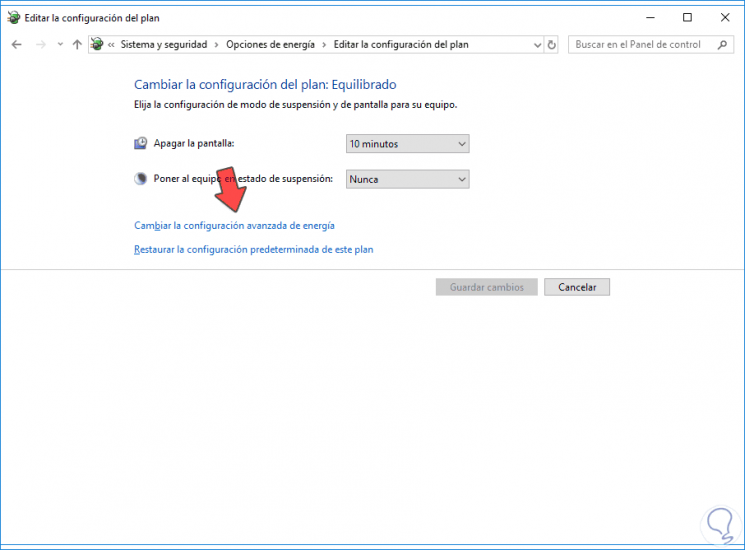
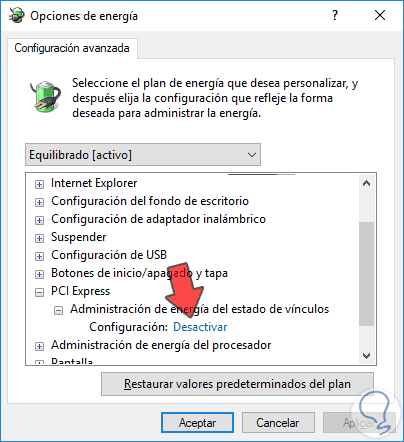
Step 6
In the window that opens we will look for the “PCI Express†option. We will press and deactivate the option that appears.
2. Reinstall drivers to fix NVIDIA Kernel error
The controllers or drivers allow us to have full compatibility between hardware and our equipment along with the software. Thanks to these tools we can control our hardware devices easily. Sometimes a bad update or a lag of versions cause certain errors that end up affecting our daily tasks. In reference to graphics cards, having correct graphics installed is essential to avoid problems in the visual part of the system. One more option that we propose is that you reinstall the NVIDIA drivers from their official website.
3. Disable visual effects in Windows 10 to fix NVIDIA Kernel error
Visual effects can also have an impact on graphic performance, so we can try to disable it and check the error status.
Step 1
We perform the following key combination and then enter the command "sysdm.cpl".
+ R
sysdm.cpl
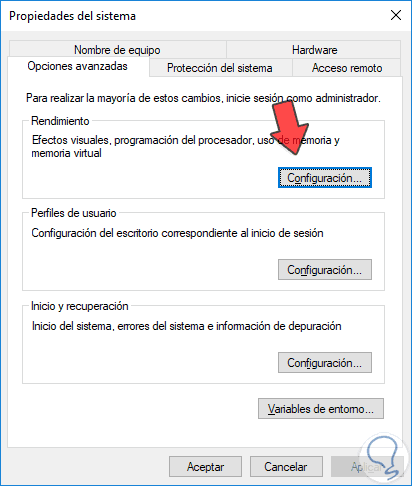
Step 2
Here we will enter the “Advanced options†section of the top menu. Within the "Performance" section, click on "Configuration".
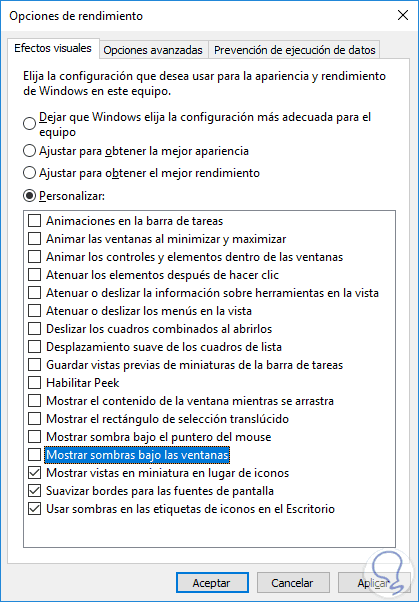
Step 3
Here we will click on “Customize†and all the unmarked options must be minus the last 3 of the image. Try deactivating them if the error still exists.
4. Configure PhysX to troubleshoot NVIDIA Kernel error
NVIDIA PhysX is a powerful engine that relies on GPU acceleration to achieve good visual effects. We will configure it to avoid the Kernel error.
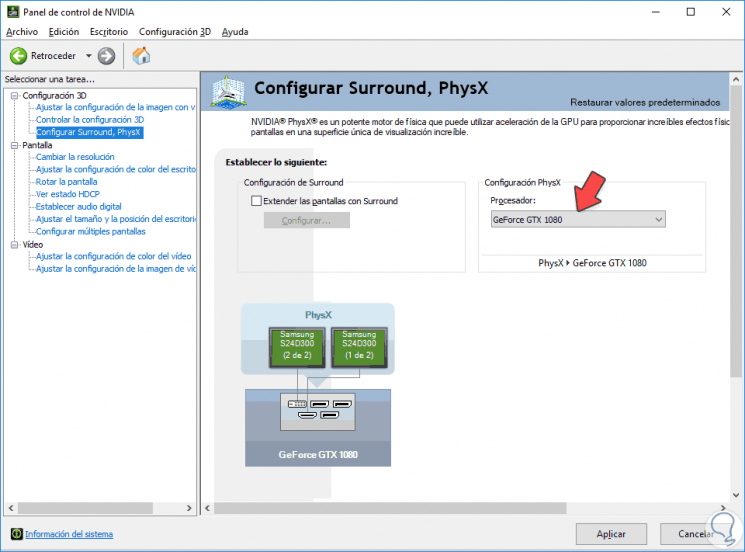
- Go to an empty place on your desktop and right click, here we will click on “NVIDIA Control Panelâ€.
- Now go to the section on the left of the category "3D Configuration" and then click on the option "Surround Configuration, PhysX". Here on the right we will press your graphics card as PhysX processor.
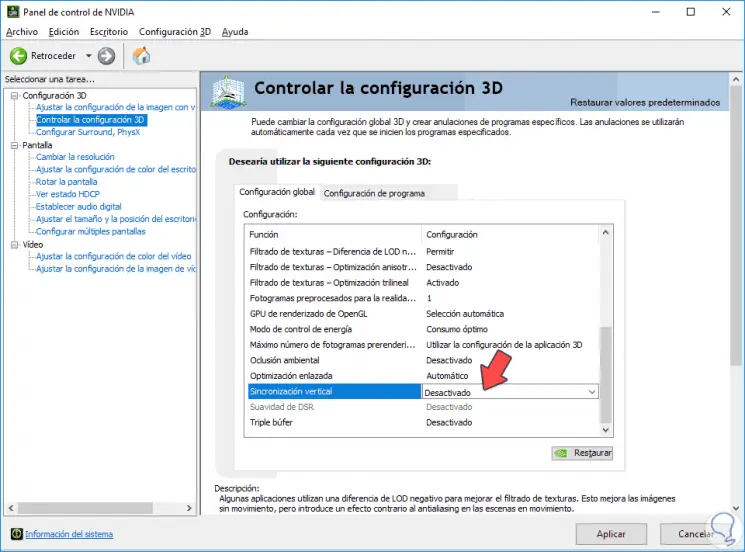
5. Disable vertical sync to fix NVIDIA Kernel error
To change the configuration of NVIDIA vertical synchronization we will do the following.
- You have to go to an empty space on the desktop and right click to enter the “NVIDIA Control Panelâ€.
- Here we will enter the left section of “Control the 3D configuration†and in the right part, in “Global configuration†we will look for the “Vertical synchronization†and deactivate it.
6. Modify Registry Editor to fix NVIDIA Kernel error
Step 1
We will enter the Registry Editor with the following key combination and typing the regedit command.
+ R
Regedit
Step 2
Now we will go to the following route:
Computer \ HKEY_LOCAL_MACHINE \ SYSTEM \ CurrentControlSet \ Control \ GraphicsDrivers
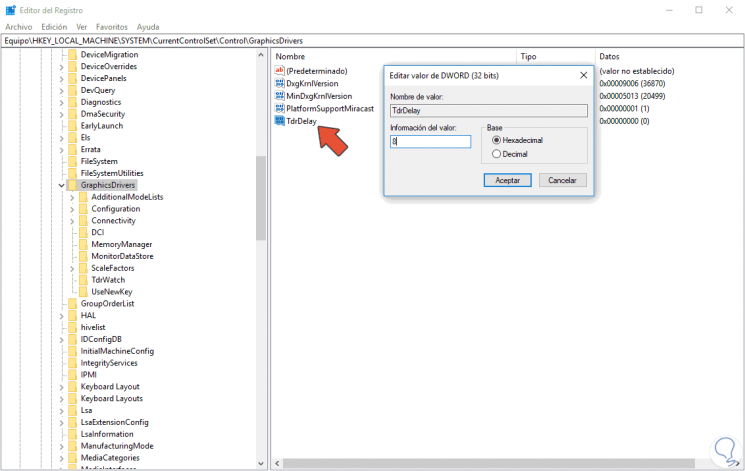
Step 3
Now we will do the following:
- Here we will right click on “GraphicsDrivers†and choose “New - DWORD value (32 bits)â€. We will name this value "TdrDelay".
- We will right click on the new value and give it a value of 8. Then we will click on Accept and restart.
7. Disable GPU hardware acceleration in the browser to fix NVIDIA Kernel error
Chrome is one of the most widespread browsers so if you are using it you may be encouraging problems with the graphics. We will disable hardware acceleration as follows.
Step 1
We go to the Chrome browser and enter the following path in the URL bar. Then press Enter.
chrome: // settings /
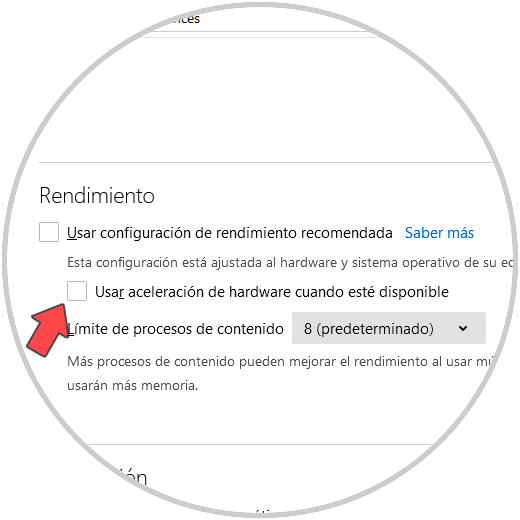
Step 2
Now we will go to the "Advanced configuration" section and look for the "System" category. Here we will disable the option “Use hardware acceleration when available†and restart the browser.

Step 3
If you use Internet Explorer or Firefox you will have to do the following. If you use Microsoft Edge, this browser acquires the system configuration automatically.
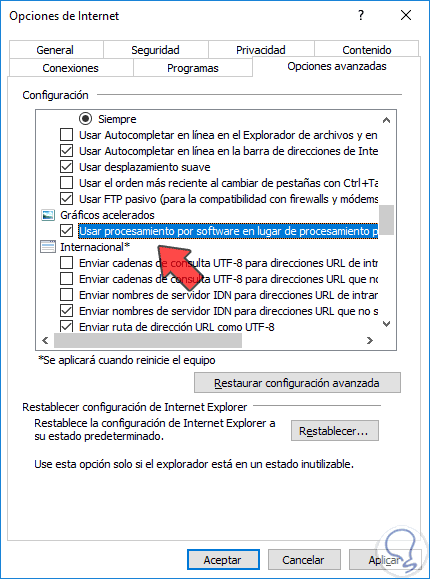
Disable hardware acceleration in Internet Explorer
We will do the following steps:
- We open Internet Explorer
- Click on the Settings icon on the top right in the form of gear and choose “Internet Optionsâ€
- We go to the “Advanced options†tab and activate “Use software processing instead of GPU processingâ€
Disable hardware acceleration in Firefox
To disable this option in Firefox we will do the following:
- We open Firefox and type the following address in the URL bar. Press Enter.
about: preferences
- Here we will look for the “Performance†section and disable the option “Use hardware acceleration when available.â€
With this options manual you can solve problems or errors related to the NVIDIA Kernel Mode Driver in Windows 10.