The Start menu in Windows 10 has been there for decades and although its design has changed, and will continue to do so, it has the basic task of allowing us to have access to applications, programs, system tools and from its search box to perform filters search results. But sometimes the Start menu simply doesn't work , which affects the execution of a large number of activities that we usually do from there..
From the start menu we can access our arsenal of tools and applications and even pinned files. The good thing about the Windows 10 Start menu is that it is customizable and we can place whatever we want. Therefore, if this is your case with the Start menu, TechnoWikis has a comprehensive solution to correct it and make it work as it should be.
To stay up to date, remember to subscribe to our YouTube channel! SUBSCRIBE
1. Repair Windows 10 Start Menu with CHKDSK
Step 1
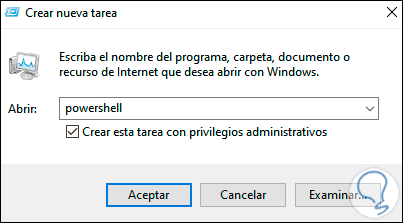
To start our solution process, we open the Task Manager, we go to the menu "File - Run new task":

Step 2
In the pop-up window we enter "powershell" and make sure that the box "Create this task with administrative privileges" is active:
Step 3
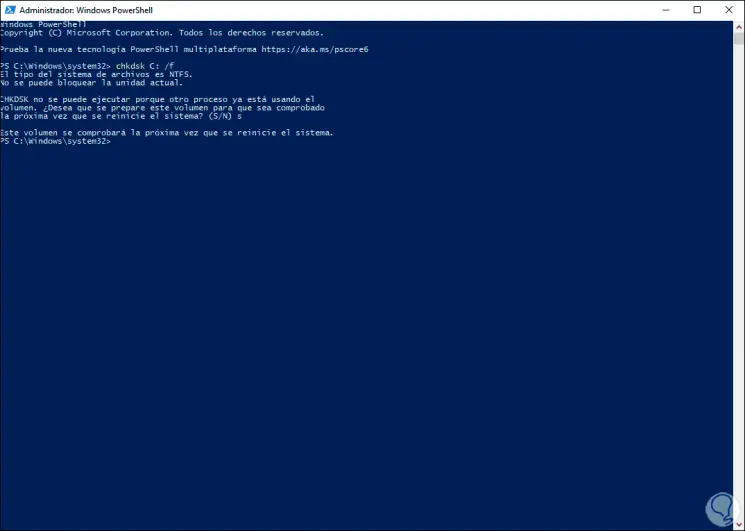
We click OK and in the Windows PowerShell console we execute the following:
chkdsk C: / f
Step 4
In the PowerShell message we enter the letter S so that the system is in charge of performing an analysis to the disk at the next boot, chkdsk has the task of analyzing the hard disk for faults or errors that prevent certain tasks from being executed as is, including the Start menu:
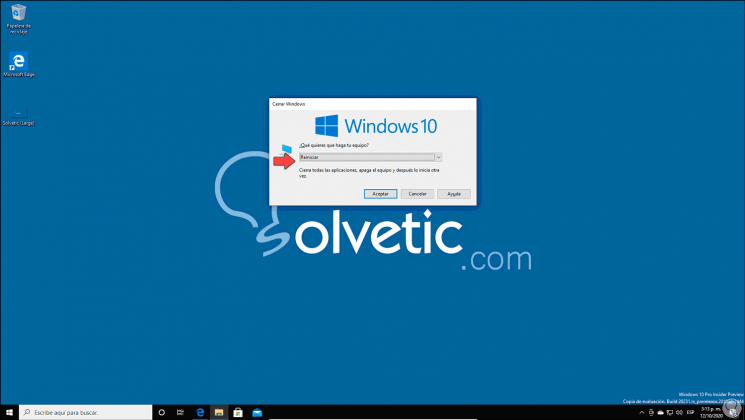
Step 5
We exit the PowerShell console with “exit” and now we use the Alt + F4 keys and in the pop-up window we will select the “Restart” option:
Alt + F4
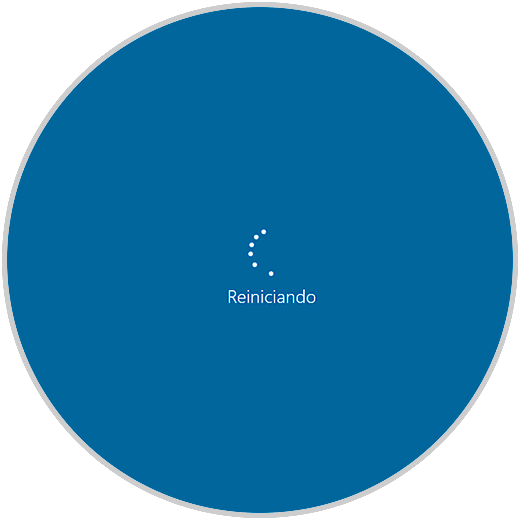
Step 6
We click OK and Windows 10 will be restarted to run the analysis:
Step 7
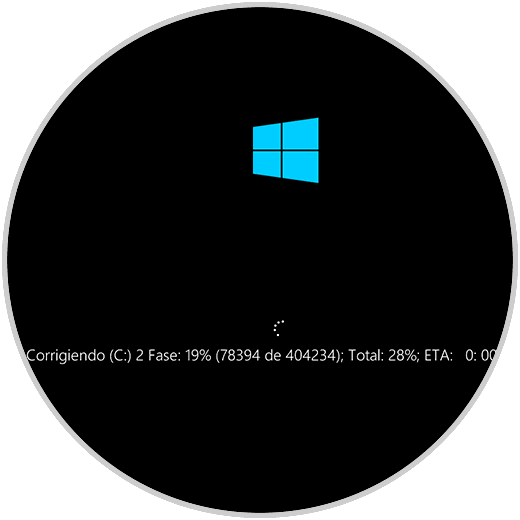
After this we will see the following message related to the analysis process:

Step 8
If we do not skip the task, the process of a complete analysis of the hard disk will be carried out to look for errors:
Step 9
After this process has finished, the system will continue with the login process. When accessing we verify that the Start menu works as it is.

2. Repair Windows 10 Start Menu with PowerShell
Step 1
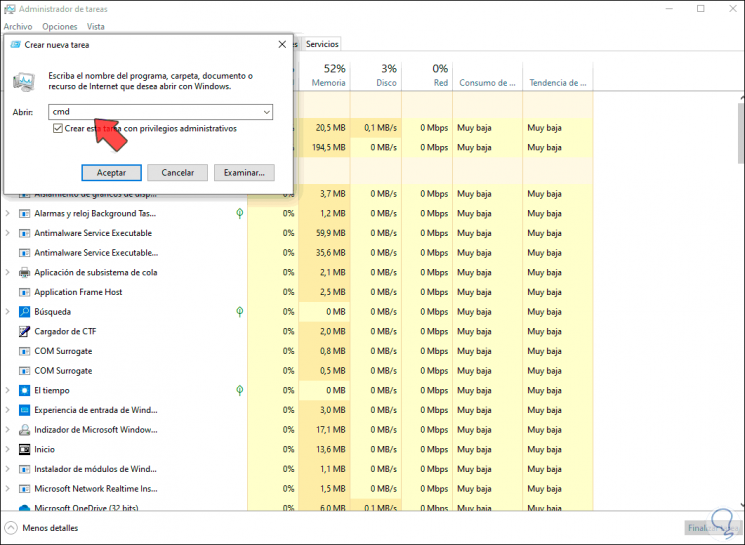
If not, do not lose your head, go back to the Task Manager and from File select "Run new task", enter "powershell" and run it with administrative privileges:
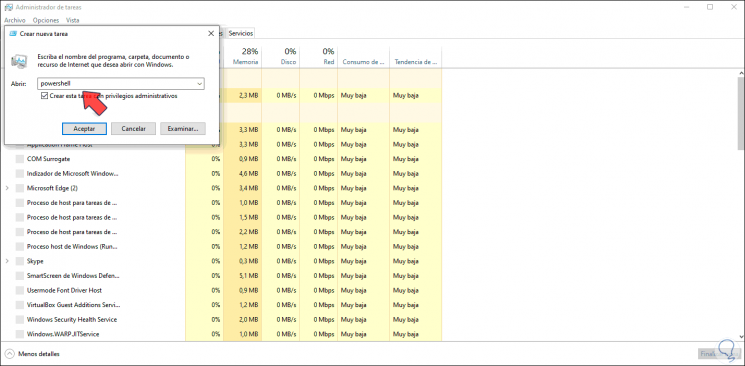
Step 2
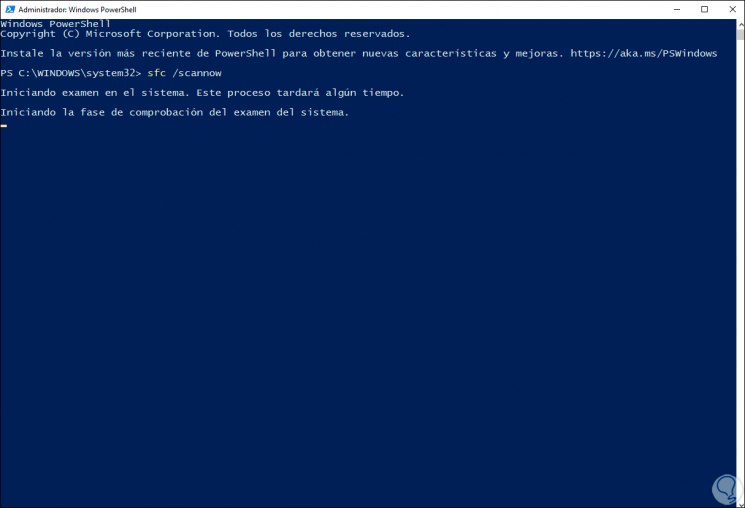
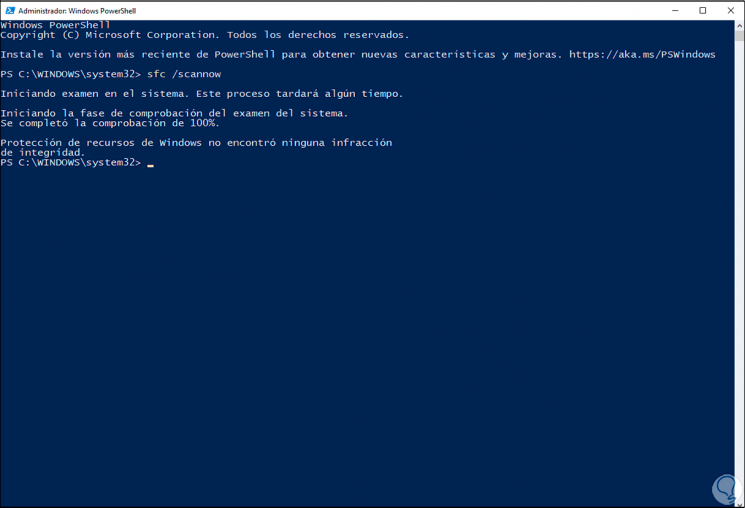
In PowerShell now we are going to execute the following command:
sfc / scannow
Step 3
SFC (System File Checker) is a command that has the mission of analyzing the Windows 10 NTFS file system to detect any error that has a negative impact on the behavior of the system, at the end of this process we will see the following. In case of errors we will see them there.
Step 4
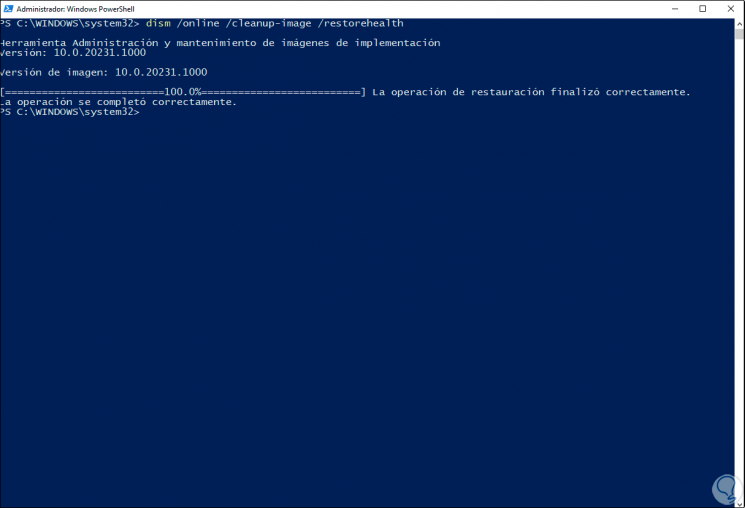
Now we execute the following:
dism / online / cleanup-image / restorehealth
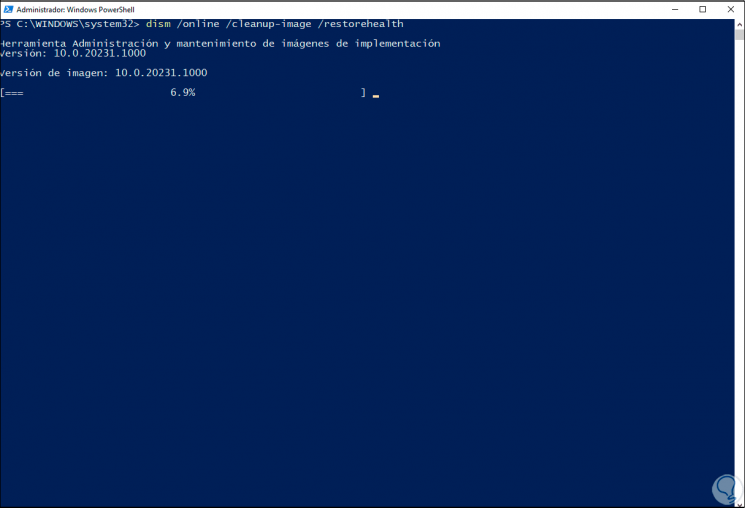
Step 5
DISM is an exclusive command for the system image and as the Start menu is an integral part of Windows 10, it can detect where the error is and correct it:
Step 6
If the failure persists, we will execute the following. This is a command that reinstalls most packages on the system.
Get-AppxPackage | % {Add-AppxPackage -DisableDevelopmentMode -Register "$ ($ _. InstallLocation) \ AppxManifest.xml" -verbose} 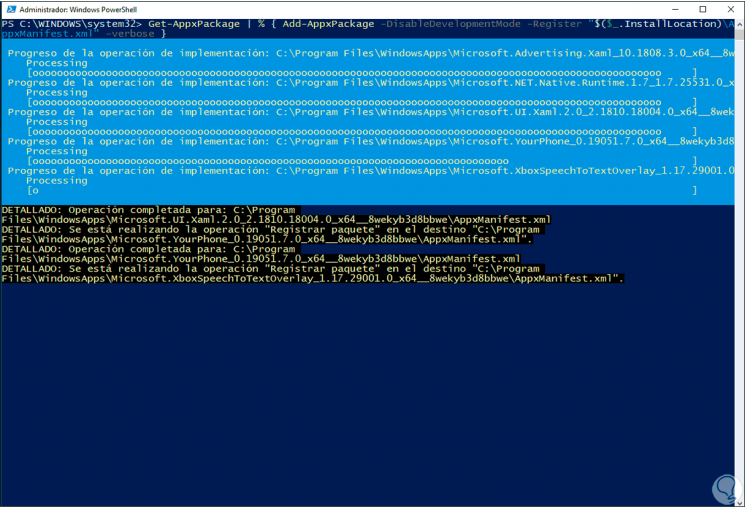
3. Repair Windows 10 Start Menu with Advanced Startup
Step 1
In case the Start menu is still rebellious and does not want to work with this, we go back to the Task Manager and create a new task as administrators, in this case we execute "cmd":
Step 2
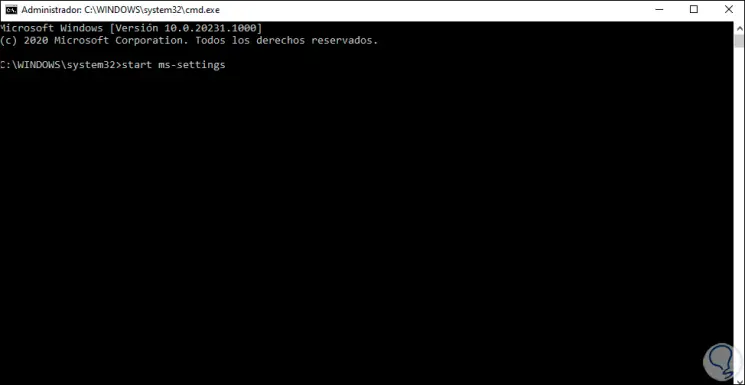
In the command prompt console we enter the following:
start ms-settings:
Step 2
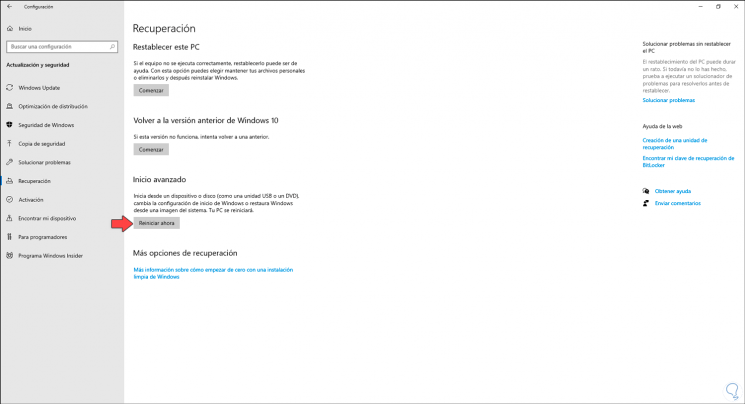
In the Configuration utility we will go to the following path:
Step 3
We click on "Restart now" located in the "Advanced startup" section and the system will be restarted, we will see the following:
Step 4
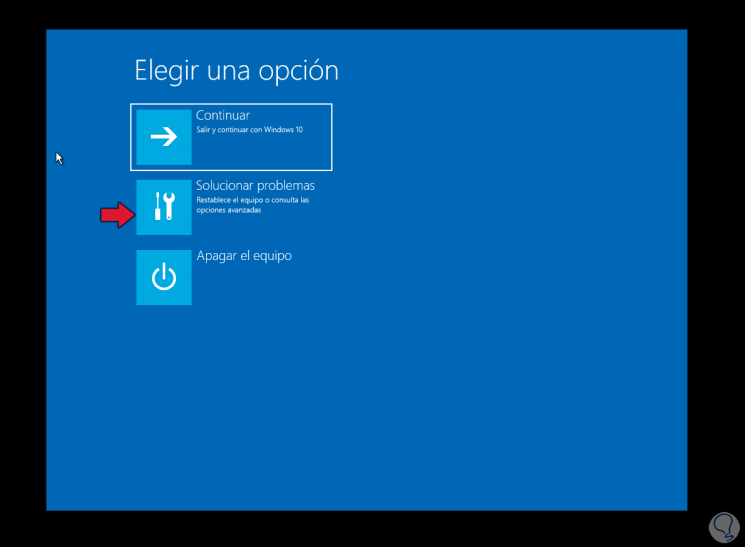
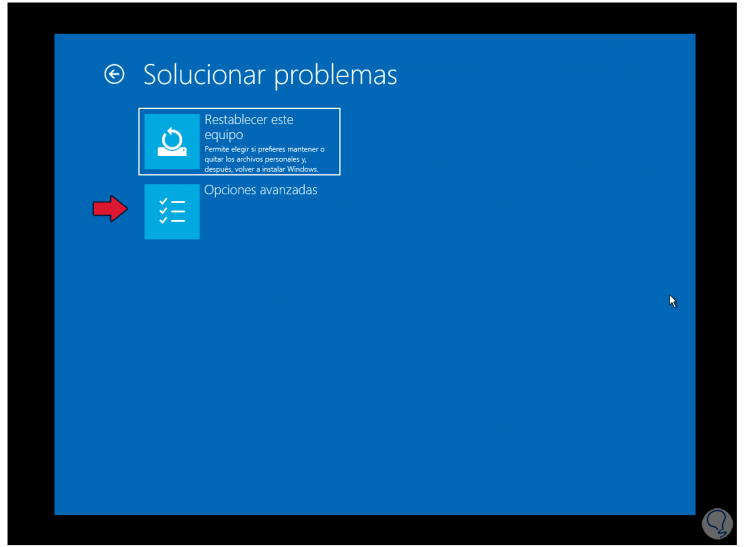
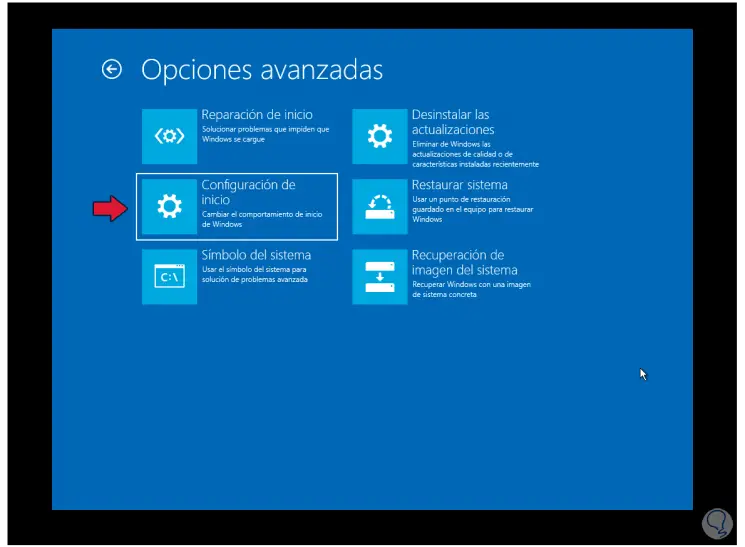
We click on "Troubleshoot" and in the next window we click on "Advanced options":
Step 5
In the next window we click on "Start Settings":
Step 6
By clicking there we will see the following:
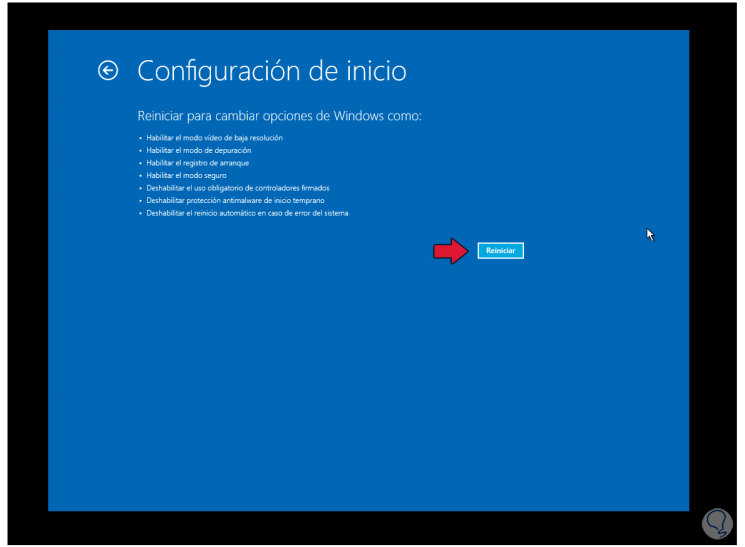
Step 7
We click on the "Restart" button and a series of options will be launched to use:

Step 8
We press the F4 key to start the computer in Safe Mode:

Step 9
Once we are in this mode we right click on Start and select "Shut down or log out - Restart":
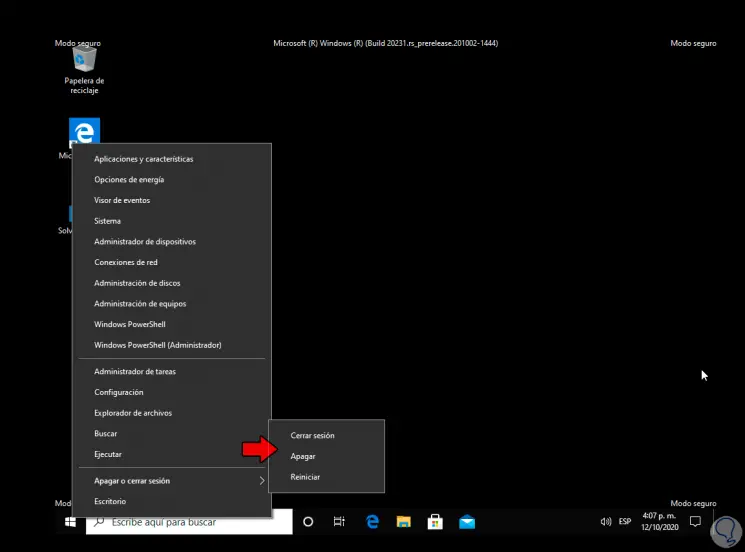
Step 10
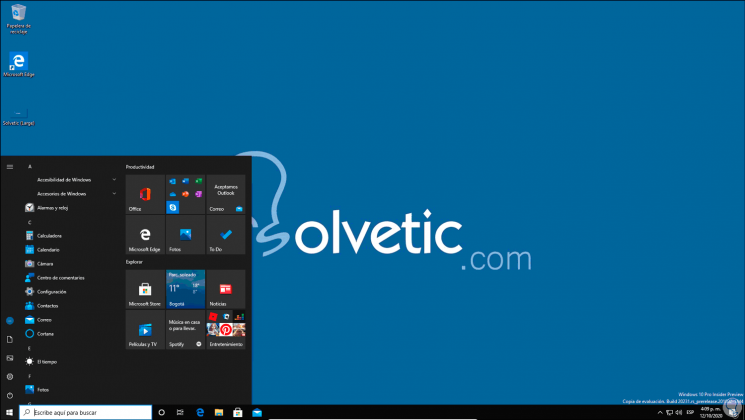
When the system restarts, the Start menu should work:
With these methods explained by TechnoWikis we can correct the errors in the Start menu and be able to access what we need from there..