External hard drives allow us to have information stored on a specific piece of hardware and will vary in format depending on the content or device. While USB memory sticks are one of the most widespread tools, external hard drives themselves are another way of having extra storage on our computers. Normally we connect our external disks in Windows 10 for various reasons such as:
- Use them as a backup medium
- Add space to the local hard drive
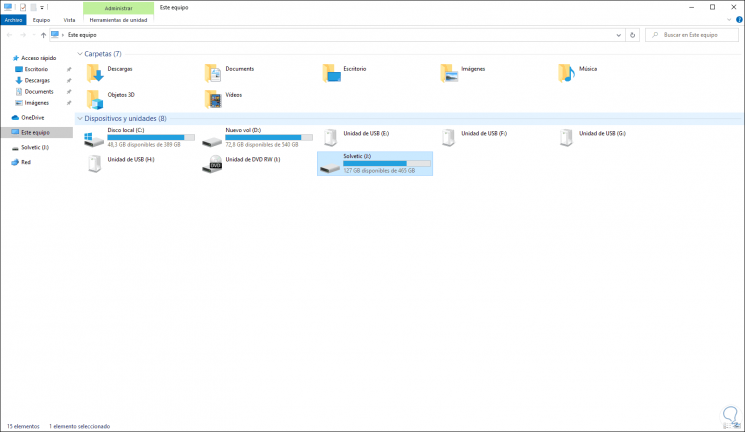
When we connect the external hard drive in Windows 10 , the system will automatically assign a letter to access it. Many users remove the external disk by disconnecting it directly from the USB port and this is really badly done since ejecting it can cause errors in the disk or make the information stored there inaccessible

To prevent this from happening we must remove it correctly and TechnoWikis will tell you how to do it. We also leave you the video tutorial with the different ways to do it..
To keep up, remember to subscribe to our YouTube channel! SUBSCRIBE
1. Eject external disk in Windows 10 from the taskbar
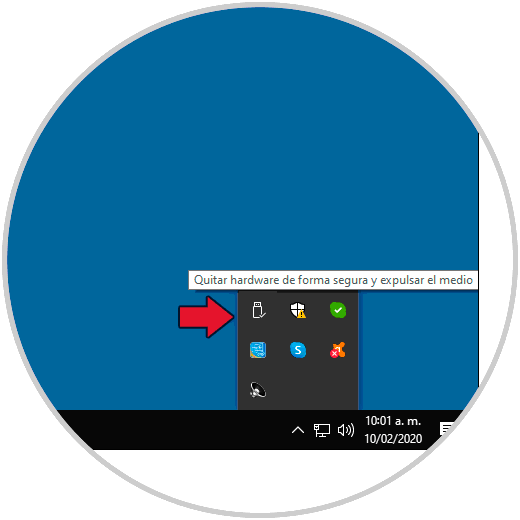
For this process it is enough to go to the Windows 10 taskbar, click on the “Show hidden icons†button and hover over the USB logo and we can see that the legend “Safely remove hardware is displayed and eject the medium":
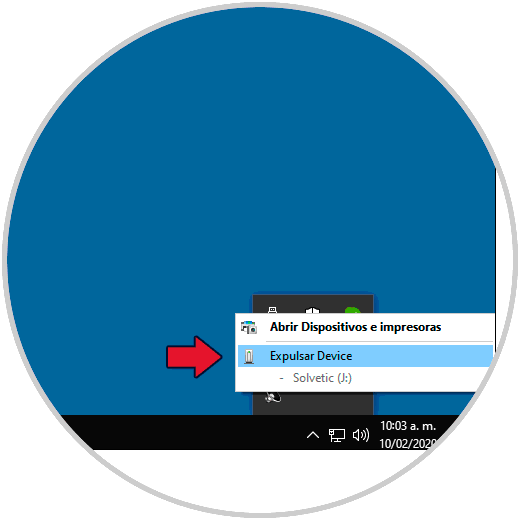
When doing this then we must click on the letter that the system has assigned to the hard disk to remove the correct medium (this because we can have different USB devices such as keyboards, mouse, etc).

2. Eject external disk in Windows 10 from File Explorer
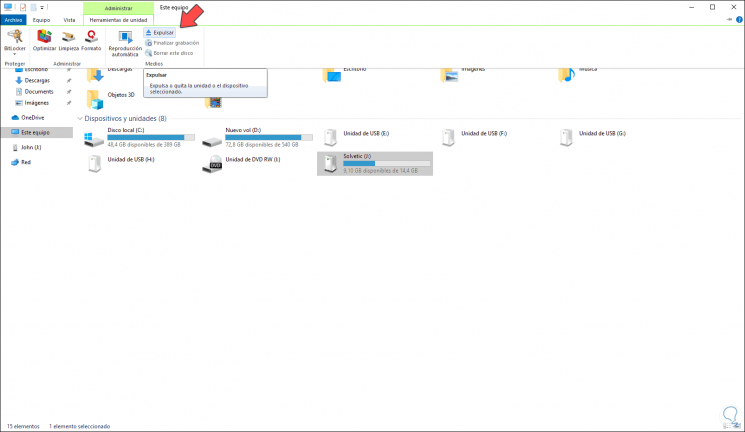
This is another of the available methods which is simple, for this we access the Windows 10 File Explorer, select the external disk and the “Drive Tools†menu will be activated and there we will find the option “Eject†in the group “Media "
We click on this option to safely eject the external disk in the system..

3. Eject external disk in Windows 10 from the Control Panel
It is another option we have to eject our discs safely.
Step 1
To use this method we will go to the following route:
Step 2
There we must go to the “Other devices†section and right click on the hard disk and select the “Remove device†option. This will eject the external hard drive correctly.

With any of these options we will remove the external hard drive so that we do not affect its general behavior.