Among the different software-level options found within Linux systems , Ubuntu is one of the most popular distributions of Linux for various reasons such as:
- Compatibility between applications and systems
That is why we can often see how new versions of Ubuntu are released, currently being the available version Ubuntu 19.10, but we have heard that Ubuntu 20.04 (April 16, 2020) will be launched in a short time and this promises to be a system with many improvements and new Ubuntu functions , something that Ubuntu has accustomed us to.
Through this tutorial, TechnoWikis wants to explain in detail what you will find in Ubuntu 20.04 and how you can both update it from an earlier version, as well as run a clean installation (from scratch).
1. What's new in Ubuntu 20.04
Ubuntu 20.04, whose code name is "Focal Fossa", is a new version of Ubuntu's long-term support (LTS) with support until 2025 and will have a compatibility level of 10 years under the "version" scheme Extended Maintenance Release (ESM) which is owned by companies.
What's new Ubuntu 20.04
The improvements or developments in this new version of Ubuntu 20.4 are:
- Improvements at the theme level in Ubuntu 20.04 as it will have a dark and clear choice of the Yaru theme being a novelty that the check boxes, option buttons and switches will turn from green to eggplant.
- Folder icon scan which maintain the identity of Ubuntu, by offering a contrast in the light and dark variants of Yaru.
- Ubuntu 20.04 will feature the latest version of GNOME 3.36 allowing all new features in 3.36 to be available in this new version of Ubuntu.
- We will no longer have integrated Amazon applications.
- Ubuntu 20.04 will have the latest LTS 5.4 core which gives us native ExFAT support and performance improvements and new additional hardware supports.
- Experimental support of ZFS and improved.
- Ubuntu 20.04 will no longer support Python 2, the Python 3 version being integrated there.
- WireGuard support for VPN usage issues adding more security to the system.
- ISO image smaller than traditional.
- Fractional scaling in Xorg session.
- Multi-monitor support in GDM.
- Better performance of GNOME Shell.
Knowing these improvements or novelties of Ubuntu 20.04 we will learn to update and install it from scratch to learn more about this.
Note
Ubuntu has test images called Dailys which can be downloaded to test the system before its official launch, these are available at the following link:
Ubuntu Image 20.04
2. How to upgrade from Ubuntu 19.10 to Ubuntu 20.04
Step 1
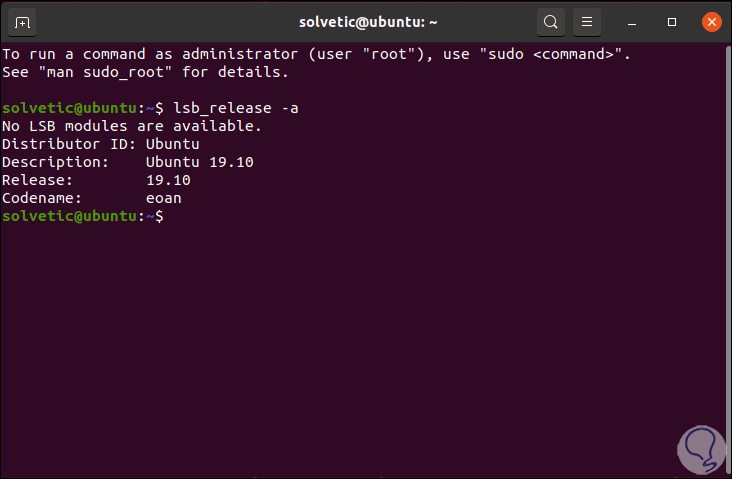
The first step is to validate the version of Ubuntu used, for this we execute the following in the terminal:
lsb_release -a
Step 2
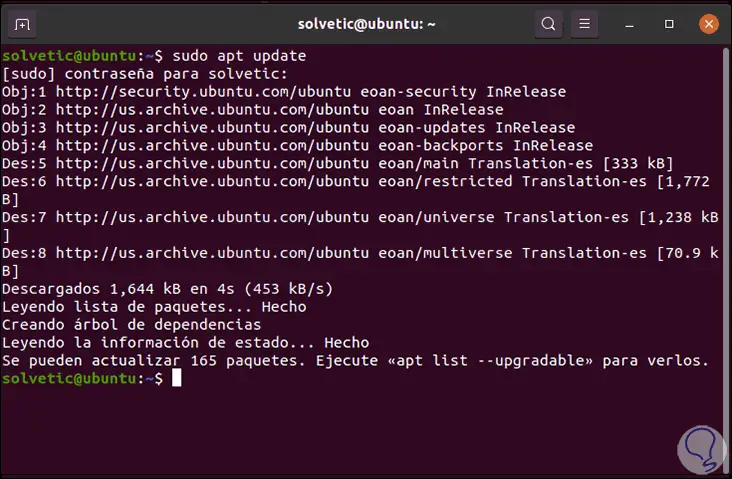
After this we will update the system by running:
sudo apt Update
Step 3
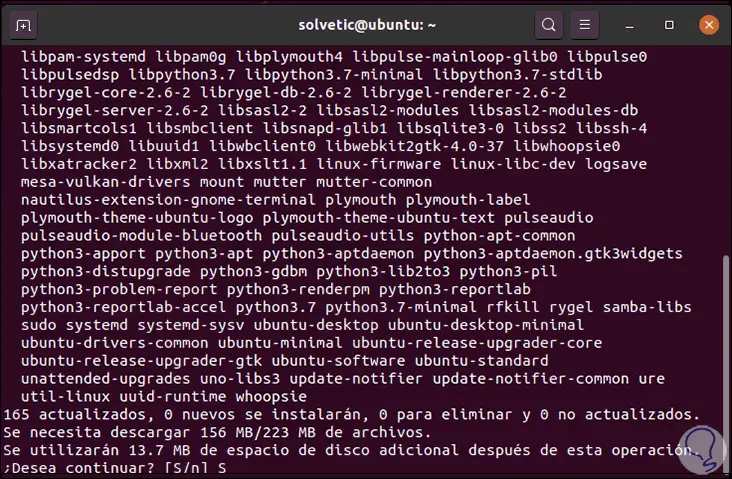
We proceed to apply these updates by executing the following command. There we enter the letter S to confirm the download and installation of these updates in Ubuntu.
sudo apt upgrade
Step 4
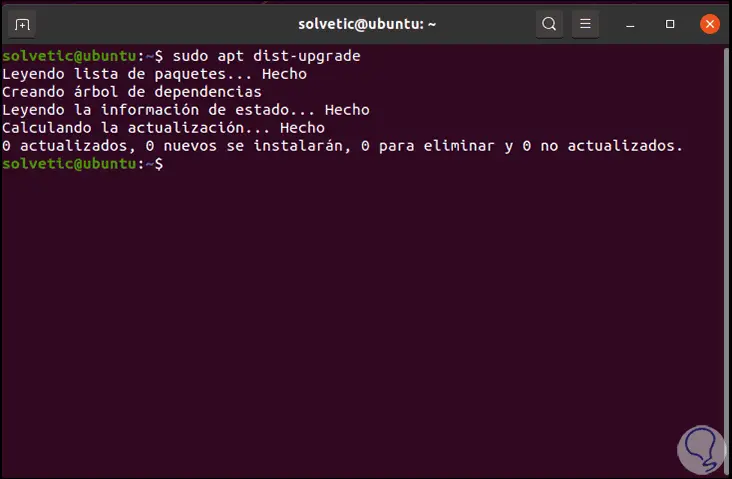
After this process we will execute the following to update the version used to Ubuntu 20.04:
sudo apt dist-upgrade
Step 5
In this case we can see that there is no update available.
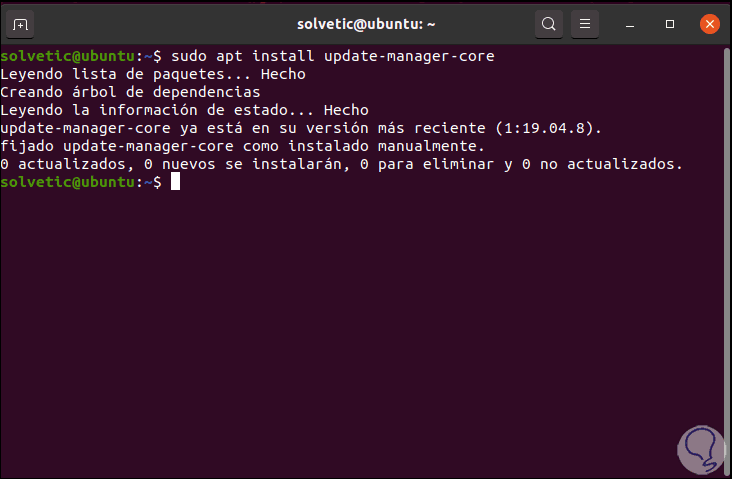
To correct this we will first install the update wizard (which already comes by default) in case we have removed it:
sudo apt install update-manager-core
Step 6
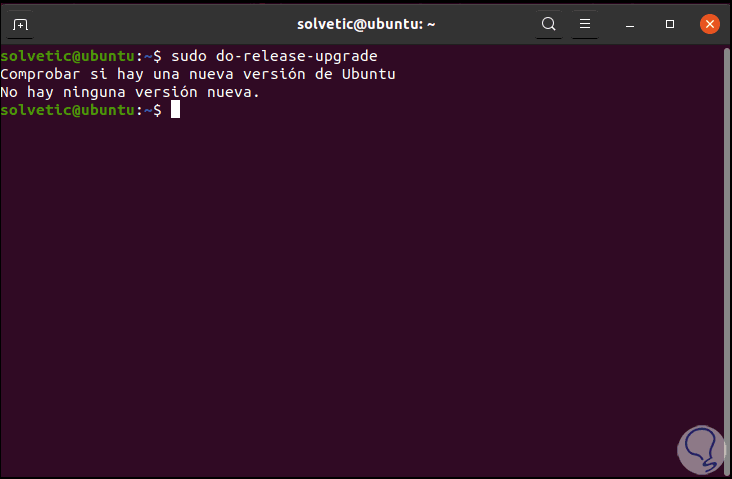
Now we will update Ubuntu 19.10 to Ubuntu 20.04 by running the following line:
sudo do-release-upgrade
Step 7
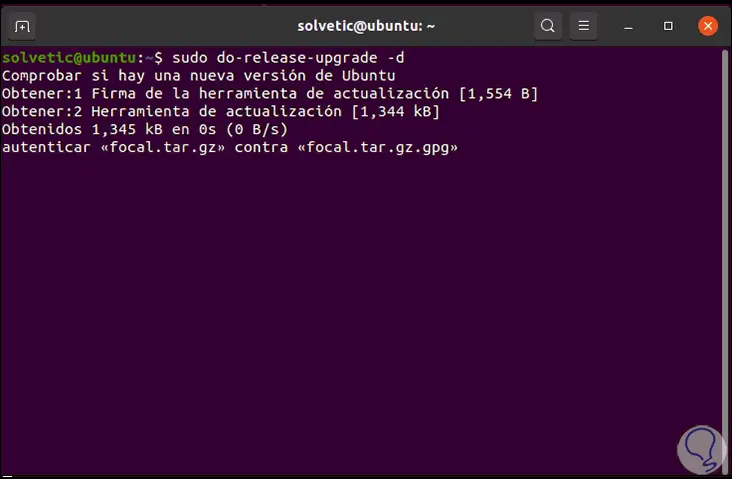
If we get to see this message we simply force the update by executing:
sudo do-release-upgrade -d
Step 8
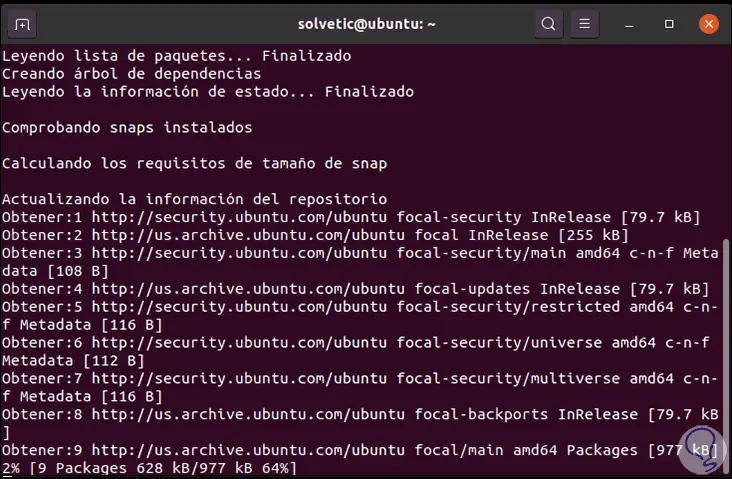
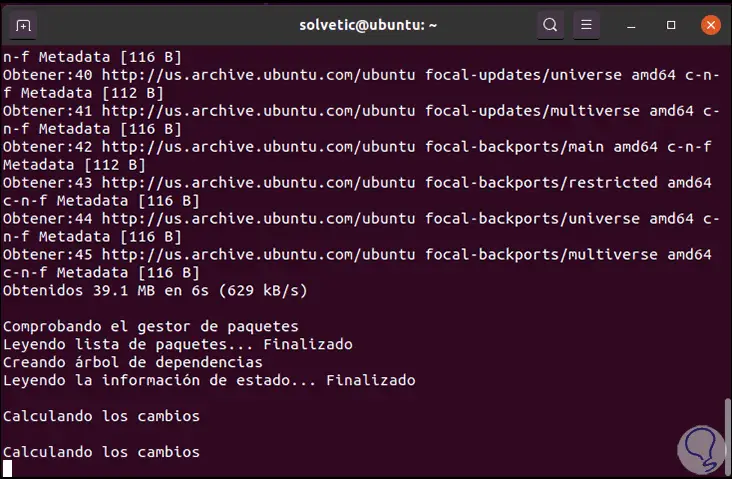
We can see that Ubuntu 20.04 (Focal) packages are downloaded:
Step 9
After this the installation changes are calculated:
Step 10
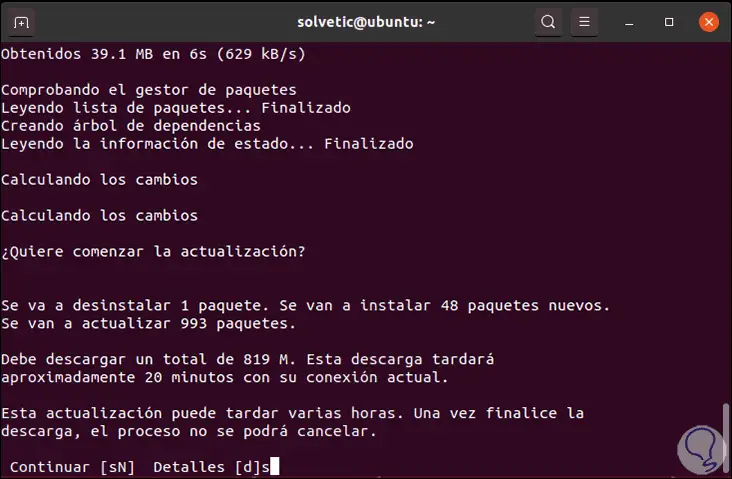
When this ends we will see the following:
Step 11
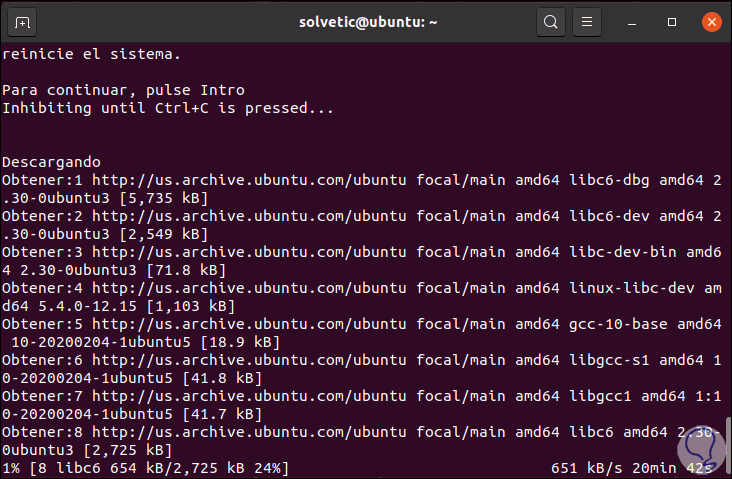
There we enter the letter "s" to confirm and to start the download we must use the Enter key:
Step 12
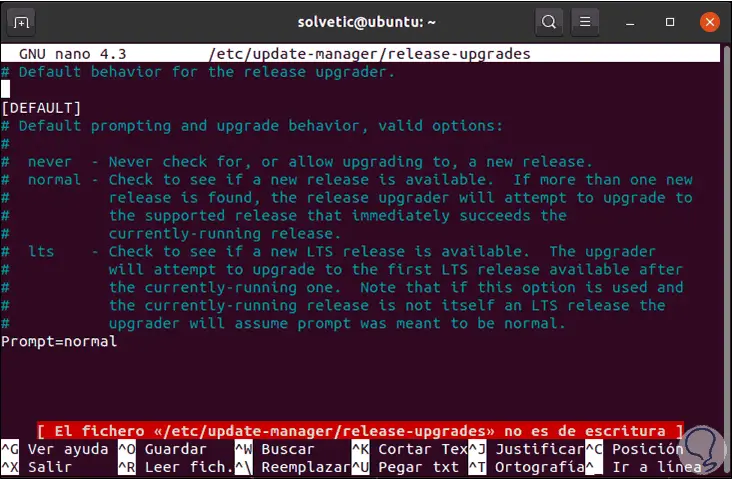
As a point to keep in mind, if after these steps you follow the error that there is no update, you must use an editor and go to the following route:
sudo nano / etc / update-manager / release-upgrades
Step 13
There we set the "normal" value in the "Prompt" line:
Step 14
We save the changes using the following key combination:
+ O Ctrl + O
We leave the editor using:
+ X Ctrl + X
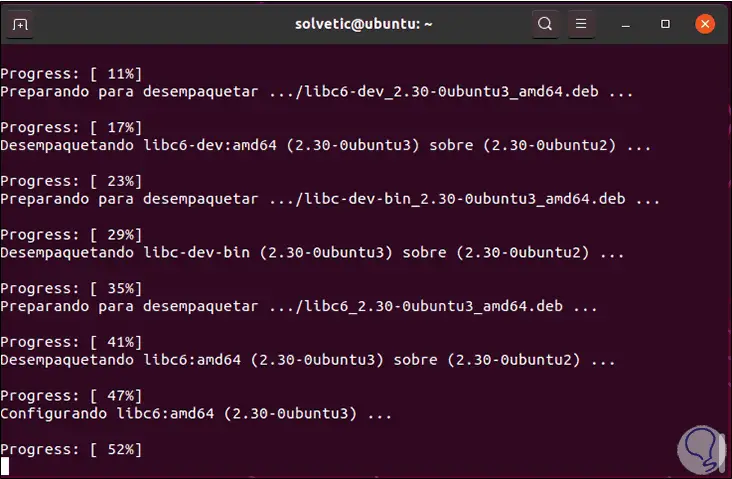
Step 15
When the update process reaches its end we will see that the update process begins:
Step 16
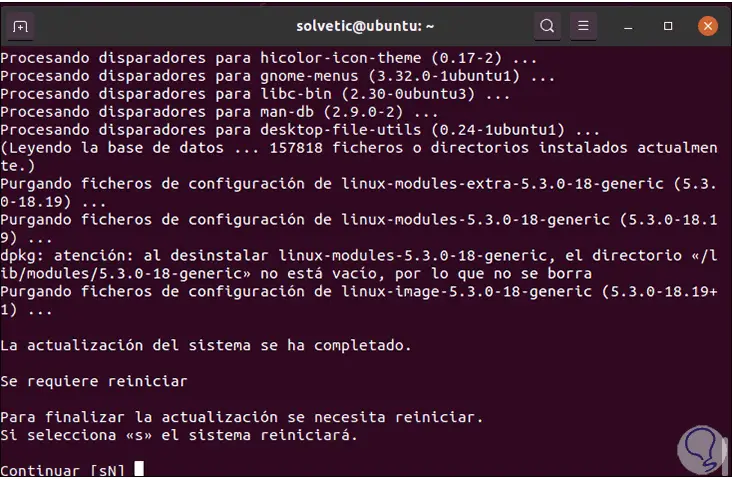
Then, when everything ends, we will see the following message:
Step 17
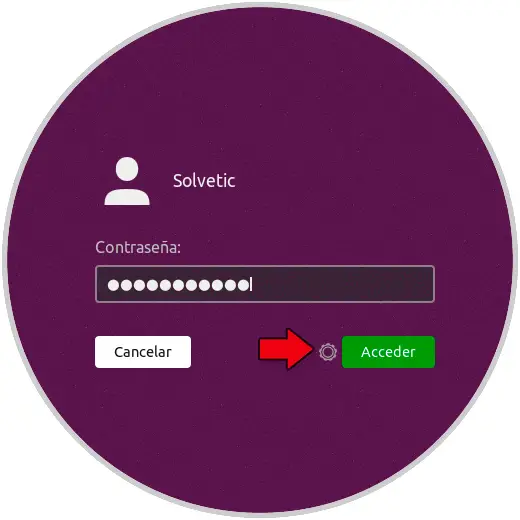
Enter the letter "S" to restart the system and apply the changes, we access the login:
Step 18
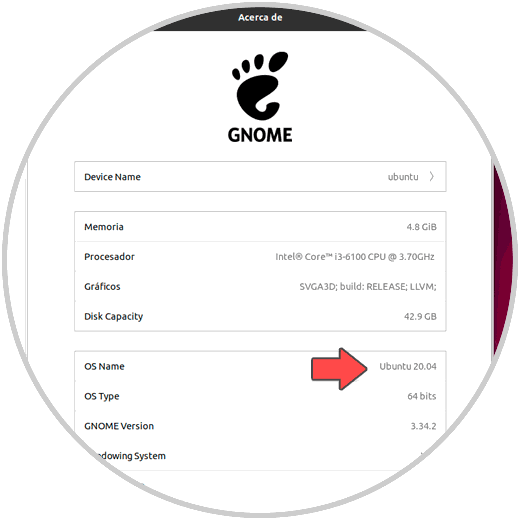
Once we log in we can go to "About" to verify that the system has been updated correctly:
From this point we will be able to use Ubuntu 20.04 and thus know its features to the fullest.
3. How to install Ubuntu 20.04 from scratch
Step 1
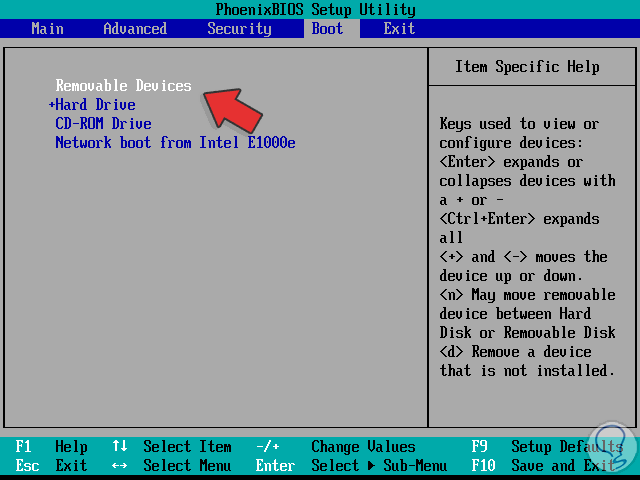
In this case we must burn the ISO image that we have downloaded and proceed to burn it to a DVD or to a bootable USB and we must configure the equipment so that the booting (booting) is from the USB media or from the DVD:
Step 2
Once we have this defined, we will start the equipment and we will directly access to define the Ubuntu 20.04 installation language: There we click on the "Install Ubuntu" button or if we want to know a little more about the system we will click on "Test Ubuntu". 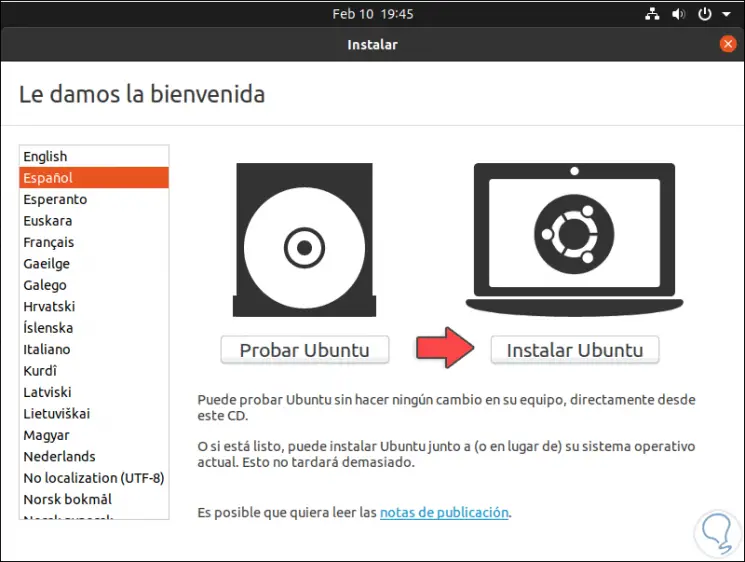
Step 3
In the next window we will define the keyboard language in Ubuntu 20.04: 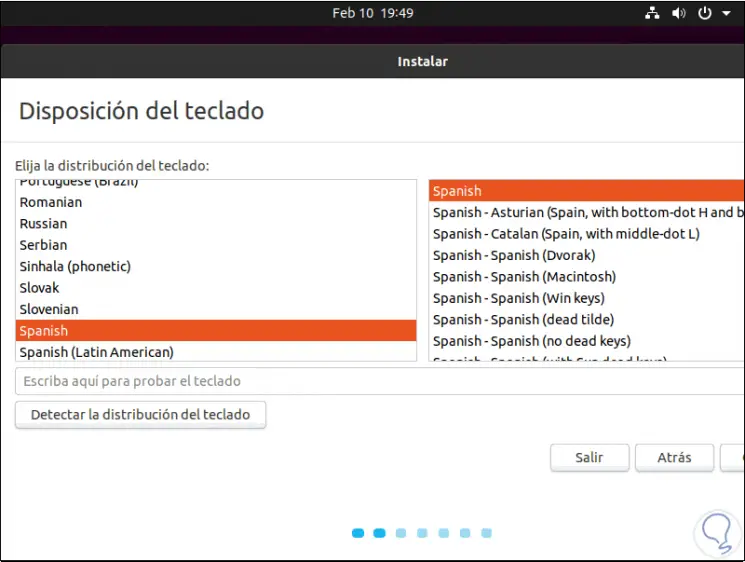
Step 4
Click on Continue and now we define the type of installation, as well as the option to install third-party add-ons for optimal system operation: 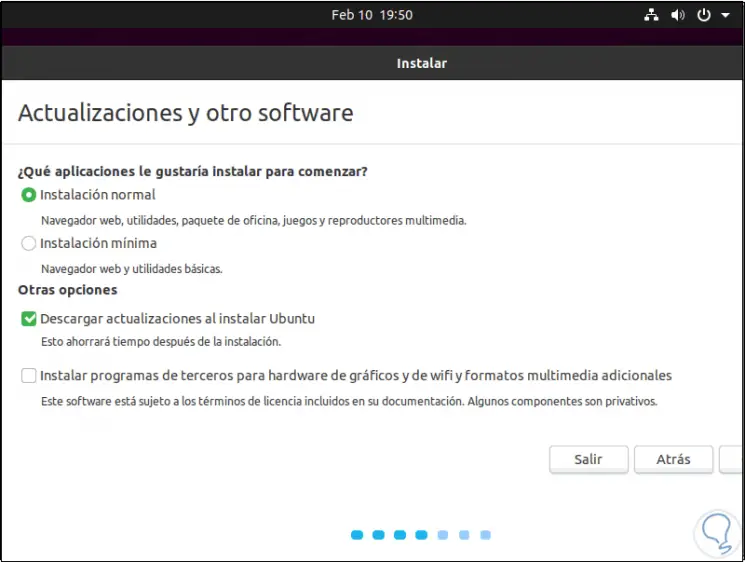
Step 5
We click on Continue and the next step will be to configure the disk, but unlike previous versions this will be the aspect in Ubuntu 20.04: 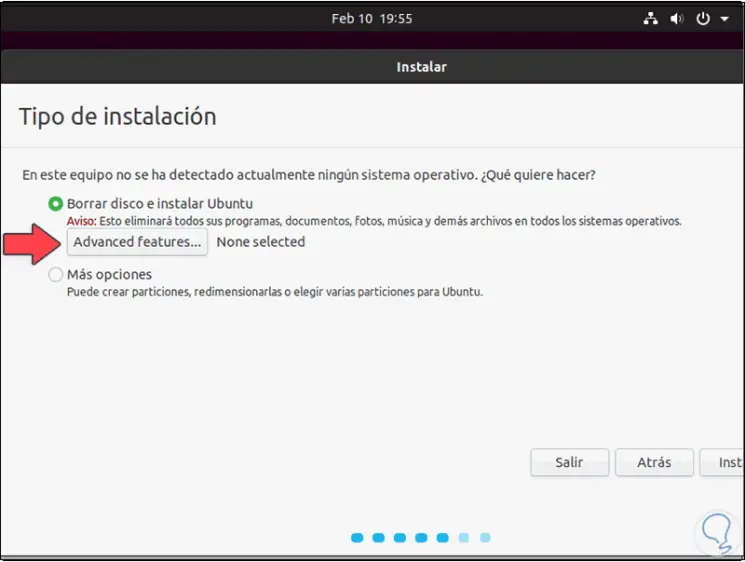
Step 6
There we can leave the default option for the system to automatically distribute the partitioning or select "More options" to do it manually based on the size of the disk. In Ubuntu 20.04 we find a button called "Advanced features" which will display the following. There it will be possible to use the security mechanism for the disk either with LVM or with ZFS (in the testing stage). 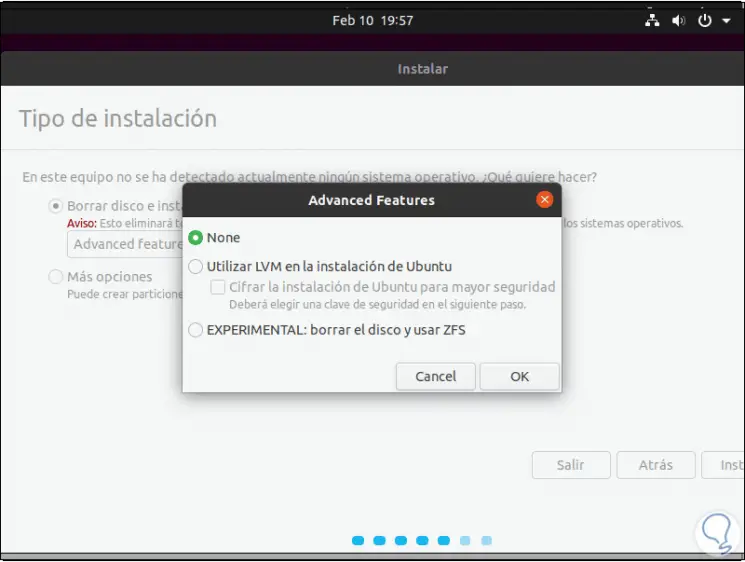
Step 7
If we do not select any of these options we click on Cancel and we can click on "Install" and we will see the following warning: 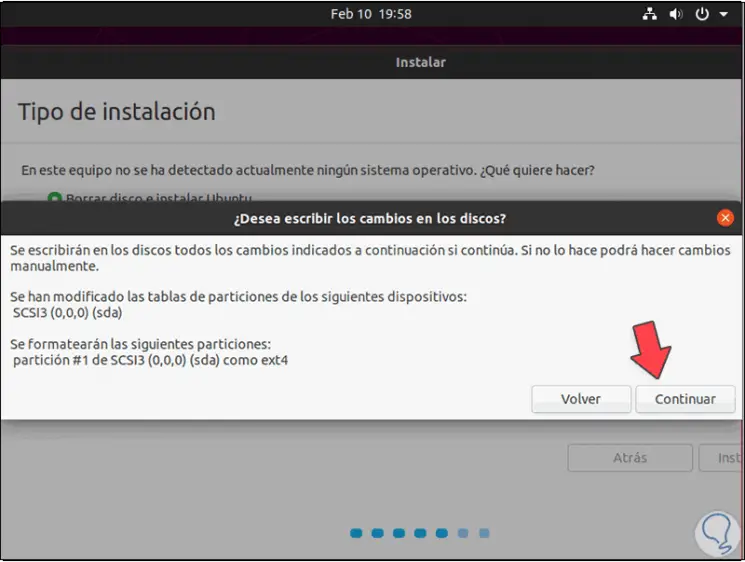
Step 8
There we click Continue to continue with the installation process defining our geographical location: 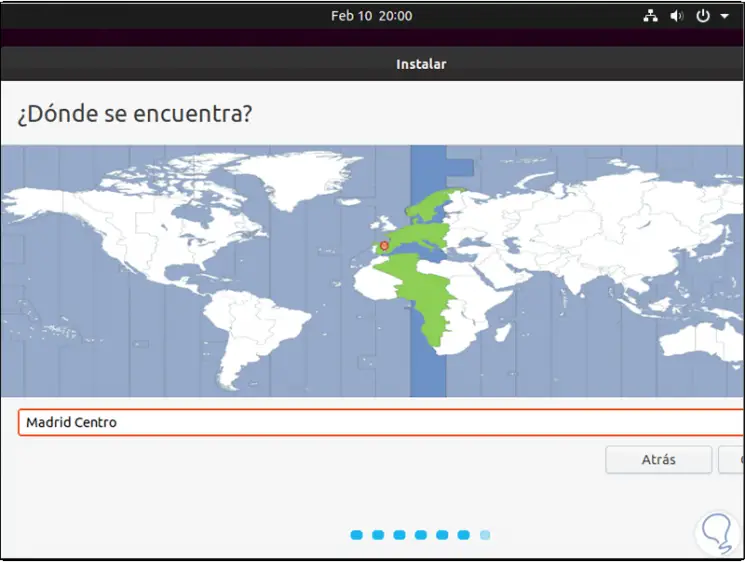
Step 9
Next, we define username and password: 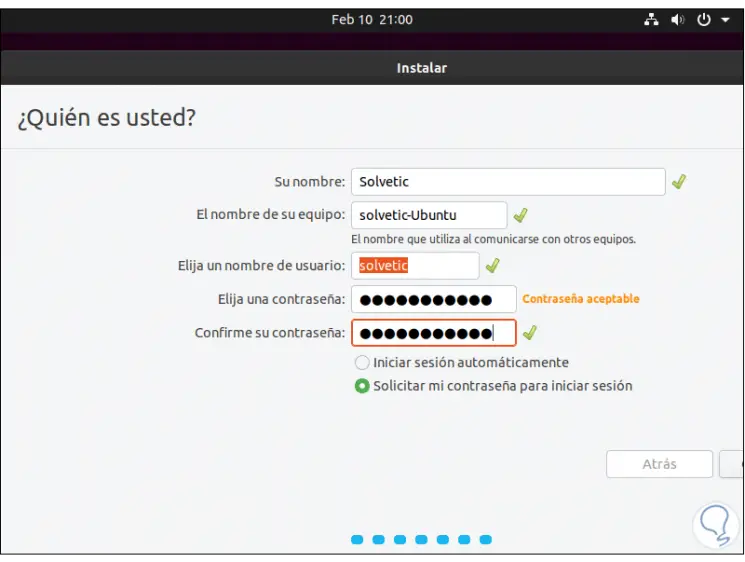
Step 10
Once this is done, click on Install to begin the installation process of Ubuntu 20.04: 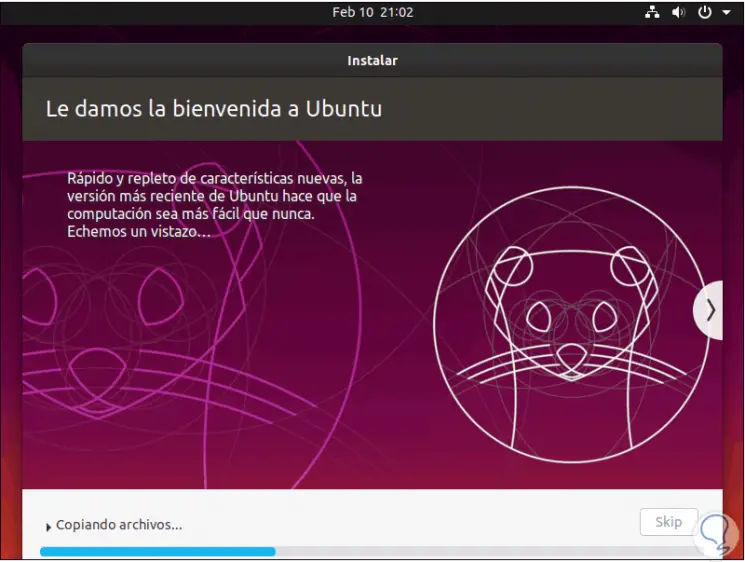
Step 11
When this process ends we will see the following: 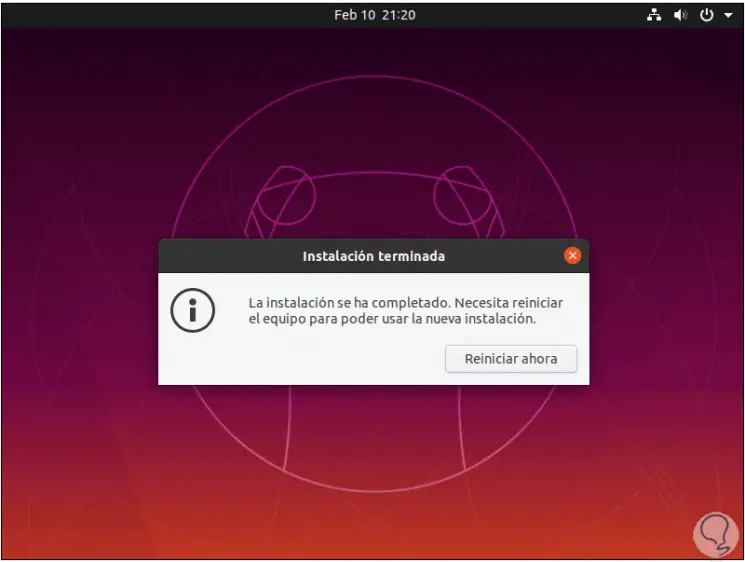
Step 12
We click on "Restart now" to complete the process and this will redirect us to the login screen and we can edit the environment if we wish and in Ubuntu 20.04 we find the GNOME + Remmina Kiosk environment as a novelty and it is the default value : 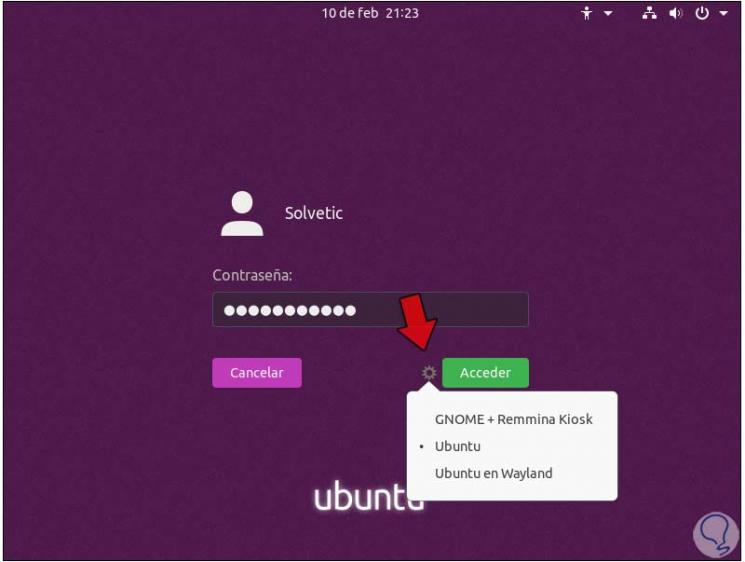
Step 13
When you log in, the welcome window will open where we must configure some aspects such as online accounts, privacy and more: 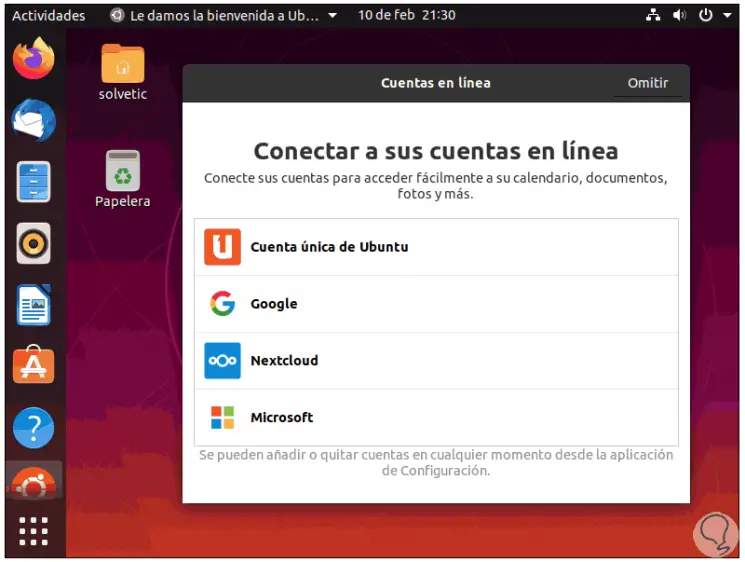
Step 14
In Ubuntu 20.04 on the welcome screen we can configure the LivePatch functionality: 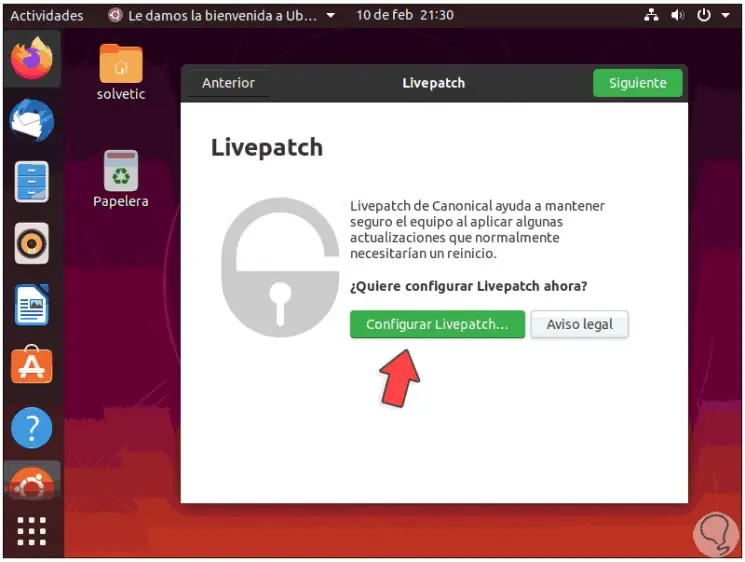
Step 15
We will already have access to its different functions: 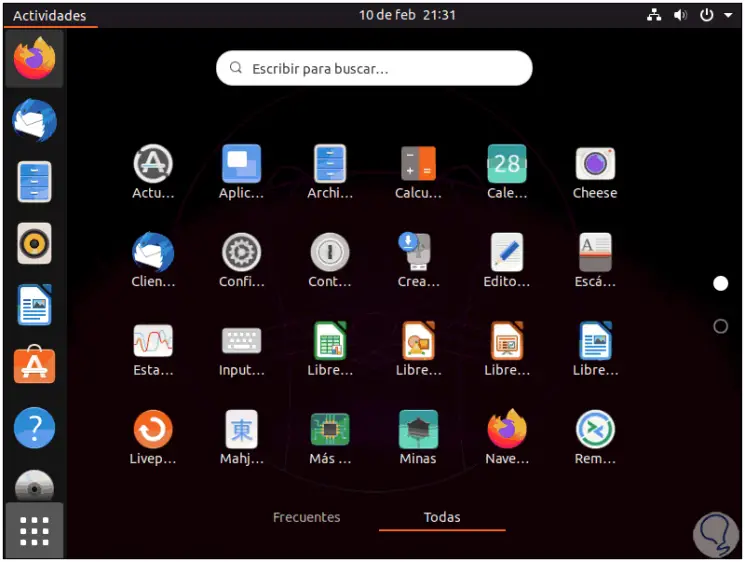
Step 16
As we mentioned at the beginning, this is an ISO test image, but it is ideal to get the most out of everything Ubuntu 20.04 has to help us be in a safe and dynamic environment. 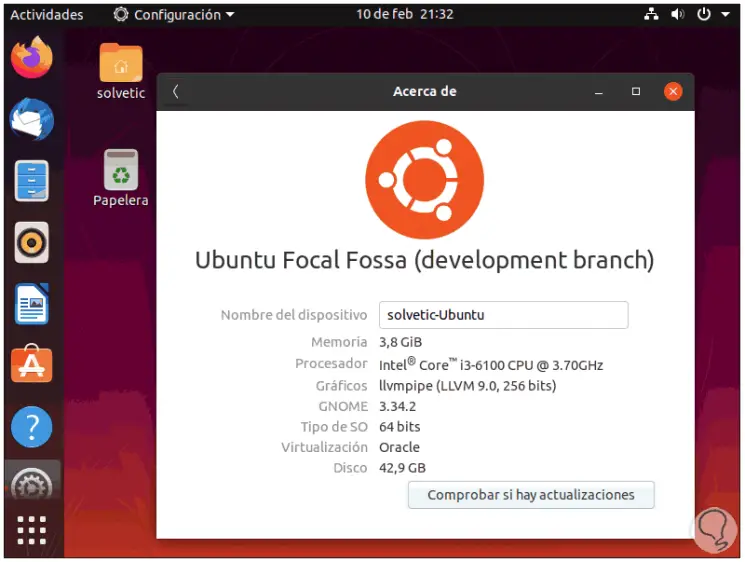
In this way we can have the Ubuntu version 20.04 completely.