Debian is one of the Linux distributions that has gained popularity for its functions and benefits both at the graphical environment level and at the server level since with Debian we have more than 50,000 packages ready to increase the overall system benefits. Currently a beta of what Debian 11 will be released and that is why TechnoWikis wants you to be aware of what this new version has for you and what she can help with both personal and corporate tasks..
What's new in Debian 11
Let's see what are the most outstanding news in Debian version 11:
- 64-bit little-endian MIPS (mips64el)
- 64-bit little-endian PowerPC (ppc64el)
- Support for 32-bit (i386) and 64-bit (amd64) equipment
- ARMv7 (EABI hard-float ABI, armhf)
- little-endian MIPS (mipsel)
Debian 11 upgrade
We show you the most outstanding software improvements in Debian 11:
- Calligra with version 3.1
- Cryptsetup will have version 2.1
- Dovecot MTA will come in version 2.3.4
- Exim default e-mail server will have update 4.92
- GNU Compiler Collection will be the default compiler with version 7.4 and 8.3
- LibreOffice updated to version 6.1
- Startup support for UEFI Secure Boot
- Apache have version 2.4.38
If you don't have Debian 11 yet, you can download it below:
Debian 11
Next, we will see how we can install Debian 11 in VirtualBox completely.
1. How to install Debian 11 on VirtualBox
Step 1
The first step is to create our virtual machine, for this we can use any of the following options:
+ N Ctrl + N
- Click on the New button in the central panel

Step 2
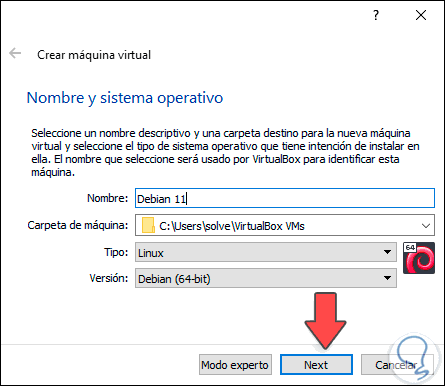
In the window displayed enter the name of the virtual machine and VirtualBox will automatically detect the system to use:
Step 3
We click Next and we will assign the RAM to use:

Note
Debian 11 requires a minimum of 2 GB of RAM.
Step 4
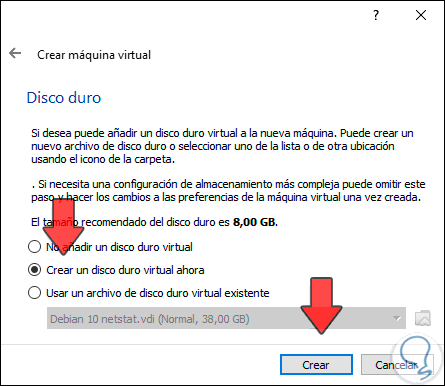
In the next window we select the option to create the virtual hard disk:
Step 5
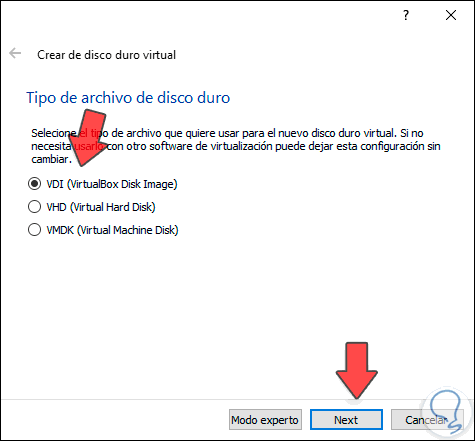
We click on “Create†and there we define the type of virtual hard disk to create:
Step 6
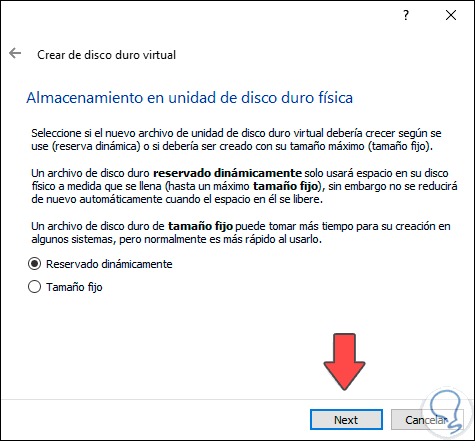
We click on “Next†and now we are going to define how the hard disk will be managed (fixed or dynamic size):
Step 7
In the following window we define where the virtual hard disk will be saved, as well as its size:
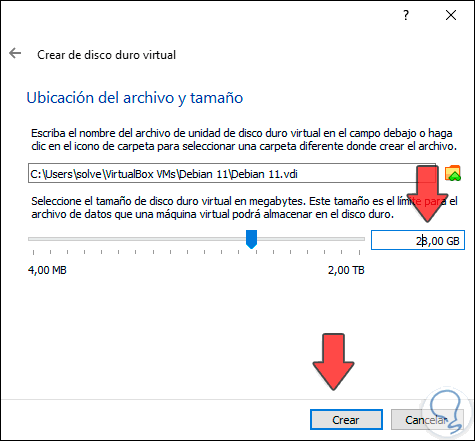
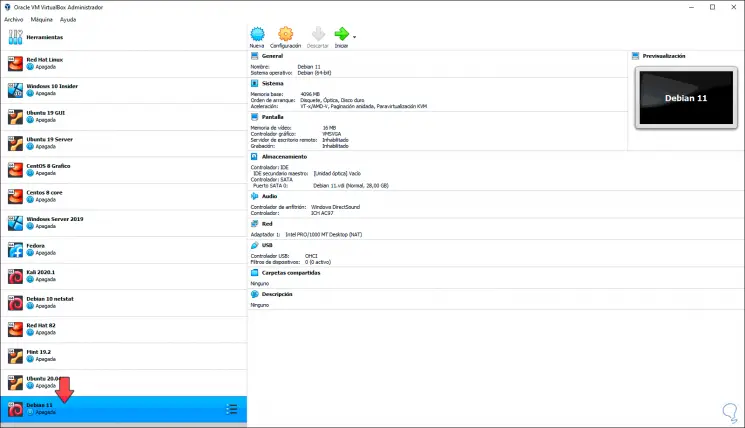
Step 8
We click on “Create†To complete the process and we will see that the virtual machine has been created:
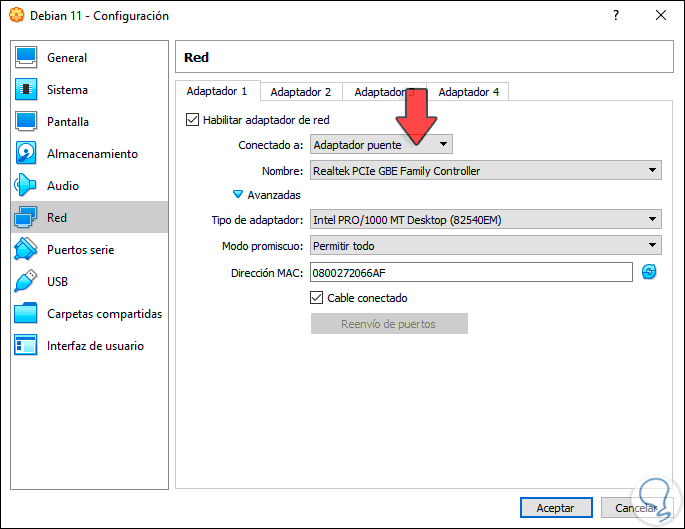
Step 9
There we click on the "Settings" button to make some adjustments, the most important being in the "Network" section to choose "Bridge Adapter" so that the virtual machine has access to the network:
Step 10
We can define other aspects such as:
Step 11
Click OK and run the virtual machine by clicking on "Start" and the following will be displayed:

Step 12
We click on the “Browse†icon to select the ISO image that we have downloaded:
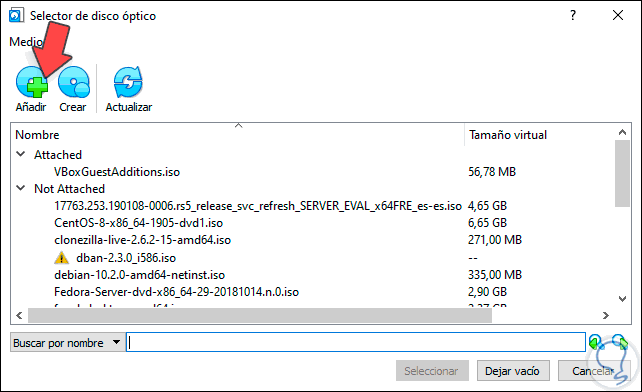
Step 13
We click on “Add†and we will go to the folder where the ISO image is:
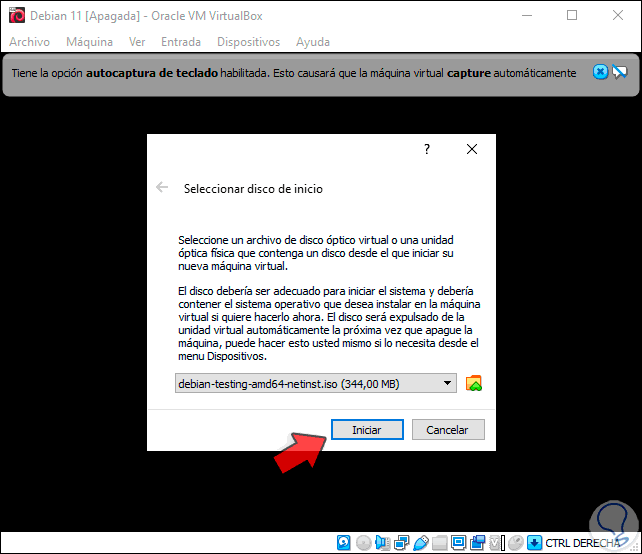
Step 14
Click on "Open" and we will see the added image:
2. How to start and configure Debian 11 in VirtualBox
Step 1
We click on "Start" and the initial screen of Debian 11 will be as follows:
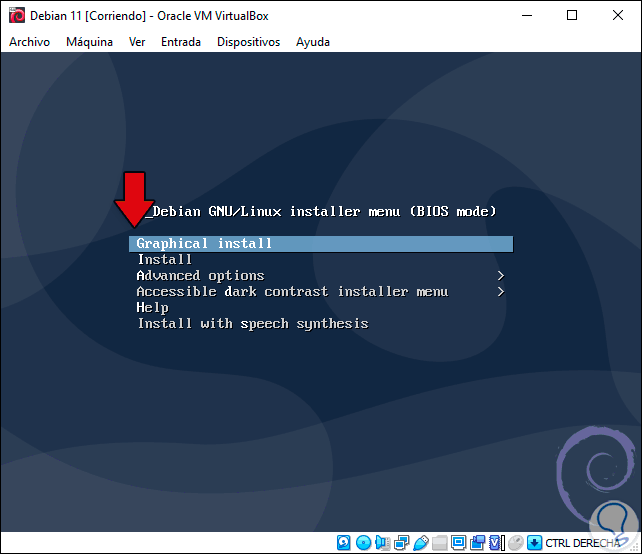
Step 2
There it will be possible:
- Perform a graphical installation
- Run the installation without a graphical environment
- Access advanced installation options
- Run the dark contrast during installation
- Run the installation with syntax specifications
Step 3
We select “Graphic install†and first we define the Debian 11 installation language:
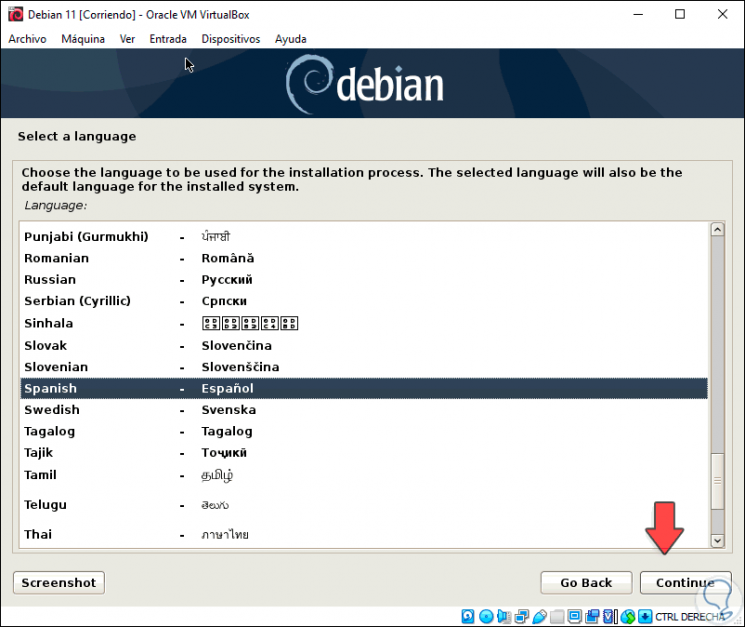
Step 4
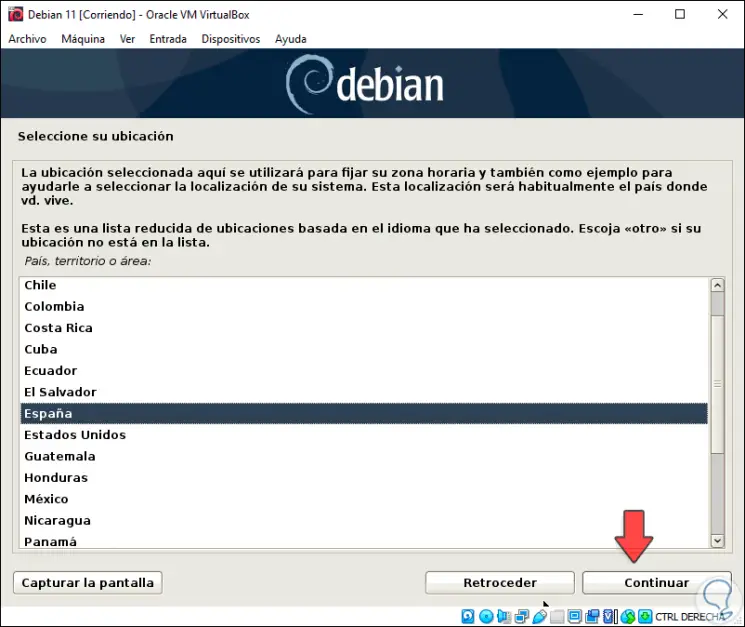
Then we define our location:
Step 5
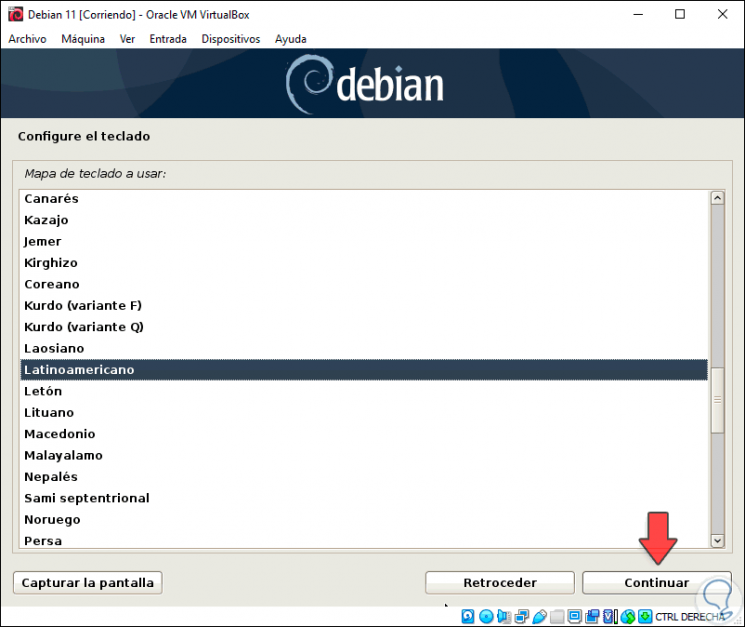
In the following window we select the keyboard layout:
Step 6
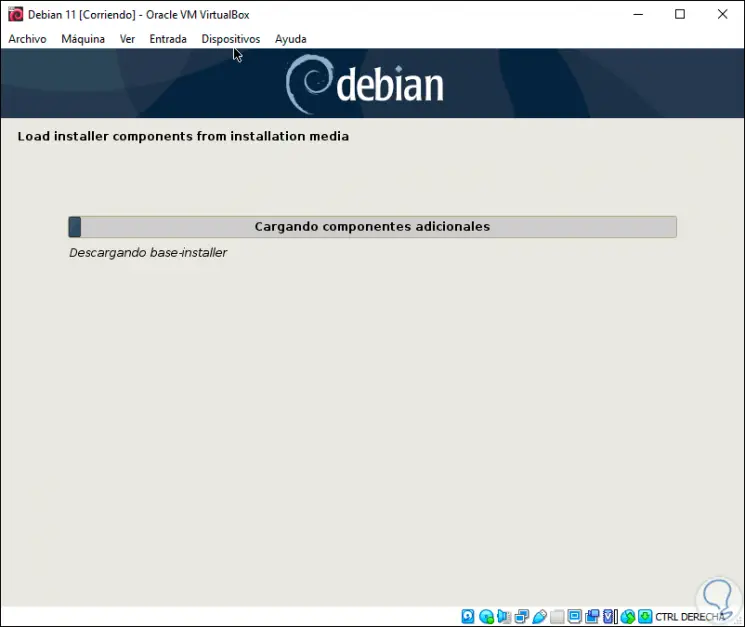
Additional components of Debian 11 will be loaded:
Step 7
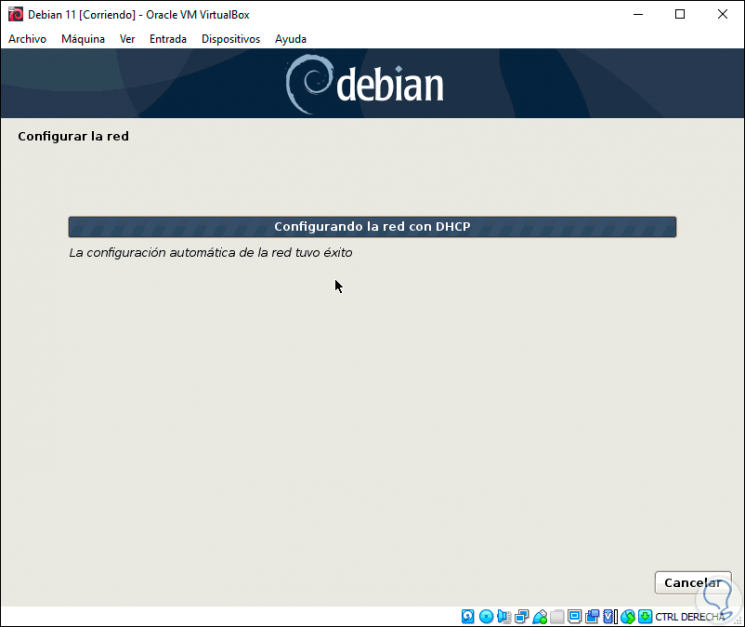
Then the network will be configured:
Step 8
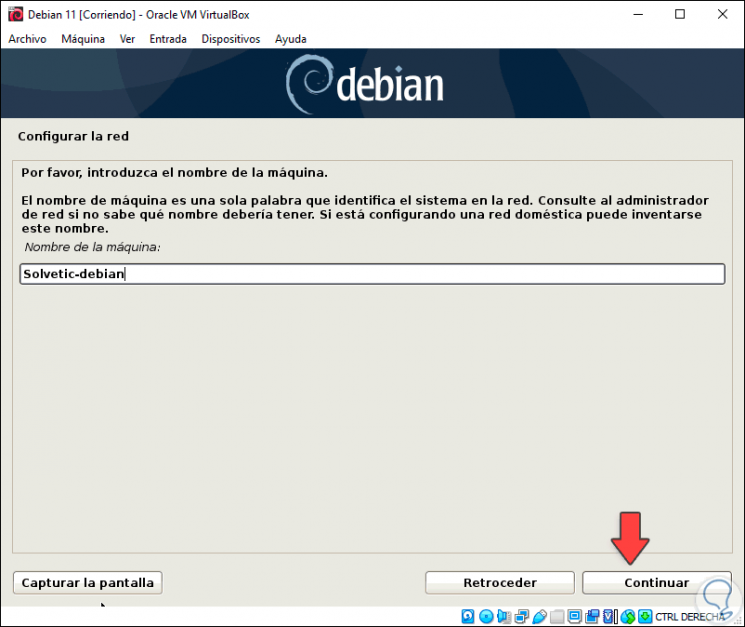
Next, we assign the name to the machine:
Step 9
We click on Continue and we can assign (if we have one) the domain name:
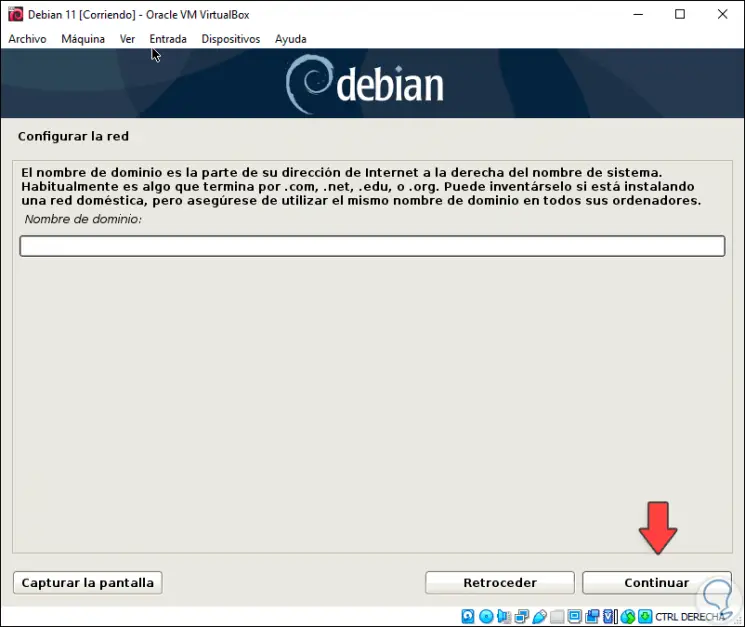
Step 10
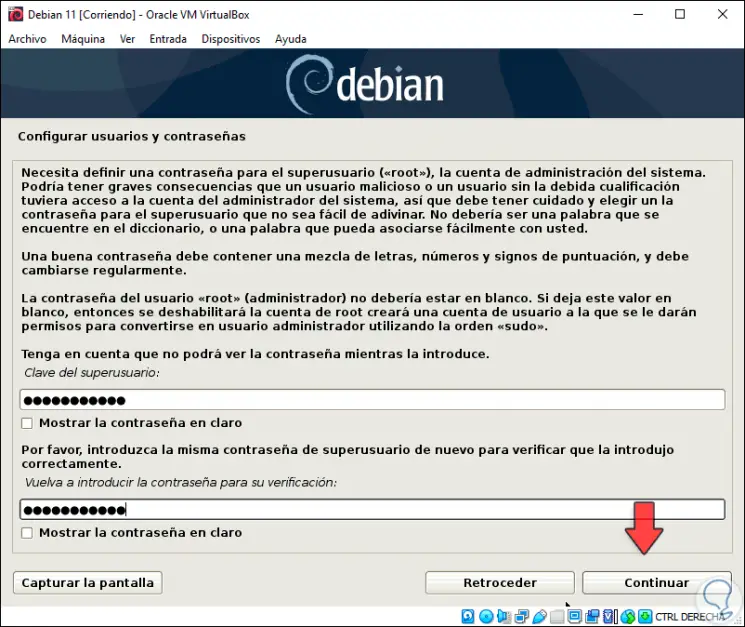
If we do not have one, this step can be omitted, after that we will assign the root or superuser password:
Step 11
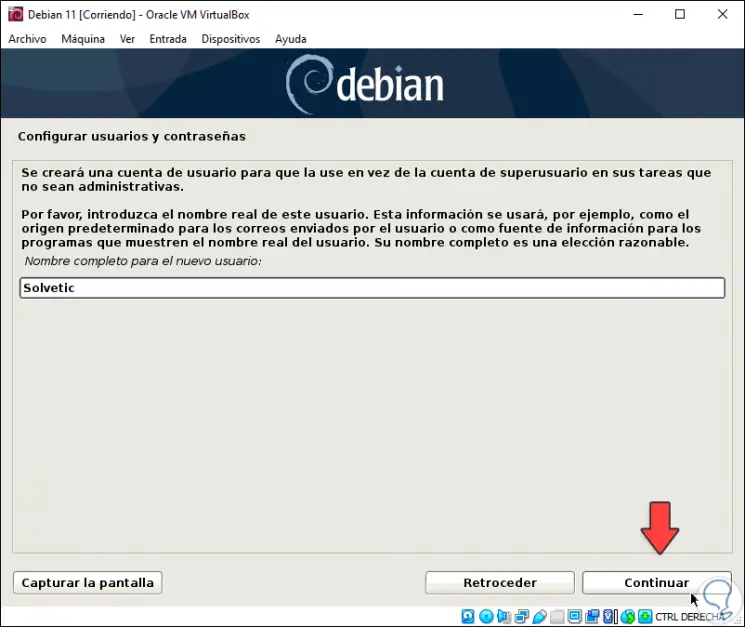
In the following window we assign the name of the administrator user:
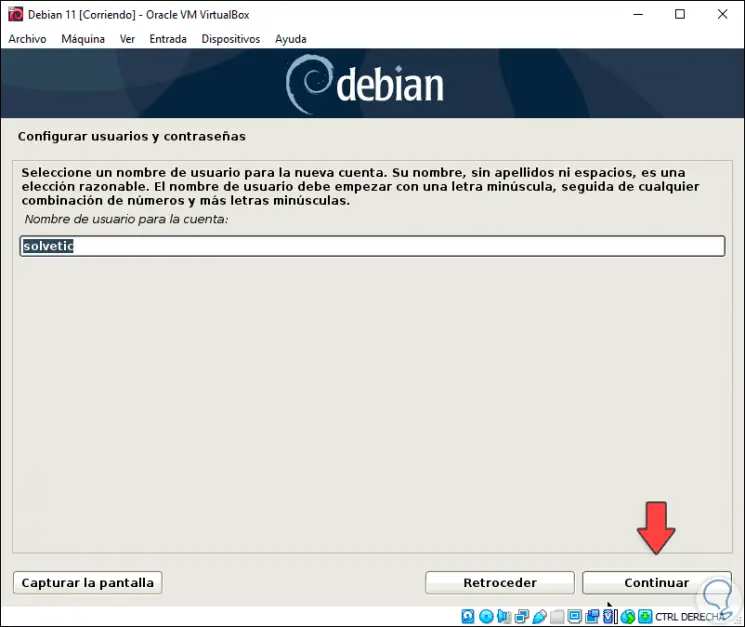
Step 12
We click on "Continue" and confirm the account:
Step 13
Now we assign this user's password:
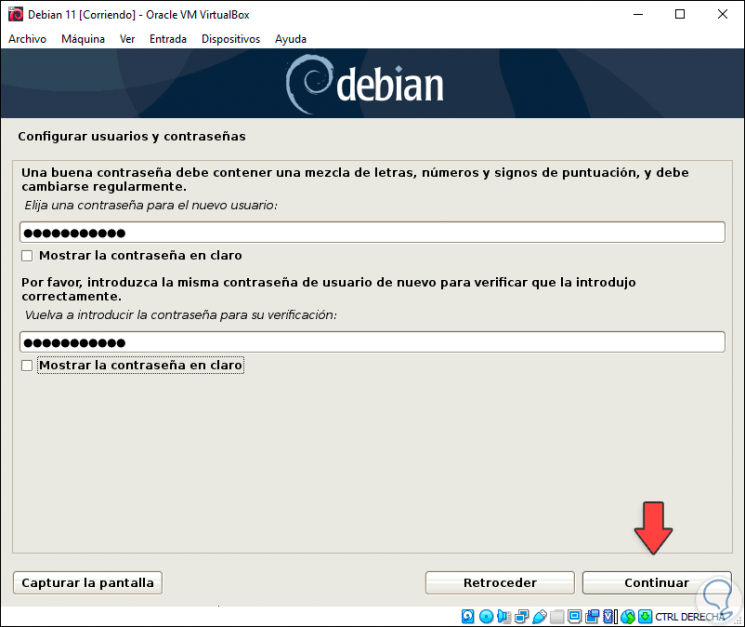
Step 14
We click on “Continue†to access the configuration of the hard disk:
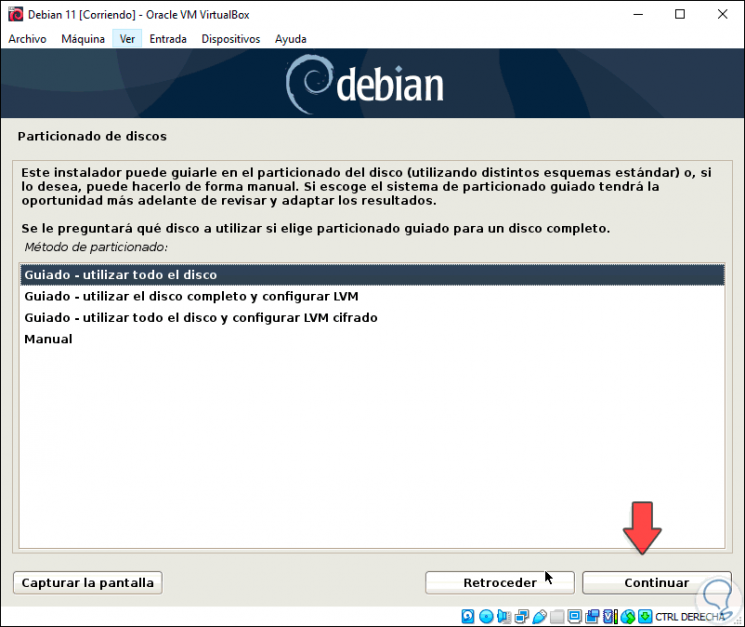
Step 15
There it will be possible:
- Use the entire disk with the wizard
- Use the entire disk and add security on logical volumes (LVM)
- Use the manual method to create partitions as necessary
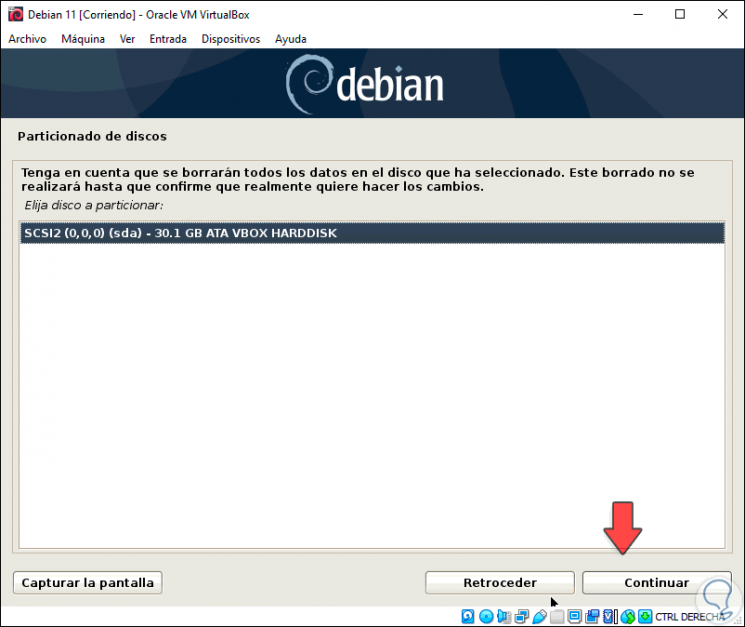
Step 16
Select the default option and choose the disk where Debian 11 will be installed:
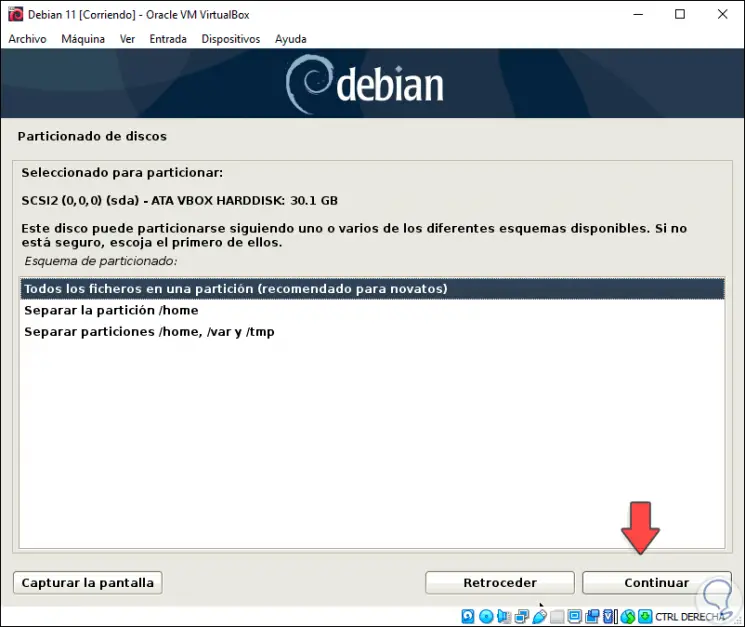
Step 17
In the following window we have some options to manage the partitions on the disk:
Step 18
We can separate the home / var or swap partitions separately or let the system distribute this, in the next window we will observe the following:
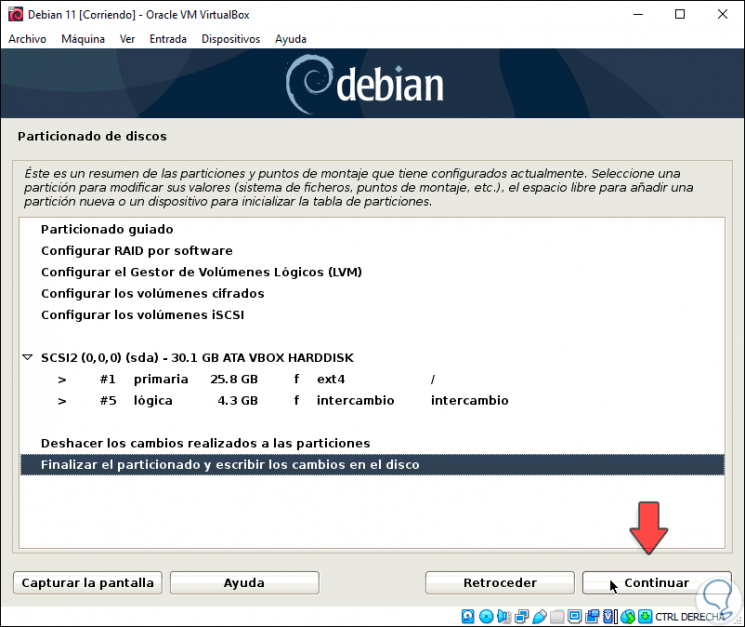
Step 19
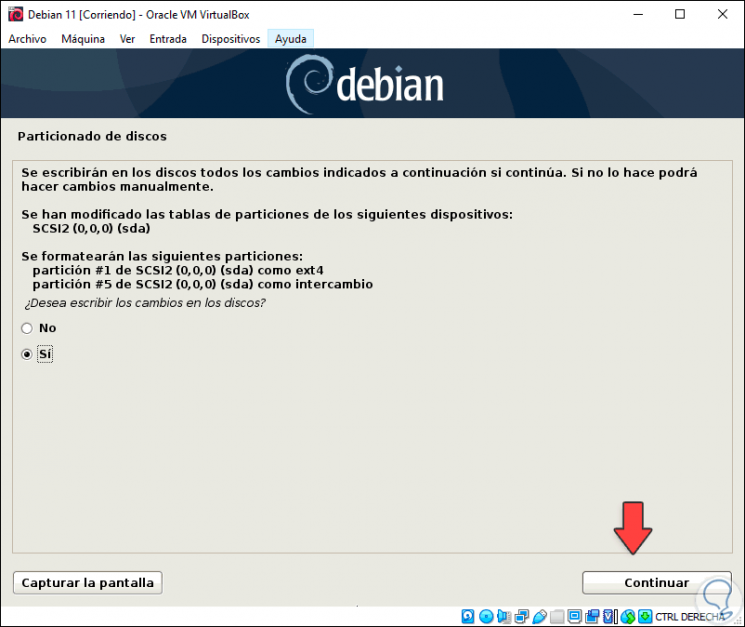
There we select "Finish partitioning and write the changes to disk" and by clicking Continue we must confirm this:
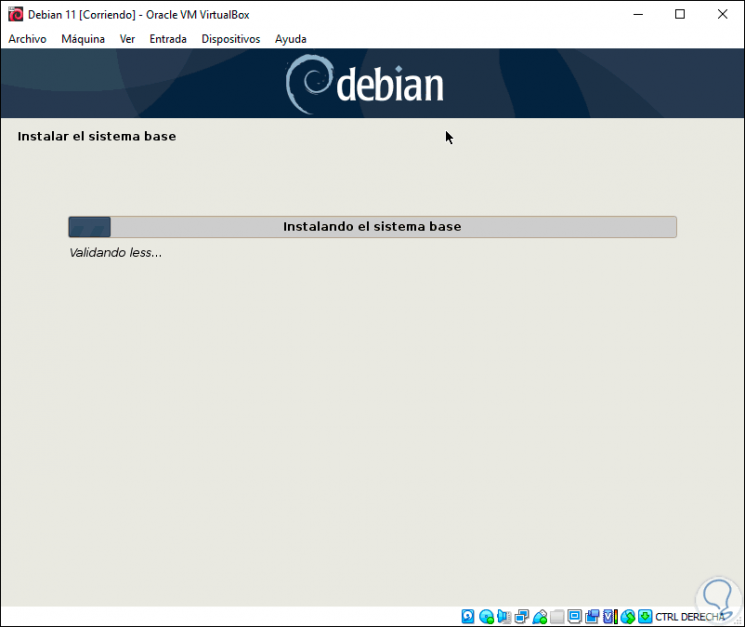
Step 20
We click on “Continue†to start the installation process of Debian 11:
Step 21
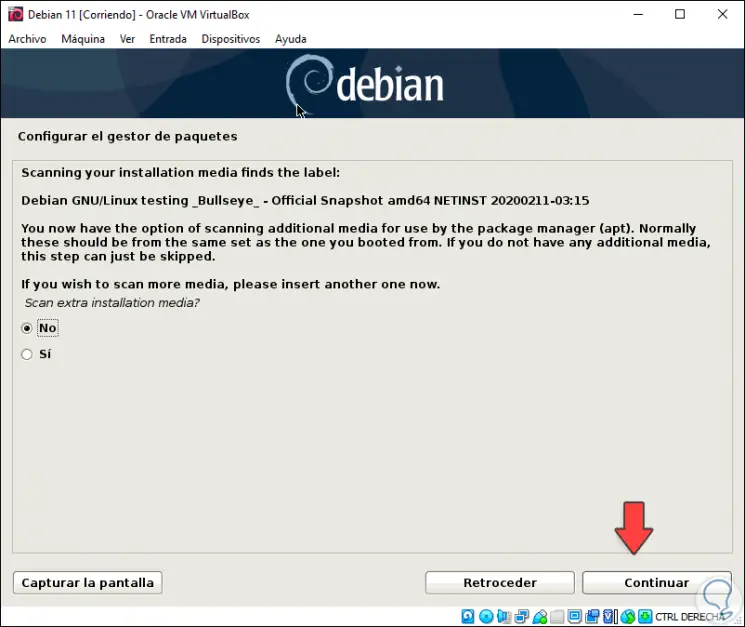
During the process we will see the following. There we can select whether or not to look for packages in more installation media
Step 22
Then we will see the following window where we can select from where the Debian 11 replica will be used or we may not use this method:
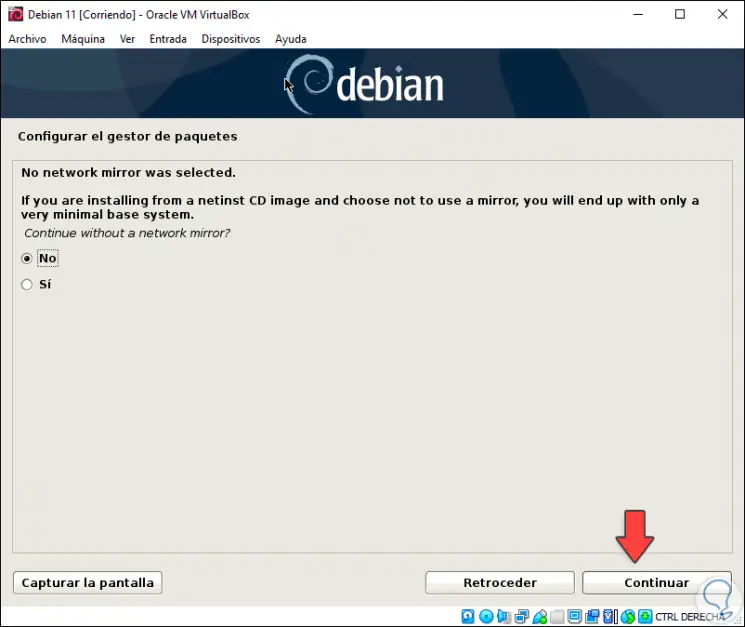
Step 23
After this, the apt package manager will be configured:
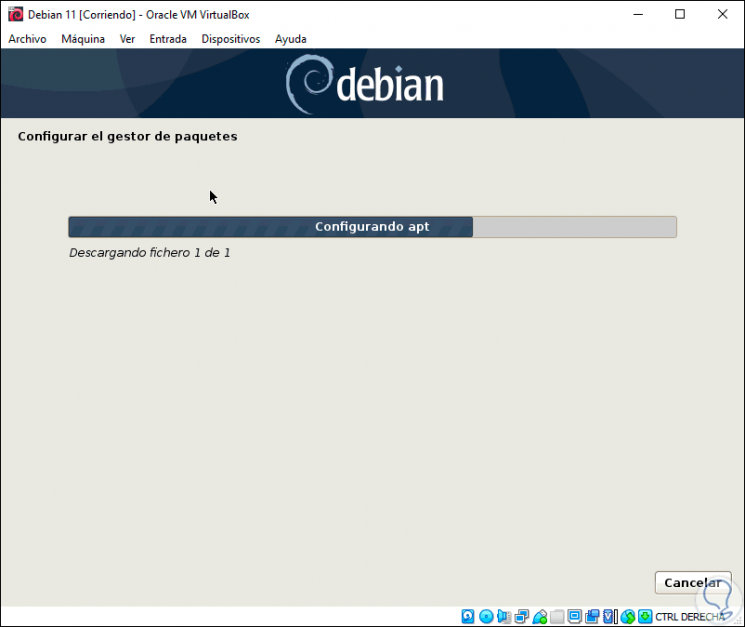
Step 24
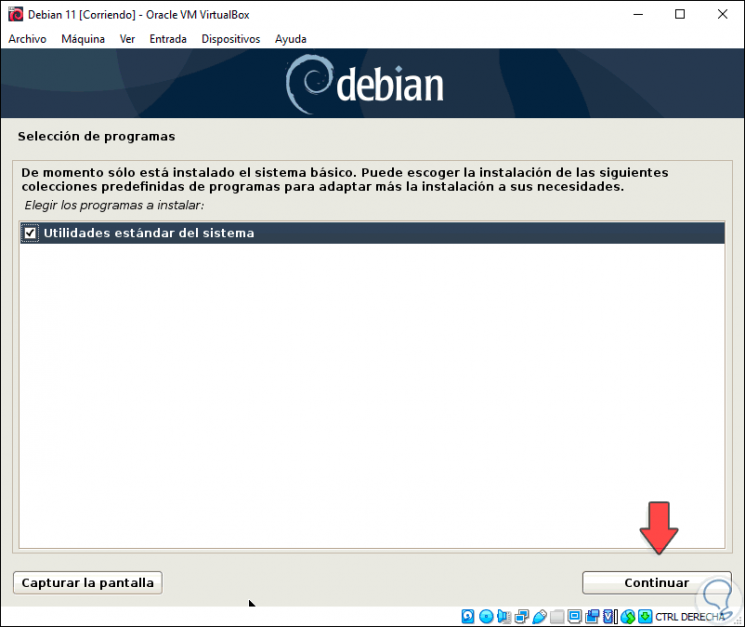
Then you will install the software to use on Debian 11, the following will be displayed about package surveys:

Step 25
We define what software is to be installed:
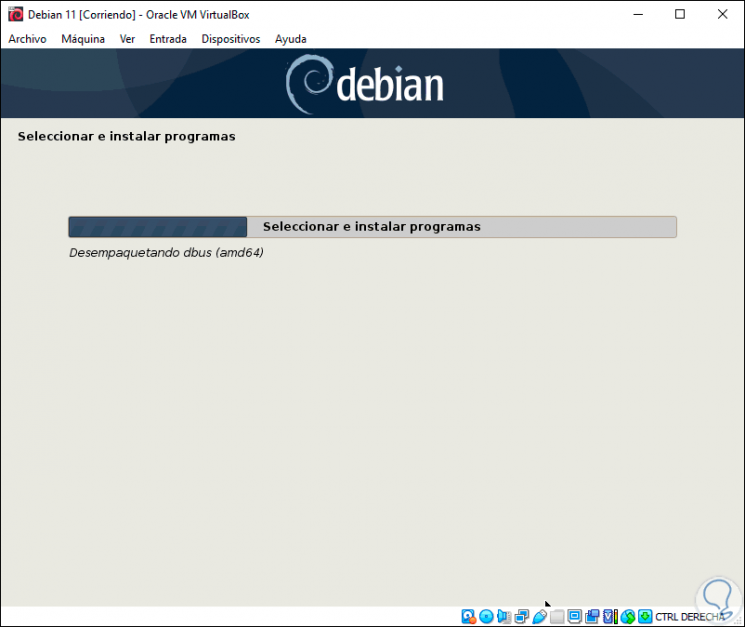
Step 26
Start downloading and installing the utilities:
Step 27
Now we will see the following associated to the GRUB bootloader:

Step 28
Select Yes and now indicate on which disk to install:
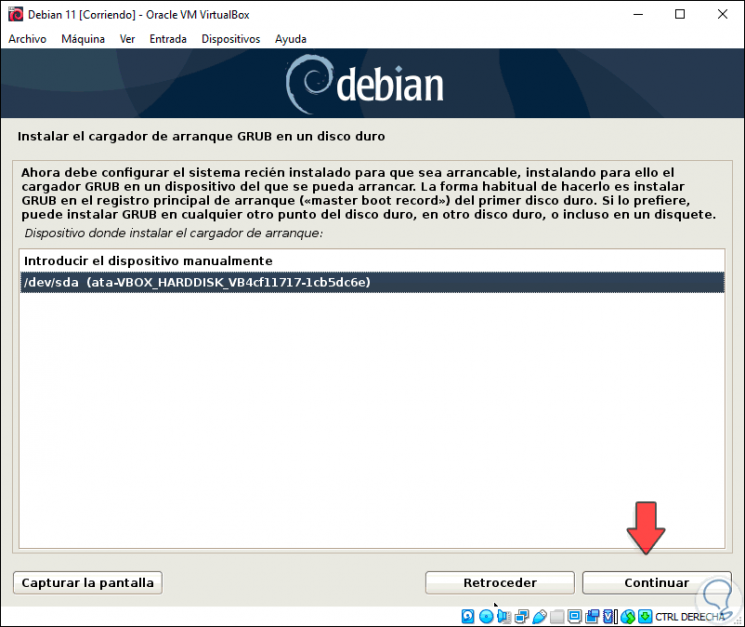
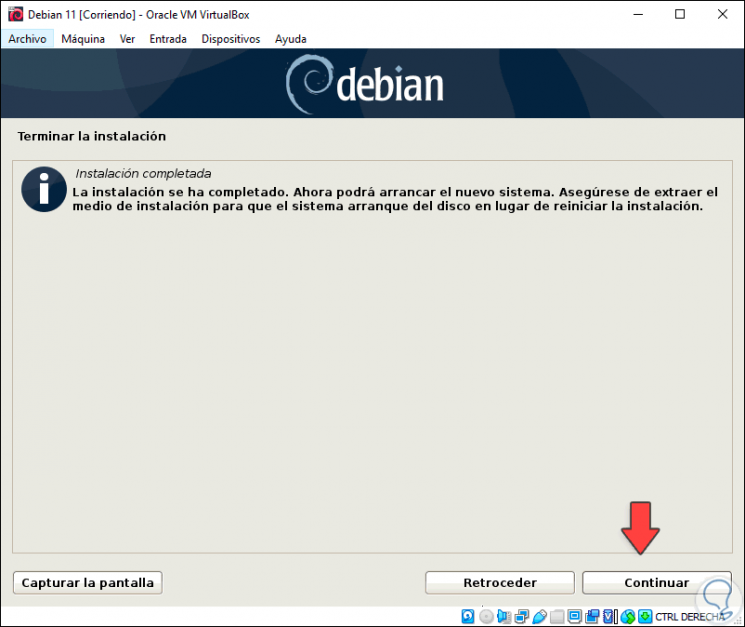
Step 29
We click on Continue to continue the process and when finished we will see the following:
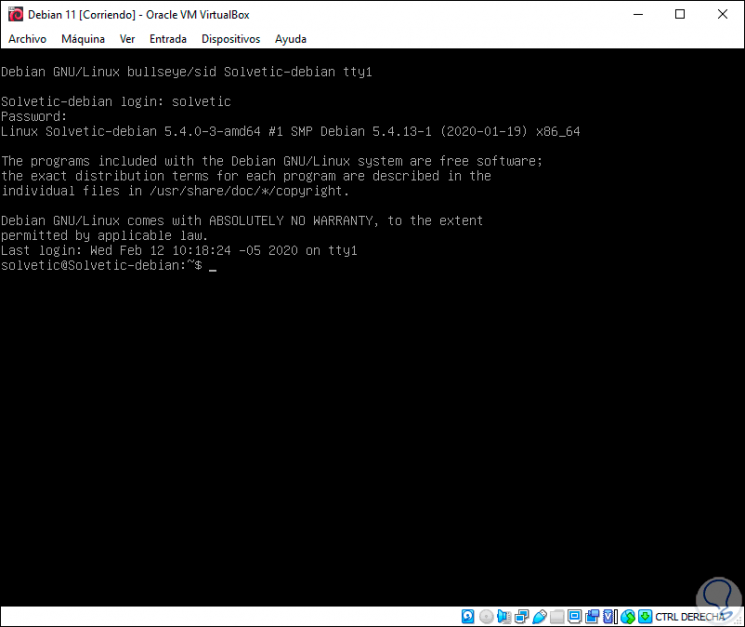
Step 30
We click Continue and Debian 11 will be restarted and we access the login where we will see the following:

Step 31
We are logged in and have accessed Debian 11:
Thus we have installed Debian 11 in VirtualBox in a simple but efficient way..