VirtualBox is one of the ideal options for working with virtual environments since these allow you to test new operating systems or applications without these having a direct impact on the physical environment. VirtualBox allows us to test Windows, Linux, macOS systems and more but one of its failures is that by default, VirtualBox does not support Wi-Fi connectivity and this will only be possible if the user has a USB Wi-Fi adapter.
The problem is that many people make use of Wi-Fi connections to test virtual machines, so if it is your case not being able to connect correctly, in TechnoWikis we will explain how to recognize the Wi-Fi card with VirtualBox .
1. How to configure the VirtualBox bridge adapter
When we create a new virtual machine in VirtualBox we have several ways to connect the network between the virtual and physical environment (NAT, bridge adapter, internal network, etc.), so that the first method will be to establish this bridge adapter (which is the physical card) in VirtualBox.
Option 1
To do this we access the application and go to the virtual machine configuration desired for such change. In the pop-up window we go to the "Network" section and define the following:
- In the "Connected to" field we select "Bridge adapter"
- In "Name" we select the current card of the team
In the advanced section we define the following:
- In the "Adapter type" field we select the Dekstop adapter type
- In "Promiscuous mode" we select "Allow all"
- Let's make sure that the "Cable connected" box is active
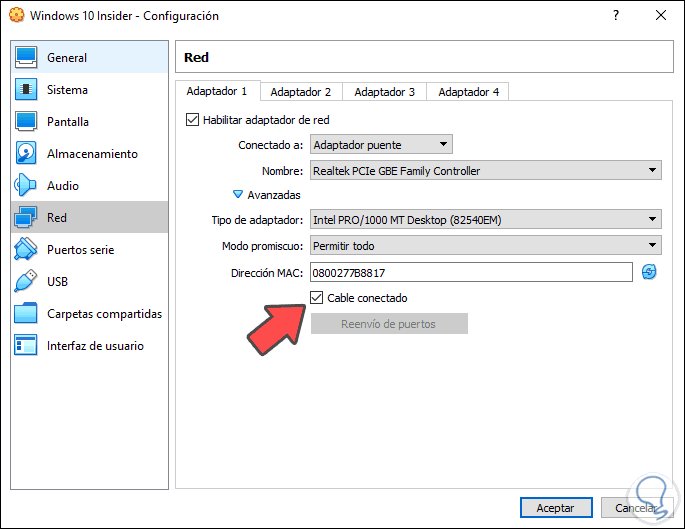
We click on Accept and then restart VirtualBox and with it we must have access to the network from the Wi-Fi card.
Option 2
We can also directly enter the MAC address of the W-Fi controller in the "MAC Address" field. To know the address we will go to Start / Settings / Network and Internet and there we go to the "Status" section and click on "View network properties": 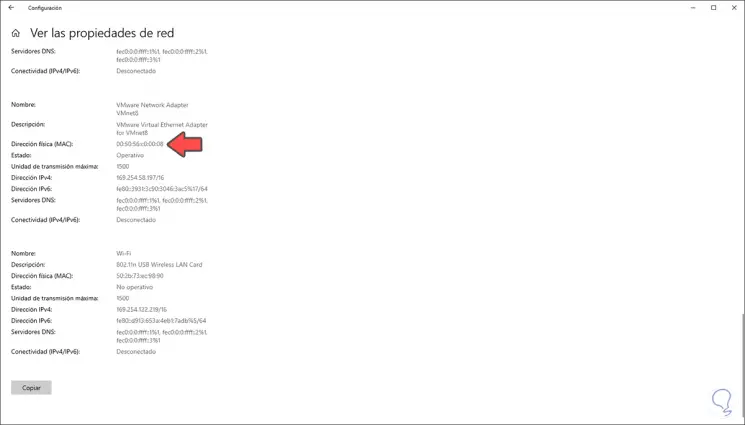
There we copy the MAC address and paste it into VirtualBox.
2. How to run the Windows 10 network troubleshooter
Step 1
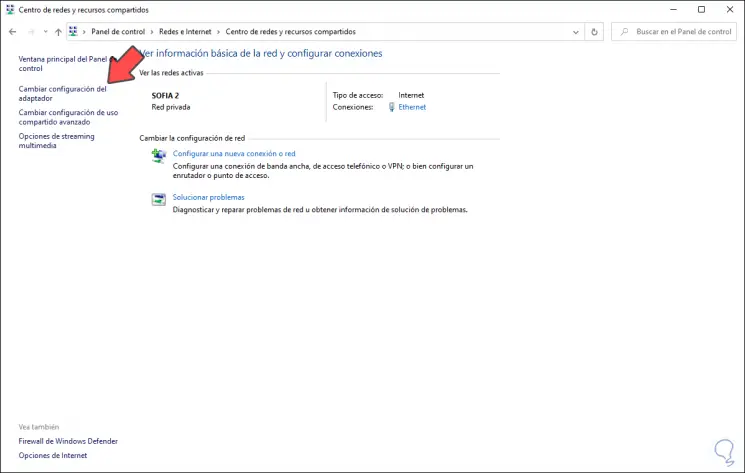
Windows 10 integrates a problem solver which is responsible for running a detailed analysis and proceed to correct errors if they exist, for this we must go to the following link:
- Center network and sharing
Step 2
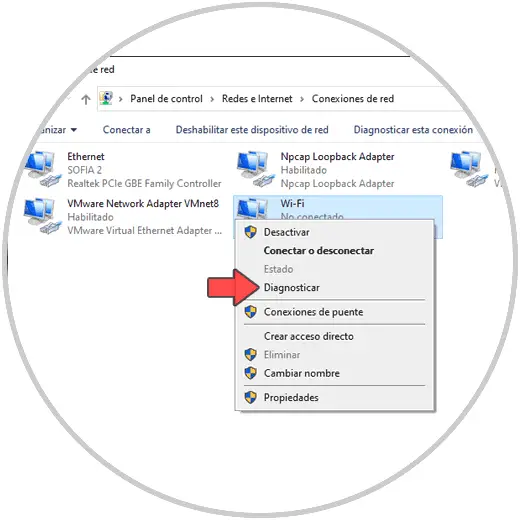
There we click on the "Change adapter settings" line and then right click on the network adapter and select "Diagnose":
Step 3
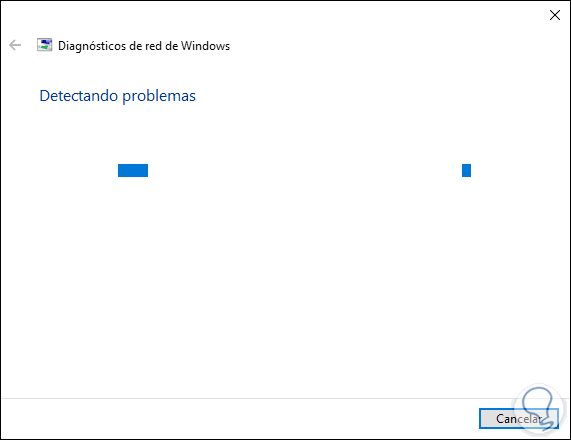
This will activate the analysis wizard:
Step 4
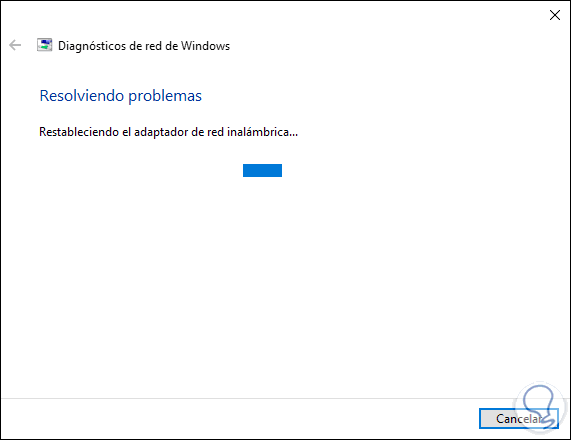
Proceed to determine the causes of the error:
Step 5
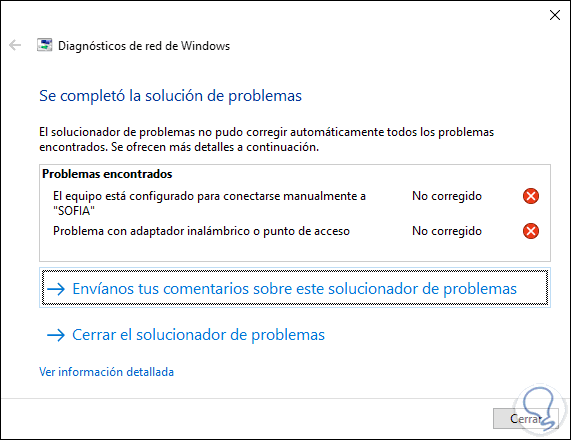
After this it will tell us, if it cannot automatically correct it, what errors are affecting the Wi-Fi adapter:
3. How to disable and enable the Windows 10 network adapter
Sometimes with a simple disablement of network services, with their respective enablement, it is enough for VirtualBox to recognize the Wi-Fi network, for this process, we go back to the virtual machine configuration and in the "Network" section we deactivate the "Enable network adapter" box for a few minutes:
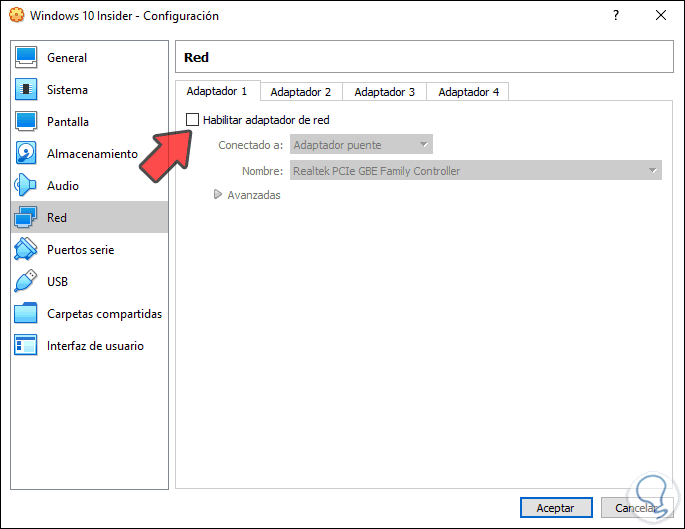
Then we activate it again to allow the connection, click OK and test the connection.
4. How to make use of the NAT adapter
NAT (Network Address Translation) is an internal network designed for IPV4 addressing, so that we can validate if the error is resolved by establishing this network. To do this, simply select "NAT" in the "Connected to" field:
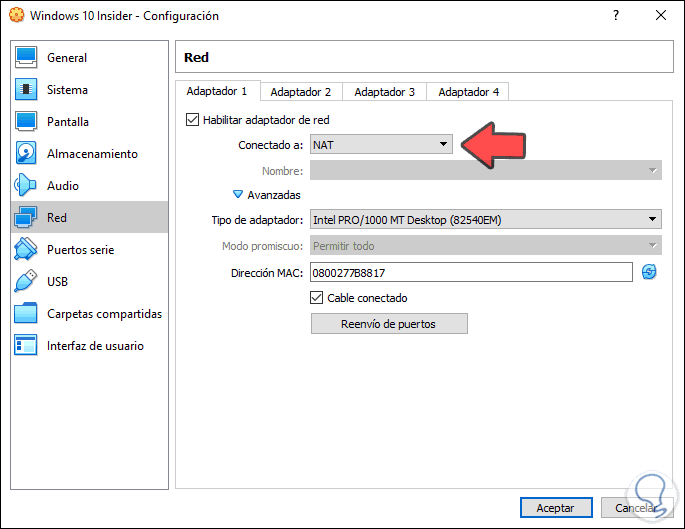
We click OK to save the changes.
With the method you select it will be possible to use Wi-Fi network in your virtual machines with VirtualBox.