Windows 10 integrates a suspension system with which hard drives, monitors and others are turned off, avoiding the unnecessary consumption of resources since if we are absent for a period of time, the system suspension will be a valuable ally to help us preserve the team life..
When we activate the system again, the network connectivity process must be carried out again and in some cases the Wi-Fi network simply does not react preventing Windows 10 from connecting correctly . If this is your problem, TechnoWikis has for you a series of tips that will help you correct this error and allow connectivity as it should be.
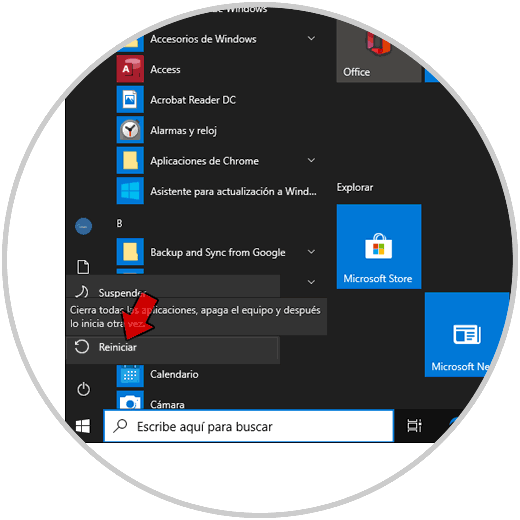
1. How to restart Windows 10
The most basic step is to restart the equipment. This allows the services and processes of the operating system to be refreshed and within these services is the network service. When suspended, the network controller can fail, so a simple restart will help everything work the way it is.
For this we go to the Start menu and there we click on the off button and select "Restart":
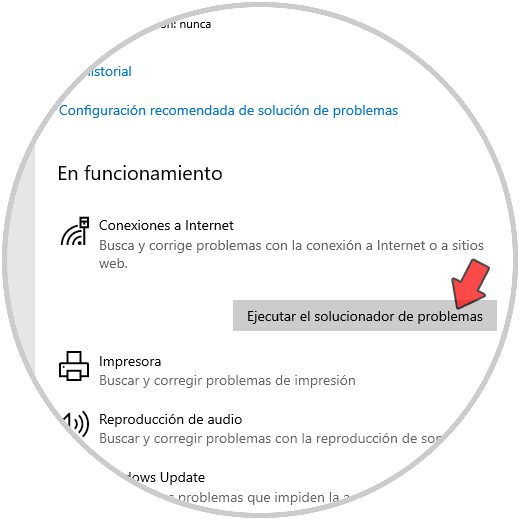
2. Run Windows 10 troubleshooter
Microsoft has decided to implement within the Windows 10 operating system a functionality called "Troubleshooter" with which it seeks to execute a detailed analysis of different hardware and software problems of the system, providing a comprehensive solution or giving us the correction guidelines.
Step 1
To use this method we will go to the following route:
Step 2
There we locate the option "Internet Connections" and clicking on it will activate the button "Run the troubleshooter":
Step 3
We click on it and the analysis process will start:
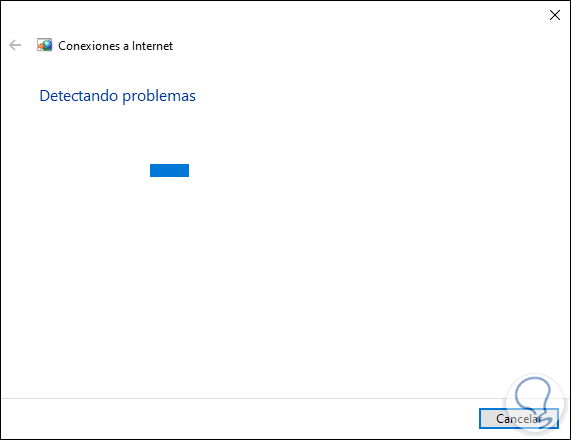
Then the error will be corrected or it will be determined where the fault is so that we can take action on it..
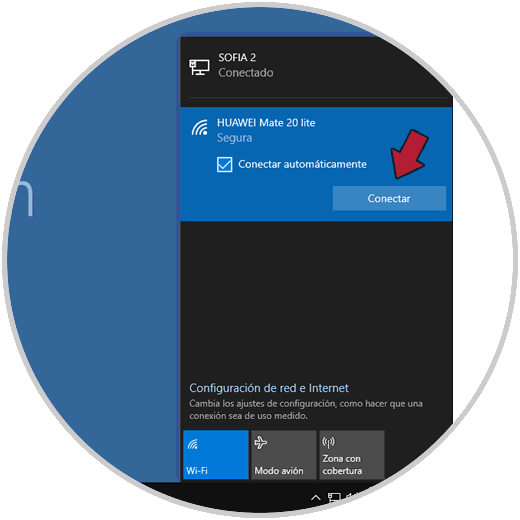
3. How to automatically connect to the Wi-Fi network
The way to connect to the Wi-Fi network is ideal since it allows the connection process to be carried out when the stored network is automatically identified.
Step 1
The first thing we must do is connect to the desired Wi-Fi network:
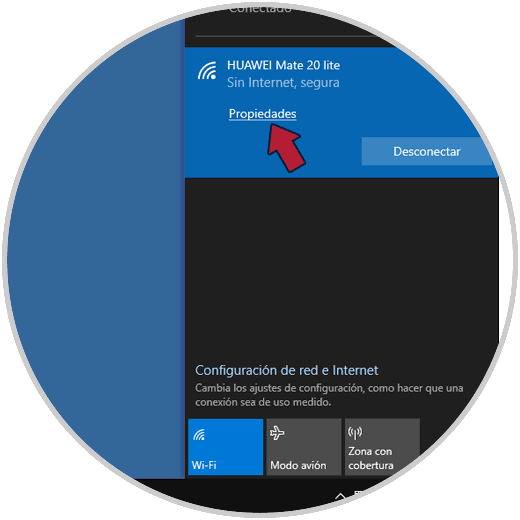
Step 2
After this we access again from the Windows 10 Action Center and this time we click on the "Properties" button:
Step 3
In the displayed window we must activate the switch "Connect automatically when it is within range":
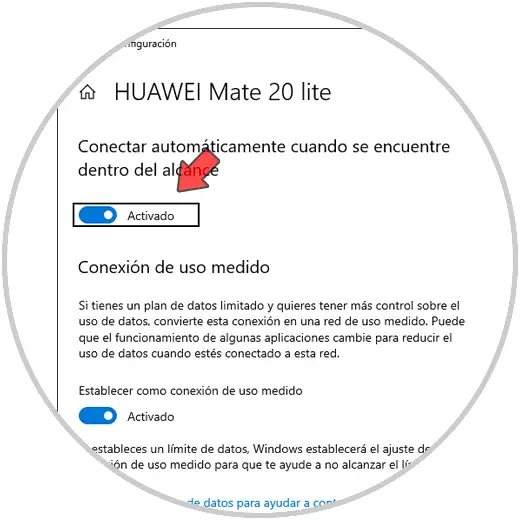
As an additional step we must confirm that the box "Connect automatically" is active when we search the network.
4. How to check Windows network driver settings
A faulty or outdated Wi-Fi network driver is synonymous with errors, as it does not work as expected.
Step 1
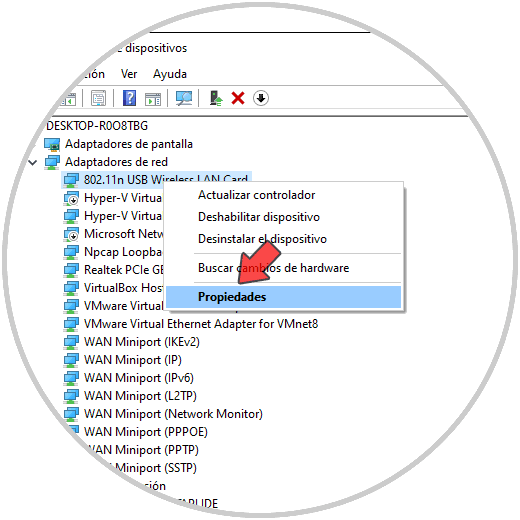
We can check this from the Device Manager, which we can access with any of the following methods:
- From Cortana or the Start search box
- Using Windows + X keys (or right click on Start)
- With the Windows + R keys and executing the command "devmgmt.msc"
There we will go to the section "Network adapters" and right-click on the Wi-Fi adapter to select "Properties":
Step 2
In the pop-up window we will go to the "Power Management" tab where we will see the following:
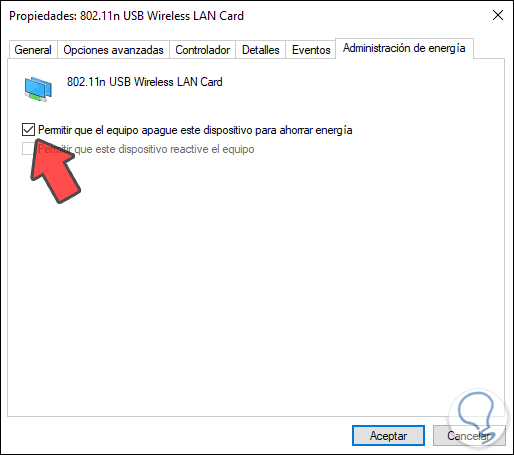
We must uncheck the box "Allow the computer to turn off this device to save energy" since if this happens the driver will not be available to connect, we click OK to save the changes..
5. How to change the Windows wireless network profile
It is possible that the current configuration of the network profile influences how you connect to the network or not, so if we change the profile we can provide a comprehensive solution. For this we go again to the properties of the wireless network from the Action Center and in the new window we will go to the "Network Profile" section and edit from Public to Private or vice versa:
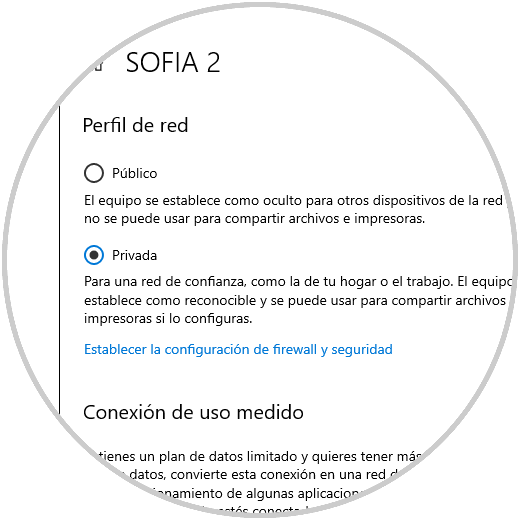
Note
The public profile does not advise TechnoWikis for security reasons.
6. How to edit Windows power options
Power is managed by Windows 10 with a focus on saving resources that depend on it, such as batteries or monitors, but its configuration can affect the way the system connects to the network.
Step 1
To validate this we will go to the following route:
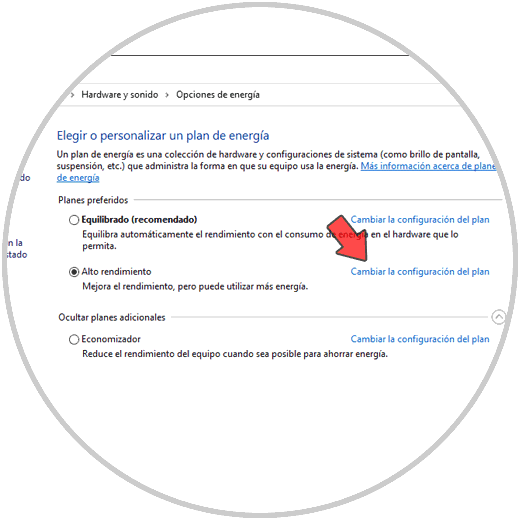
Step 2
There we click on the line "Change plan settings" located on the right side of the current plan and the following will be displayed:
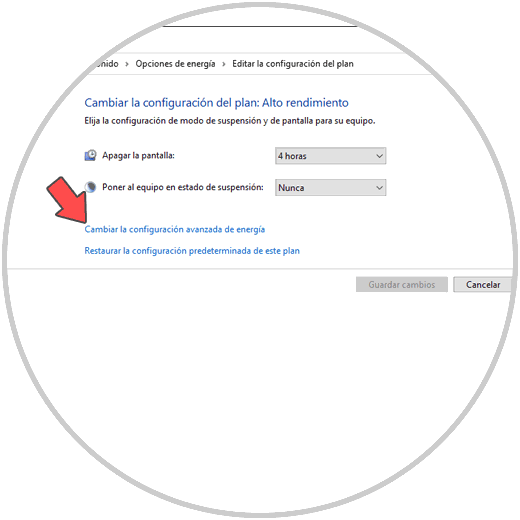
Step 3
We click on the line "Change advanced power settings" and in the pop-up window we will go to the "Hard drive" section and there we set the time at which the hard drive will turn off:
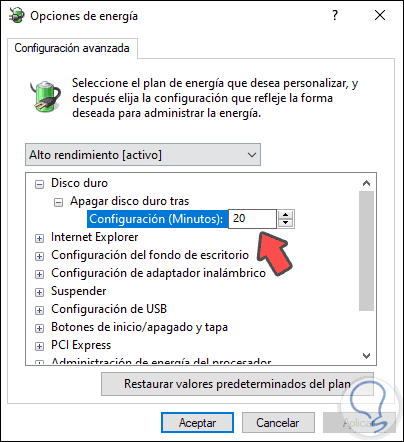
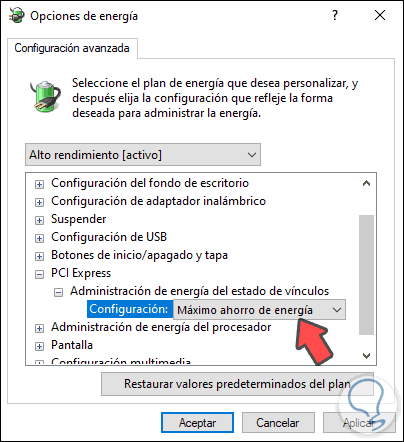
Step 4
Then we go to the "PCO Express" section and in the line "Link state power management", we set the value "Maximum power saving" in the "Configuration" section:
Note
If we operate a portable computer, we must apply the changes to both the live and battery options.
We click Apply to save the changes.
7. How to update WiFi controller settings
For this step, the first thing to do is update the Wi-Fi network controller.
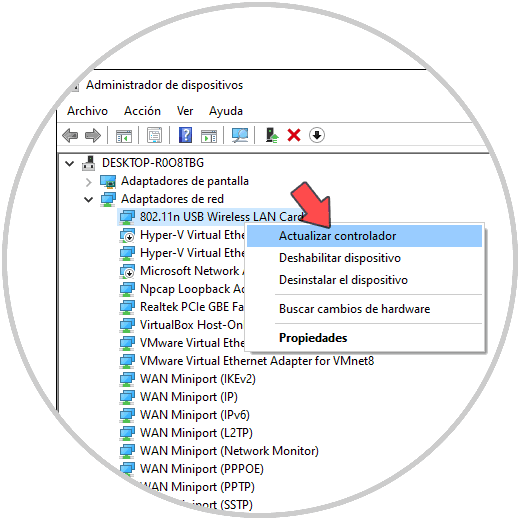
Step 1
For this we go to the Device Manager and there we right-click on the network controller located in the "Network adapters" section and select "Update driver":
Step 2
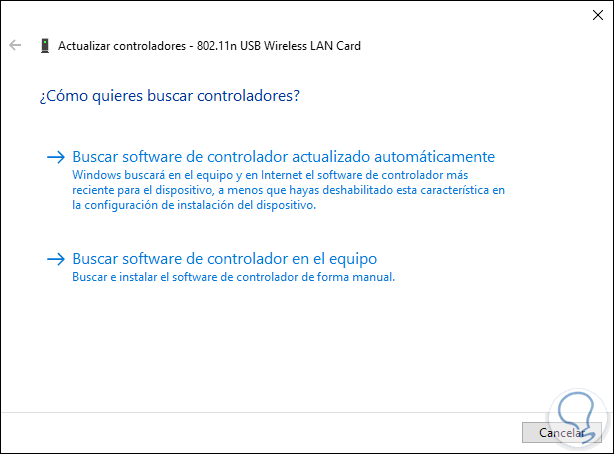
We can update it manually or automatically:
Step 3
If the error persists, we access the properties of the controller and we will go to the "Controller" tab and, if available, we click on the button "Revert to the previous controller":
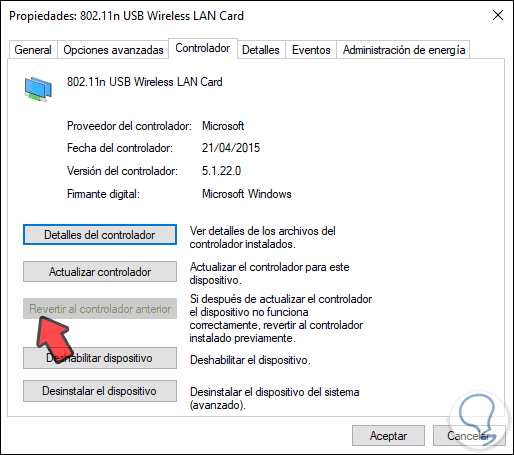
This is because some errors are associated with recent updates to the network driver.
8. How to reset network settings
If none of the steps TechnoWikis has mentioned helps you correct the error, we can reset the network values ​​so that everything is at its initial values.
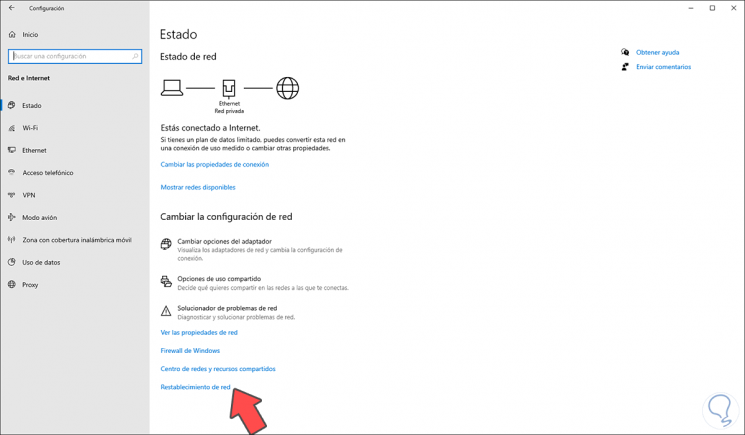
Step 1
For this we go to Start / Configuration / Network and Internet and in the "Status" section we find the "Network reset" option:
Step 2
We click there and the following will be displayed:
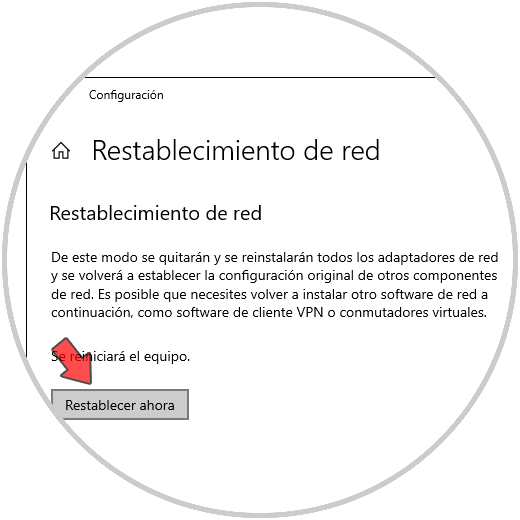
We click on the button "Reset now" to carry out the process.
Following these steps you will be able to reestablish the Wi-Fi network connection in Windows 10.