Microsoft has developed Windows Server in order to facilitate the management of objects and provide users with multiple options to work in an integral way thanks to their different roles and services..
One of the most common actions when working in a corporate environment is to share elements , call folders or files, which is something that facilitates the work between users since it is enough to access that shared resource and add, edit or delete objects of him.
In the tasks of support and control of servers with Windows Server it is normal that we do not have precise control over what resources are shared, but TechnoWikis recommends doing it since being a productive environment where you can get to transfer sensitive information, we must know what folders they are shared and in this way take a better administration on these..
TechnoWikis will explain through this tutorial how we can see which folders are shared in Windows Server and thus help control tasks.
To stay up to date, remember to subscribe to our YouTube channel! SUBSCRIBE
1. Create a shared folder in Windows Server 2019, 2016, 2012
Step 1
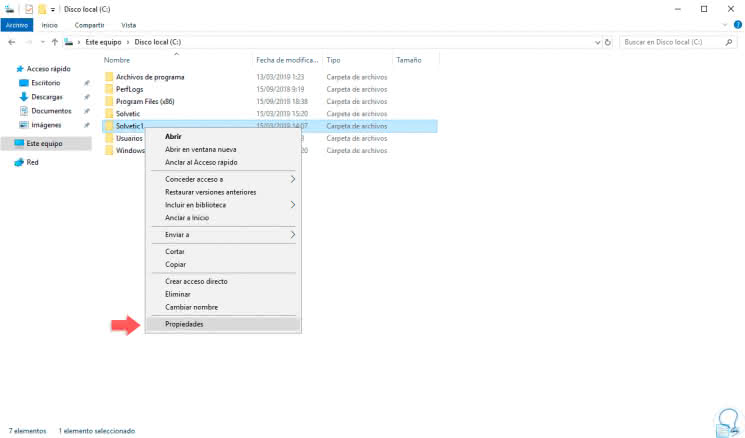
To create a shared resource in Windows Server, in this case 2019 but applies equally to previous versions, we must right click on the folder and select the option "Properties":
Step 2
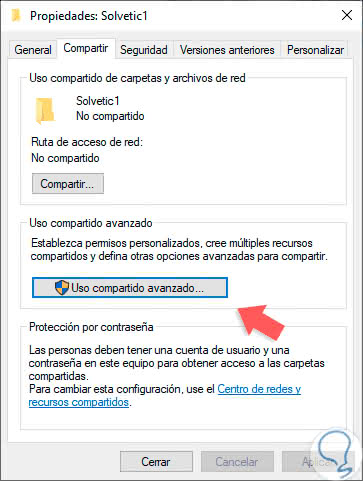
In the next window we will go to the "Share" tab:
Step 3
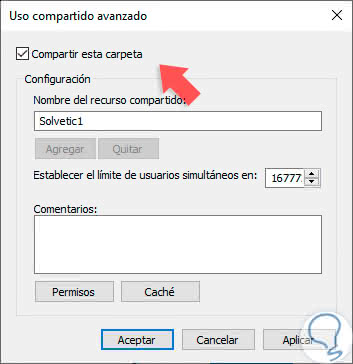
We click on the button "Advanced sharing" and in the window opened activate the box "Share this folder" and define a name for it. Click on Apply and Accept to save the changes.
2. View shared folders through the File Explorer in Windows Server 2019, 2016, 2012
The File Explorer is the central place from where we can go to the various libraries and units of our server and also has the "Network" section from where it will be possible to access shared resources both locally and in the local network.
Step 1
Before this we must go to the following route:
- Center network and sharing
- Advanced sharing settings

Step 2
There we must activate the following boxes:
- Activate network detection.
- Activate file and printer sharing.
Step 3
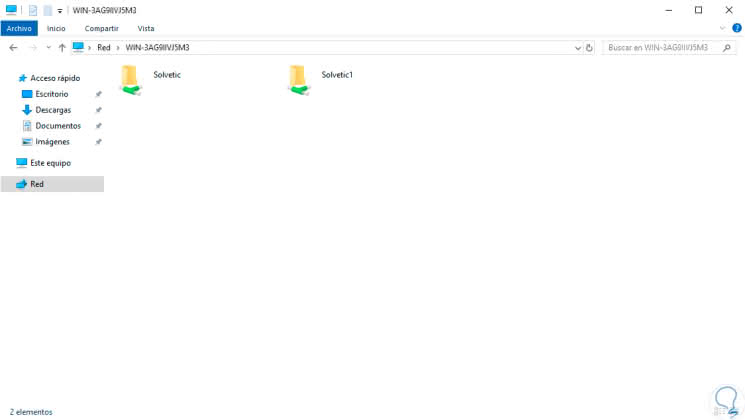
Once these options are enabled, we go to the Explorer and in the Network section we will see the active computers in the local network that have shared resources, there we will see our local team as well:

Step 4
By double clicking on it it will be possible to access the folders that we have shared in Windows Server:
3. View shared folders using the Run command in Windows Server 2019, 2016, 2012
Through this command in Windows Server 2019, or earlier versions, we have the possibility of viewing information from the system itself, accessing configuration variables, directories or directly executing programs and applications.
Step 1
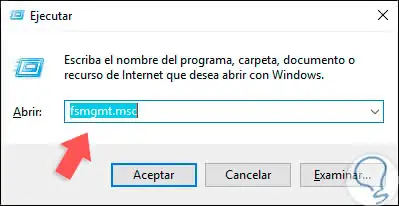
For this method we must combine the following keys and in the pop-up window we execute the following command:
+ R
fsmgmt.msc
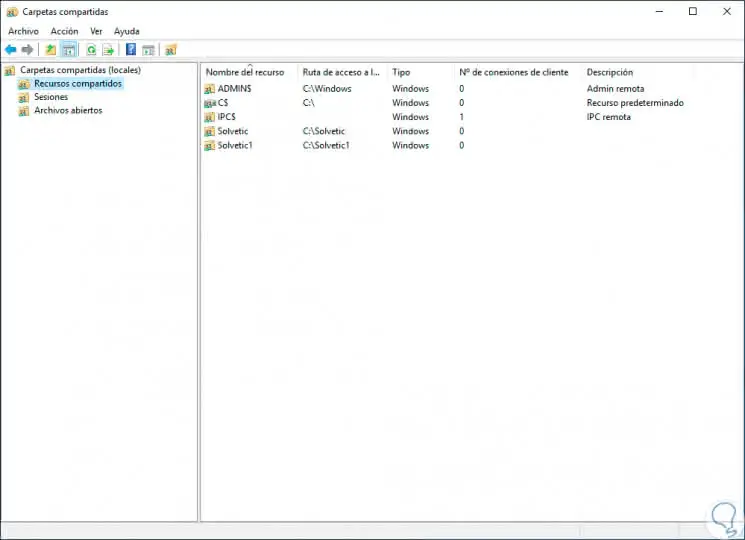
Step 2
When pressing Enter or Accept we will go to a window of the MMC console where we will see in the section "Shared resources" specific details of the shared resources in the server as:
- Name of the share on the server
- Current location of that resource on the computer
4. View shared folders using CMD in Windows Server 2019, 2016, 2012
The console of the command prompt is one of the tools integrated in the Windows Server operating system thanks to which we have numerous commands for the execution of tasks of various indoles.
Step 1
To use this method, we must access the console of the command prompt and there execute the following command:
net share
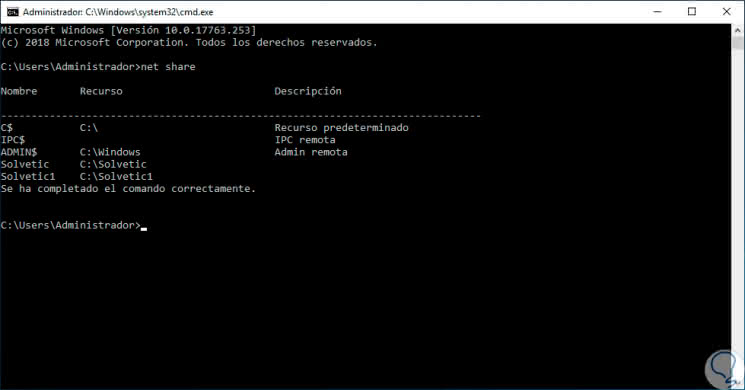
Step 2
As we can see, we will obtain the name of the shared resource on the server along with its how and its description if it has been assigned. With the command prompt we have the option to remotely view the shared resources of another computer using the following syntax:
net view \\ team / all
5. View shared folders using Windows PowerShell in Windows Server 2019, 2016, 2012
The Windows PowerShell console is integrated into Windows server as a management console through cmdlets which have been developed to optimize administration.
Step 1
To visualize the shared folders with Windows PowerShell we must access the console and there execute the following:
Get-WmiObject -class Win32_Share
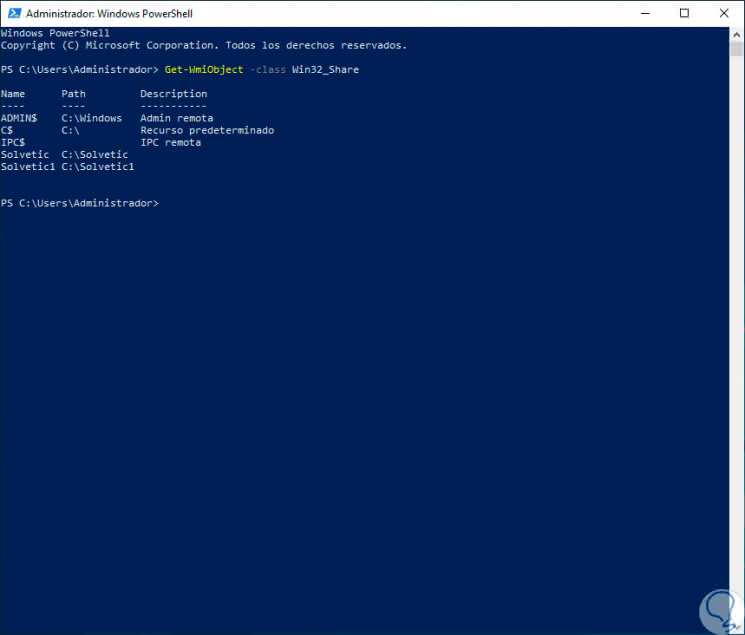
Step 2
This option will give us the same results as the command prompt. If we want to visualize the shared resources of a computer in the network of the domain, we must execute the following syntax:
Get-WmiObject -class Win32_Share -computer NOMBREEQUIPO
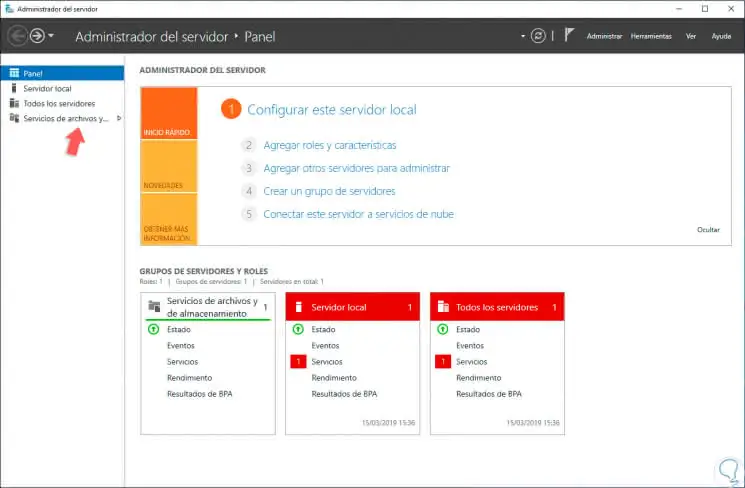
6. View shared folders using Server Manager in Windows Server 2019, 2016, 2012
Windows Server integrates an administrator which is a function through which we can perform the vast majority of tasks on the server such as adding or removing roles, integrating with Azure, viewing users and many other tasks.
Step 1
Through this administrator we can see the resources currently shared, for this we go to the Administrator of the server and there we find the line "File and storage services":
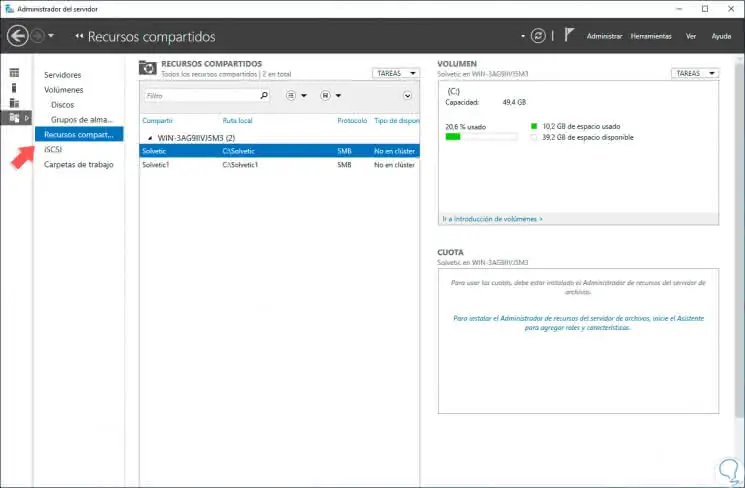
Step 2
When clicking on this line a new window will be displayed, in it we go to the "Shared resources" section. There the shared folders will be displayed and we will be able to create new shared resources as well as to edit existing ones on the server.
As we can see, there are multiple practical methods to obtain information about which folders are shared in Windows Server and in this way to add a better global administration of the server..