TeamViewer is one of the most popular software utilities for remote support since, thanks to all its integrated features, it will be very easy to access and receive support from other users with the best security features..
If you don't have TeamViewer yet, you can download it at the following link:
TeamViewer
TeamViewer is characterized by a set of tools that allow the user to carry out extra tasks, and one of the most prominent is meetings. TechnoWikis will explain to you globally what role a meeting plays and how you can record each one without having to install additional programs.
What is a meeting in TeamViewer
TeamViewer gives us the possibility to start meetings or join one by using the meeting ID, this is automatically generated by TeamViewer and will be key to access since without it we will not be able to enter the meeting.
Every meeting held through TeamViewer is encrypted and protected from any attempt of unauthorized access.
To access or create a meeting in TeamViewer, we access the application and go to the "Meeting" section where we will see the following:
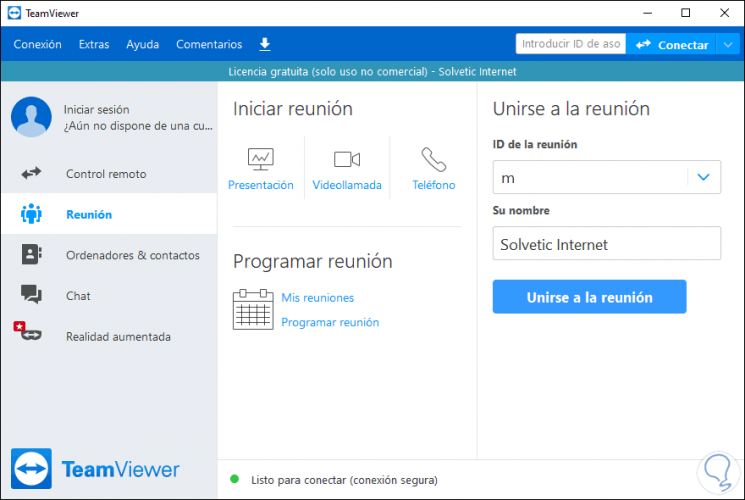
Meeting options in TeamViewer,
There we have various options such as:
- Schedule a new meeting or see the meetings we have held
- Set the username with which we access the meeting
- In Meeting ID it will always start with the letter m (meeting) by default
- We can start a meeting either by video, call or by sharing the current screen of the team
At the bottom we find a TeamViewer status, this can be:
- Green: ready to connect: allows you to start or join the meeting.
- Yellow: authenticating: this status indicates that the authentication process has been given to configure a TeamViewer session, after that we must enter the password
- Red: The connection has been interrupted or has not been established with the recipient
General Meeting Functions in TeamViewer
Some of the general functions of Meeting in TeamViewer are:
- Allows instant meetings of up to 25 participants
- Meetings can be scheduled and exported using Microsoft Outlook
- Scheduled meetings will be managed using the My Meetings function of TeamViewer
- It is possible to join a meeting in TeamViewer through a web browser without using the application
- With the TeamViewer QuickConnect button we can run meetings with individual windows
- We have TeamViewer applications for meetings on both Android and iOS
Without further words let's see how to record our TeamViewer meeting..
Note
Remember that this is a function that will only be available to the user who has organized the meeting.
1. Record meeting in TeamViewer automatically
If we do not want to manually record the meetings in TeamViewer we have the possibility to configure that they be recorded automatically by default.
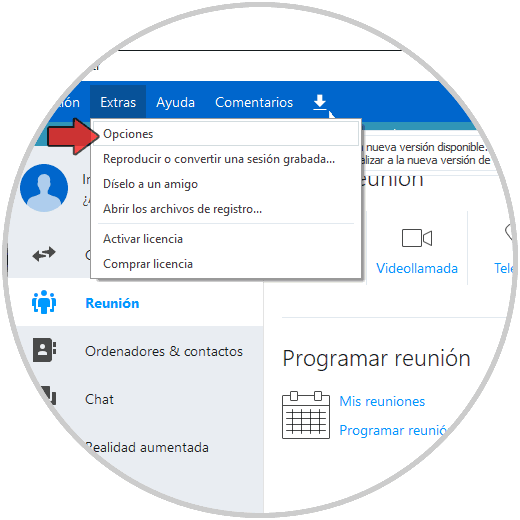
Step 1
For this we go to TeamViewer and go to the Extras - Options menu:
Step 2
Then we go to the "Meeting" field and there we activate the "Record meeting automatically" box:
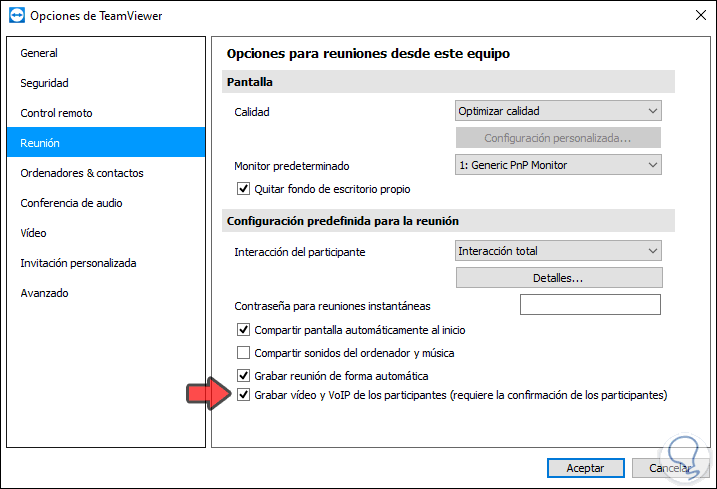
We click OK to save the changes.
Please note that the recordings of the meeting will be in the .tvs format, developed by TeamViewer. These will record both the content and the sound of the screen of the user who has organized the meeting, as well as the videos and VoIP of the connected webcams..
2. Record meeting in TeamViewer manual
If the goal is to record a particular meeting manually, the steps are as follows.
Step 1
We open TeamViewer and go to the Meeting section, there we select the type of meeting, in this case it will be "Share screen" and we can see that the management console of the meeting itself will be launched on the right side:
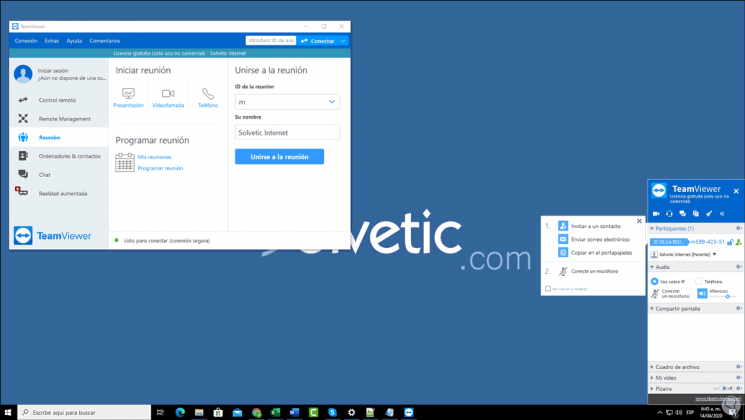
There we can do the following:
- Invite other users to the meeting via email, contacts or paste link
- Connect or not a microphone if available
- On the side we find the meeting ID and the options to activate or not the phone and VoIP
Step 2
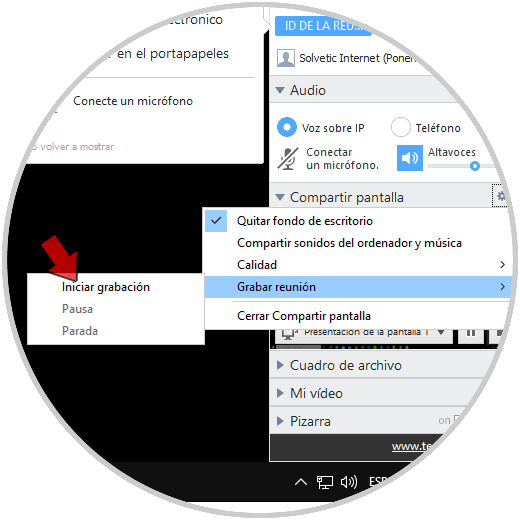
To record our meeting, we click on “Options” in Share screen and select “Record meeting” and then we find the option “Start recording”:
Step 3
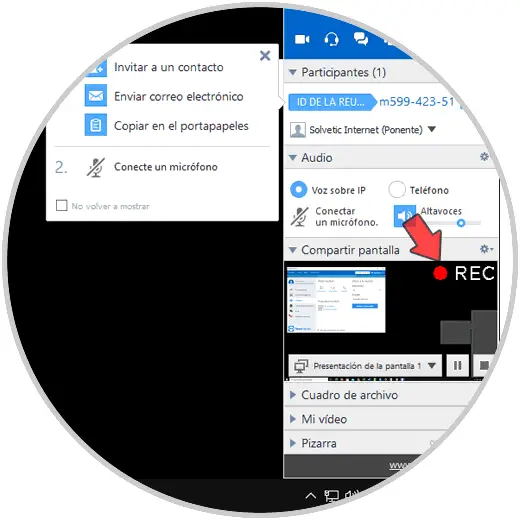
We validate that the meeting is being recorded since we will see the REC button at the top of the preview:
Step 4
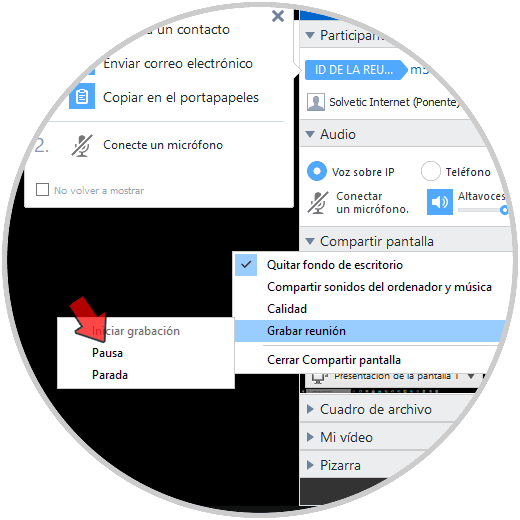
To stop the recording, we go back to Options - Meeting and there it will be possible to stop or pause it as necessary:
Step 5
When we stop recording, a new window will open where we will define the path where the video must be saved:
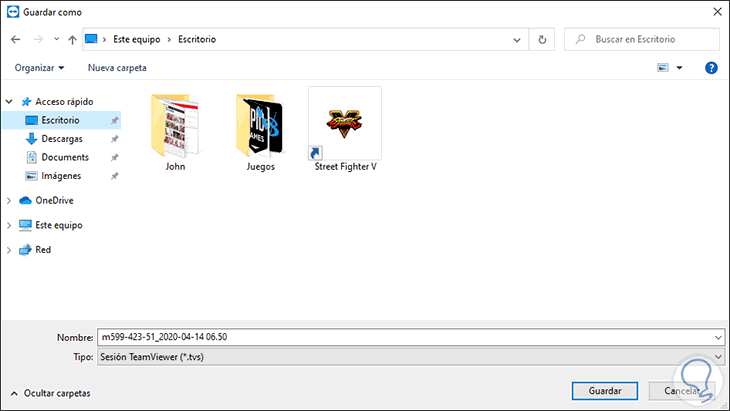
As we mentioned, this will be saved in the .tvs format.
Step 6
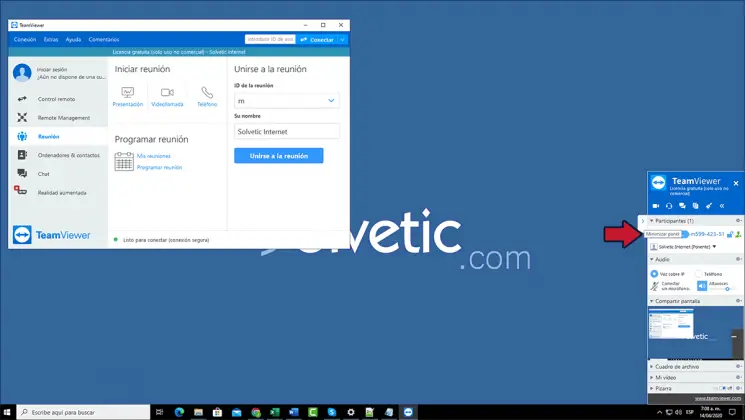
If during the recording we do not want the TeamViewer panel to be displayed, just click on the side button (Minimize panel):
Step 7
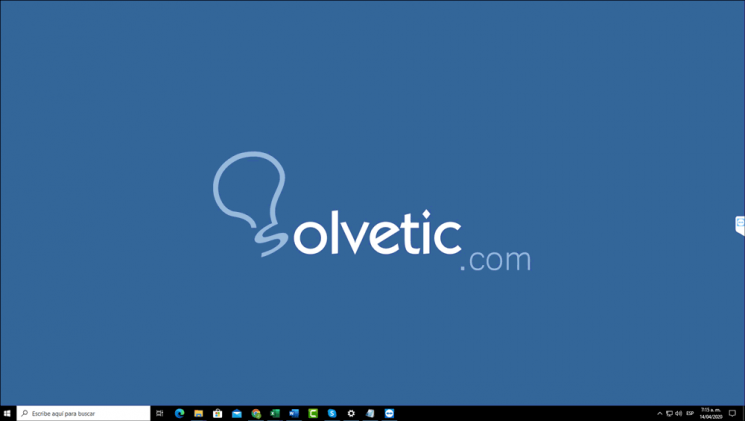
This will give us a complete perspective of the screen that we are recording at the moment:
3. View and convert the TeamViewer meeting video
Step 1
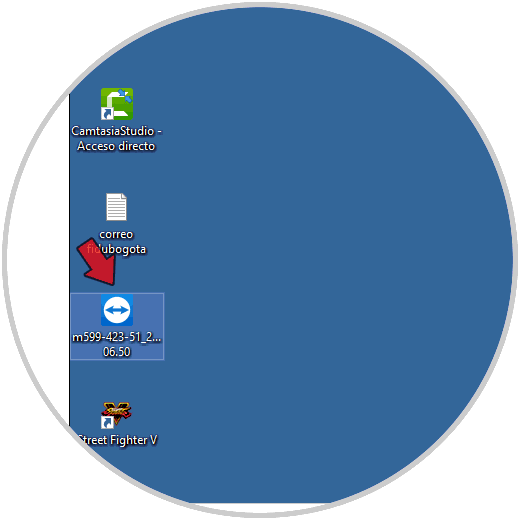
At any time we can access the video that has been saved from the TeamViewer meeting:
Step 2
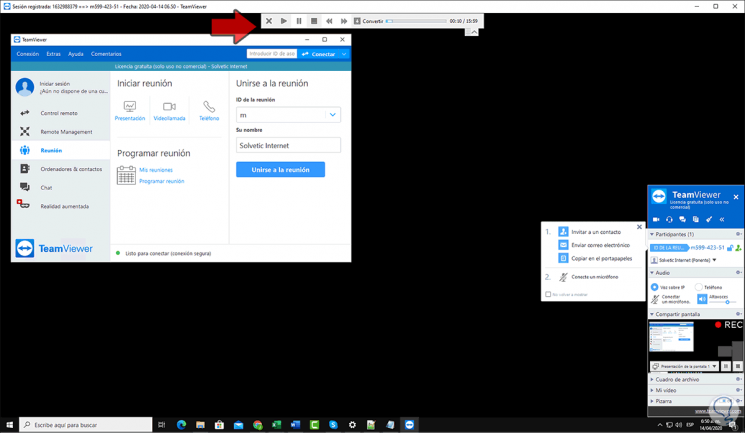
We double-click on it and we can play the recorded video of the meeting:
Step 3
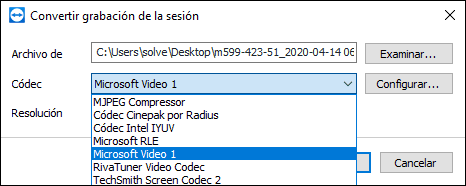
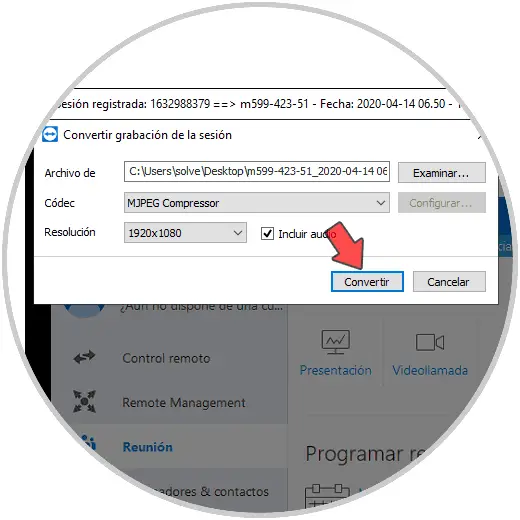
At the top we find the controls of this as they are pause, stop, play and a special one called "Convert", this allows us that the video in .tvs format can be converted to a global format to be seen on other computers that do not have With TeamViewer, we click on this button and in the pop-up window it will be possible:
- Set the path where the video will be saved
- Set the desired resolution
- Option to integrate or not the audio of the video
Step 4
Once we define these parameters we click on “Convert”:
Step 5
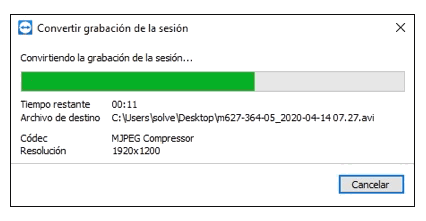
The video will proceed to become the new format:
Step 6
When this ends we will see the following:

We have verified how the Meeting function in TeamViewer is working and complete allowing us to make different configurations on them as necessary, but without losing quality or professionalism.