The use of large files is normal nowadays due to the amount of data we handle such as images, audios, videos and others, which, although it is useful, in many cases it can be complex if these files should be shared with Other users either through the local network, mail or other means where only a specific size is allowed ..
In order to operate these large files with a better level, we have compression and decompression tools which give us the opportunity to significantly reduce large files and share them securely.
Through this tutorial TechnoWikis will explain how we can compress and decompress a file using RAR in Windows 10. One of the most used utilities in the world for this process is WinRAR which is available for download at the following link:
WinRAR
WinRAR has been developed as a file manager thanks to which we can manage all types of files focusing basically on reducing the size of files, unzipping RAR files, ZIP files or creating new files in RAR and ZIP file format which are used widely today..
The objective of a RAR file is to lodge in one single file one or more elements in order to reduce the space occupied by the original objects, this facilitates the sending of these files through e-mail, FTP sites and more.
This type of files when they are compressed will have a .rar extension and it is necessary to use WinRAR since Windows 10 does not support this type of files natively..
To stay up to date, remember to subscribe to our YouTube channel! SUBSCRIBE
1. How to compress a file as RAR in Windows 10
Once downloaded and installed WinRAR in Windows 10, to compress one or more files in Windows 10
Step 1
We select the elements to be compressed and right click on them a series of options will be available such as:
Add to file
This option opens WinRAR where it will be possible to set parameters such as passwords, split the file and more.
Add to "Name.rar"
This option allows the elements to be compressed and the name of the container folder automatically assigned.
Add and send by email
This option compresses the selection and attaches it to the mail platform used by default in Windows 10.
Add to "Name.rar" and send by email "
It is the same as the previous step but it attaches the file with the name of the container folder.

Step 2
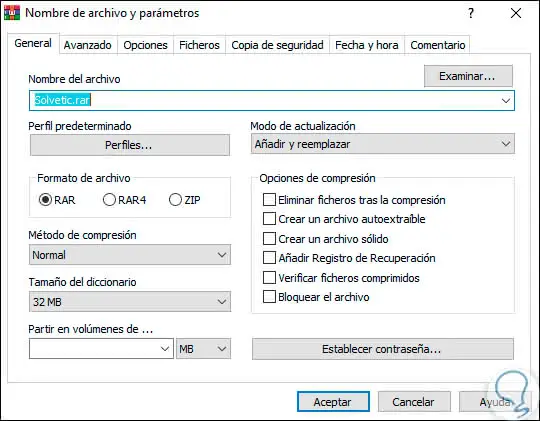
In this case we select the "Add to file" option and the following window will be displayed:
Step 3
As we can see, we have several tabs with options:
general
There it will be possible to carry out actions such as:
- Assign the name to the compressed file.
- Define the type of file to be compressed (RAR, RAR $ or ZIP).
- Define the compression method (Standard, Very fast, Good, The best, etc).
- Define the size of the dictionary.
Advanced
From this section it will be possible to:
- Set the percentage of recovery.
- Compress in the background.
- Turn off the computer when the task is completed.
Options
There we find parameters such as:
- Make use of the BLAKE2 checksum.
Files
There it will be possible to do the following:
- Define the files to be compressed.
- Exclude elements of the selected file.
- Compress the files separately.
Backup
Here we have the option to do the following:
- Delete attributes of the selected file.
- Clears the destination disk.
Date and Time
Here it will be possible:
- Store the modification date.
- Save the creation date and the last access.
- Add files of specific date ranges.
Commentary
Here it will be possible to add comments from a file.
Step 4
Once these parameters are defined, click on the "Accept" button and we will see our RAR file created in the folder where the elements are added. One of the advantages of this WinRAR file is that the information will remain there, so if the original information is lost, it will be available in the RAR file.

2. How to unzip a file in Windows 10
Step 1
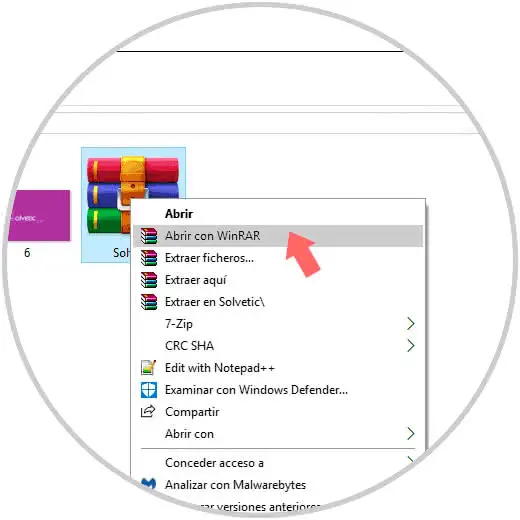
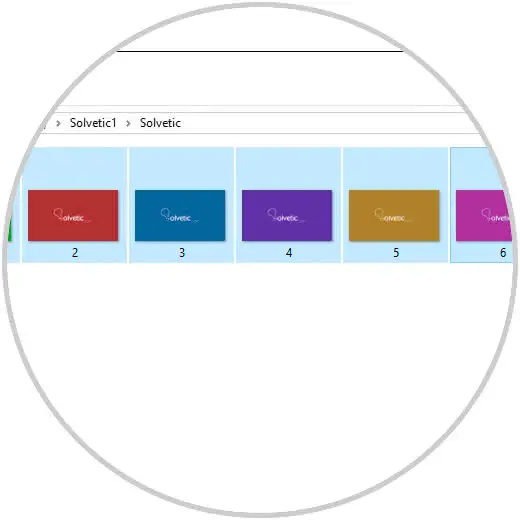
The process of decompressing RAR files is simple, for this we must right click on the compressed file and in the expanded list select the option "Open or Open with WinRAR":
Step 2
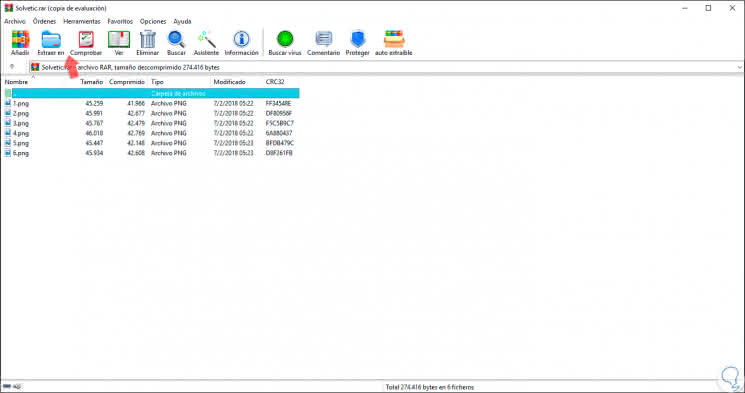
The following window will be displayed:
Step 3
There we found the elements that have been compressed originally and in the upper part we found some options to be done like adding more objects to the file, checking the integrity of the files, looking for elements and more.
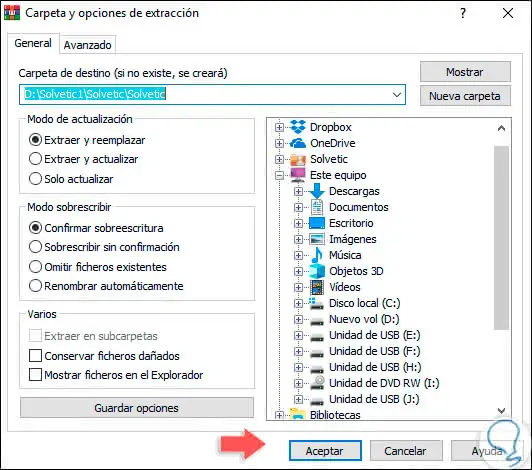
In this case we click on the option "Extract in" and the following window will be displayed where we must define the path in which these files will be decompressed:
Step 4
On the left side we have some additional options such as extracting and replacing the files, if they exist, update them, overwrite them and more. Once we define the route where they will stay, click OK and there the files that have been decompressed will be saved:
Step 5
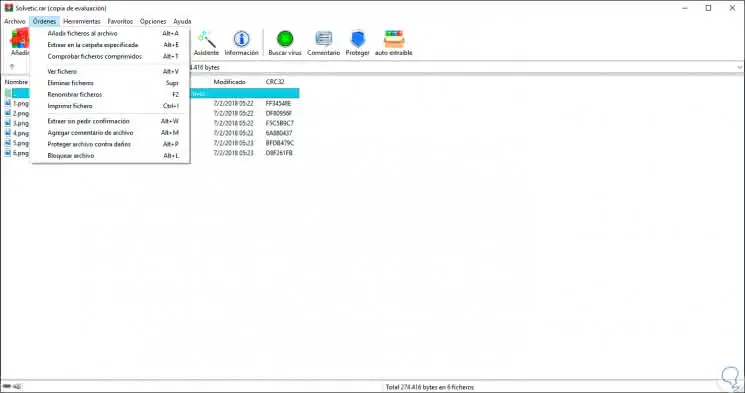
From the "Orders" menu we have additional options to manage the way in which the files with WinRAR will be extracted:
WinRAR is a practical utility to carry out the process of compression and decompression of files in Windows 10 with multiple options of use and security.